10 Day Utah Mighty 5 National Parks Road Trip Itinerary
*Grounded Explorers contains affiliate links, which means I may earn a small commission if you make a purchase at no extra cost to you. I truly appreciate your support; it keeps this blog running. Read my full disclaimer here.
Are you thinking of planning a Utah Mighty 5 road trip? Do you imagine yourself strolling through tall sandstone canyons or climbing up to where the angels land? Perhaps you want to experience the most scenic coffee shop in the southwest?
This roadtrip has it all! Witness some of the strangest goblin-like rock formations, incredible natural arches that seem to defy gravity, and one-of-a-kind bright orange hoodoos! Utah will truly make you wonder if you are still on Earth
These are a few examples of what you’ll see on this road trip. Follow me as I spill the beans on my favorite hikes, scenic stops, photography spots, and tours. Plus tips on lodging and food, because a hungry camper isn’t a happy camper, right? 😉
Table of Contents
- 10 Day Utah Itinerary Overview
- Day One: Salt Lake City To Moab (4 hours)
- Day Two: Moab, Canyonlands, and Deadhorse
- Day Three: Moab and Arches National Park
- Day Four: Moab to Torrey (2.5 hours)
- Day Five: Capitol Reef National Park.
- Day Six: Highway 12: Capitol Reef to Bryce Canyon (2.5 hours)
- Day Seven: Bryce Canyon National Park
- Day Eight: Bryce Canyon to Zion (2 hours)
- Day Nine: Zion National Park
- Day Ten: Zion to Salt Lake City (~5 hours)
- Utah Mighty 5 Road Trip Tips
- FAQs
- Final Thoughts
10 Day Utah Itinerary Overview
As a Utah local, I’ve been lucky enough to explore all five national parks and their surrounding hidden gems countless times. This 10-day itinerary brings together everything I’ve learned, allowing you to explore each park in depth while also visiting incredible bonus stops that are often overlooked. Are you ready to check some things off your bucket list?
Day One: Salt Lake City to Moab (4 hours)
Day one will feel a bit hectic, especially if you’re flying in and picking up a rental car. After this, you’ll drive about four hours to Moab, check into your accommodations, and, if you still have the time and energy, head out for a sunset hike. Wrap up the day with a well-earned dinner in Moab!
Morning
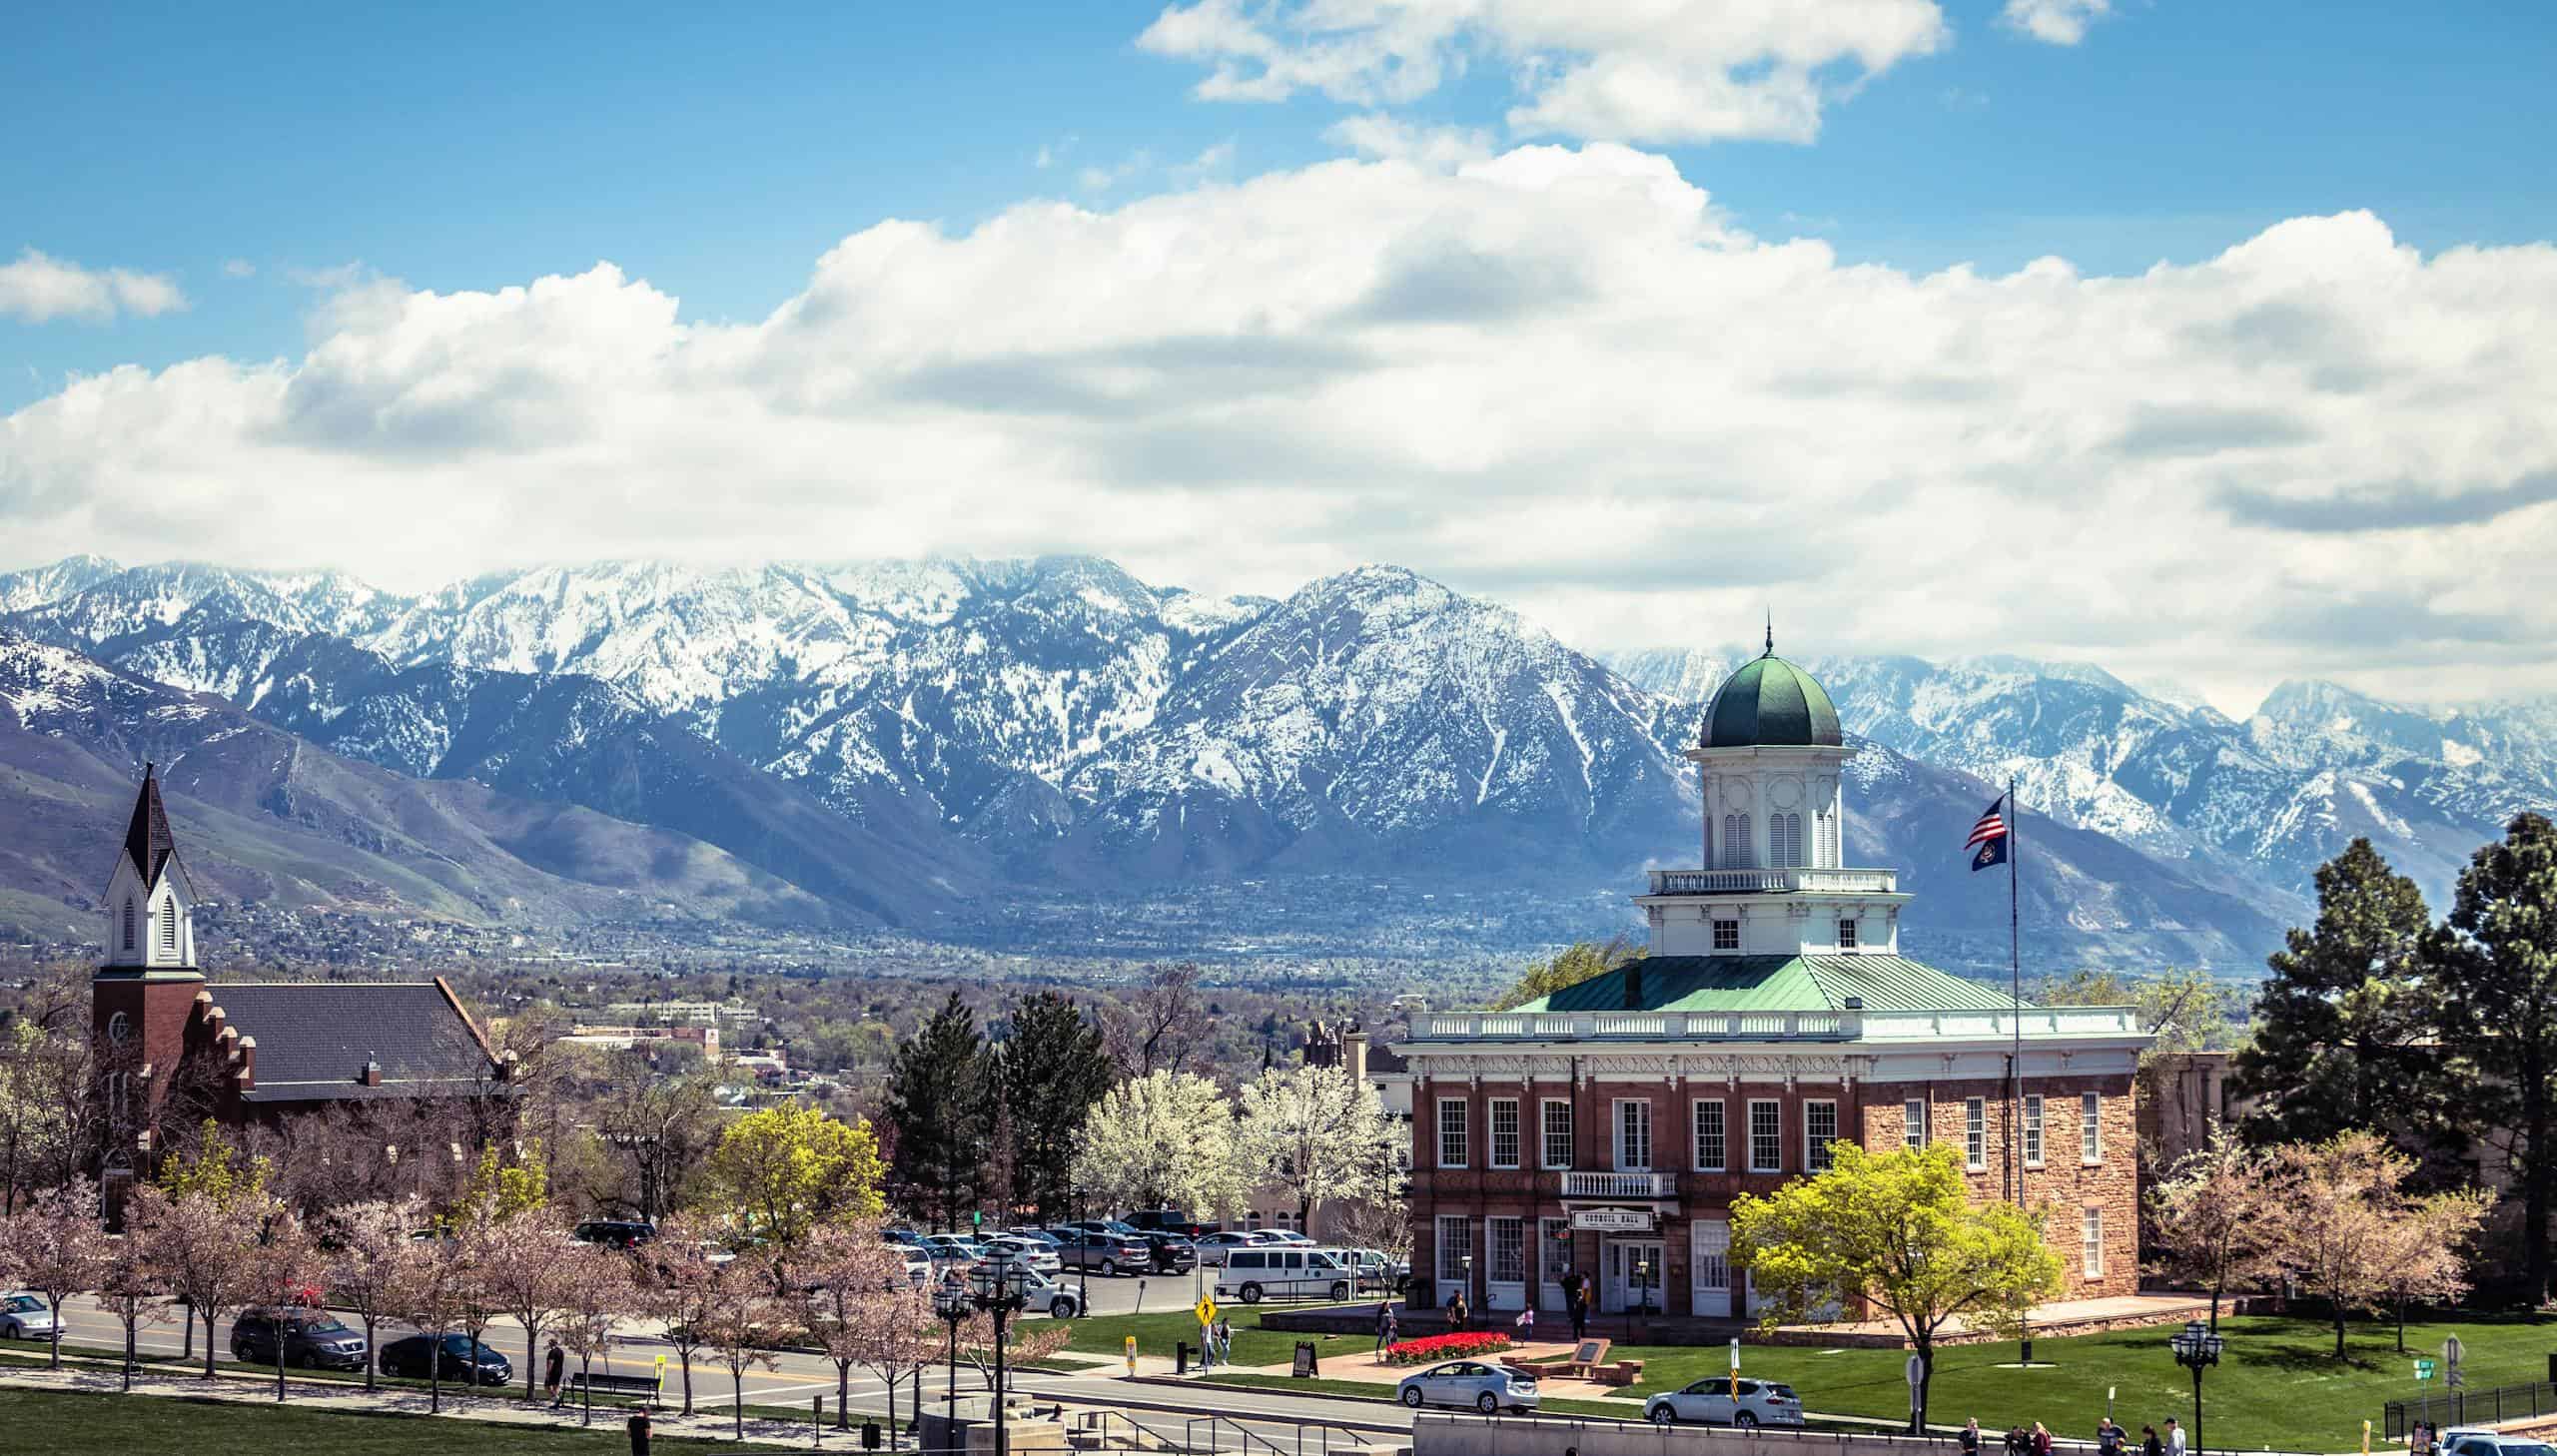
Your morning will likely start with flying into Salt Lake City and picking up a rental car. If you are a local, I suggest taking advantage of the day by hitting the road as early as possible.
If you’re anything like me, coffee is a must before a long drive! I recommend skipping downtown Salt Lake City; it’s out of the way and can get busy. Instead, try one of my favorite local coffee spots just off I-15 that make for an easy, convenient detour.
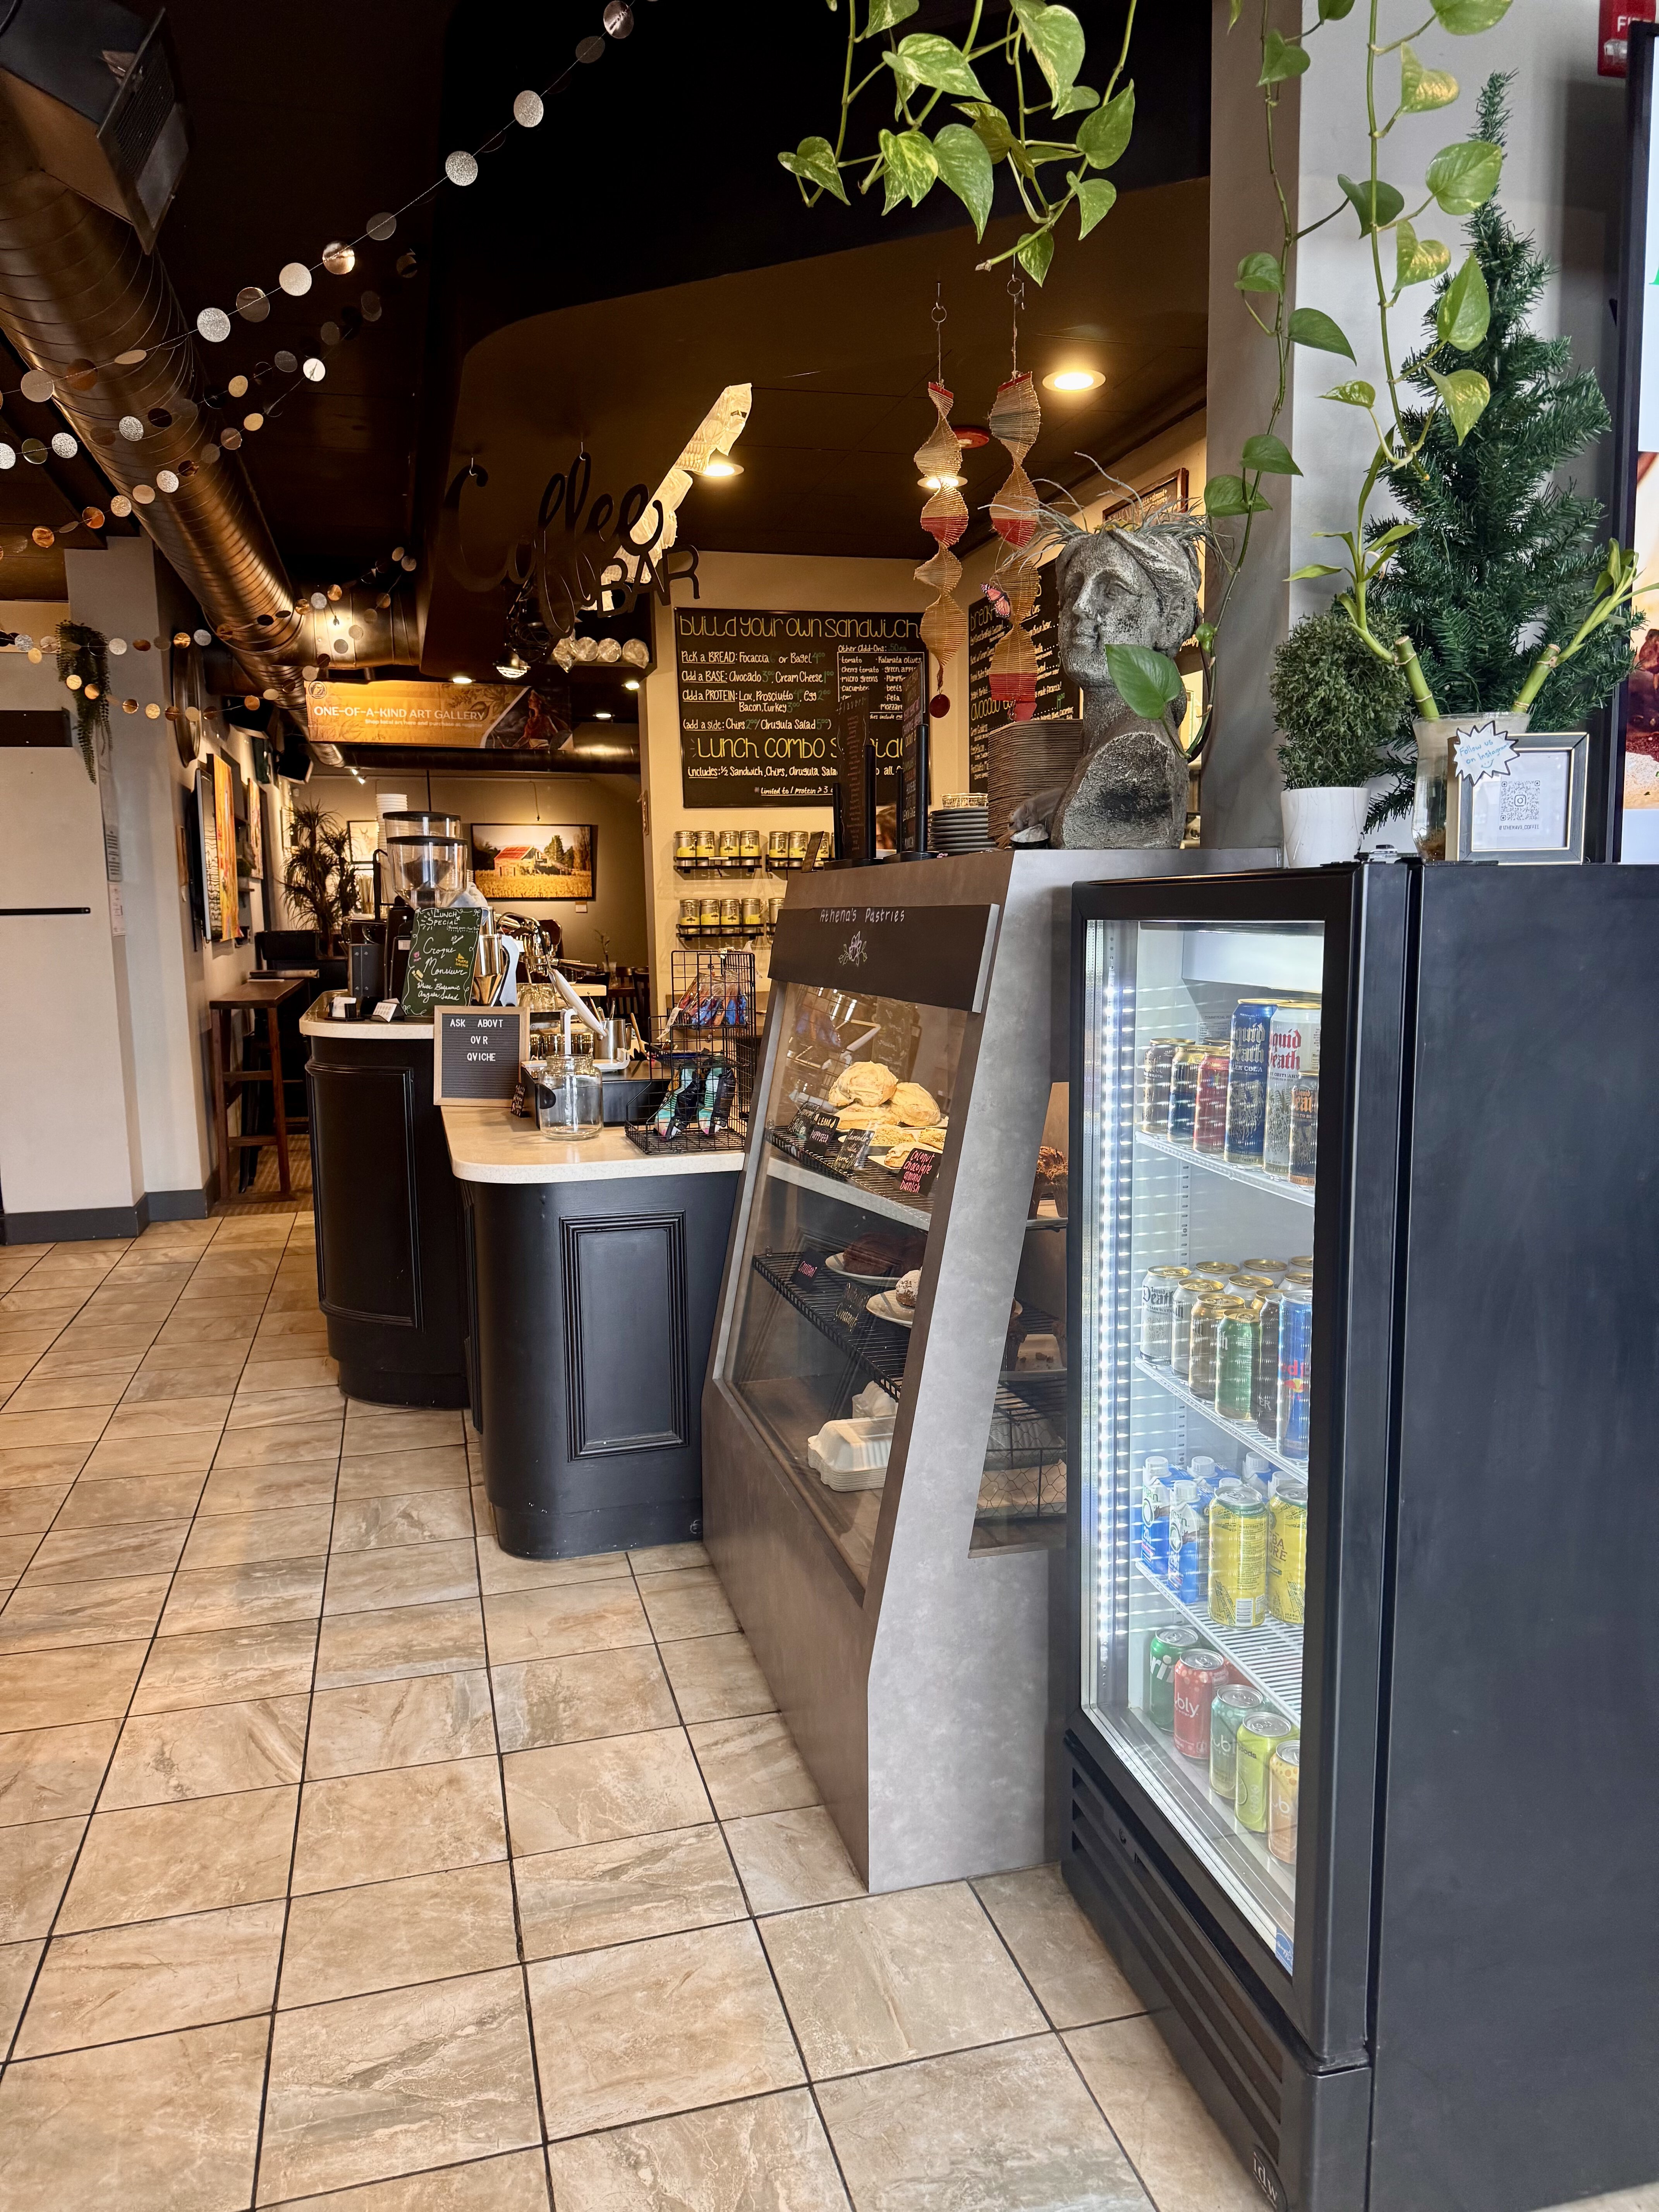
Athena VII (no drive-thru) is about 20 minutes south of the airport and offers excellent coffee, affordable breakfast options (served until 11 a.m.), and delicious sandwiches available all day!
My go-to is the breakfast croissant, paired with their namesake “Athena” latte, which is an almond, pistachio, and honey latte. I don’t know about you, but I might need to go there again!
Another great option, 15 minutes south of the airport, is Tres Gatos, which has a small drive-thru. Parking is tricky, and I suggest parking across the street. It is a wonderful local coffee shop with great food options!
Ask the Barista for their favorite monthly specials. I recently had a Vanilla Custard Latte, which was divine! Don’t forget to grab the Bacon Breakfast Sandwich for that much-needed morning boost.
Pro Tip: Stock up on supplies in the Salt Lake Valley before hitting the road. Salt Lake has all the major grocery stores, such as Costco, Walmart, and Smiths (Kroger). While there will be general stores in towns along the way, such as Moab or Torrey, they are generally pricier
Afternoon
Time to hit the road towards Moab! The first hour is on I-15, followed by the scenic Spanish Fork Canyon to Price. Price is the halfway point, and a great pit stop to stretch your legs; otherwise, Green River is the next town three hours into the drive.
You’ll notice a Maverik in nearly every town, which is my preferred gas station for a snack run!
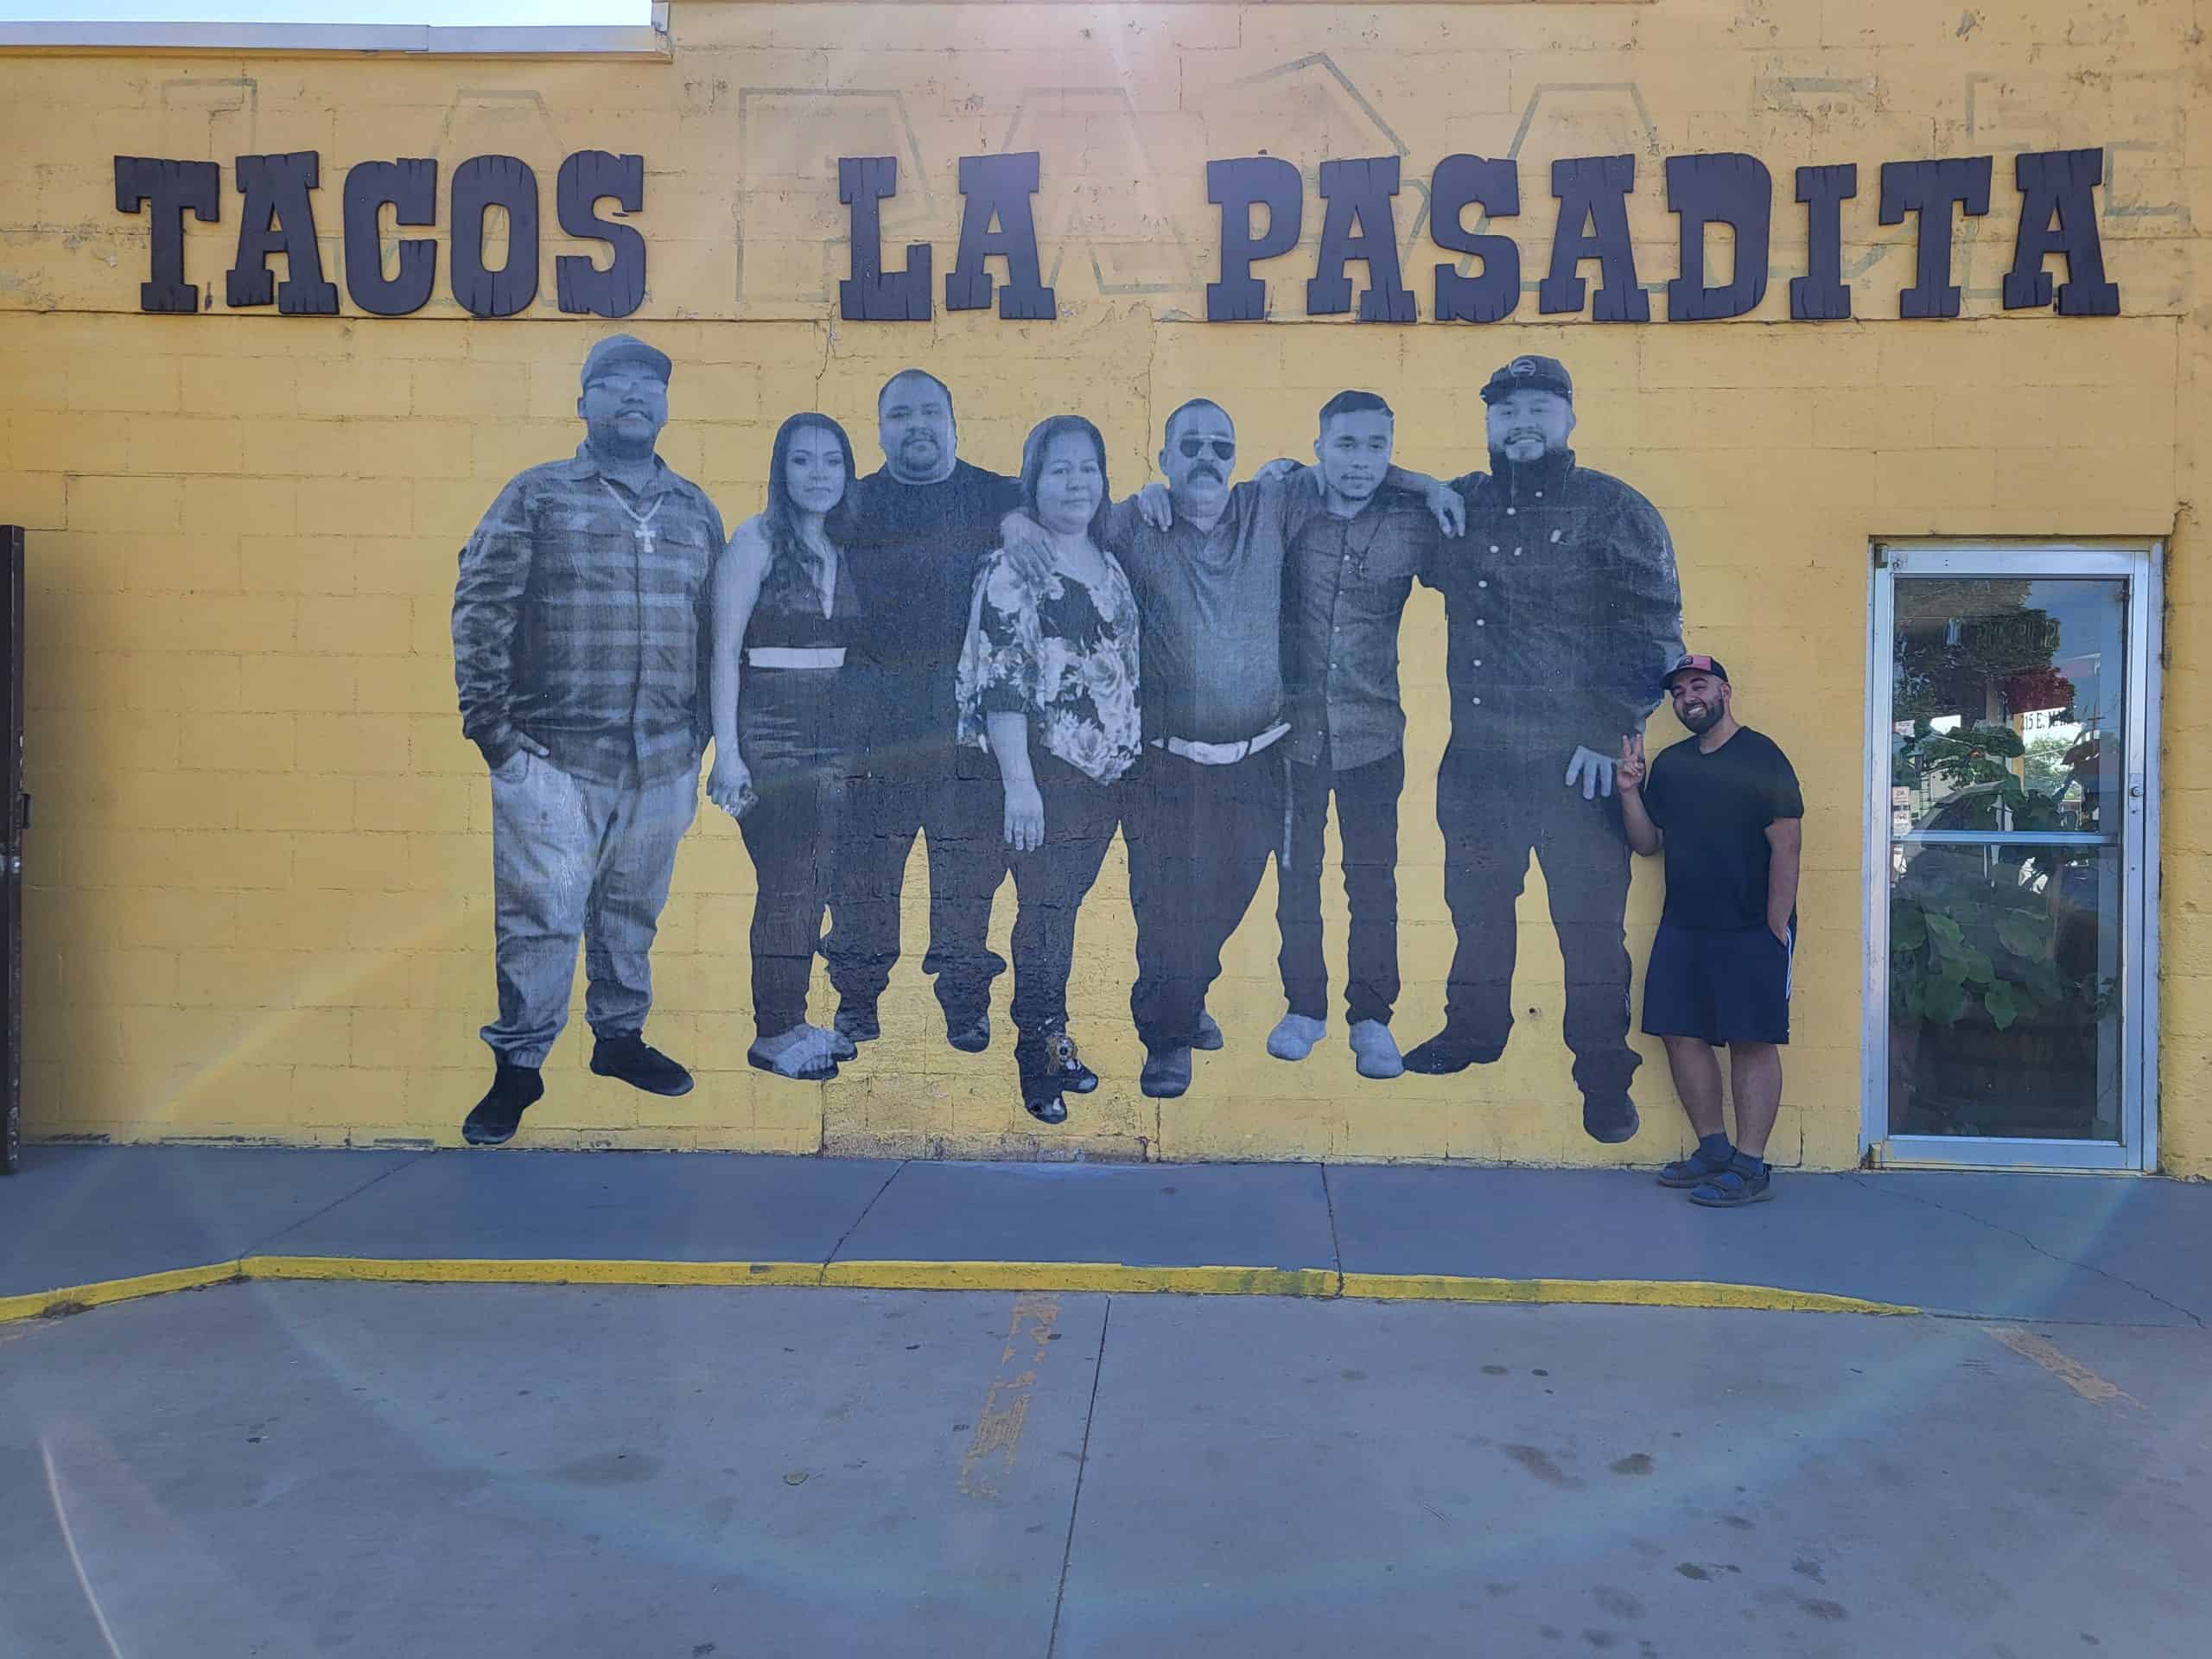
If you are craving something more solid, I recommend Tacos La Pasadita. I stop here nearly every time and get enough of their Carne Asada and Pollo street tacos! They are reasonably priced, and you can easily get a full-on 2-4 tacos!
Ray’s Tavern is also a great stop if you’re feeling hamburgers instead. Both restaurants are in Green River.
Green River is also known for fresh, locally grown watermelons, and you’ll see several vendors selling them along the main road. We’ve never eaten a watermelon so quickly! Don’t forget to enjoy the beautiful scenery along the way!
Evening
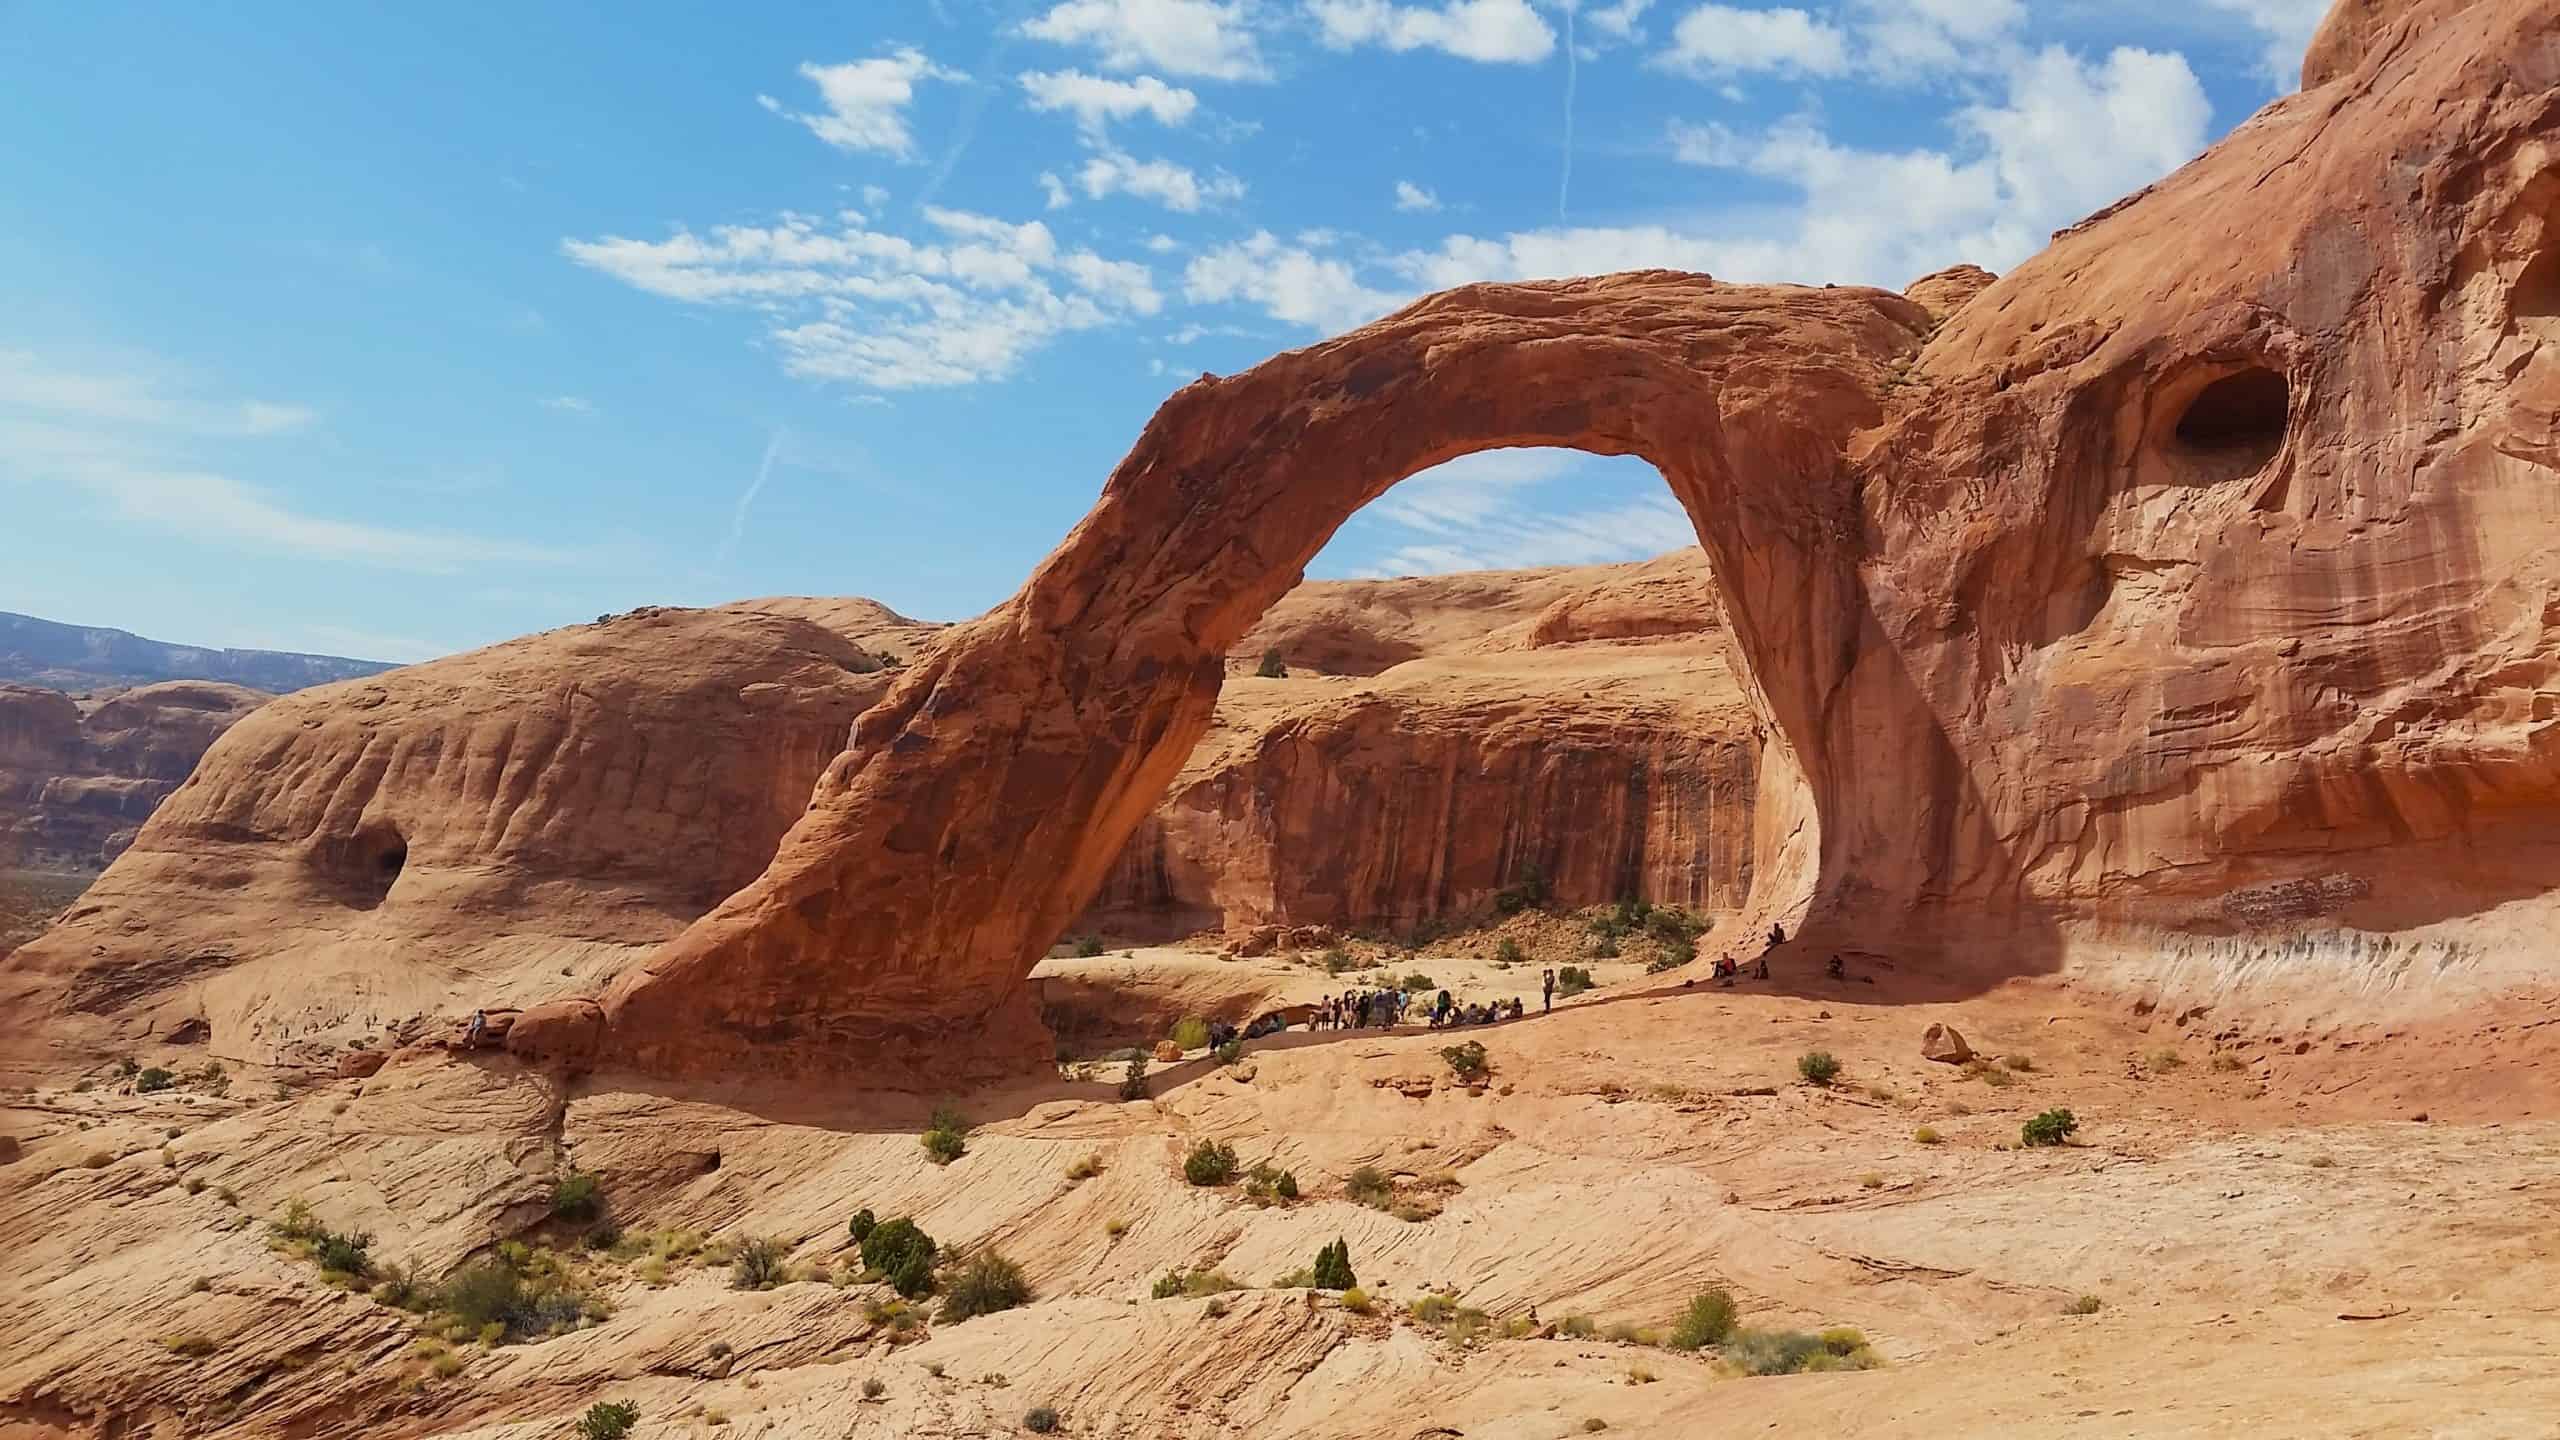
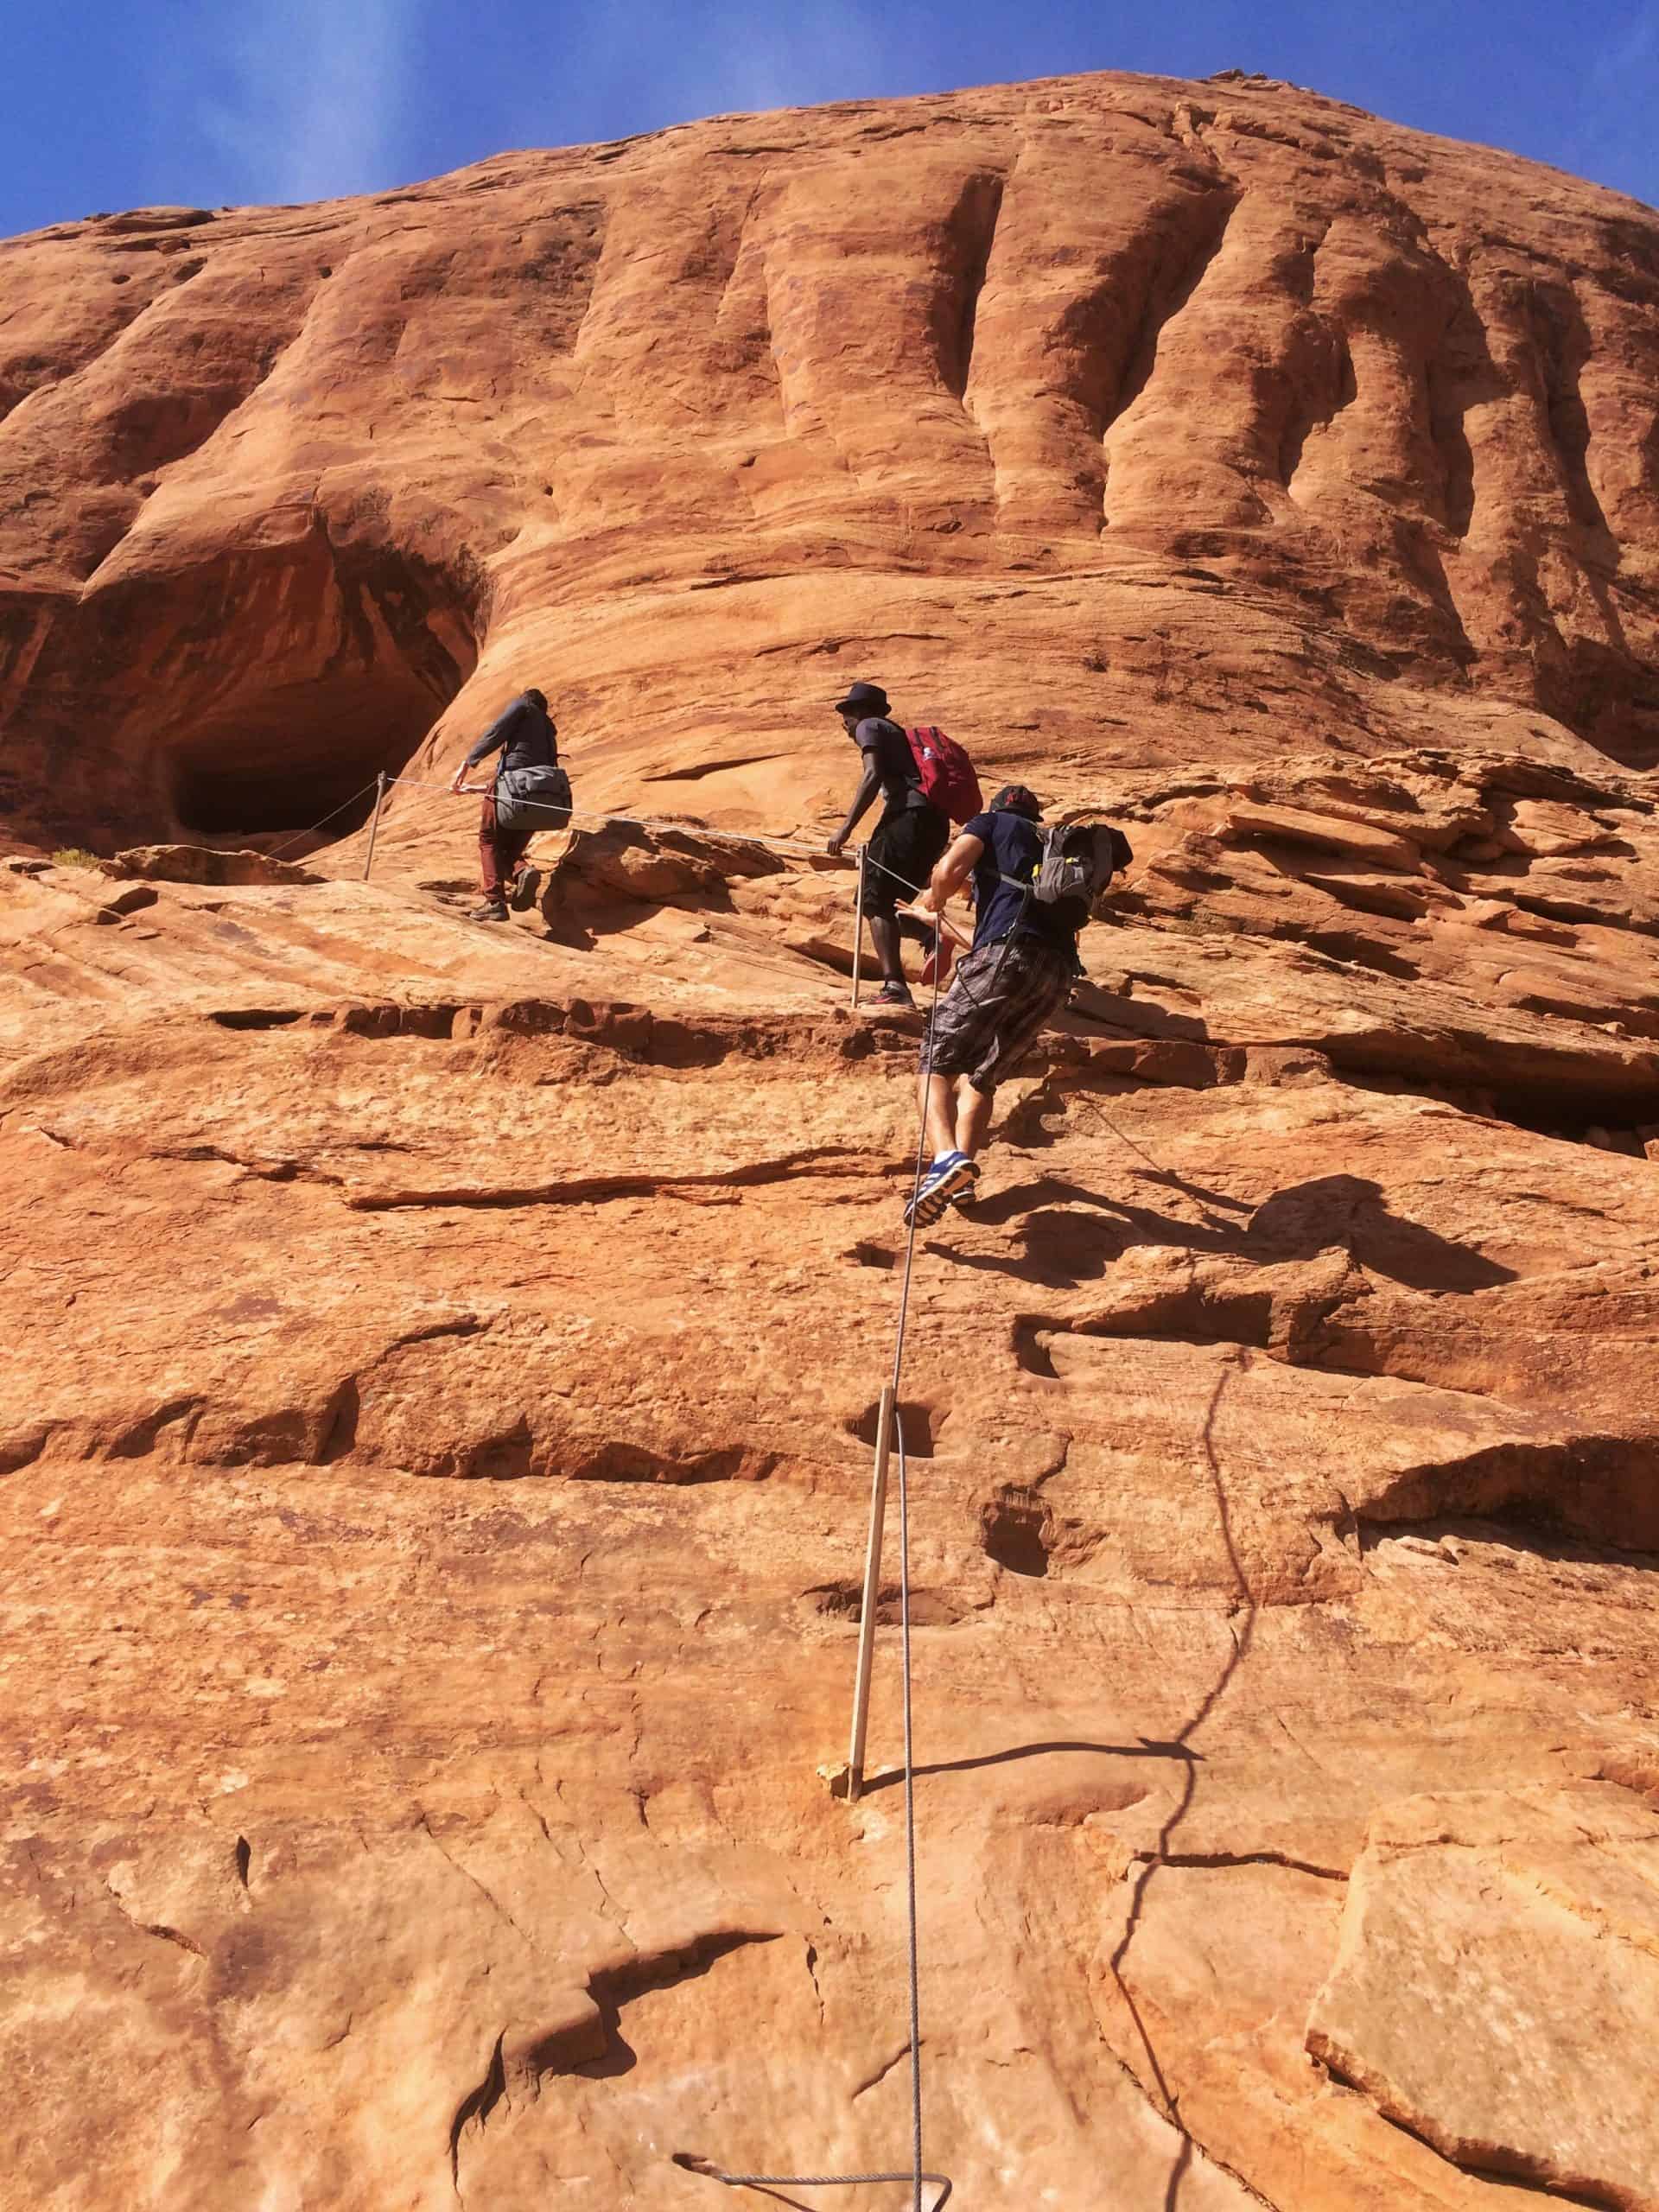
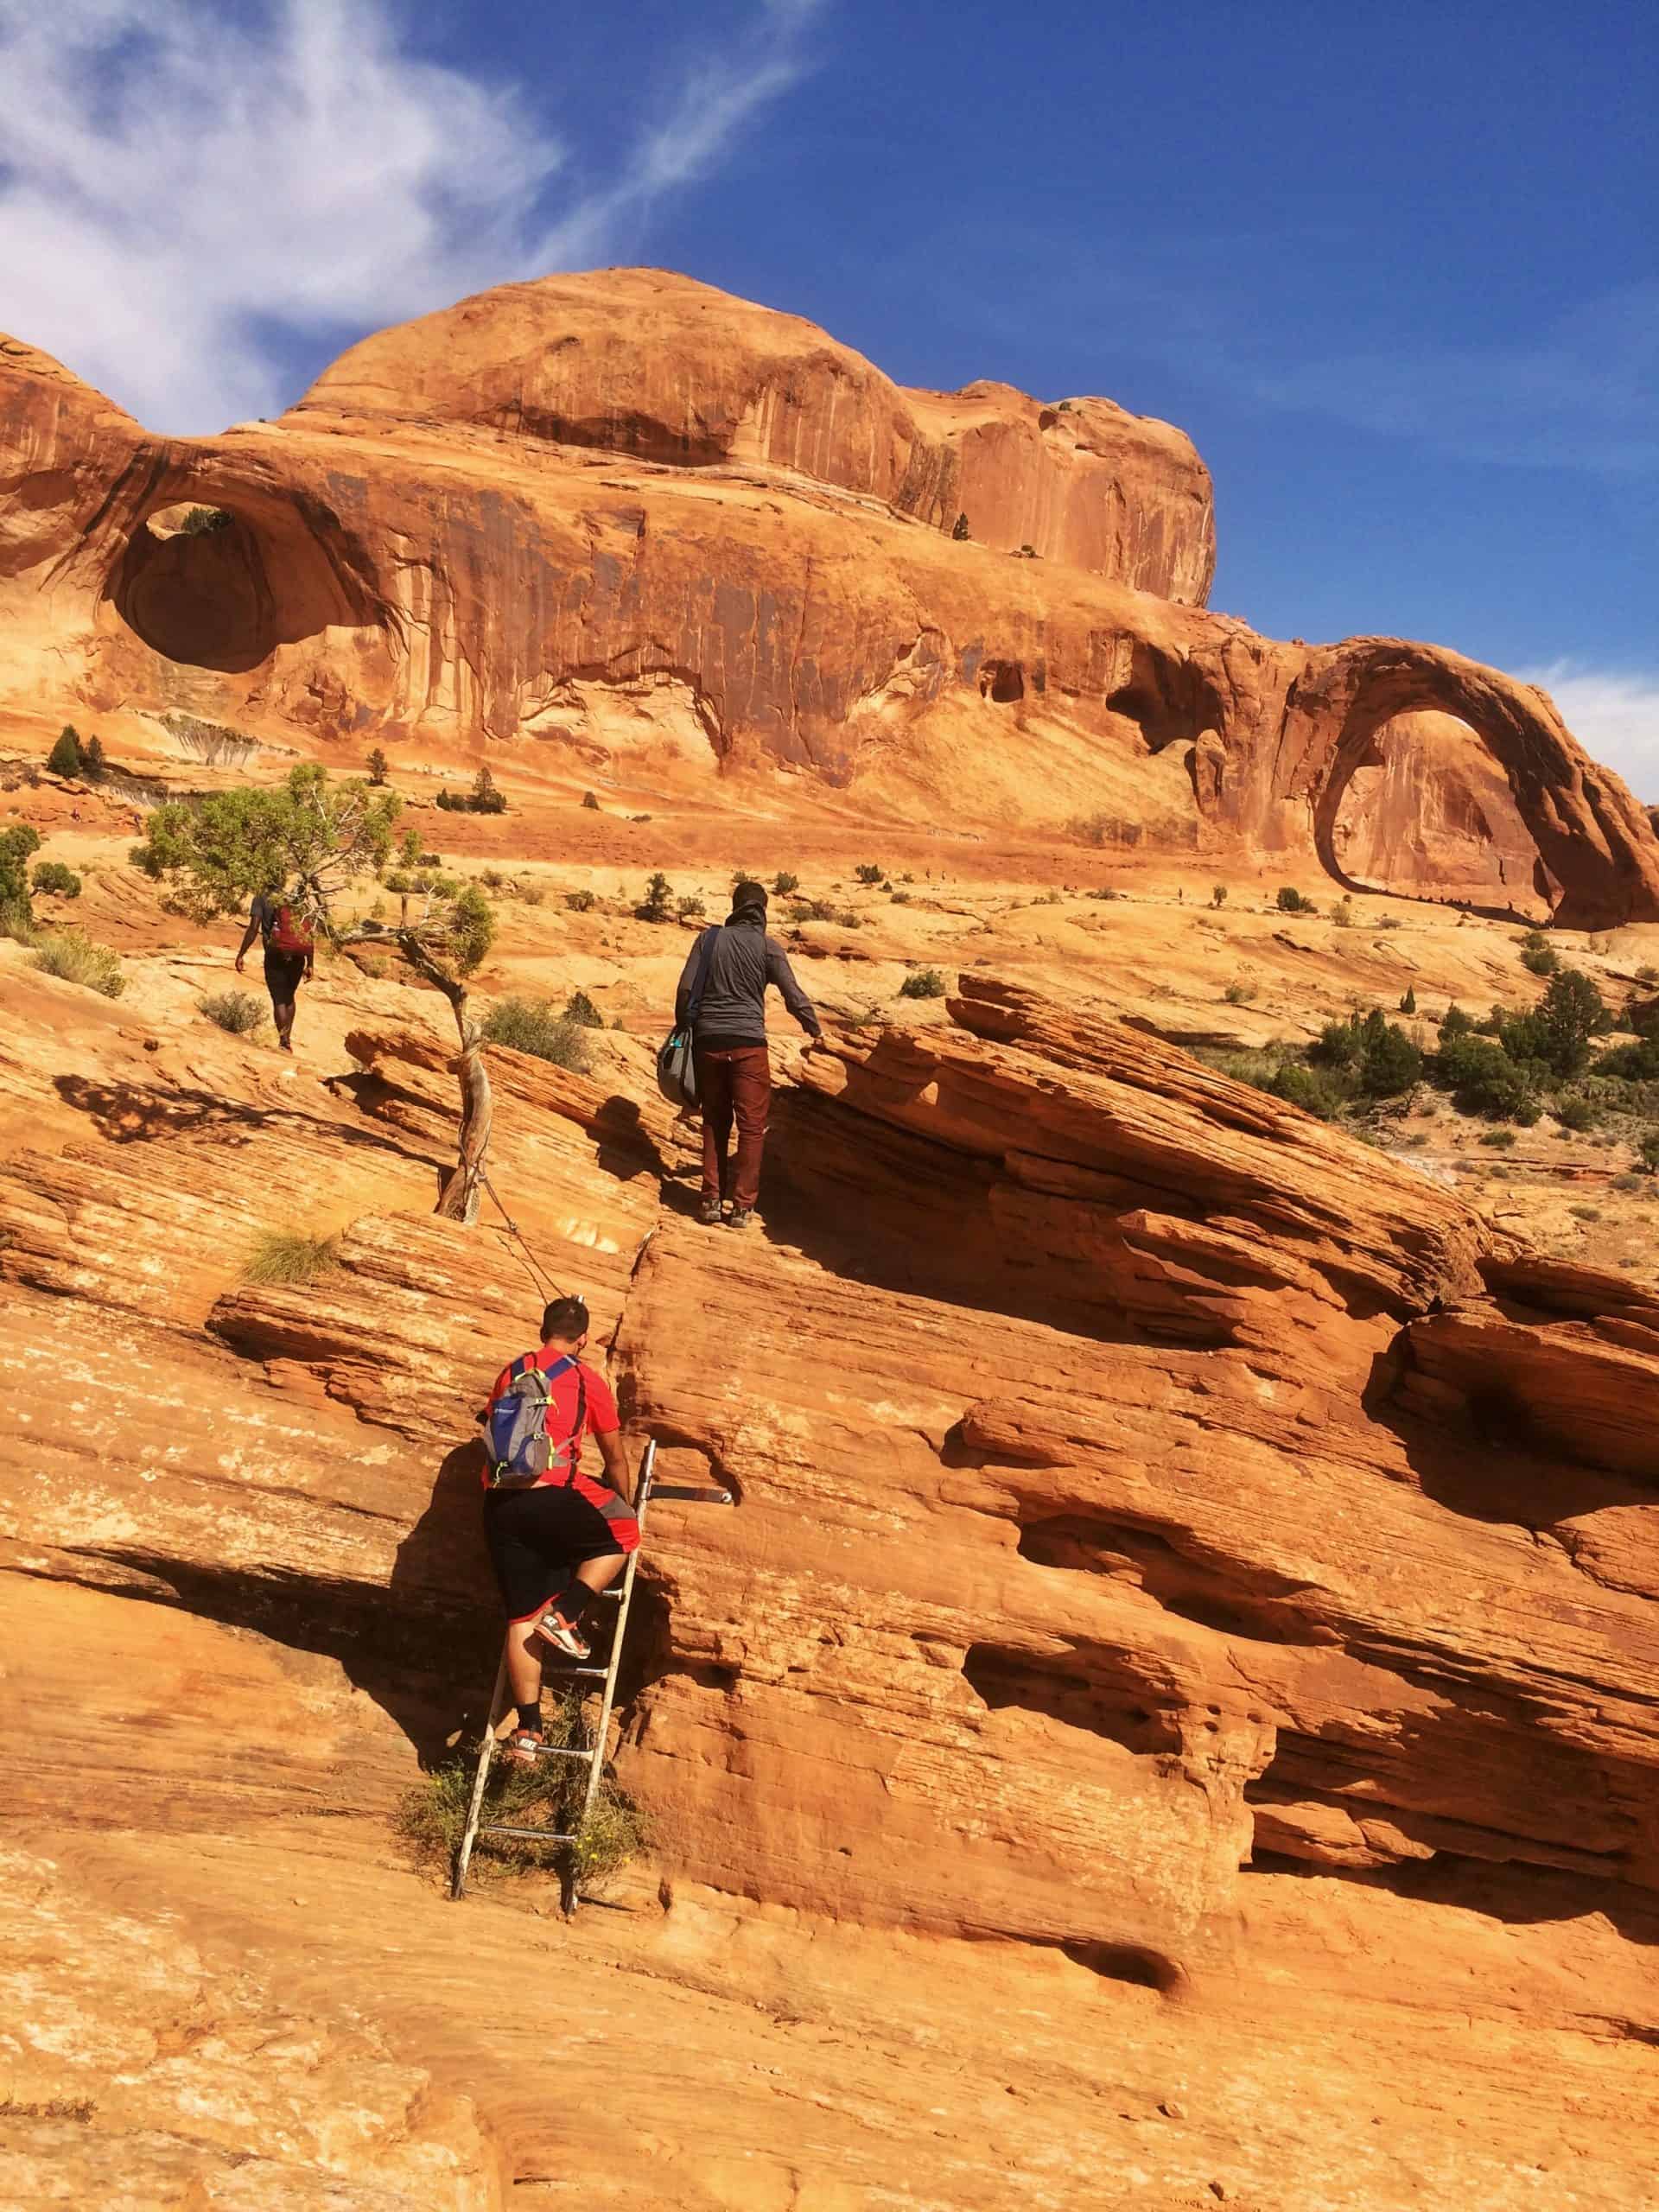
Depending on when you arrive in Moab and the season, I recommend squeezing in a hike! After checking into your stay, drive 20 minutes west from Moab to take on this stunning hike to the iconic Corona Arch.
Plan for at least two hours to complete the 2.4-mile (3.9 km), 459-foot (140 m) round-trip hike and watch the sunset behind the arch! I personally love the short ladder and rope section, but don’t be caught off guard. Wear good hiking shoes,
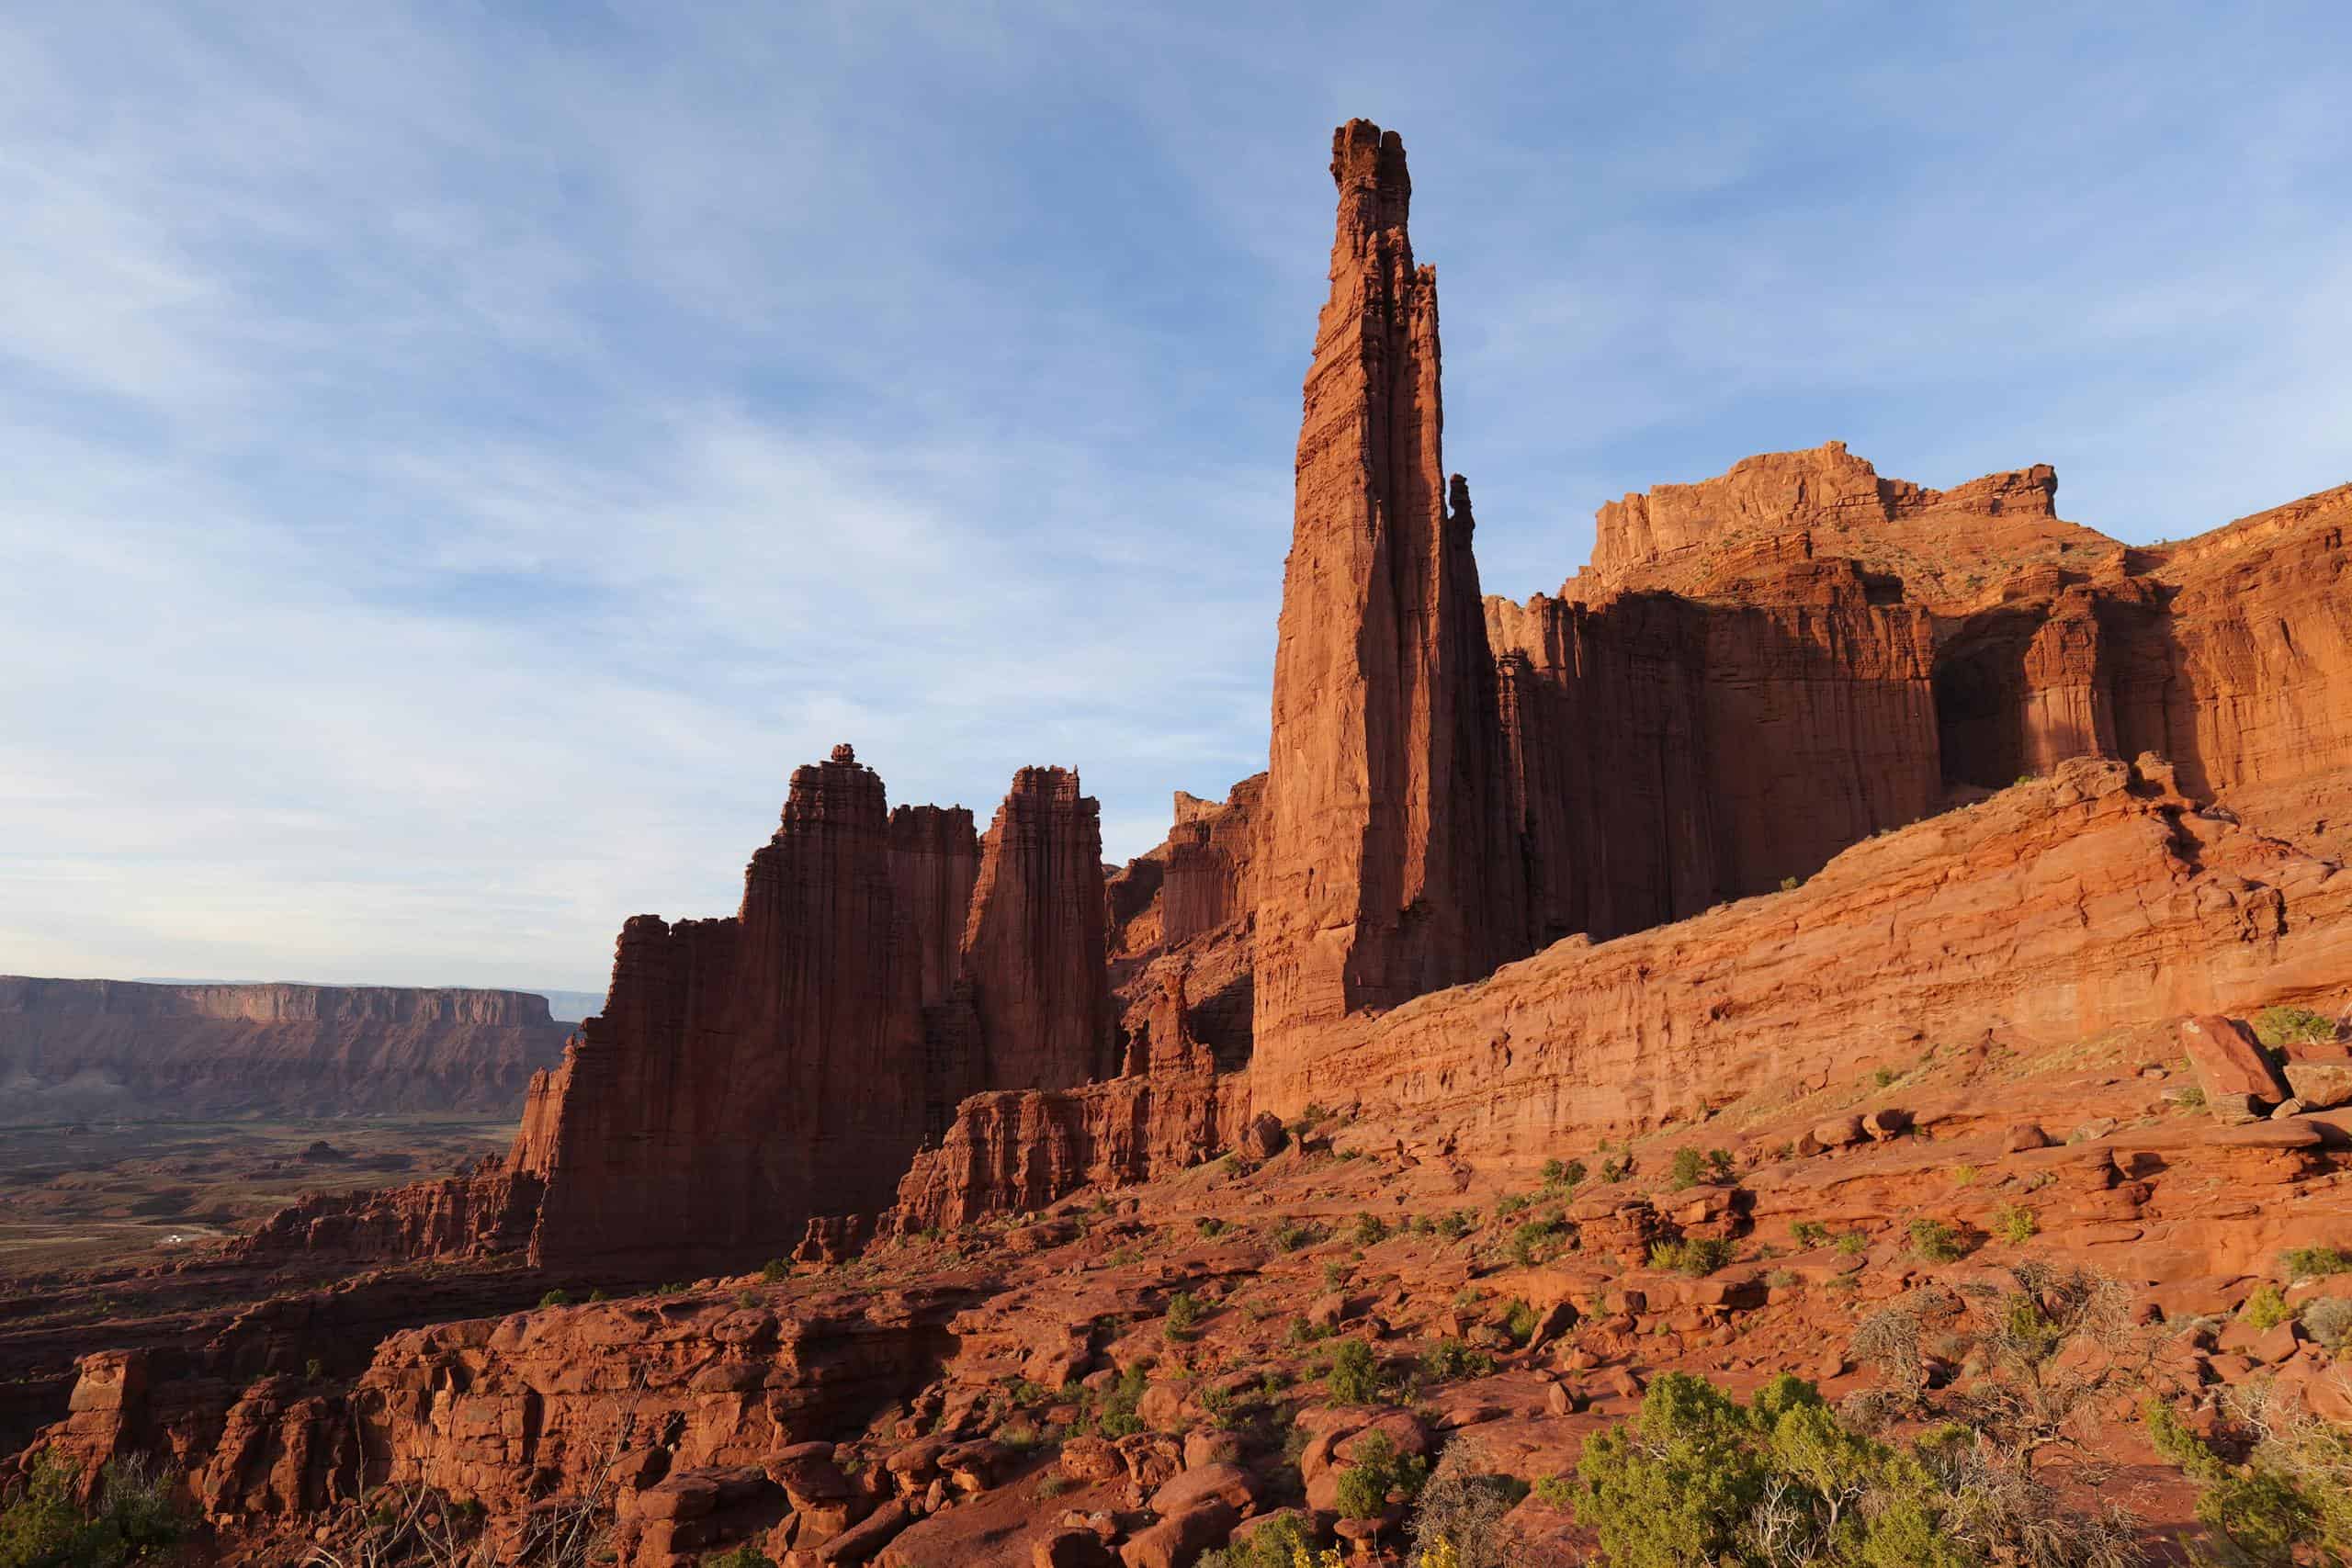
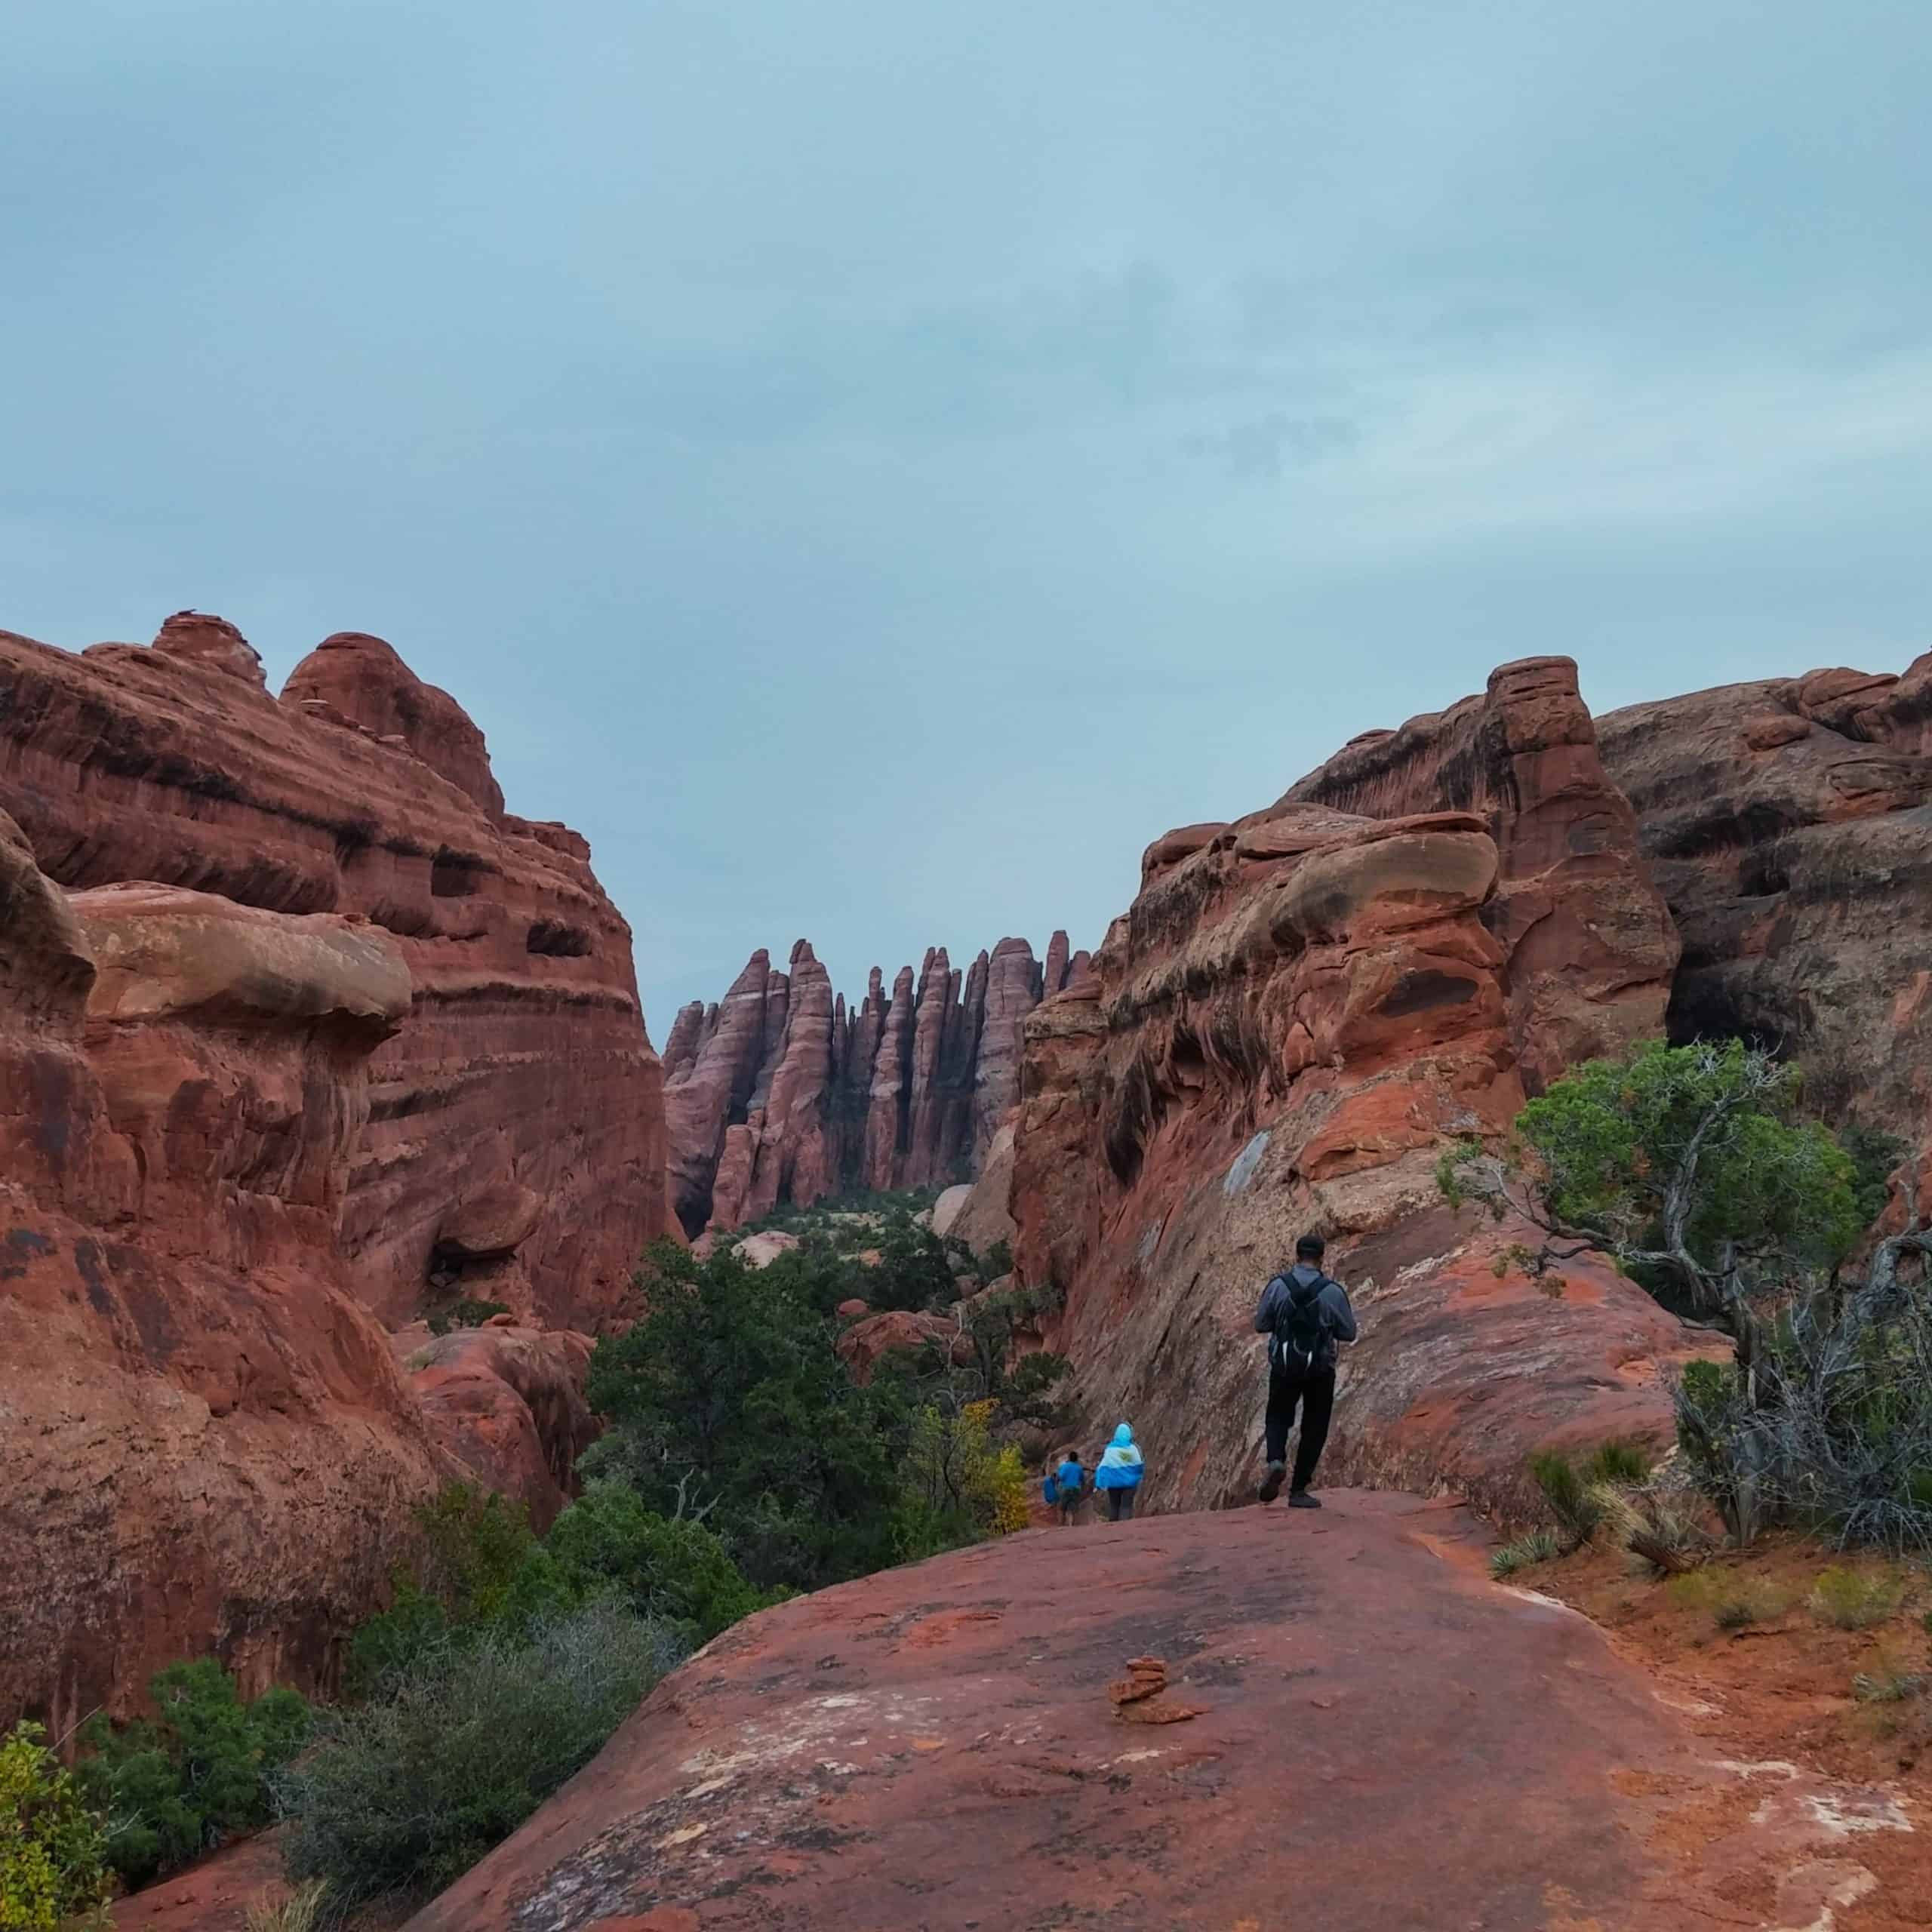
If you’ve hiked Corona Arch before and need a great backup option, look no further than the Fisher Towers Trail. This underrated gem sits 40 minutes east of Moab. Give yourself at least three hours to complete this 4.6-mile (7.4 km) and 1509 feet (1374 m) round-trip hike.
Once you are done with your hike, return to Moab for dinner! My absolute favorite restaurant in Moab is the Sultan Mediterranean Grill, don’t miss out on their Alpino Chicken!
Another great option is Moab Brewery, perfect for a relaxed evening meal, drinks, and a fun vibe!
Where To Stay In Moab
You will be spending the first three nights in Moab as your base and exploring from there. Each National Park and trailhead you’ll visit is within about an hour’s drive.
Comfort Suites Moab is my go-to hotel for a clean, comfortable, and affordable stay, complete with amenities, including a complimentary buffet-style breakfast. If you know me, I am a sucker for a yummy free breakfast!
It is located within walking distance of several restaurants, including the Sultan’s Mediterranean Grill and Sweet Cravings Bakery + Bistro (which I plan to try next time I stay there!)
Moab KOA – Conveniently located within town, with more amenities than a typical campground. My first time staying in Moab was at the KOA, and really, nothing beats a nice warm shower, especially when you’re camping!
BLM Campgrounds on Highway 128 – Scenic, budget-friendly, and right along the Colorado River, but expect minimal amenities and potential noise.
Day Two: Moab, Canyonlands, and Deadhorse
Day two kicks off with a stop at a local café or coffee shop, followed by an exciting zipline tour. From there, you’ll drive about 40 minutes to explore Canyonlands National Park. Wrap up the day with dinner and some time wandering through the small, charming town of Moab.
Morning
Start your day at a local café or breakfast spot. Moab Coffee Roasters is always a great choice, with delicious coffee, good food, and my personal weakness: gelato!. If you’re in the mood for a classic sit-down breakfast, Moab Diner delivers comfort food with a side of 1980s nostalgia and plenty of charm.
Do you enjoy starting your day with an adrenaline-inducing activity? The Moab Zipline with Raven’s Rim Adventure Tours is an adventure of a lifetime! This is one of the most scenic and unique zip lines in Utah, with snowcapped peaks in the distance contrasted with the famous red rock landscape!
Afternoon
If you’re hungry after your morning adventure, grab a quick lunch before heading to Arches National Park. The Moab Food Truck Park is a great option for a quick, easy bite, with plenty of choices to satisfy just about any craving. I am a sucker for a good street taco, and Tacos el Gordo delivers!
Evening
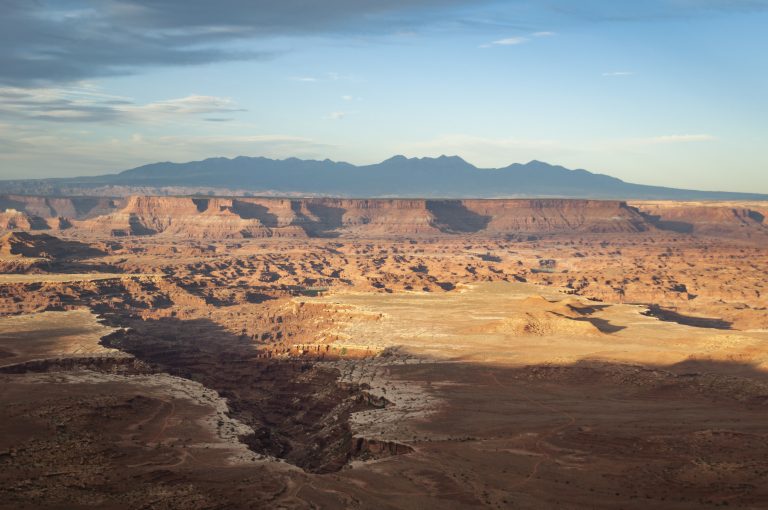
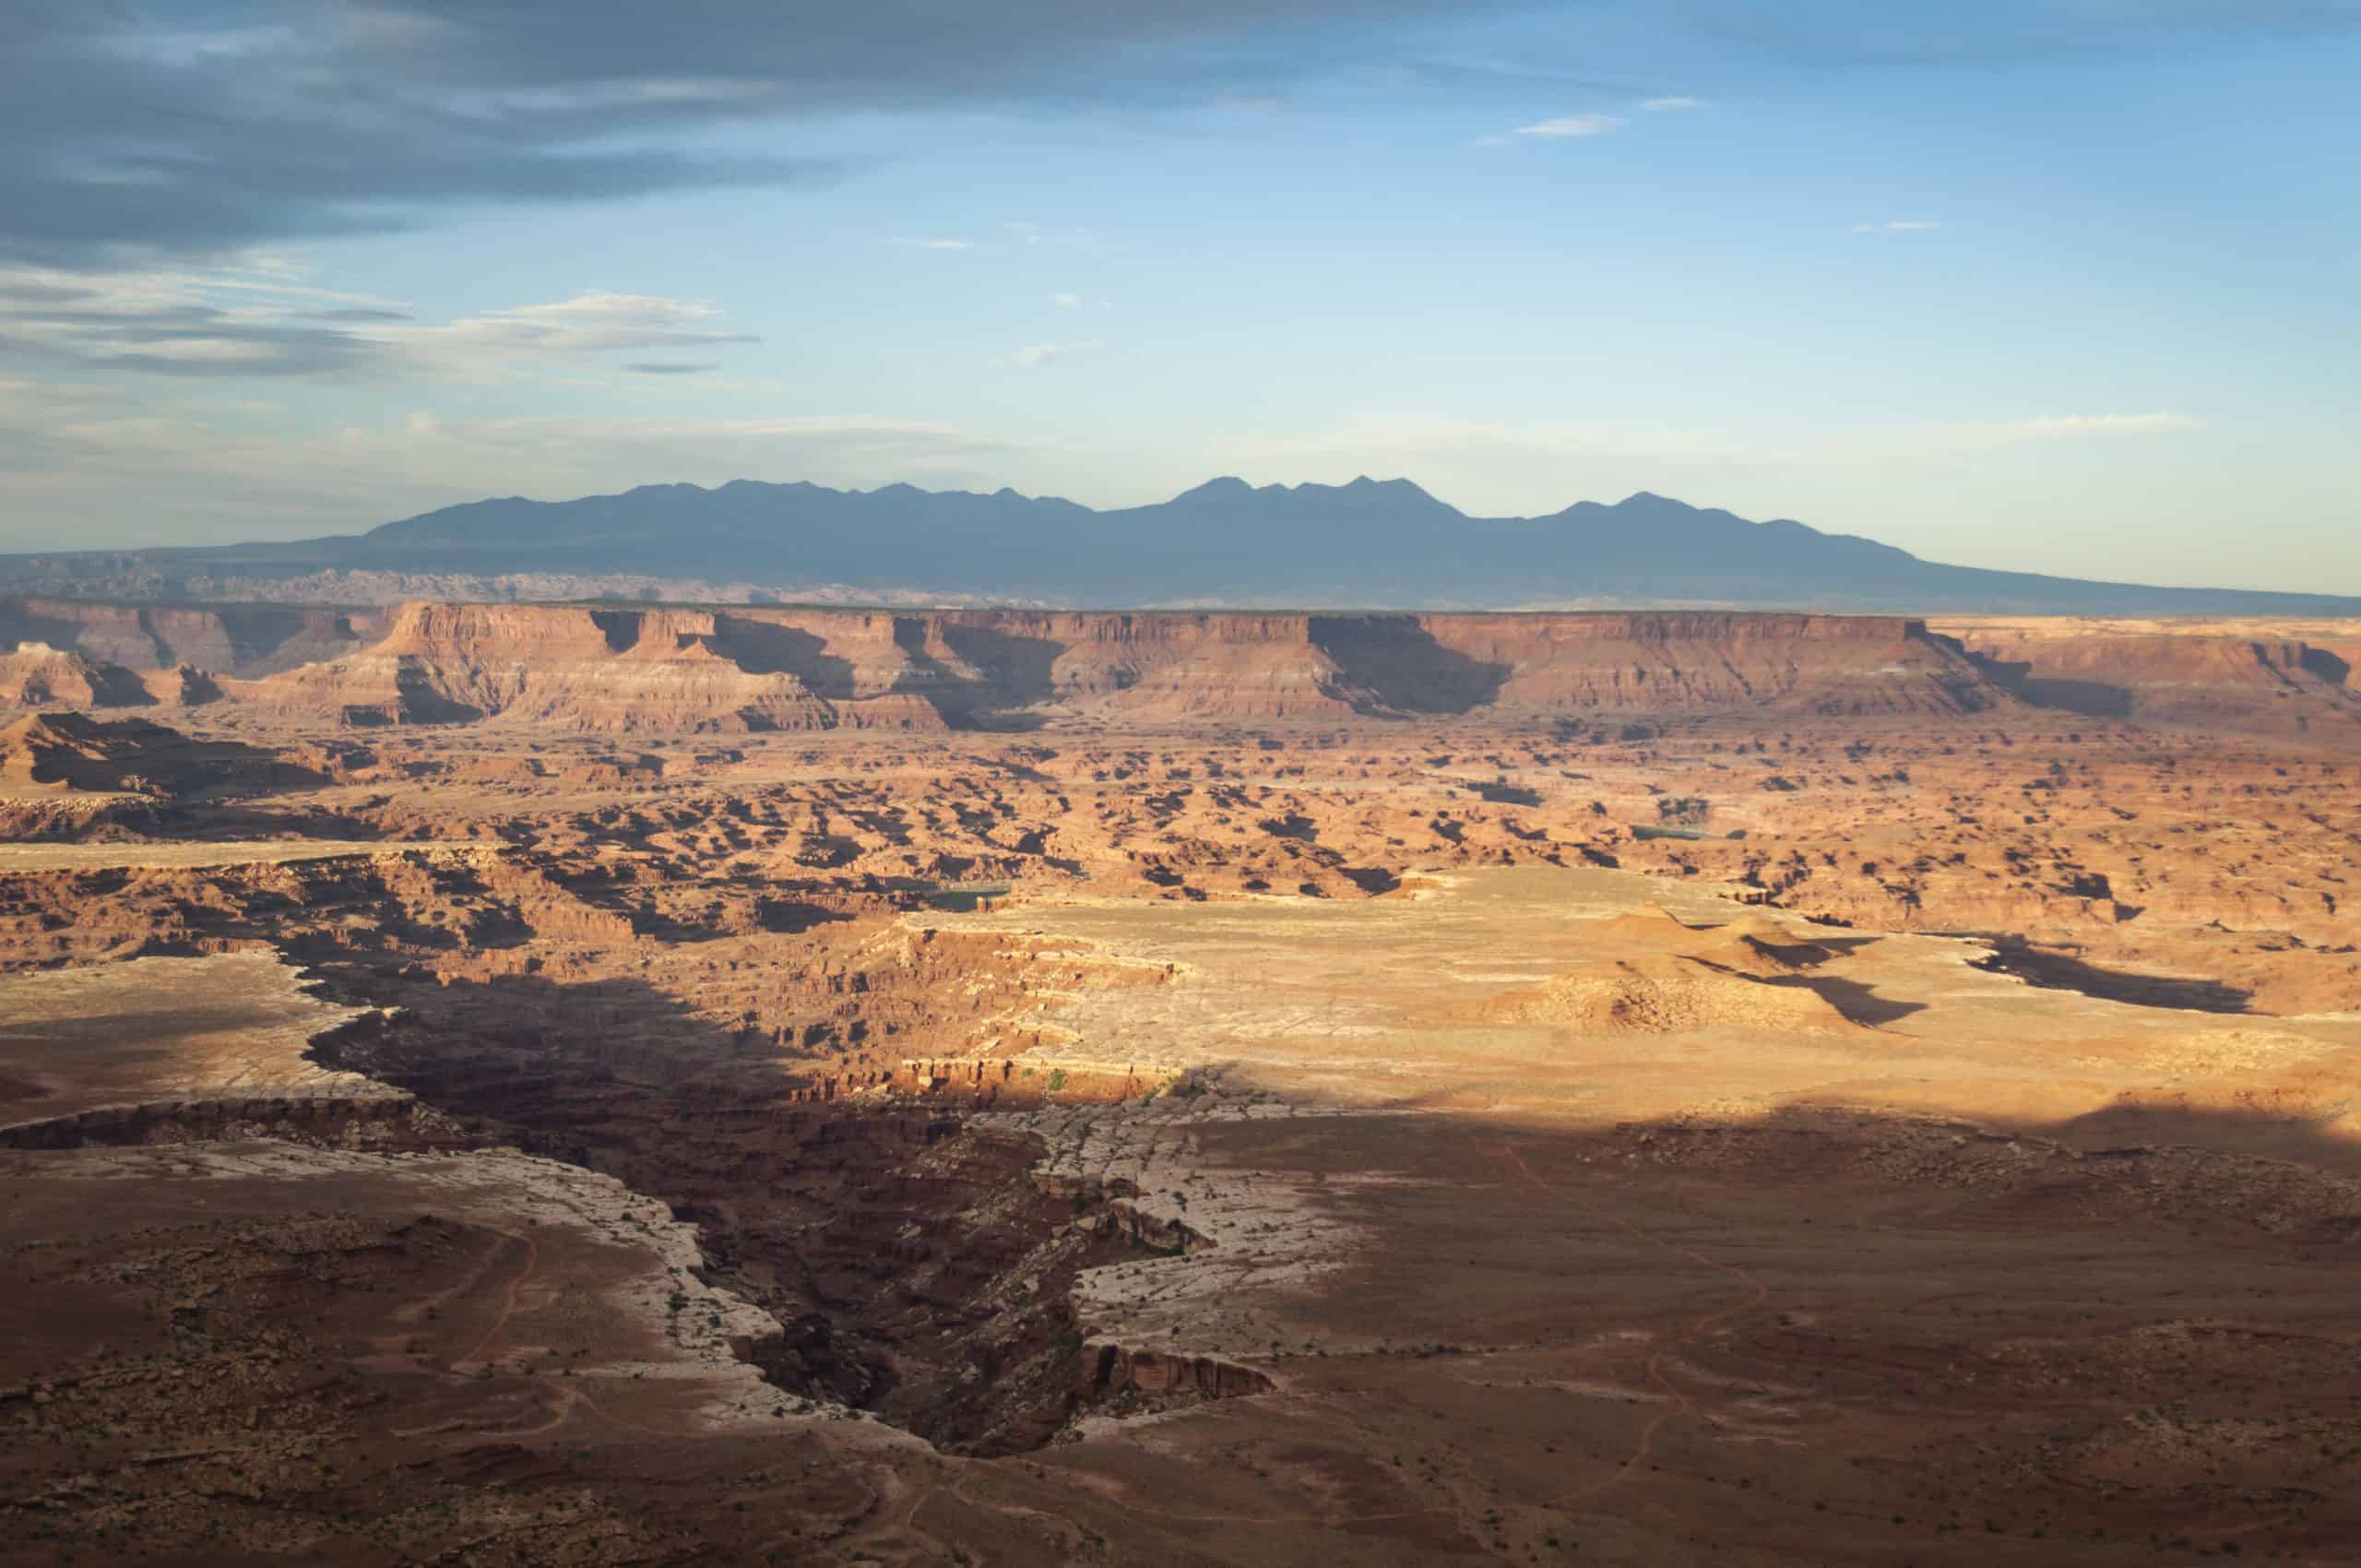
Spend the rest of your day exploring Canyonlands National Park, which is one of Utah’s most iconic national parks and the first of the Mighty 5 you’ll be exploring! Canyonlands is divided into three districts, and I recommend visiting the Island in the Sky district. It is the most visited section, and a half day is ample time to see the highlights.
It is about a 40-minute drive to the Canyonlands National Park Visitor Center. Once there, I recommend hiking the easy trail to the picturesque Mesa Arch, but please refrain from walking on the arch!
Make sure to stop at the many breathtaking overlooks! My personal favorite one is Grandview Point, but I recommend stopping at the following five overlooks along the main road: Visitor Center Overlook, Shafer Canyon, Green River, Buck Canyon, and Grandview Point Overlook. Each is a quick walk-up, well-marked, and hard to miss!
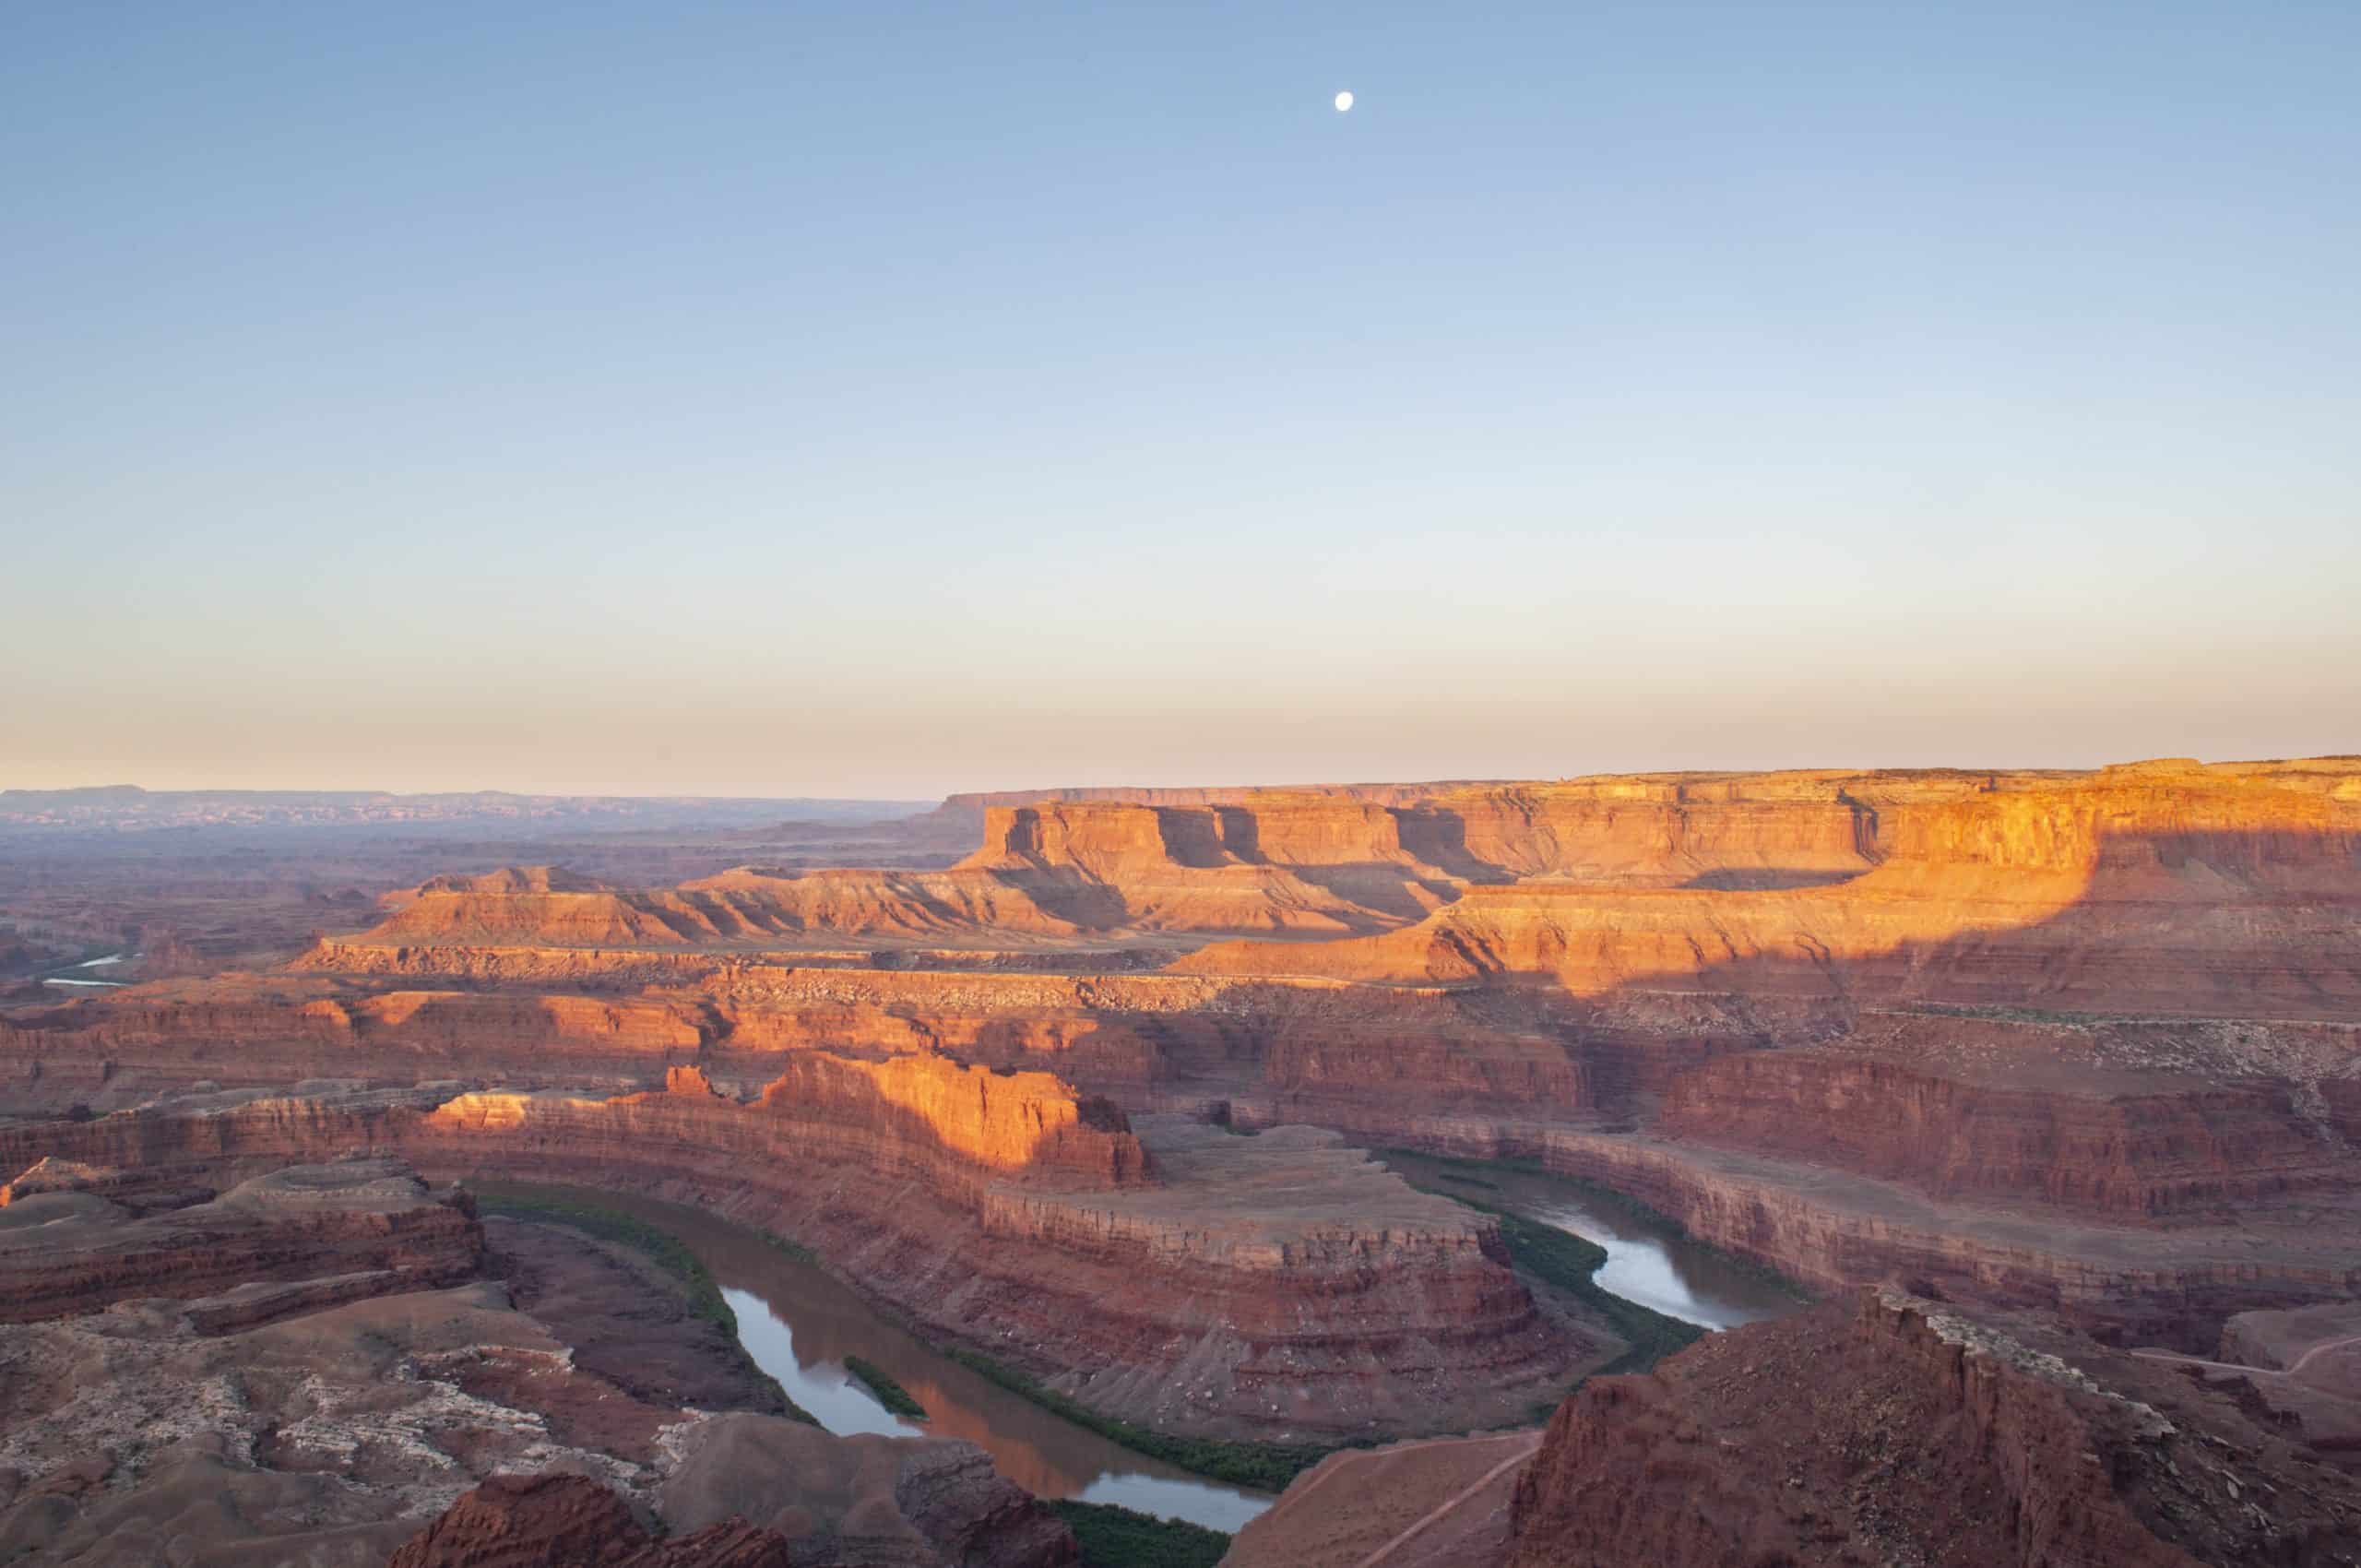
If you have time, don’t miss out on Deadhorse Point State Park at sunset. It will take your breath away. The entrance fee is $20, but the main viewpoint is well worth the price of admission! On my first visit, I couldn’t believe what I was seeing with my eyes, and I stop here every time I visit Moab.
Once you’re back in Moab, check out Proper Brewing & Burger Co., a local Utah brewery with tasty, affordable burger options and a variety of beers. The Broken Oar Restaurant is also a great option and makes a killer pulled-pork sandwich for a reasonable price.
Day Three: Moab and Arches National Park
Day three will be spent exploring Arches National Park in depth, with a handful of overlooks and a few hikes. Arches feels like another planet, with the largest concentration of natural arches anywhere in the world!
Update: Arches National Park is NOT requiring timed-entry for the 2026 season.
Morning
Do you want to skip all the hassle and logistics and just go straight to Arches National Park? Opt to take this guided scenic van tour from Moab, and let someone else handle the timed-entry permits, driving, and planning for you.
Relax with snacks, engaging commentary, and a comfortable ride in a glass-enclosed (or open-top, weather permitting) ride. In four hours, you’ll hit all the iconic highlights plus a few easy walks. What a fun, stress-free way to experience the park at its best.
I recommend bringing plenty of snacks for the day — City Market in Moab is a great place to stock up. Wicked Brew makes a really great Almond Joy Latte and is the earliest open coffee shop in Moab at 6 am. No rest for the wicked, right?
Pro Tip: Get to the park entrance before 7 am to beat the crowds, which is only 10 minutes north of Moab. Once you’re in the park, you can stay all day.
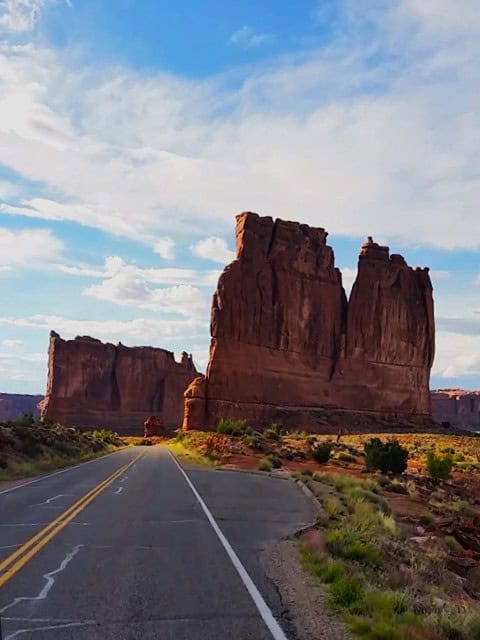
When you arrive in Arches National Park, one of the first trailheads you’ll encounter is Park Avenue. This short hike can be completed in about an hour and offers incredible views of the iconic Courthouse Towers.
Next, make a quick stop at La Sal Mountains Overlook, where the La Sal Mountains loom dramatically as a constant backdrop to the desert landscape. Many visitors are surprised to see snowy alpine mountains so close to the desert!
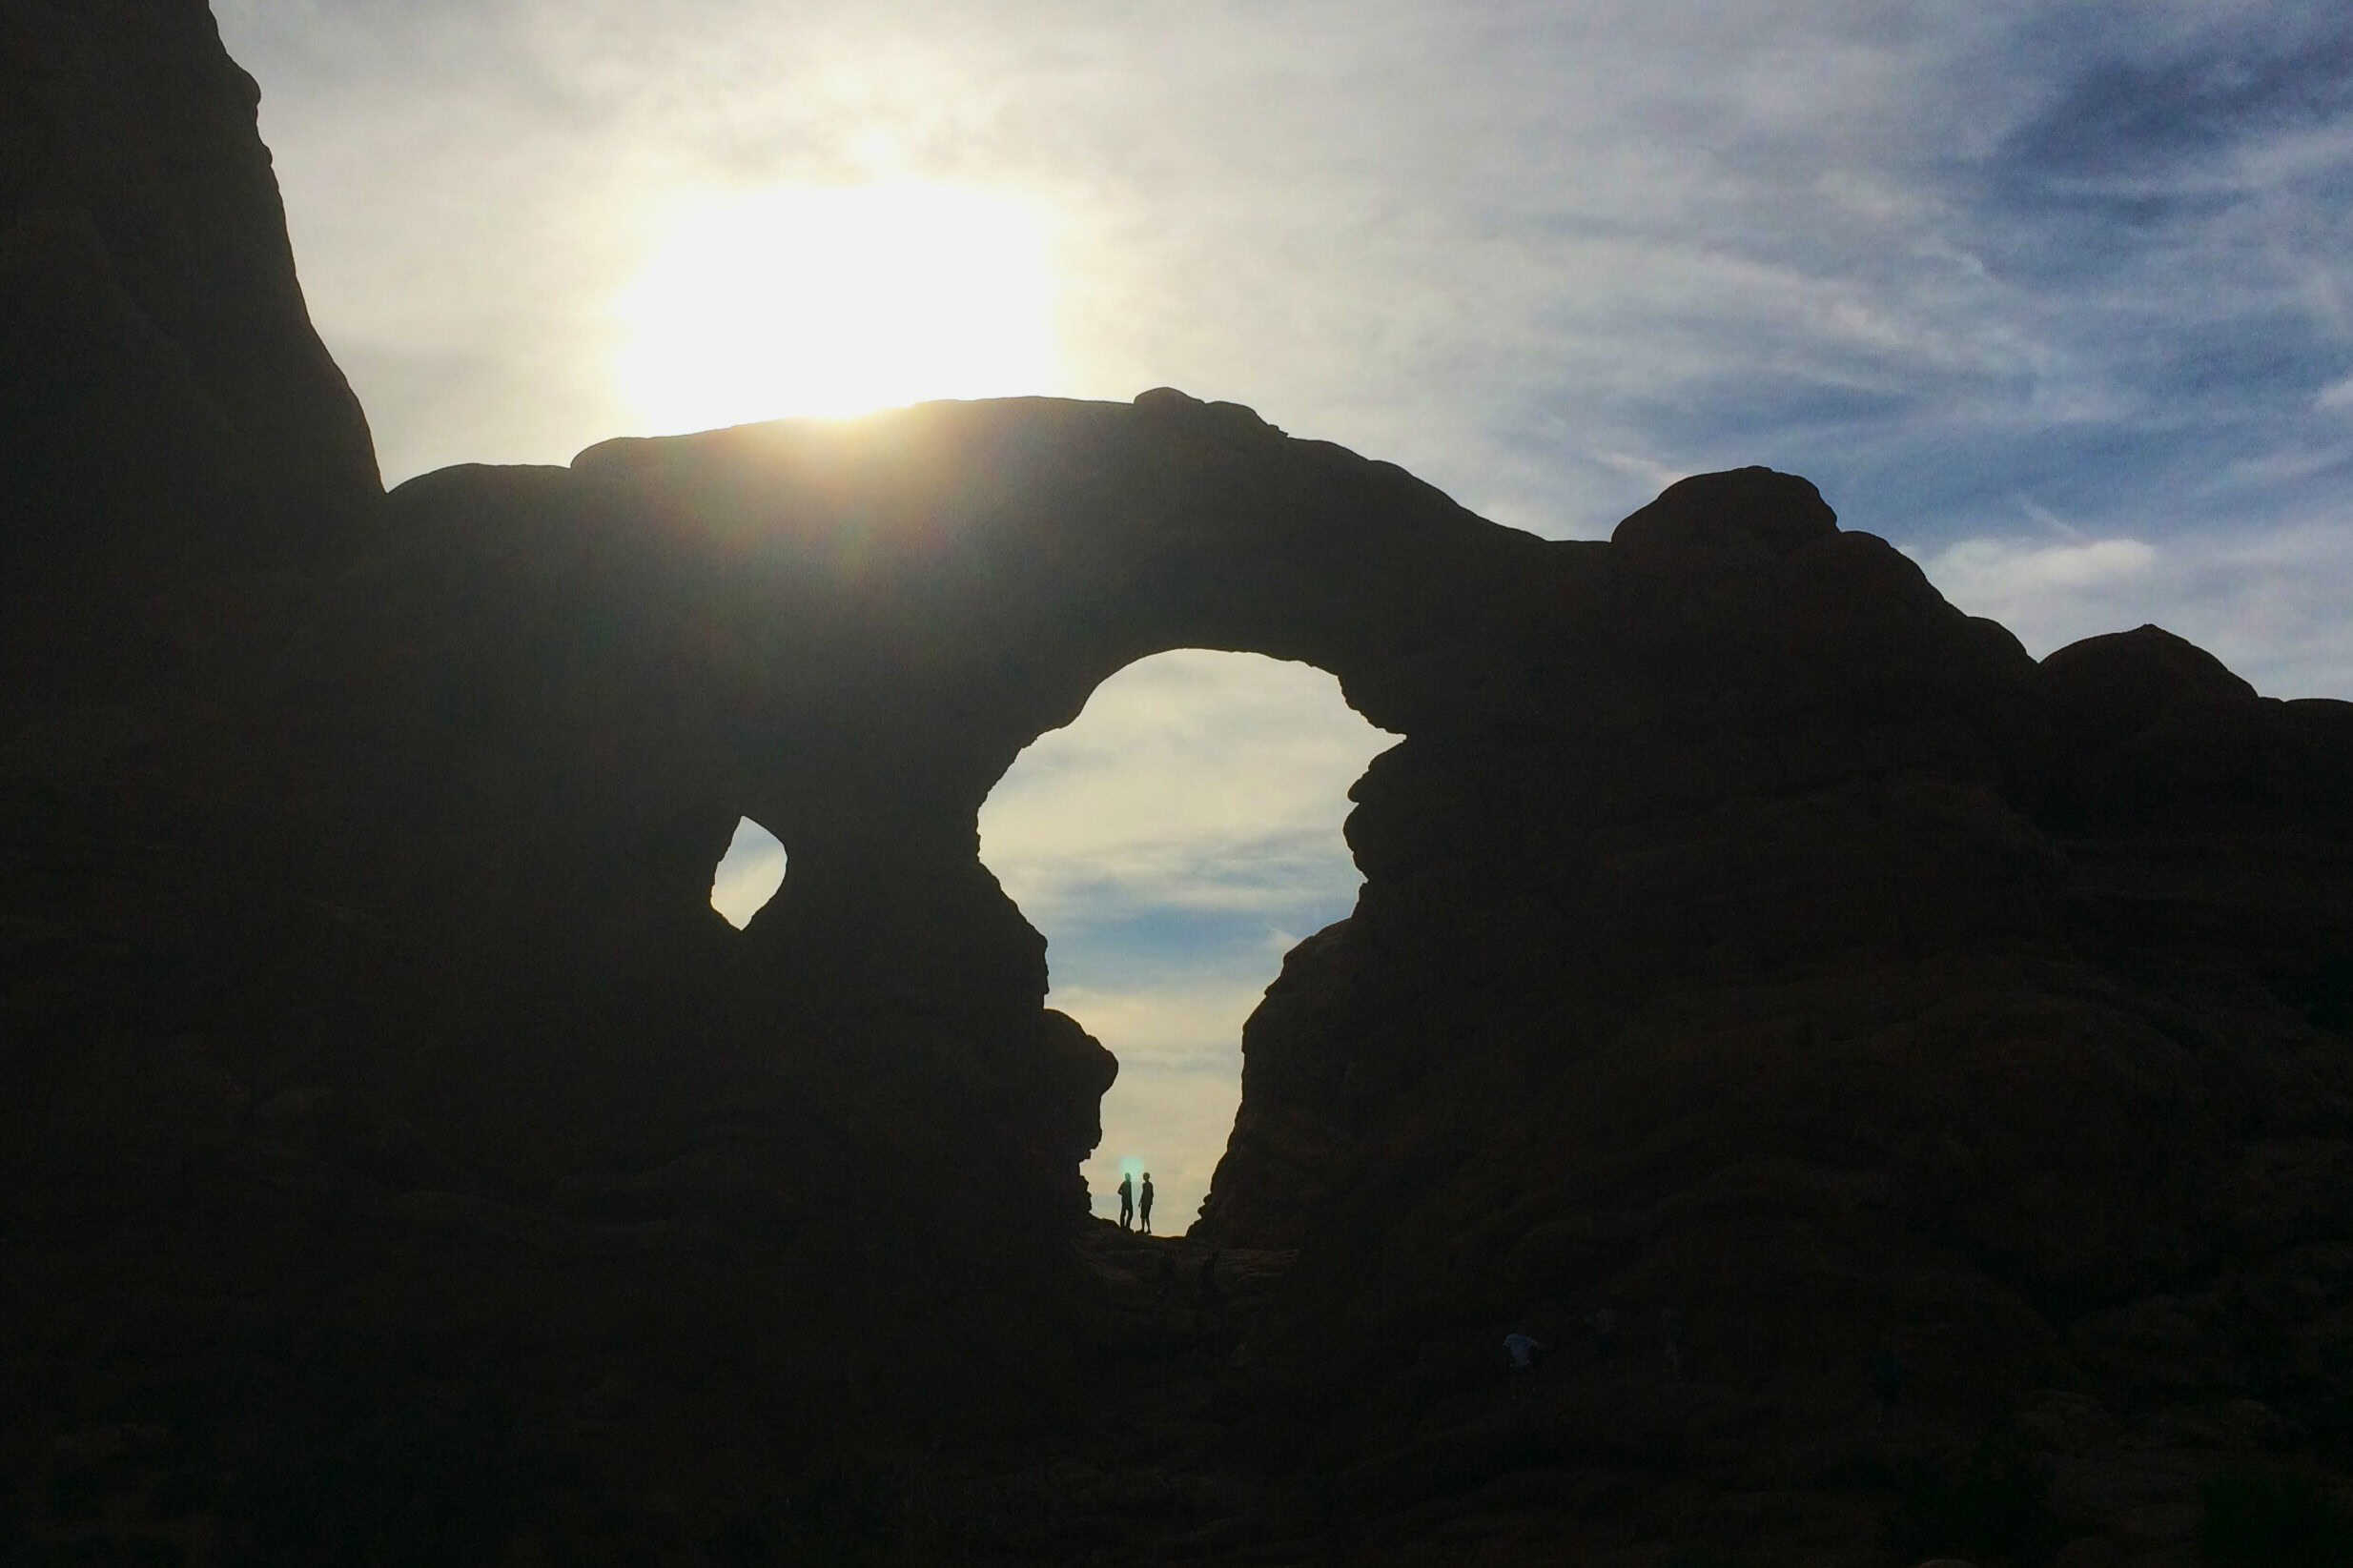

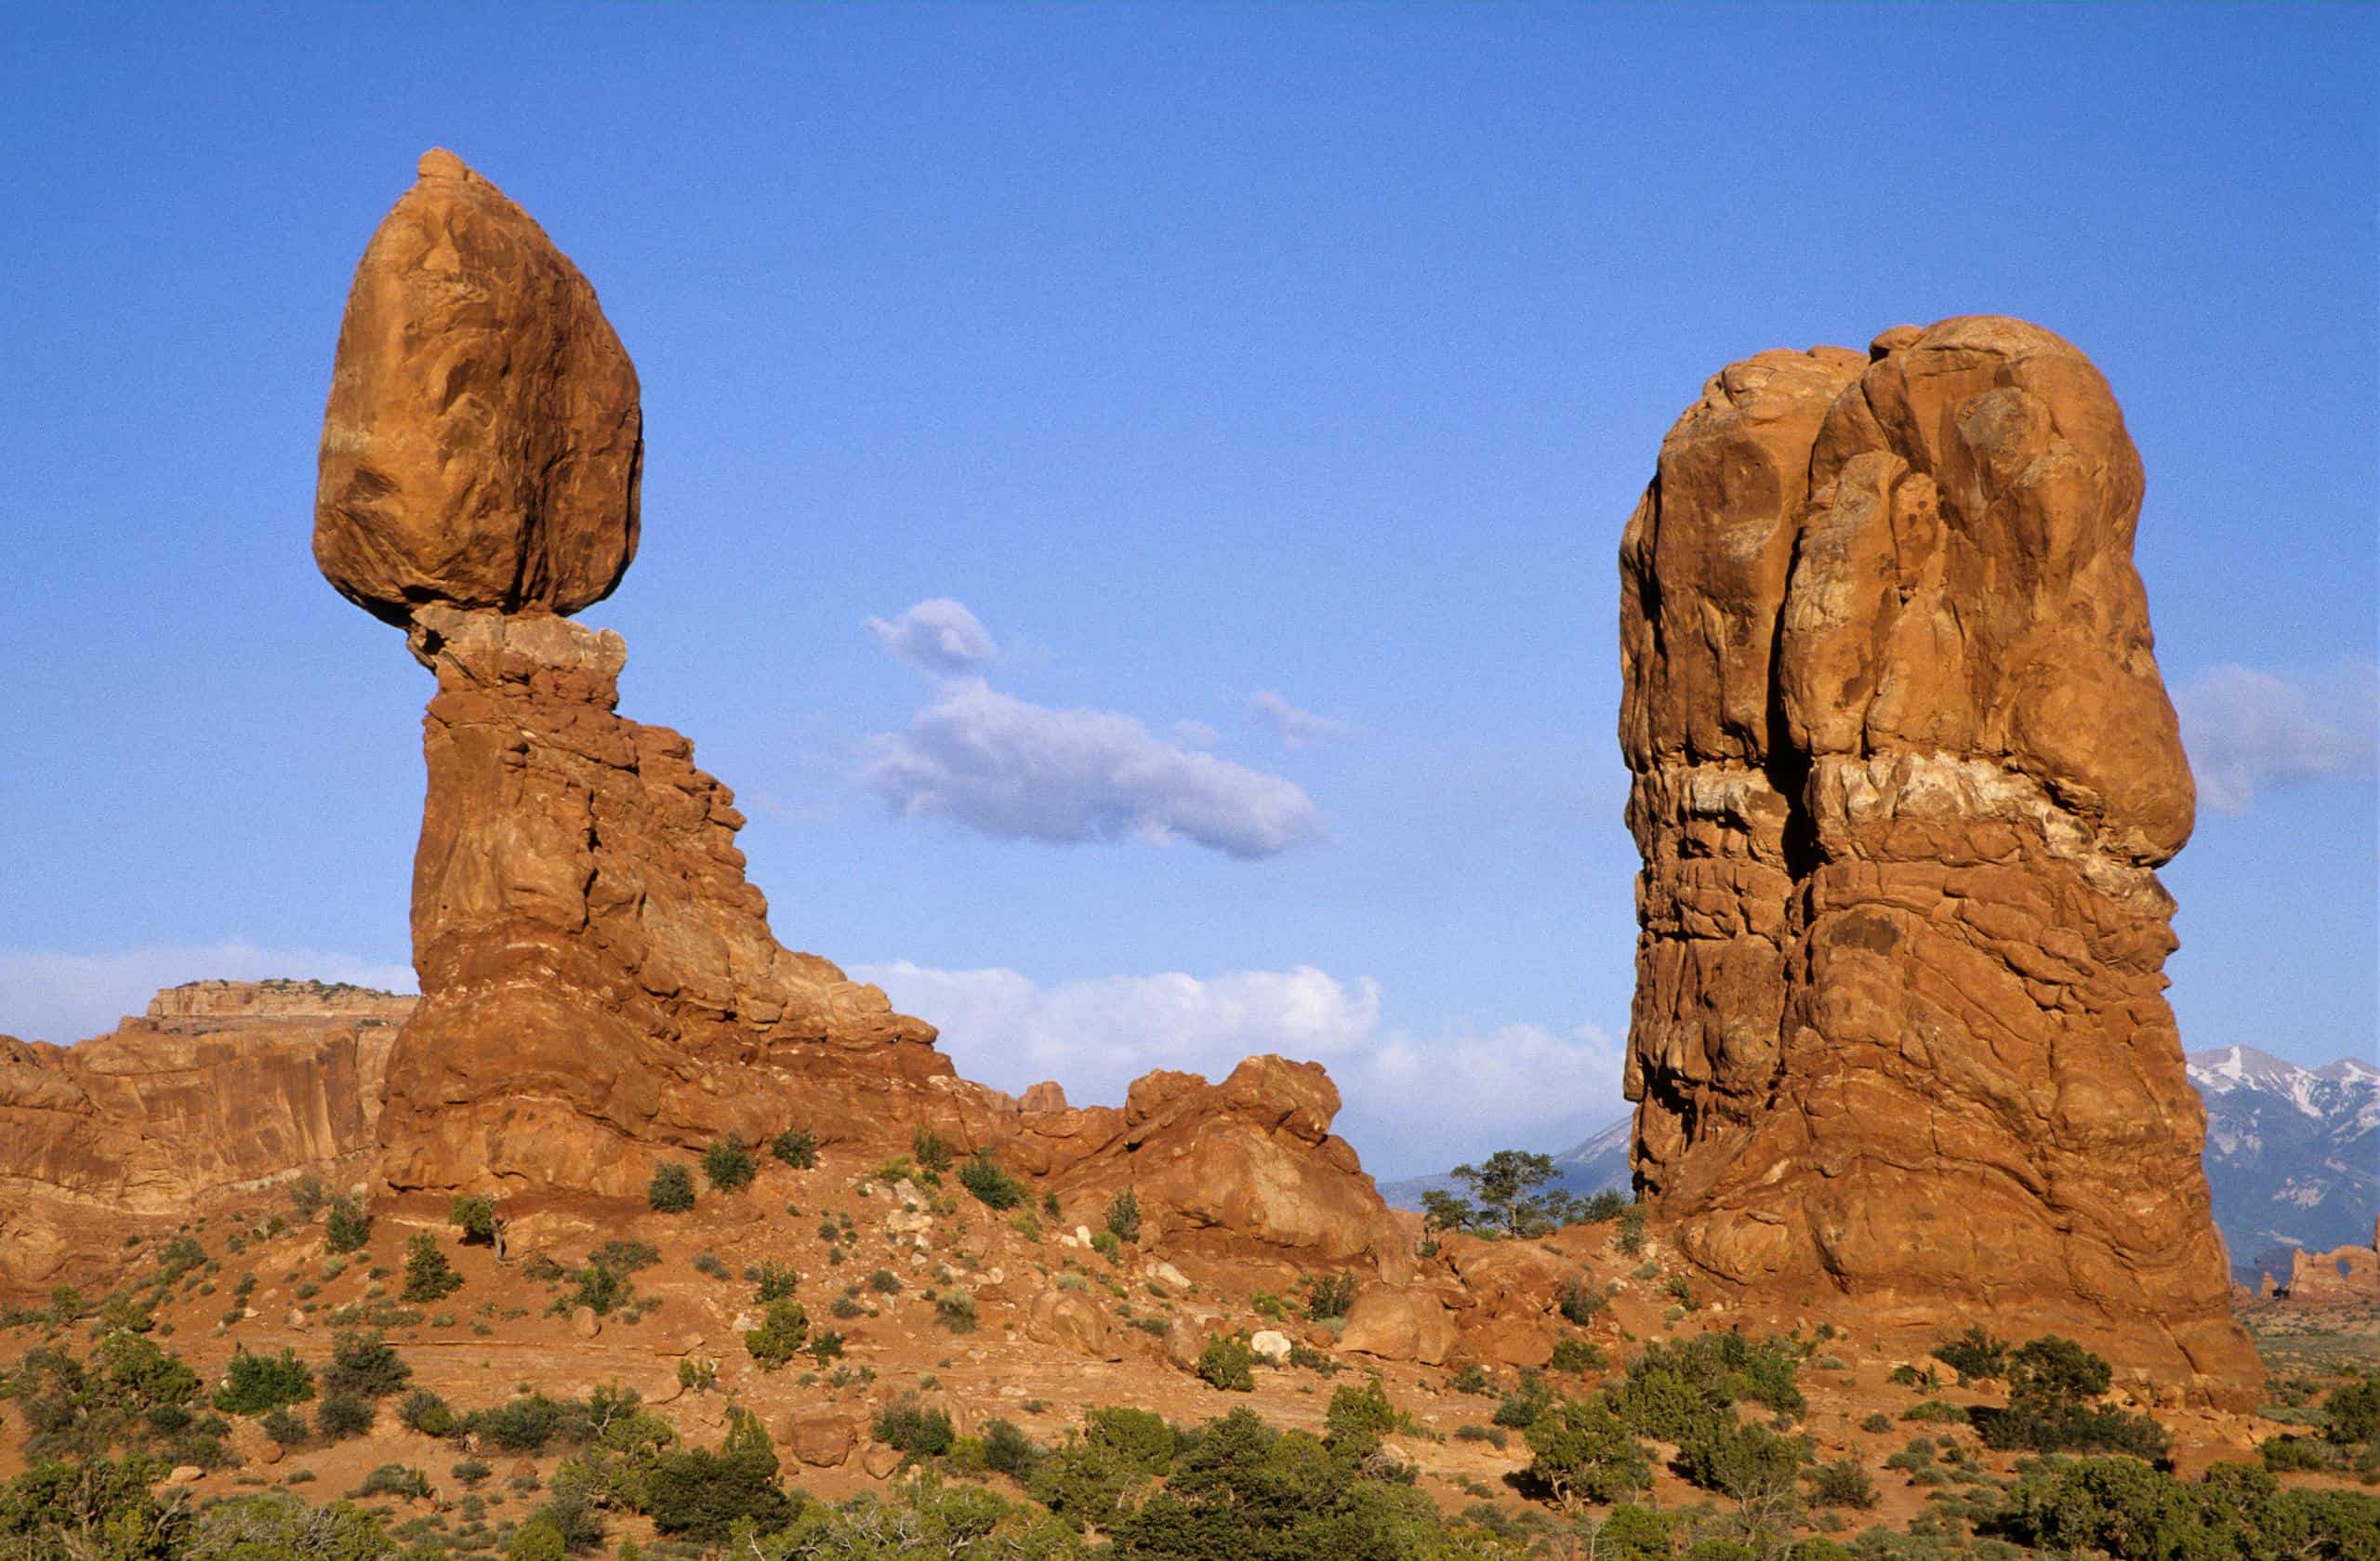
Next up are the Petrified Dunes and Balanced Rock, both quick stops that are absolutely worth hopping out of the car for. From there, take the short spur road to one of my favorite corners of the park. Give yourself about an hour to wander around Turret Arch, the Windows, and the always-impressive Double Arch.
Afternoon
I suggest skipping the next stop for now. It’s the most famous hike in the park, and saving it for sunset is well worth it. Instead, continue driving to the end of the park, to the Devils Garden Trailhead.
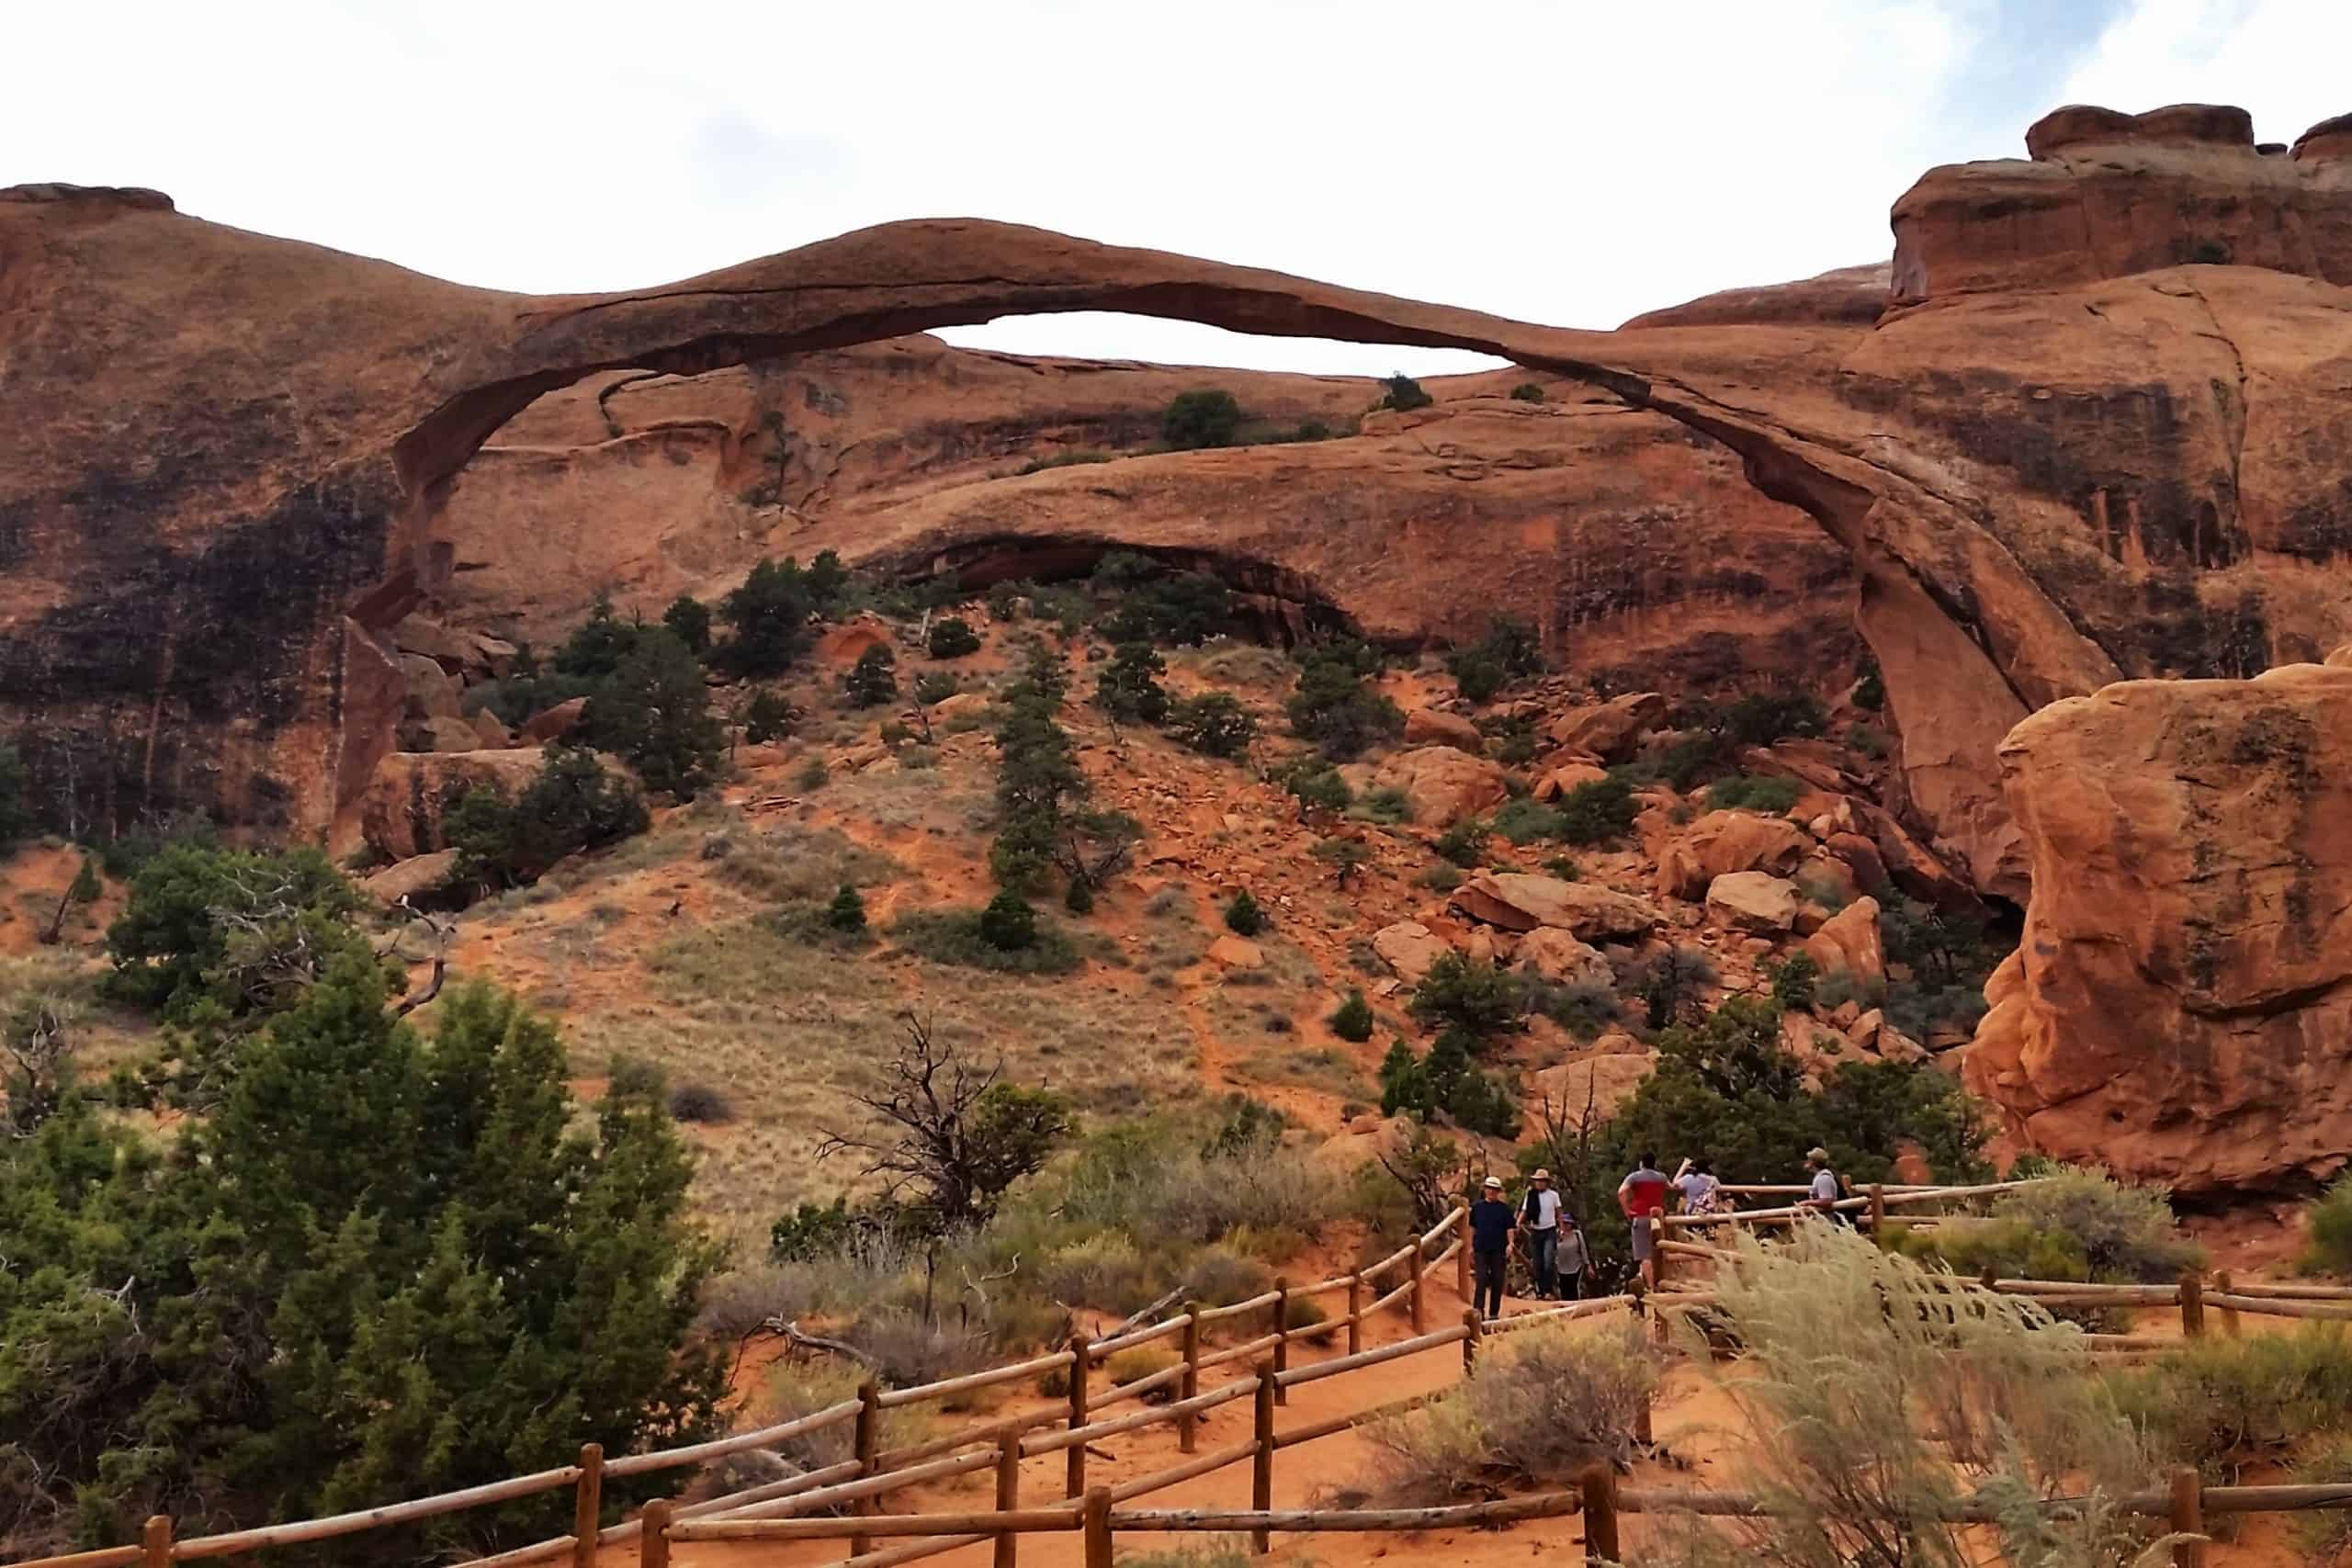
Once there, choose the option that best suits your time, energy, and adventure level! The first option is to hike the first section of the Devils Garden Trail and turn around at Landscape Arch. This out-and-back hike takes about 1–2 hours and is iconic!
If you’re ambitious, take on the full Devil’s Garden Loop. This route includes scrambling and some route-finding, making it more advanced, and typically takes 4–5 hours. Don’t underestimate this hike, and ensure you have plenty of time and water! We had to hike out in the dark and nearly got lost.
If you’re short on time, stick with the shorter option and make sure you’re back in time for the final hike (at least 1-2 hours before sunset).
Evening
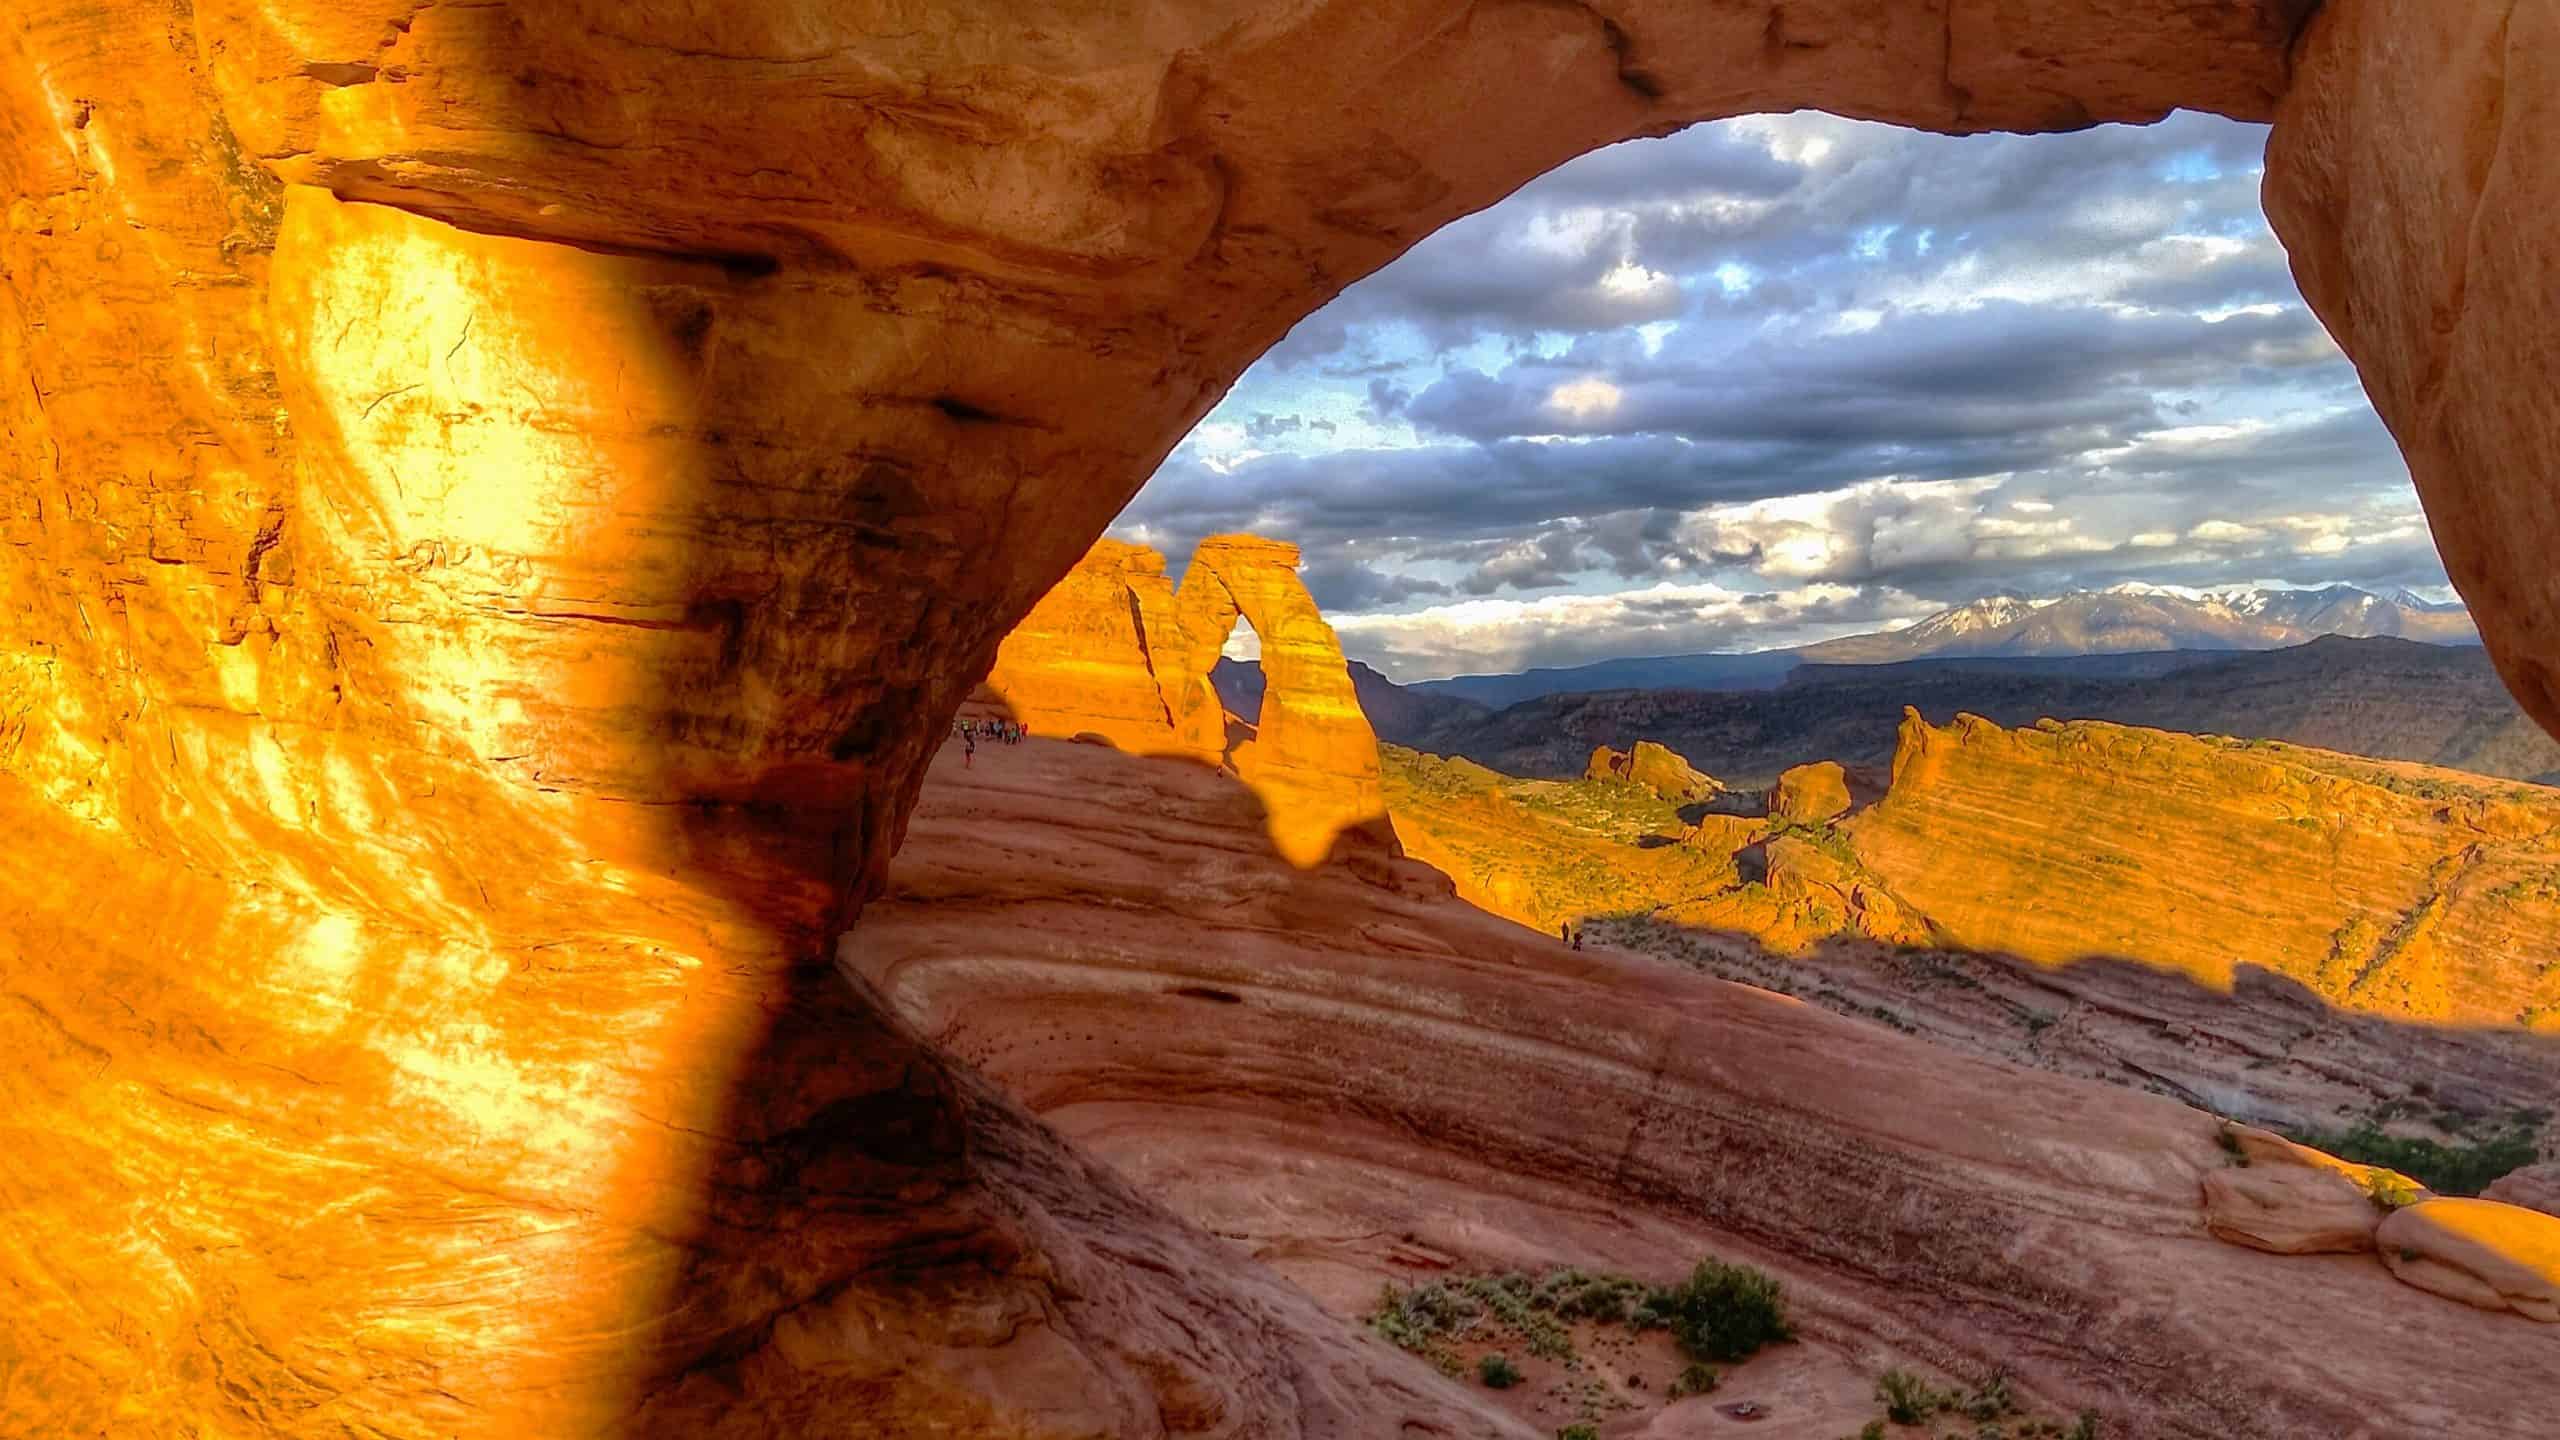
Exploring Arches in a single day is a lot, and every recommendation here is based on my personal experience. You may not be able to fit in every stop—but it’s still worth trying! The final (and most iconic) stop is Delicate Arch!
Delicate Arch truly lives up to the hype. It’s amazing seeing how such a seemingly “delicate” rock formation is still standing, and there’s a reason it appears on Utah’s license plates. Sunset here is a feast for the eyes, and don’t forget to pack headlamps for the hike back down.
Since you’ll likely arrive back in Moab late, here’s one final food recommendation: Giliberto’s Mexican Taco Shop. Their tacos hit the spot after a long day, and they’re usually open late, often past midnight.
Day Four: Moab to Torrey (2.5 hours)
Kick off day four with breakfast in Moab to fuel up for the 3-hour drive to Torrey, stopping enroute at Goblin Valley State Park. Spend the evening exploring Capitol Reef’s historic district, viewpoints, and introductory hikes.
Morning
You’ll start day four with a 2.5-hour drive, so I suggest fueling up before hitting the road! On a recent visit to Moab, I ate breakfast at Bonjour Bakery & Café, and I really enjoyed their coffee and Mediterranean plate!
Pro Tip: Don’t forget to stock up on supplies at City Market. The rest of the road trip, you’ll only find smaller general stores.
On your drive to Capitol Reef, a short 15-minute detour (one-way) off Highway 34 brings you to one of my favorite state parks: Goblin Valley. You could easily spend an entire day here wandering amongst the otherworldly goblin-like rock formations, but even a 1-2 hour visit is well worth it! It is $20 to enter per vehicle.
Check out the visitor center and hike Entrada Canyon to get up close to the rock formations. The hike should take about an hour and is very scenic!
Afternoon
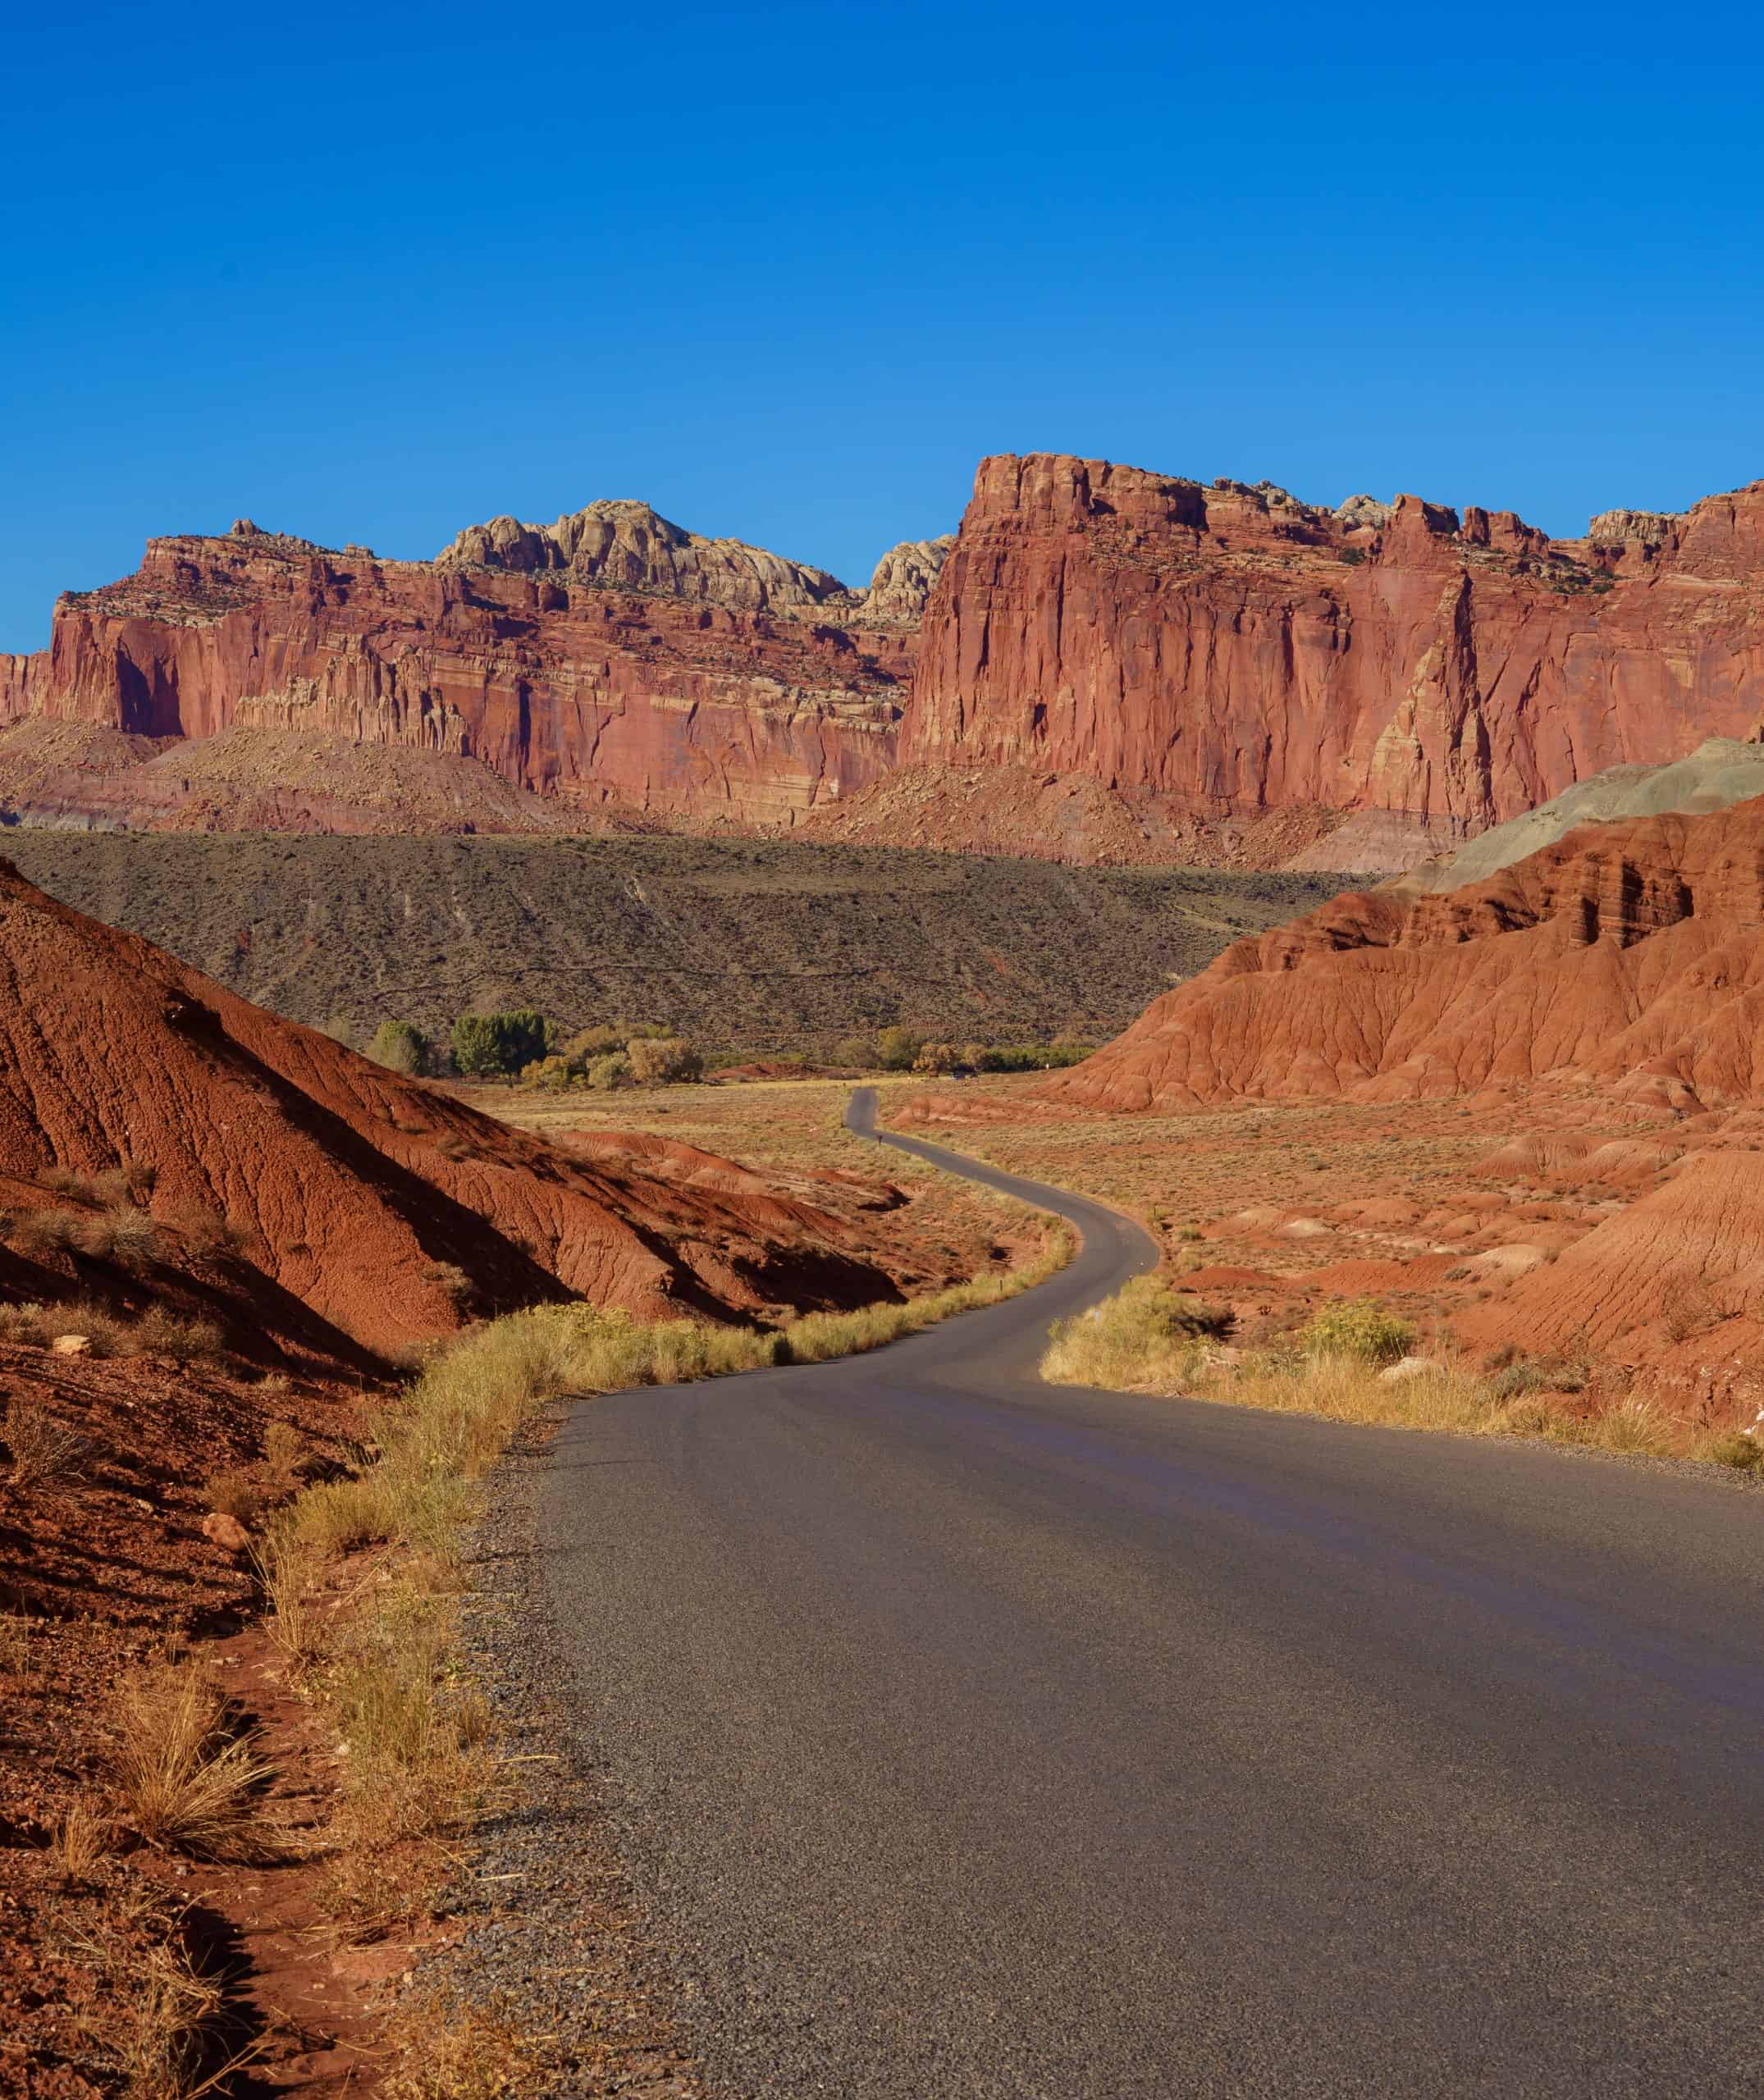
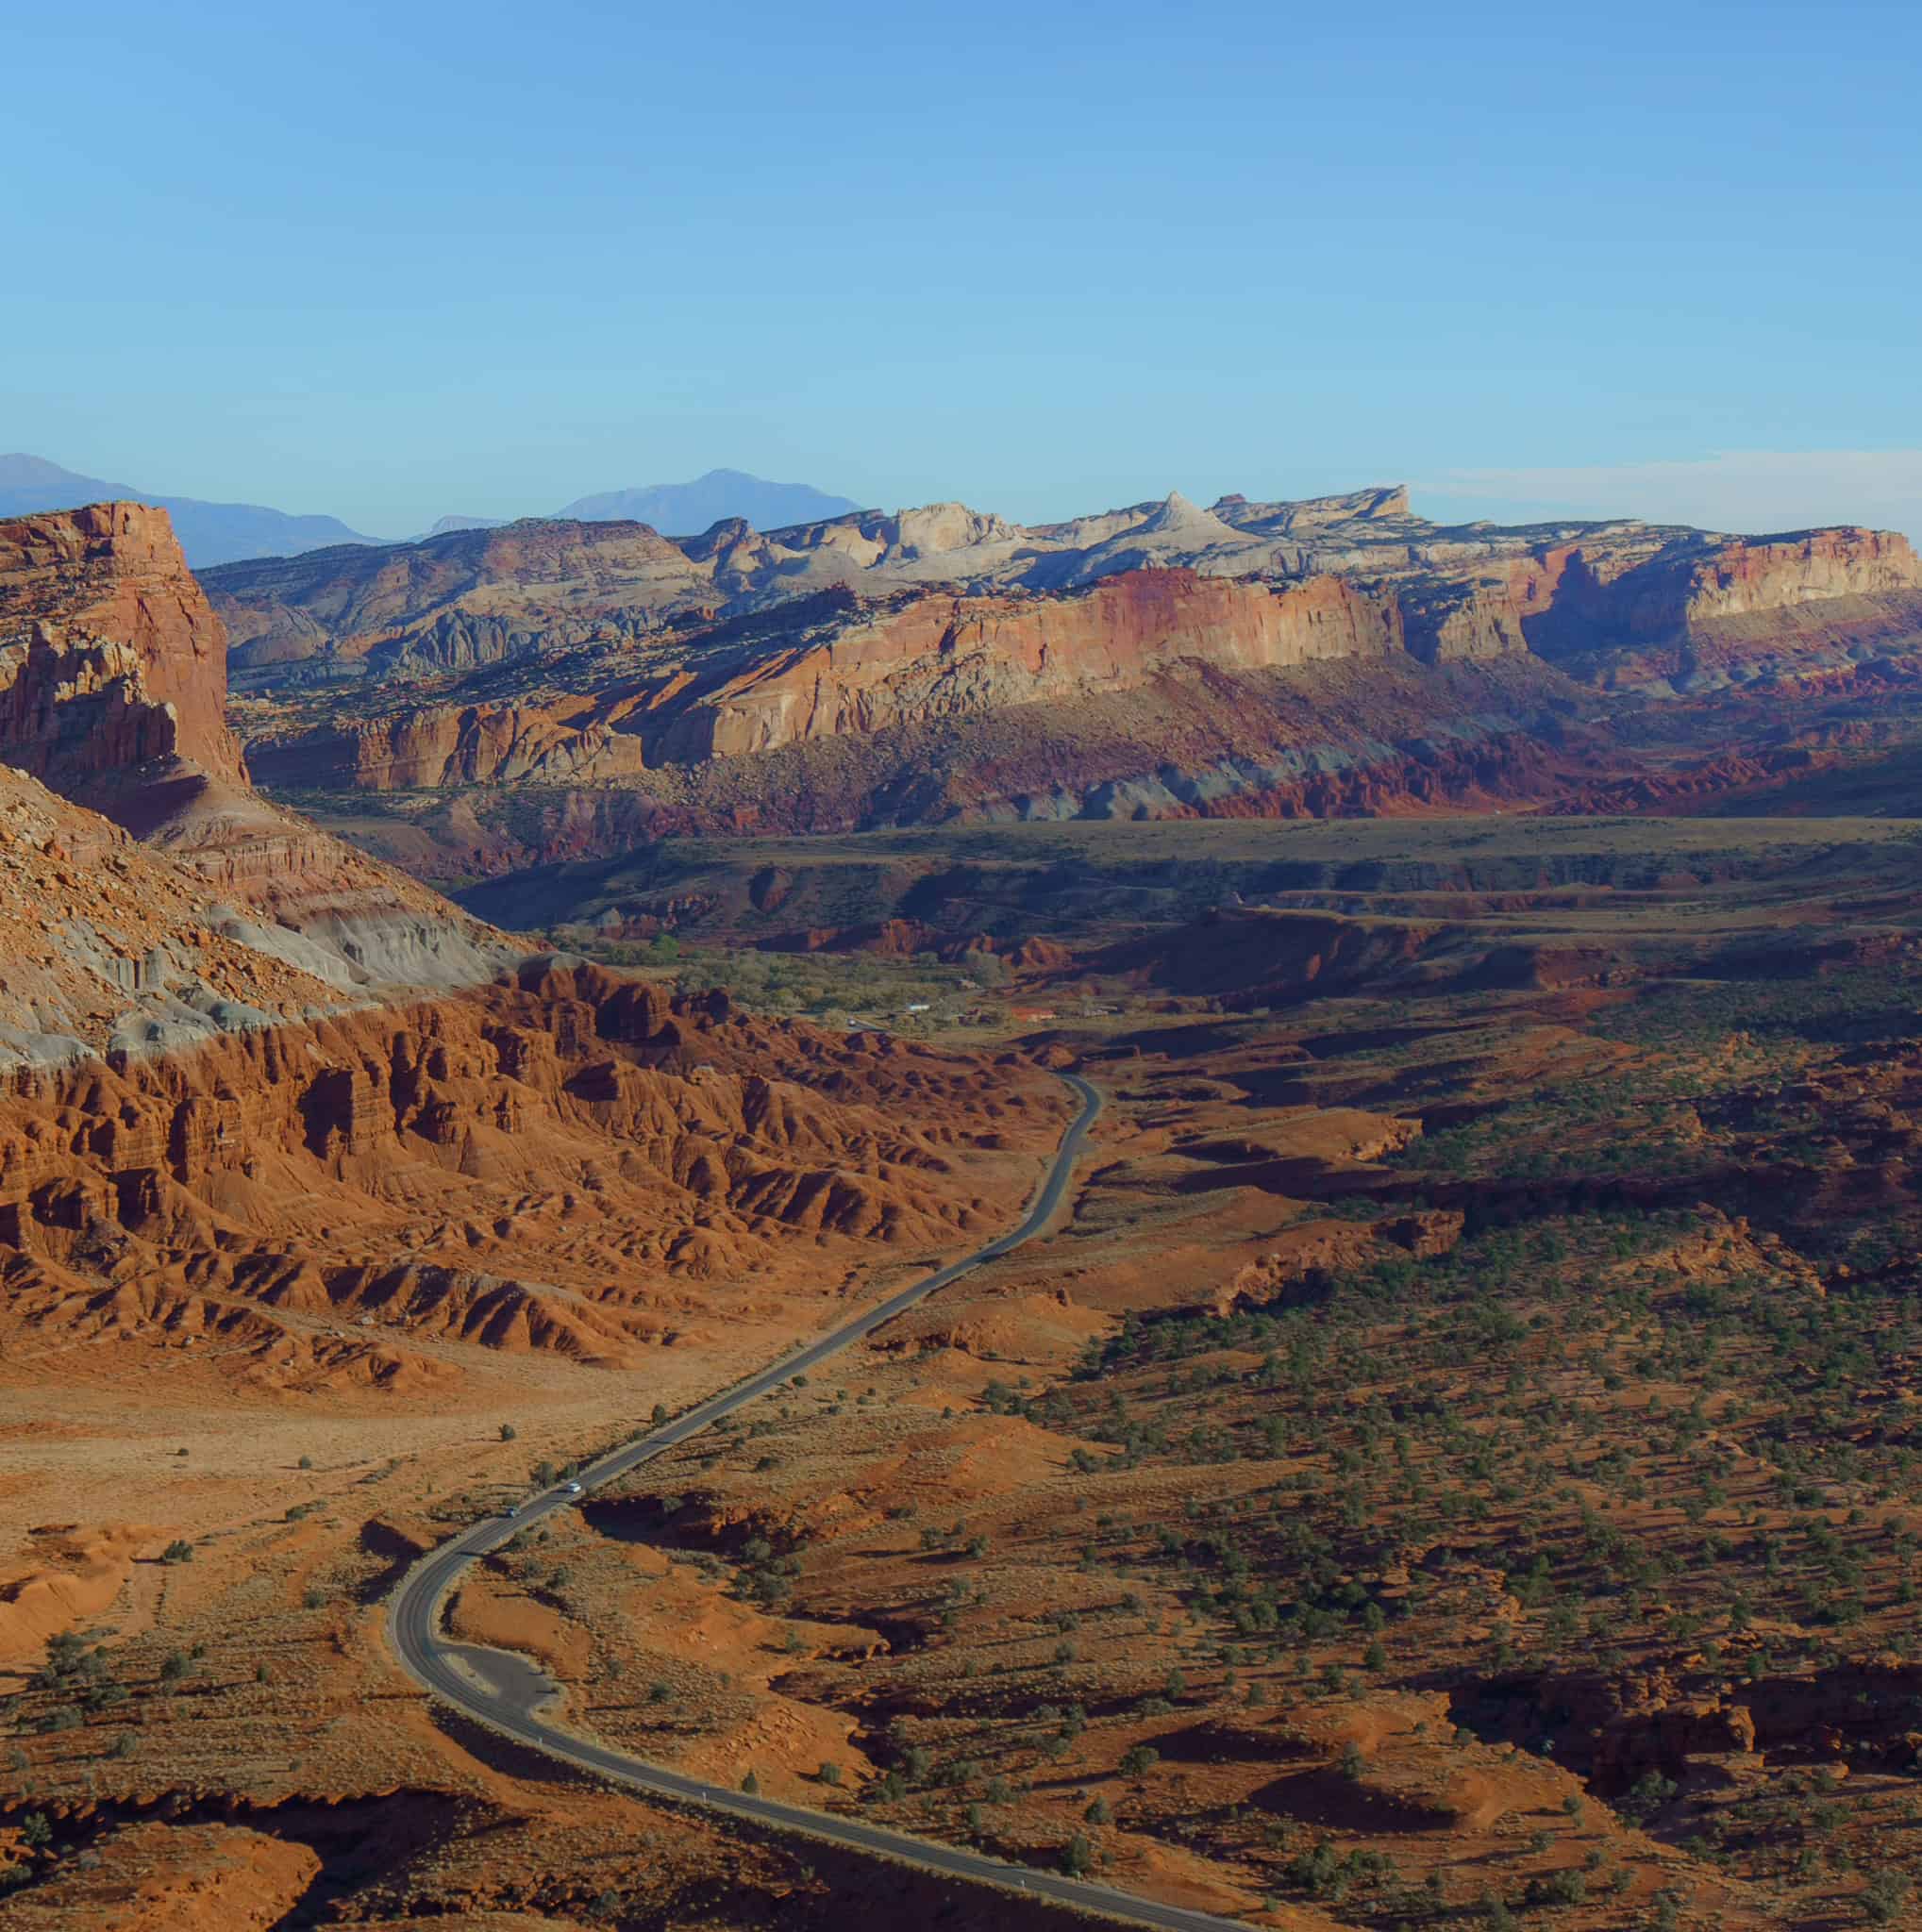
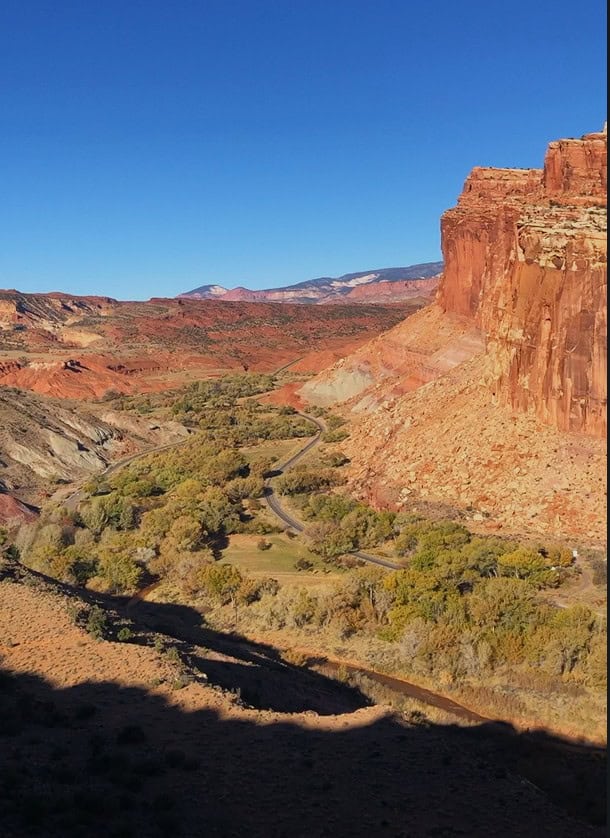
To get to Torrey, you will be driving on Highway 24, which cuts through Capitol Reef National Park. If it’s too early to check in to your accommodations, take some time to explore the highlights of the small, historic town of Fruita.
Here you’ll find the picturesque Fruita Barn, as well as the Gifford Homestead, famous for its legendary pies (which often sell out early – I still haven’t been lucky enough to snag one). Don’t worry, if you are as unlucky as I am, you can swing by early the following morning!
The Fruita Orchard also offers fruit picking in season, typically in early summer, so it’s worth checking their website and social media pages for current updates. Lastly, don’t miss the petroglyphs, which are accessed by an easy, well-maintained walk that offers a glimpse into the area’s ancient history.
Evening
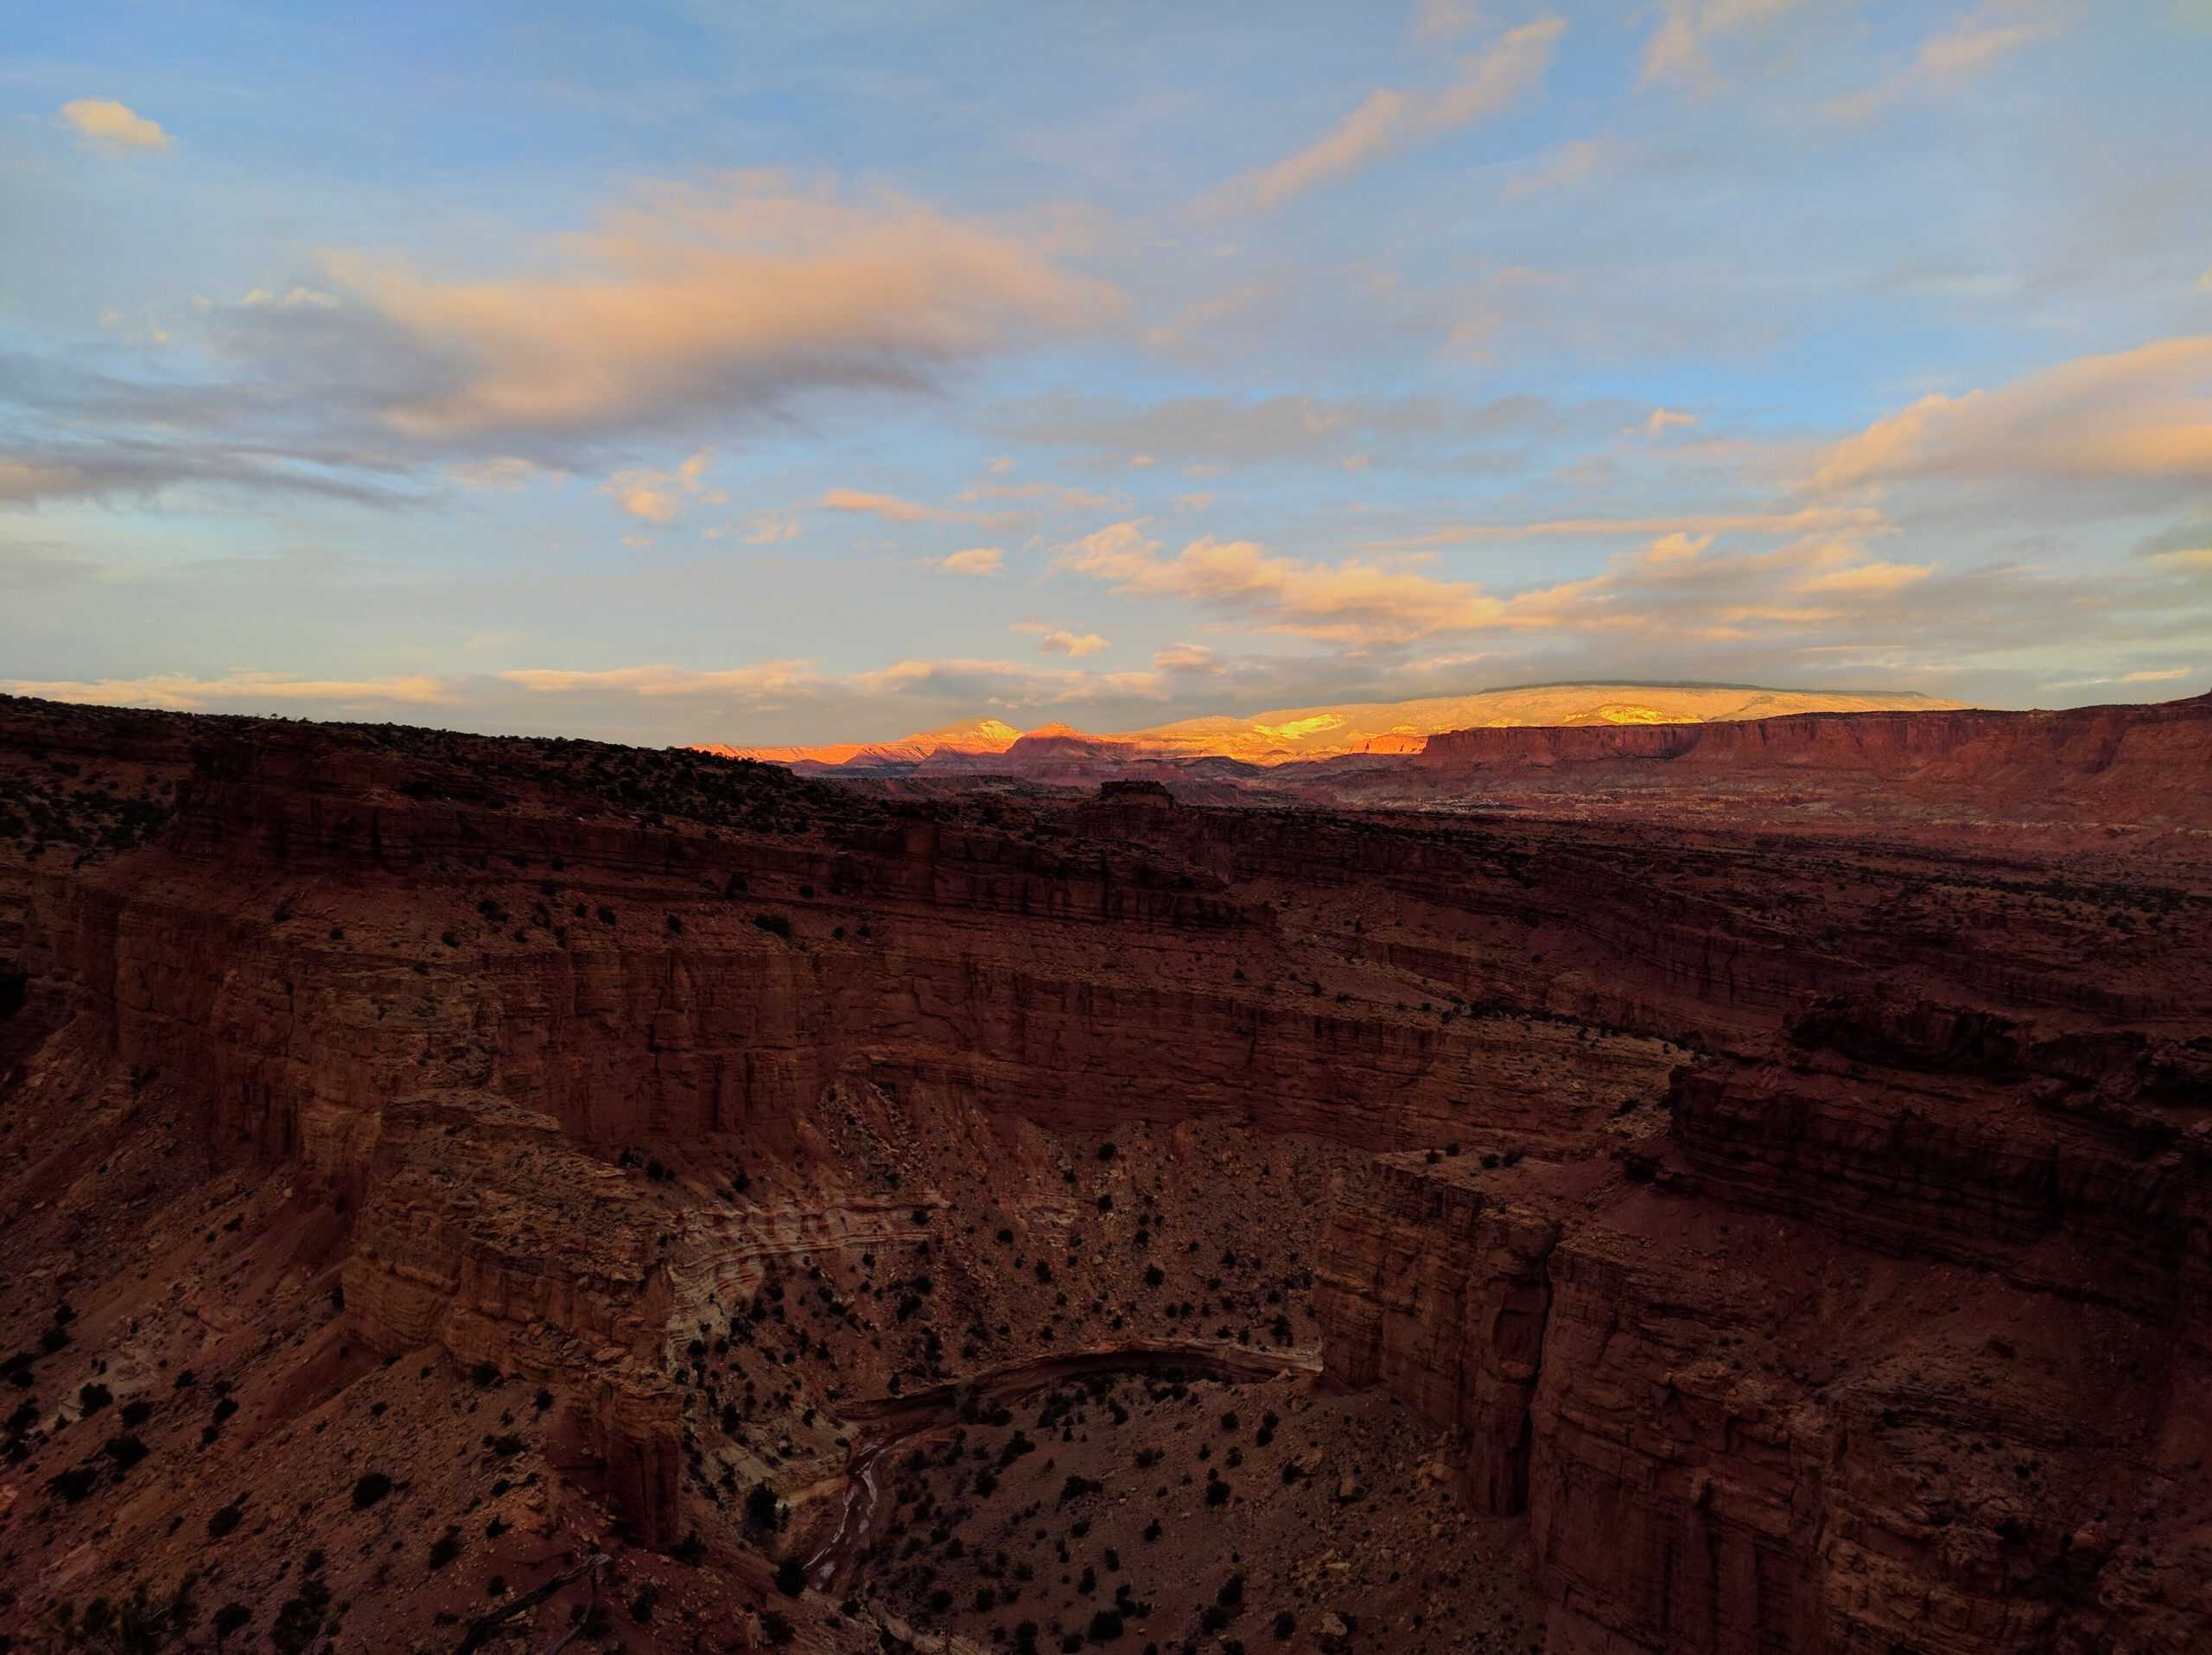
Capitol Reef is one of my favorite national parks, and one of the reasons is just how much variety it packs into a small area. Within just a few miles, there are so many unique hikes and overlooks!
Two of my favorite evening hikes are the Chimney Rock Trail (2–3 hours) and the Hickman Bridge Trail (1–2 hours), which is one of the park’s most popular day hikes (and for good reason), as the bridge is impressive! Both hikes are excellent in golden hour lighting! If I had to choose one, I would go with Chimney Rock!
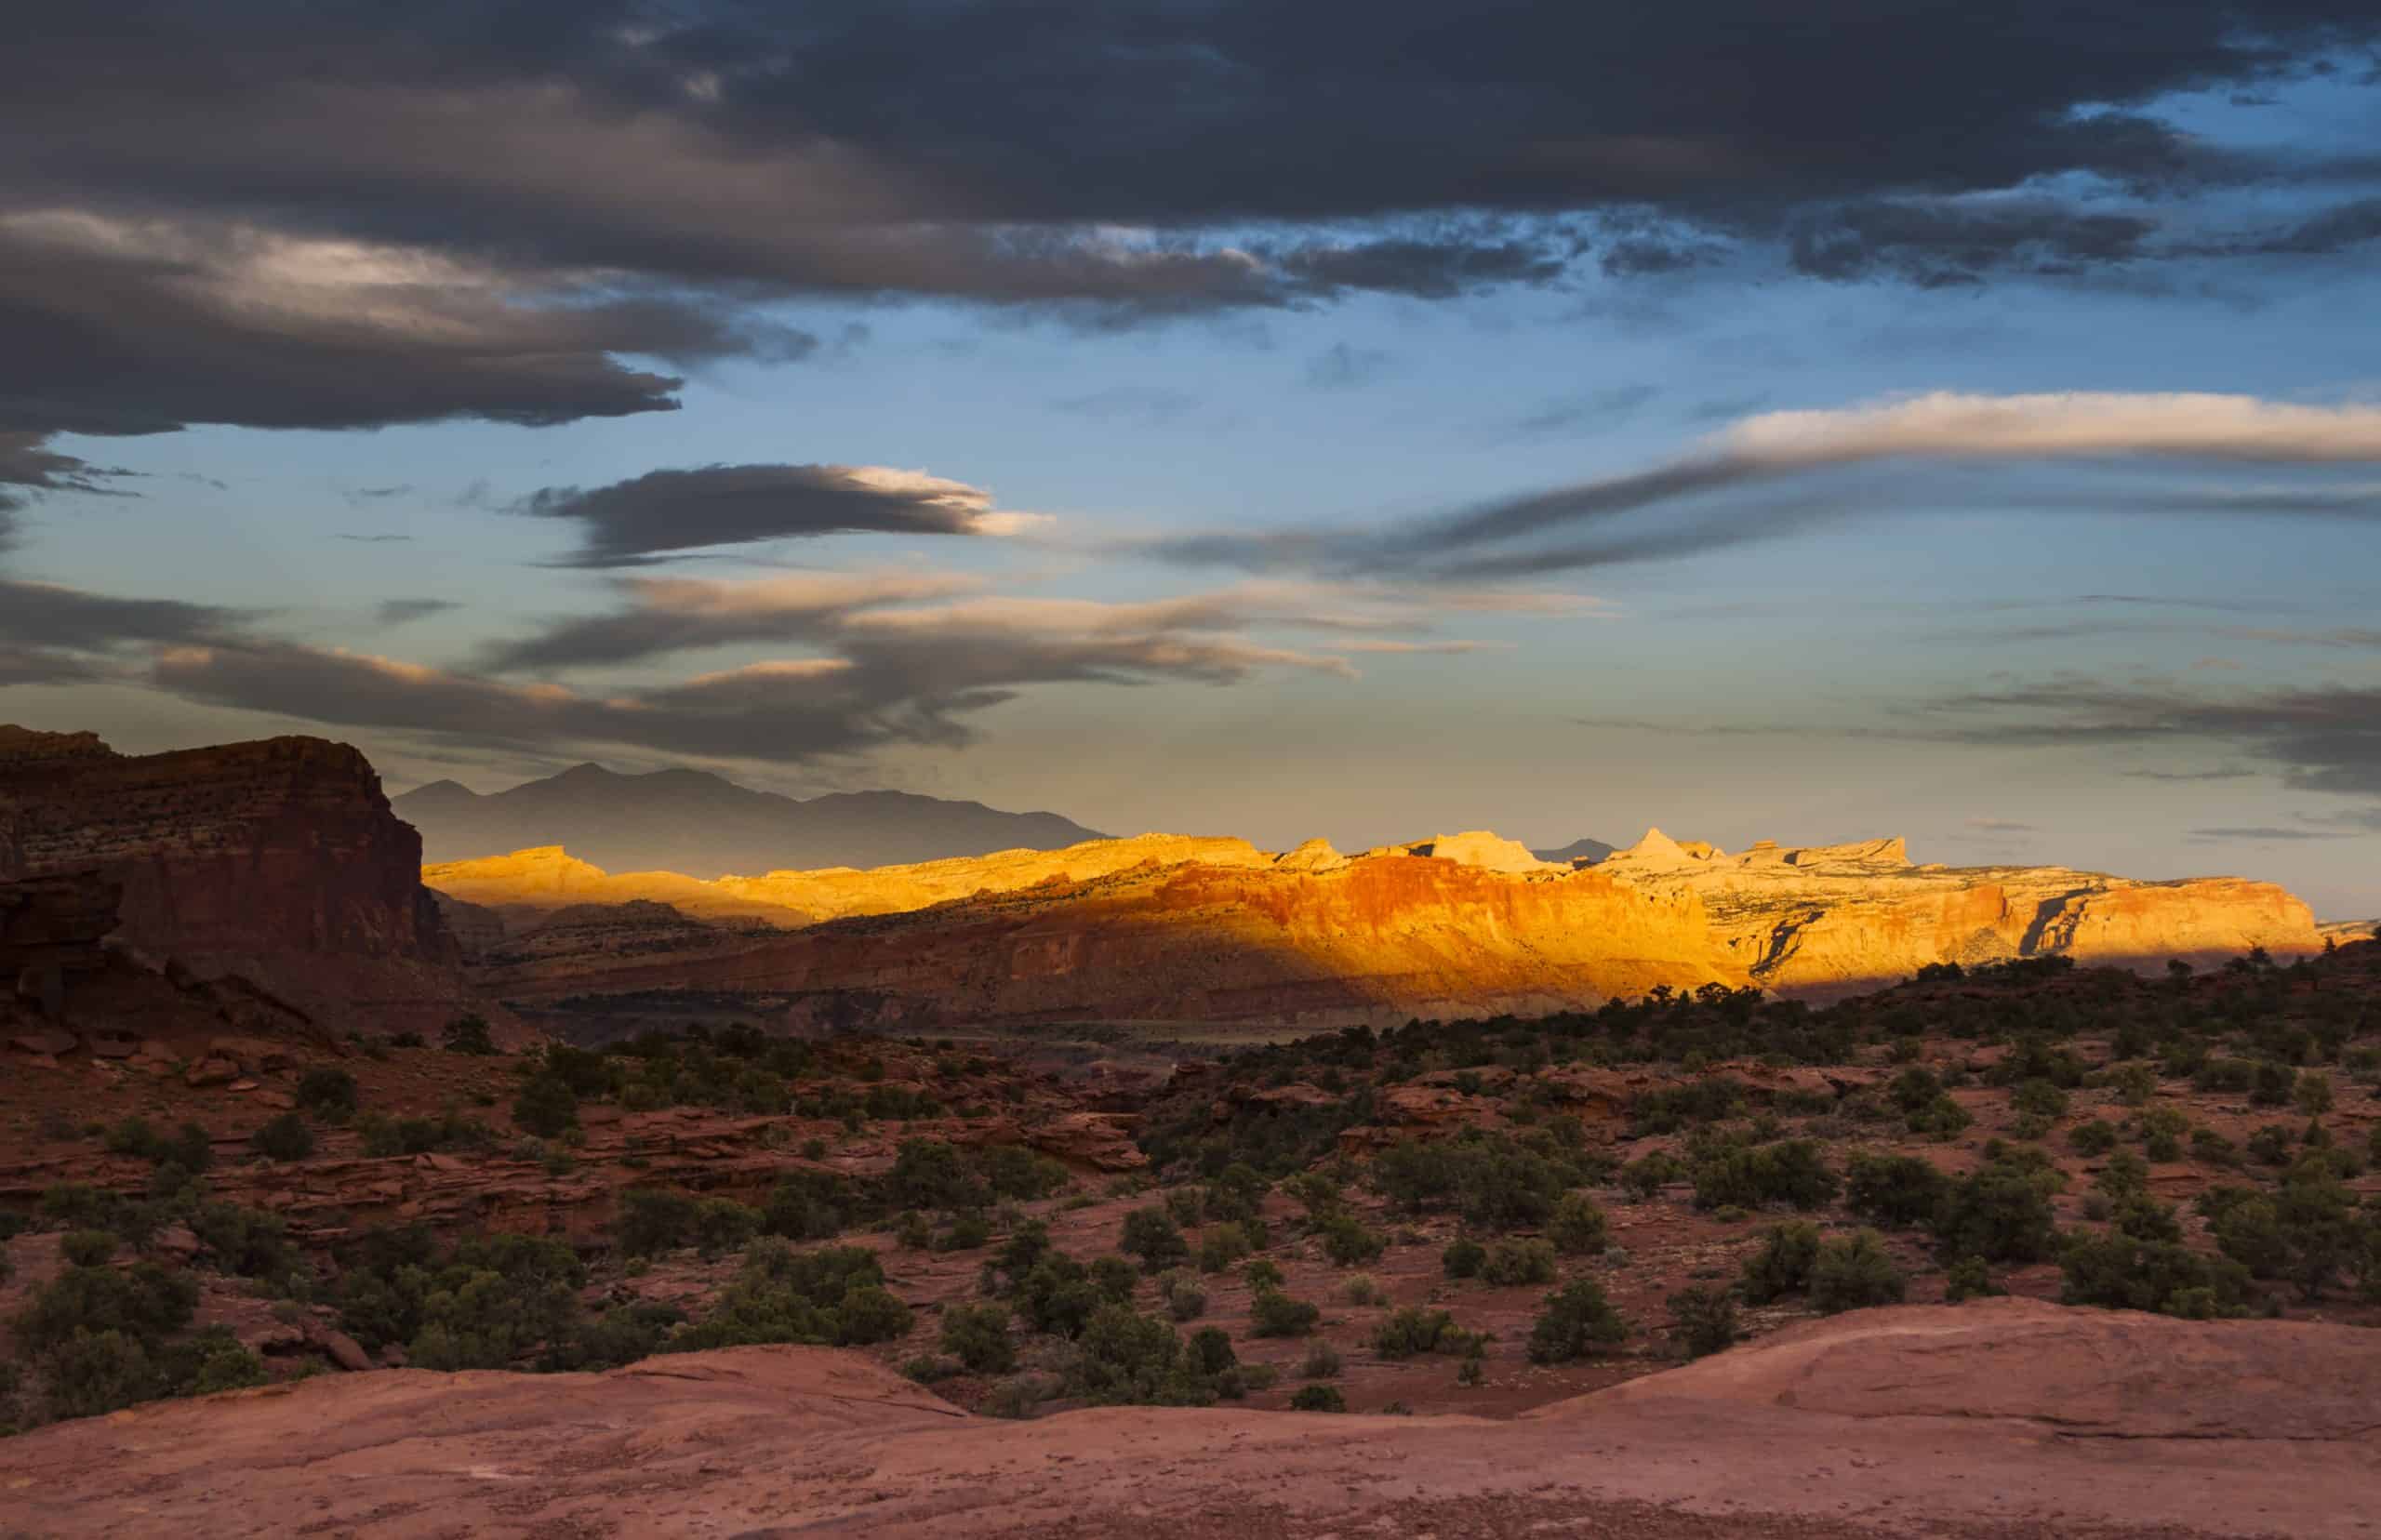
To end the day, just off Highway 24, about 15 minutes from Torrey, is a short dirt road that leads to three excellent overlooks: Panorama Point, Goosenecks Overlook, and Sunset Point. If you love photography, you’ll want to spend time at each one.
My personal favorite for sunset is Panorama Point, which I didn’t realize at the time is actually the cover photo on the park brochure!
Note: While Panorama Point and Goosenecks are a quick walk, Sunset Point is actually about a 30-45 minute walk round-trip.
Once you’ve worked up an appetite, fill yourself up with a mac and cheese burger at Capitol Burger food truck (which is seasonal). Torrey is a really small town with only a handful of dining options. Channis Italian Bistro is another great option for pasta lovers!
Where To Stay Near Capitol Reef
You will be spending two nights near Capitol Reef, and I recommend staying at Capitol Reef Resort, which is located a few minutes from the park’s west entrance. It is both convenient and reasonably priced!
What makes it especially fun is the variety of stays they offer, from hotel rooms, cabins, tepees, and even covered wagons. Set against the stunning views of the redrock country from your window, it makes for an unforgettable stay!
For campers, Fruita Campground is the best option; it is centrally located and costs $25 per night. While there are no showers, it offers all other basic amenities. Booking in advance through recreation.gov is recommended.
Additionally, between Torrey and the park entrance, you’ll find BLM land with several free camping options! I have personally camped for free on this dirt path just off Highway 24, and this dispersed site near Torrey. As always, use common sense, respect posted signage, and follow LNT practices.
Subscribe Here!
Sign up for My Weekly newsletter!
Day Five: Capitol Reef National Park.
Start your day with breakfast in Torrey, then kick things off with a hike to Cassidy Arch! Spend the afternoon exploring the remote beauty of Cathedral Valley, followed by a sunset walk, and wrap up the day with a well-earned meal!
Morning
Start the day with breakfast in Torrey at The Wild Rabbit Cafe, and try out one of their yummy breakfast food options!! Additionally, if you missed out the day before, try again for pies at the Gifford Homestead; this might be your lucky morning!
If you’re up early, I highly recommend hiking Cassidy Arch before the day’s main activity. This 3.3-mile (5.3 km) hike climbs 662 feet (202 m) and typically takes 2–3 hours. The payoff is an incredible arch that you can actually walk across, with scenic views along the way!.

Afternoon
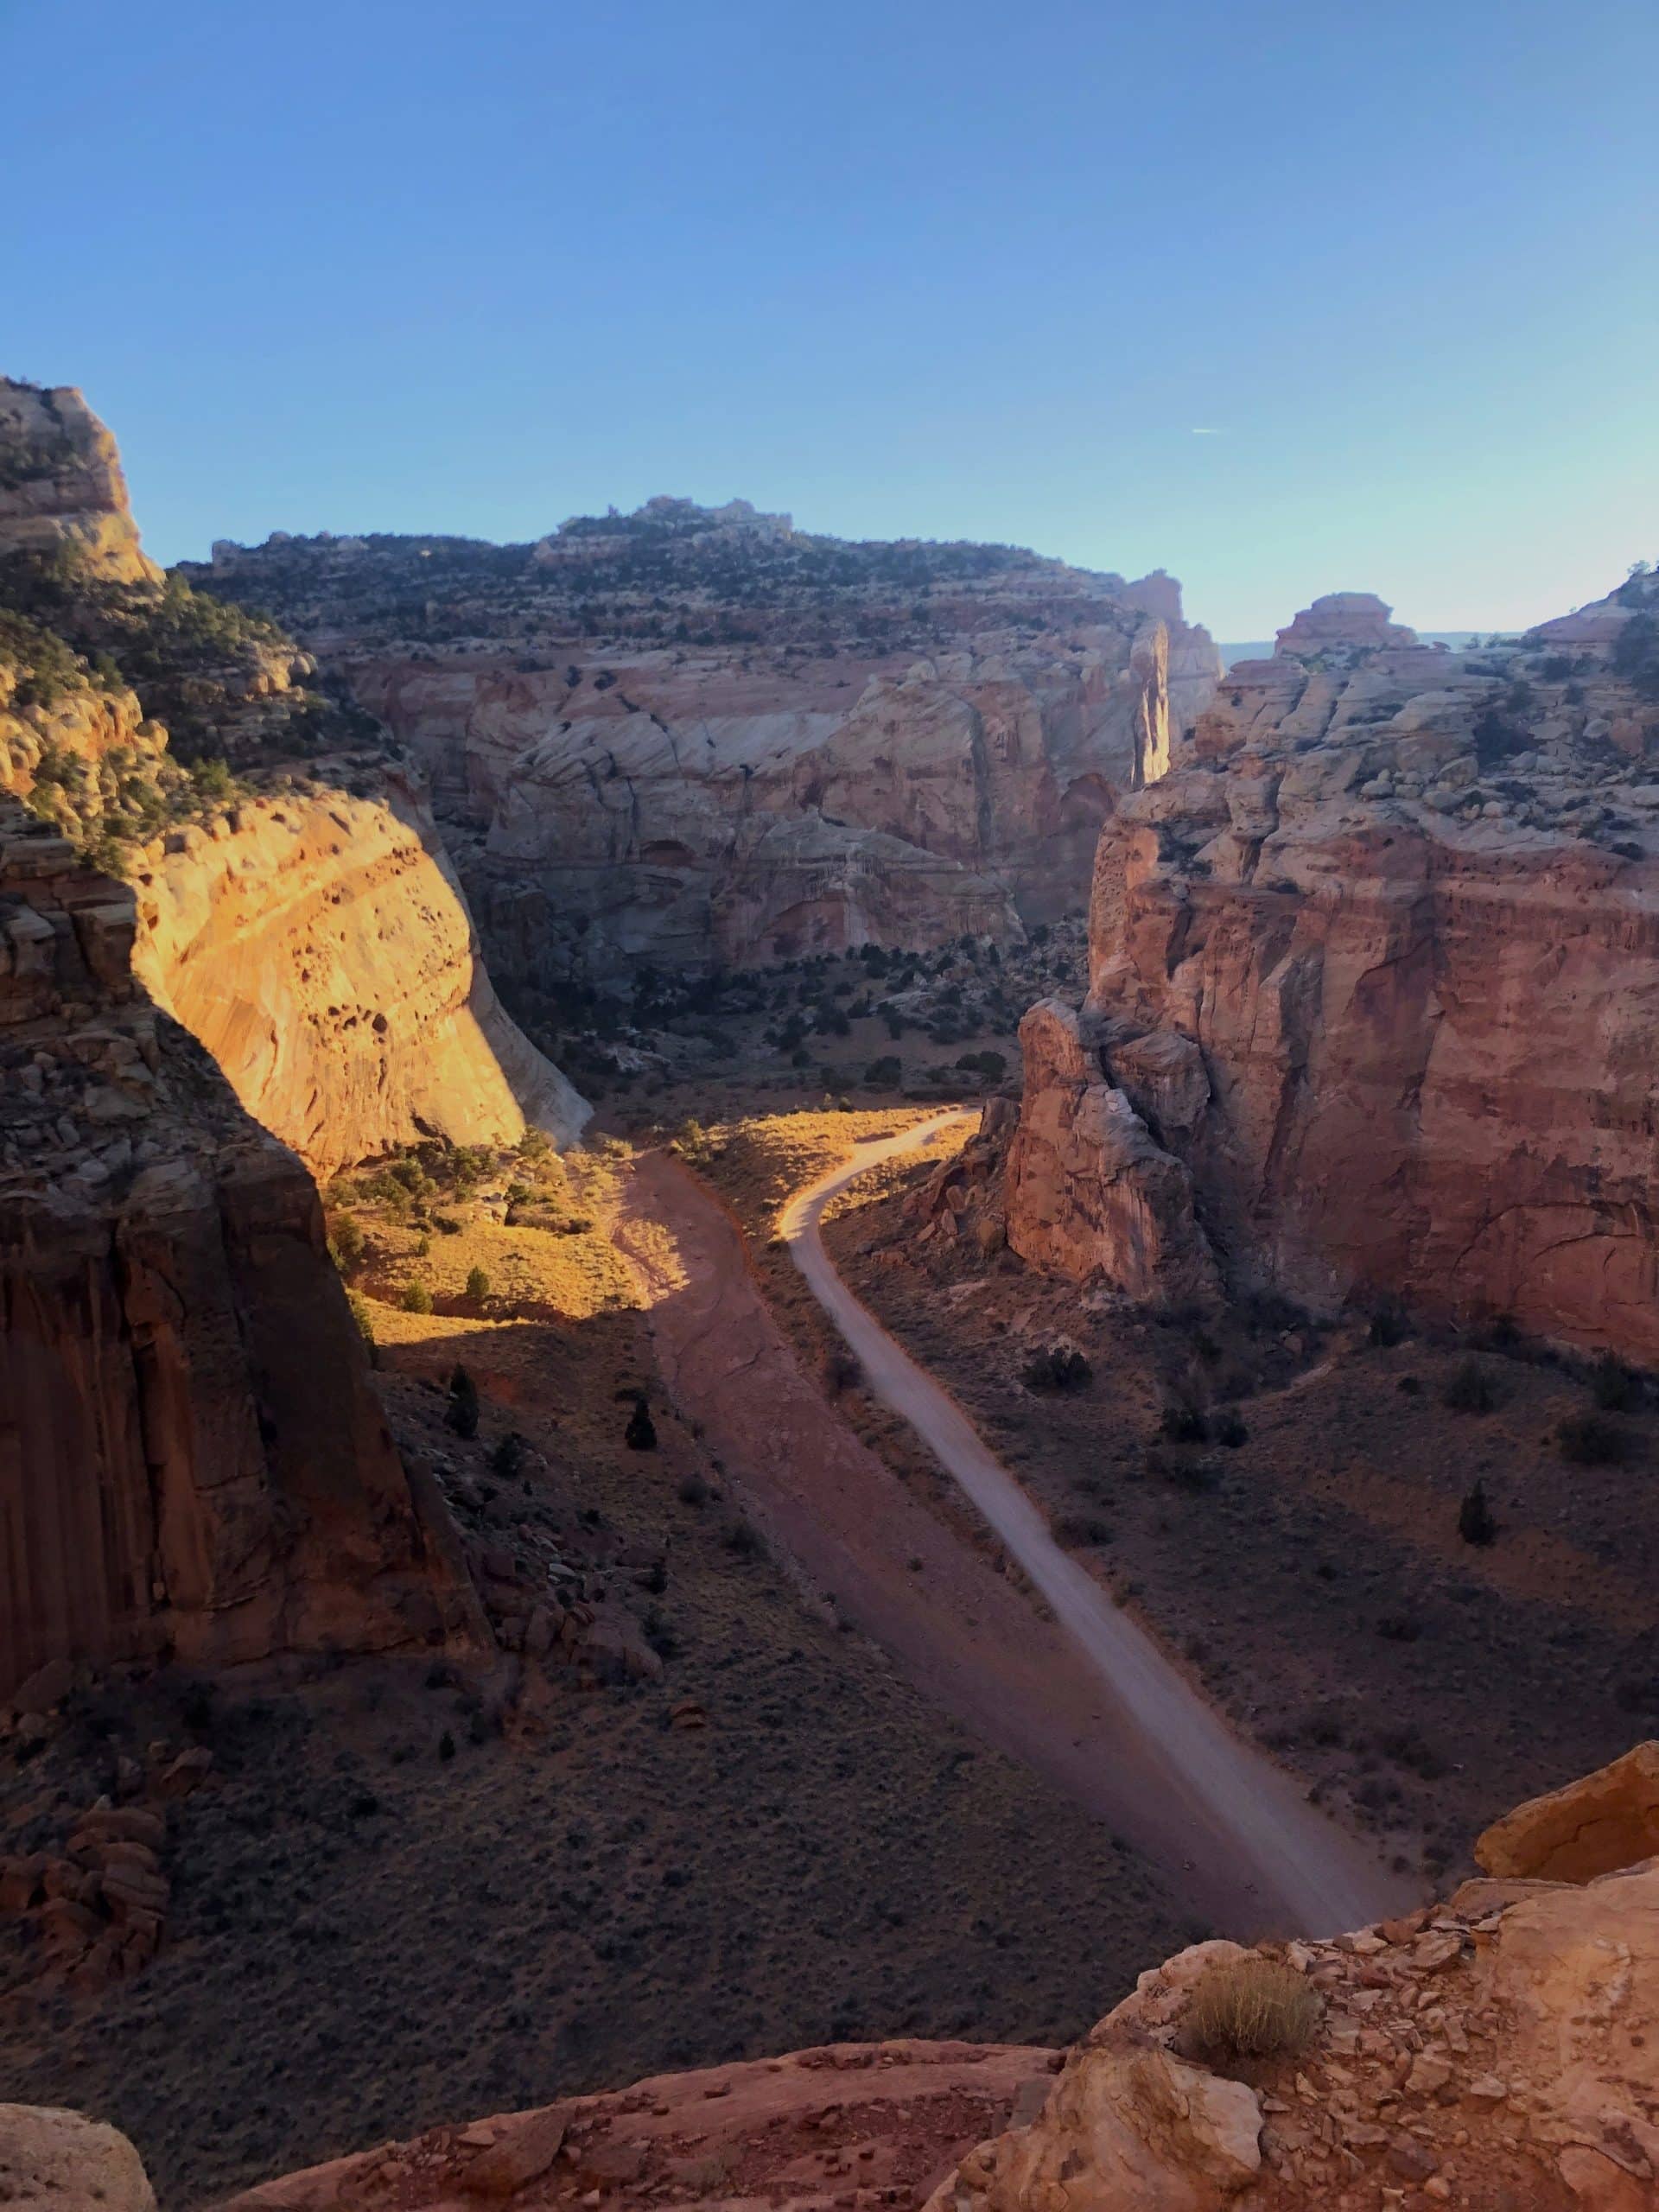
Set aside a half day to explore one of Capitol Reef’s most remote and wild corners: Cathedral Valley. Home to the striking Temple of the Sun and Moon, this rugged landscape feels worlds away from the main park roads.
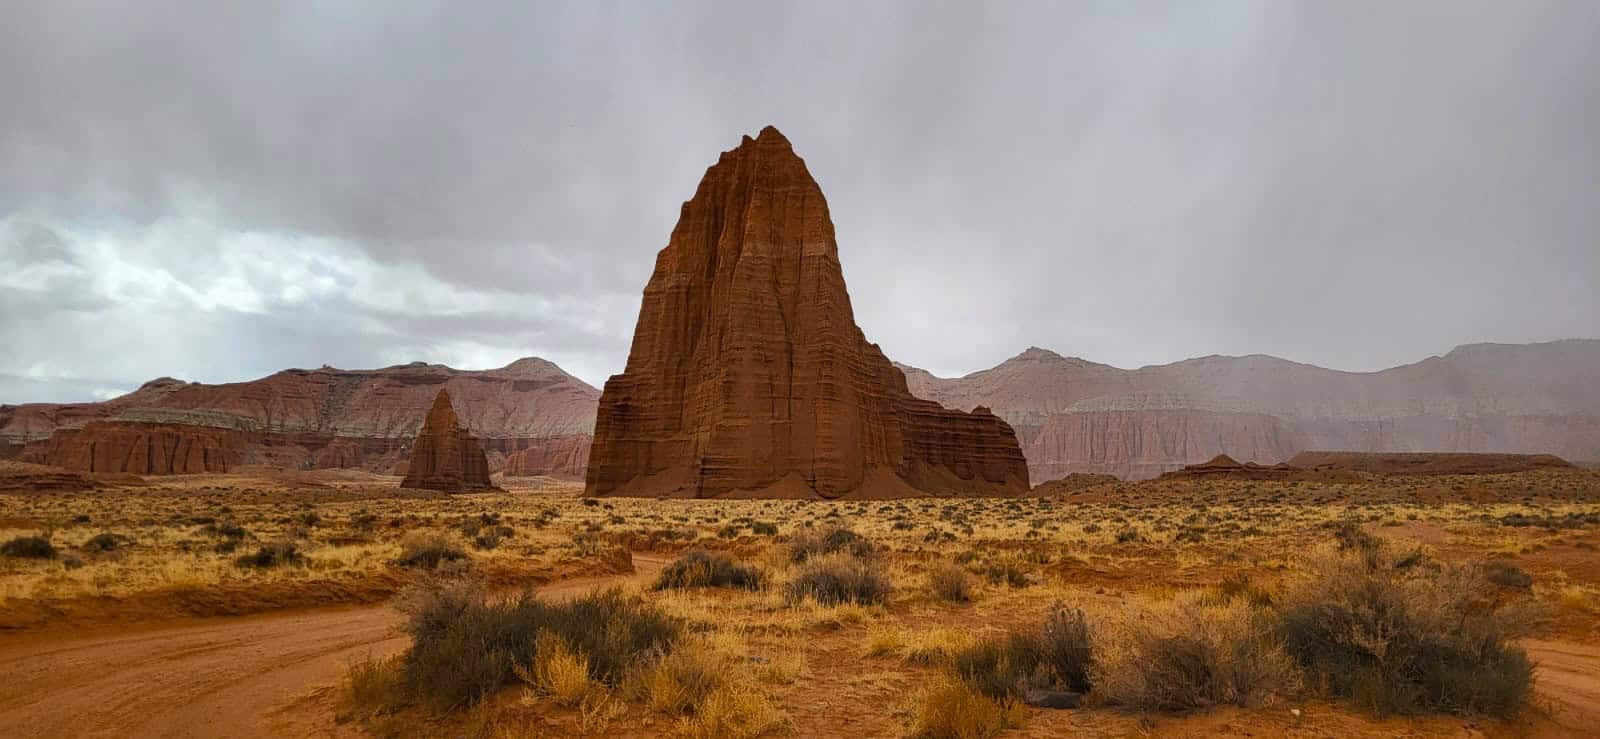
Instead of dealing with the hassle of renting an off-road vehicle, I suggest booking a private tour with Waterpocket Adventure Company. They operate locally out of Torrey and take all the stress out of the experience. Think comfortable transportation, snacks along the way, and a knowledgeable local guide who knows the area inside and out!
There are two tour options: one starting early at 8 am and one at 2 pm.
Evening
If you opt for the 2 pm tour, you will likely arrive back in Torrey around 7 pm. Depending on the time of year, you may have time for a short hike or a sunset spot.
The three overlooks previously mentioned: Panorama Point, Goosenecks Overlook, and Sunset Point, are the best overlooks in the park for sunset, with Sunset Point being a short hike. If there’s one you missed the day prior, squeeze it in here!
To end the day, check out Curry Pizza, one of my favorite restaurants! It’s located 10 minutes west in the tiny town of Bicknell. Yes, it’s Indian/Pakistani curry on pizza! I recommend the Chicken Tikka Pizza.
I have tried their Bicknell and Salt Lake locations, and I can confirm that both locations have the same great quality!
Day Six: Highway 12: Capitol Reef to Bryce Canyon (2.5 hours)
Caffeinate yourself for the 2.5-hour drive along scenic Highway 12 to Bryce Canyon National Park. Along the way, hike Lower Calf Creek Falls and stop at Kiva Koffeehouse for a break. End the day by checking into your accommodations and enjoying dinner near Bryce Canyon National Park.
Morning
Start the day off with breakfast and fuel up for a long day ahead! I love Dark Sky Coffee, and what better way to start your day than with a yummy latte and a breakfast sandwich!
If there’s a hike you missed in Capitol Reef, now’s the perfect time to squeeze it in. Most trails are just minutes from Torrey.
One bonus hike that I am especially fond of is the Cohab Canyon trail to the Fruita overlooks. This 3.3-mile (5.3 km) hike gains 764 feet (233 m), takes about 2–3 hours, and delivers stunning scenery the entire way, especially at the overlooks.
The trail starts in Fruita, so if you couldn’t get enough of the pies, consider grabbing one for the road before heading out!
Afternoon
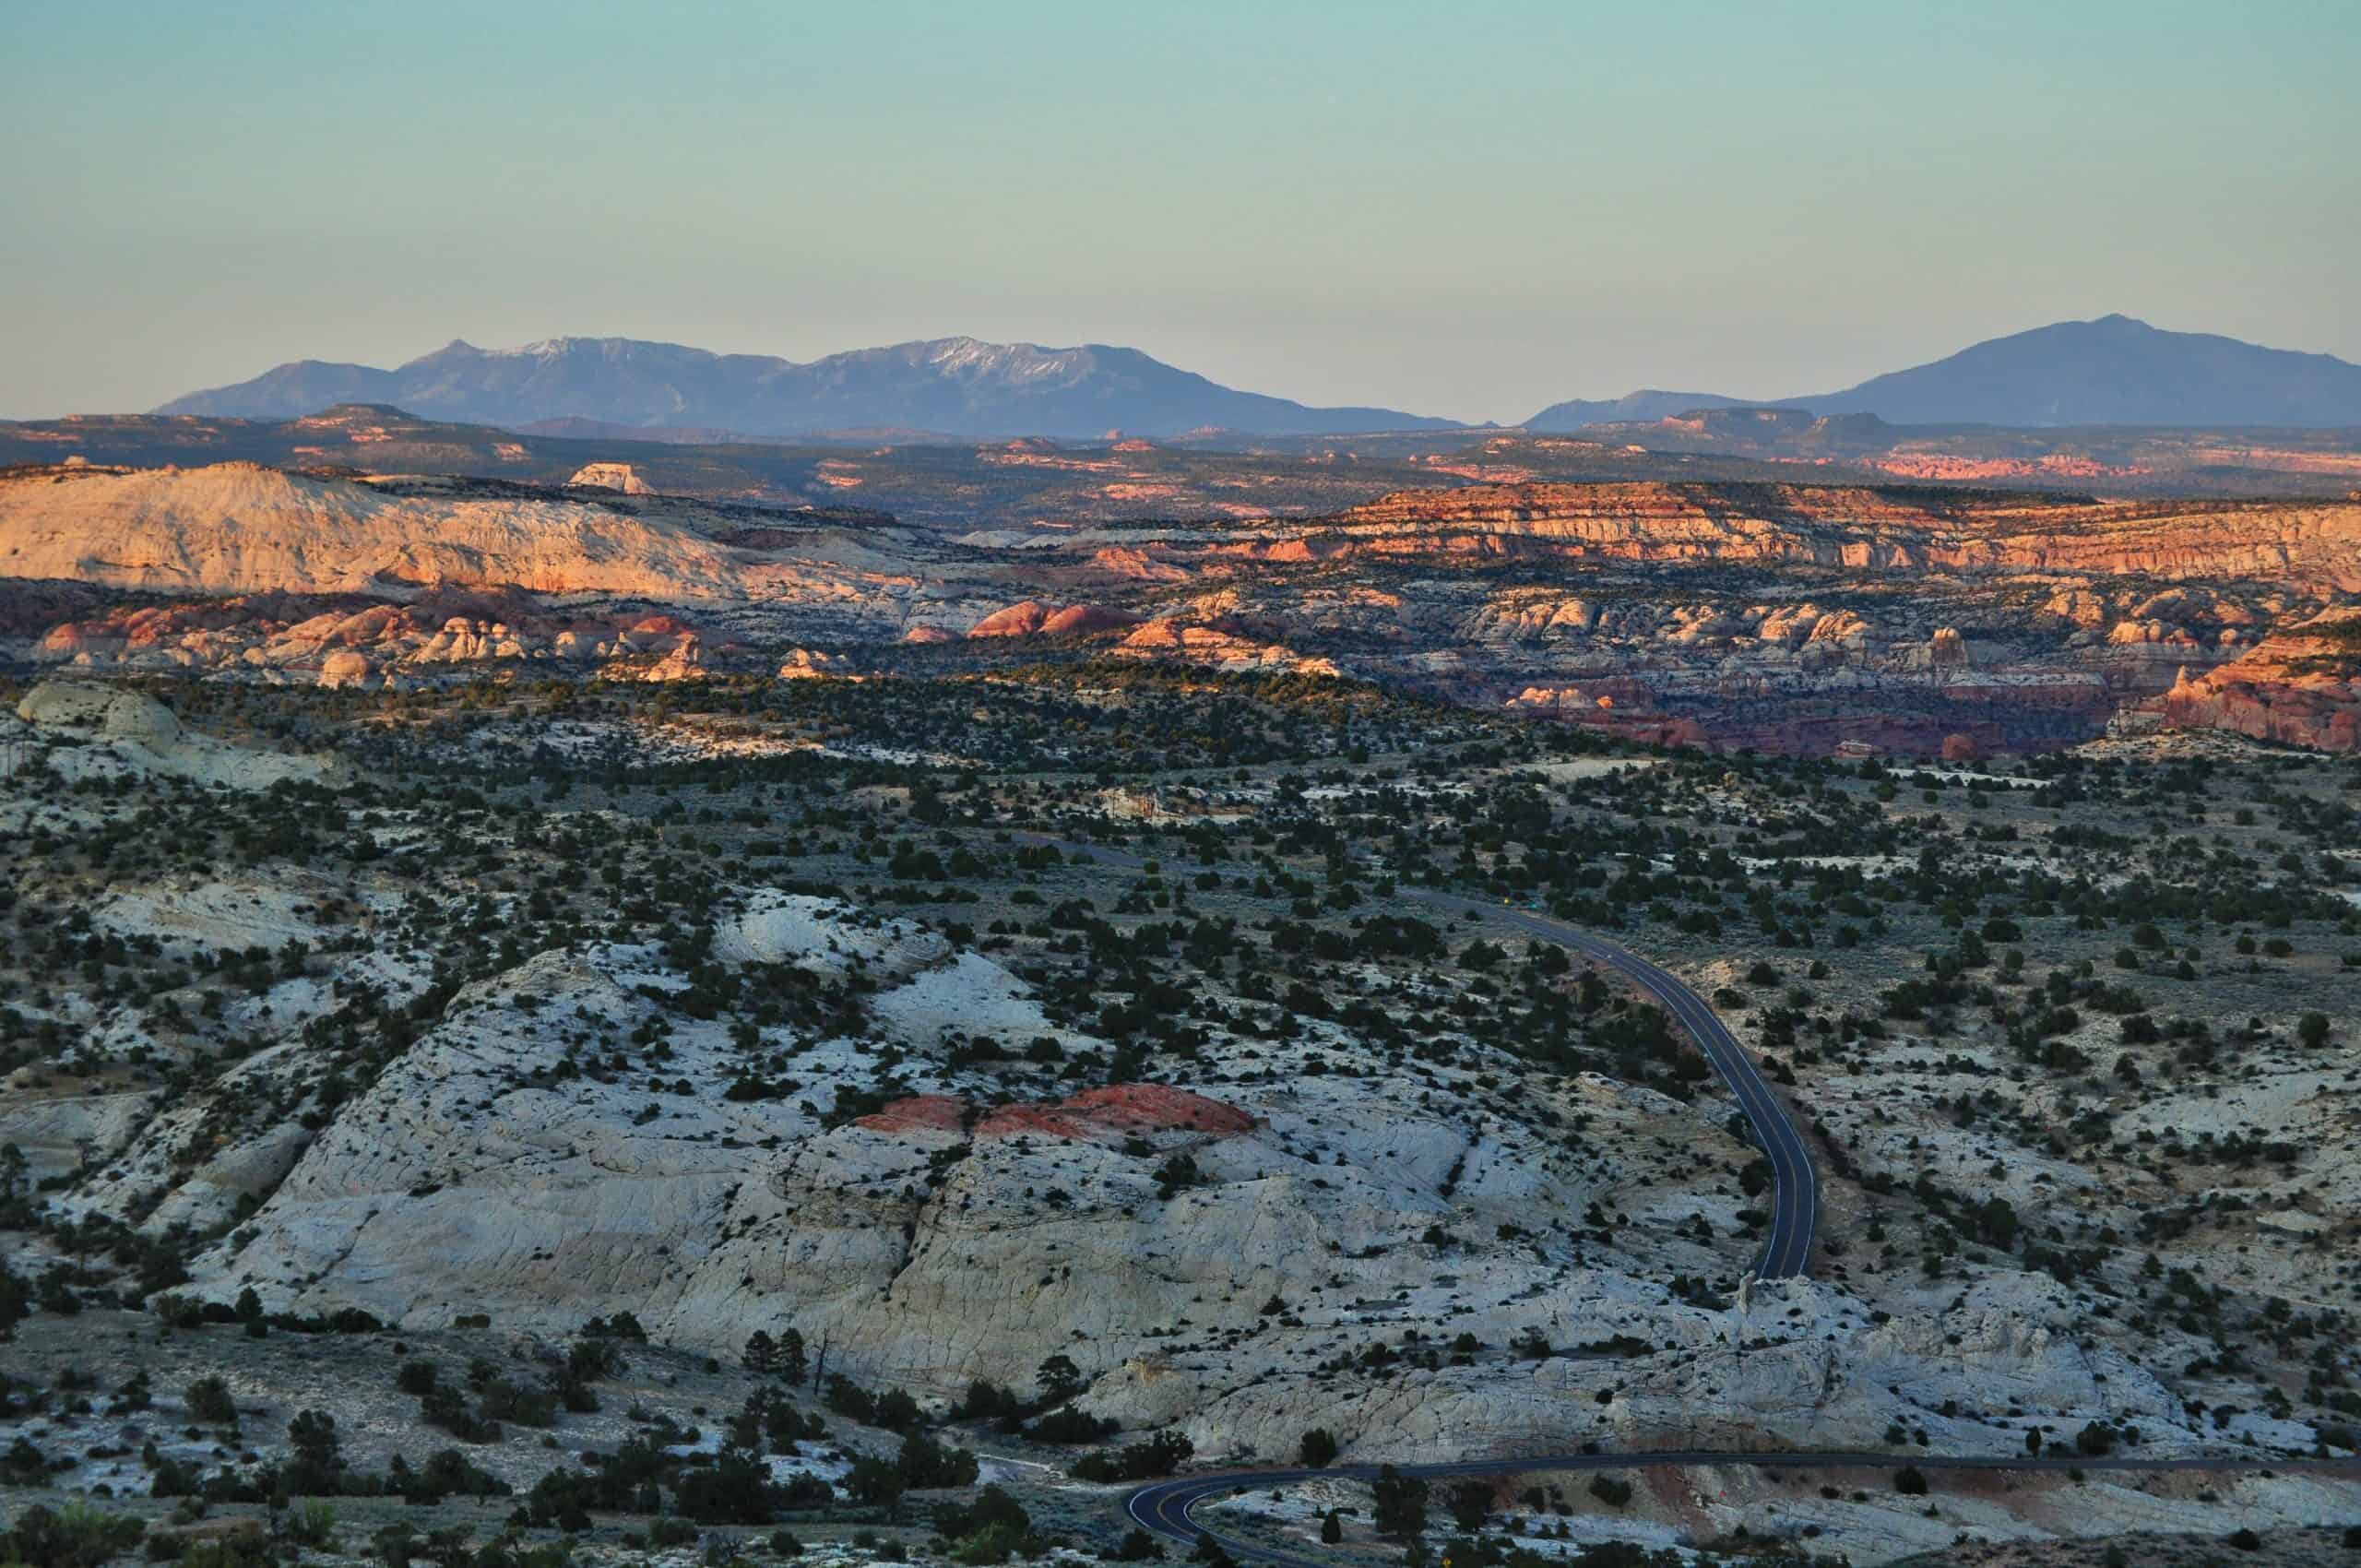
Once you leave Torrey, you’ll hop on Highway 12, which, in my opinion, is one of the most stunning scenic drives in Southern Utah. With a longer itinerary, you’ll have time to enjoy some of the highlights along the 122-mile scenic byway.
Right away, the road climbs in elevation and passes several overlooks, including the stunning Larb Hollow Overlook, a worthy first stop. From there, you’ll descend into the tiny town of Boulder, home to the famous Hell’s Backbone Grill and the lesser-known Burr Trail Grill – both amazing dining options!
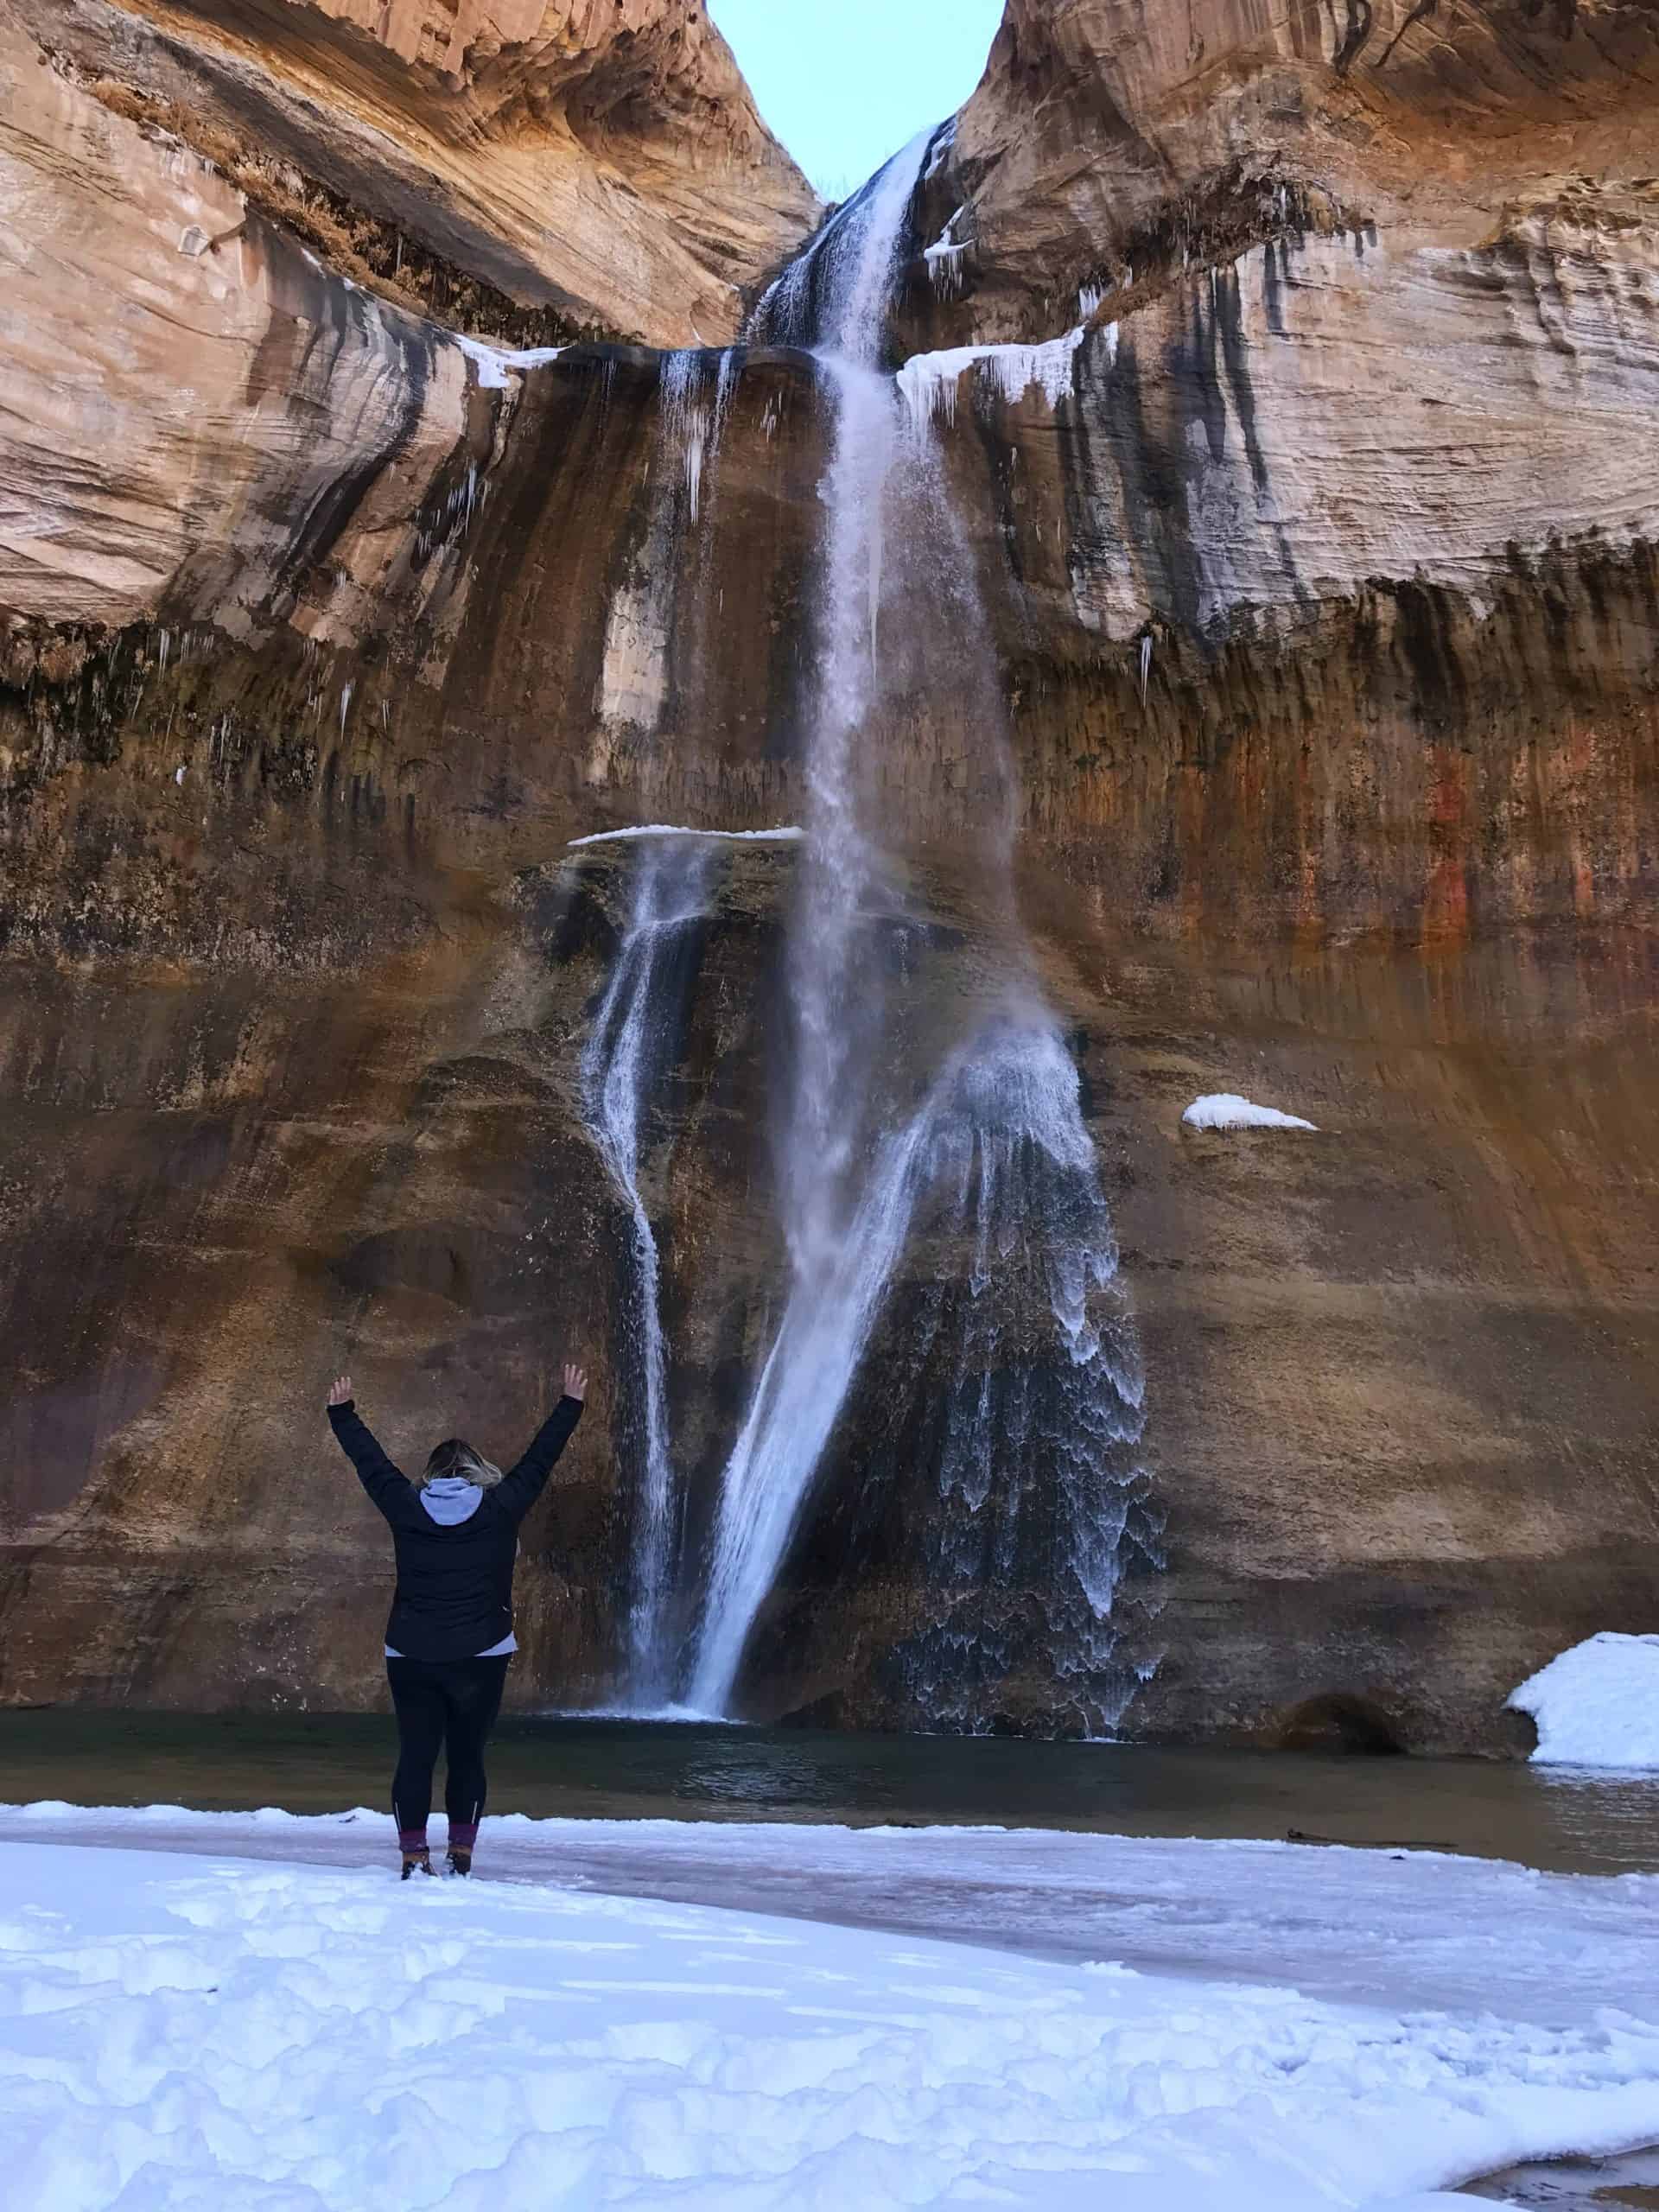
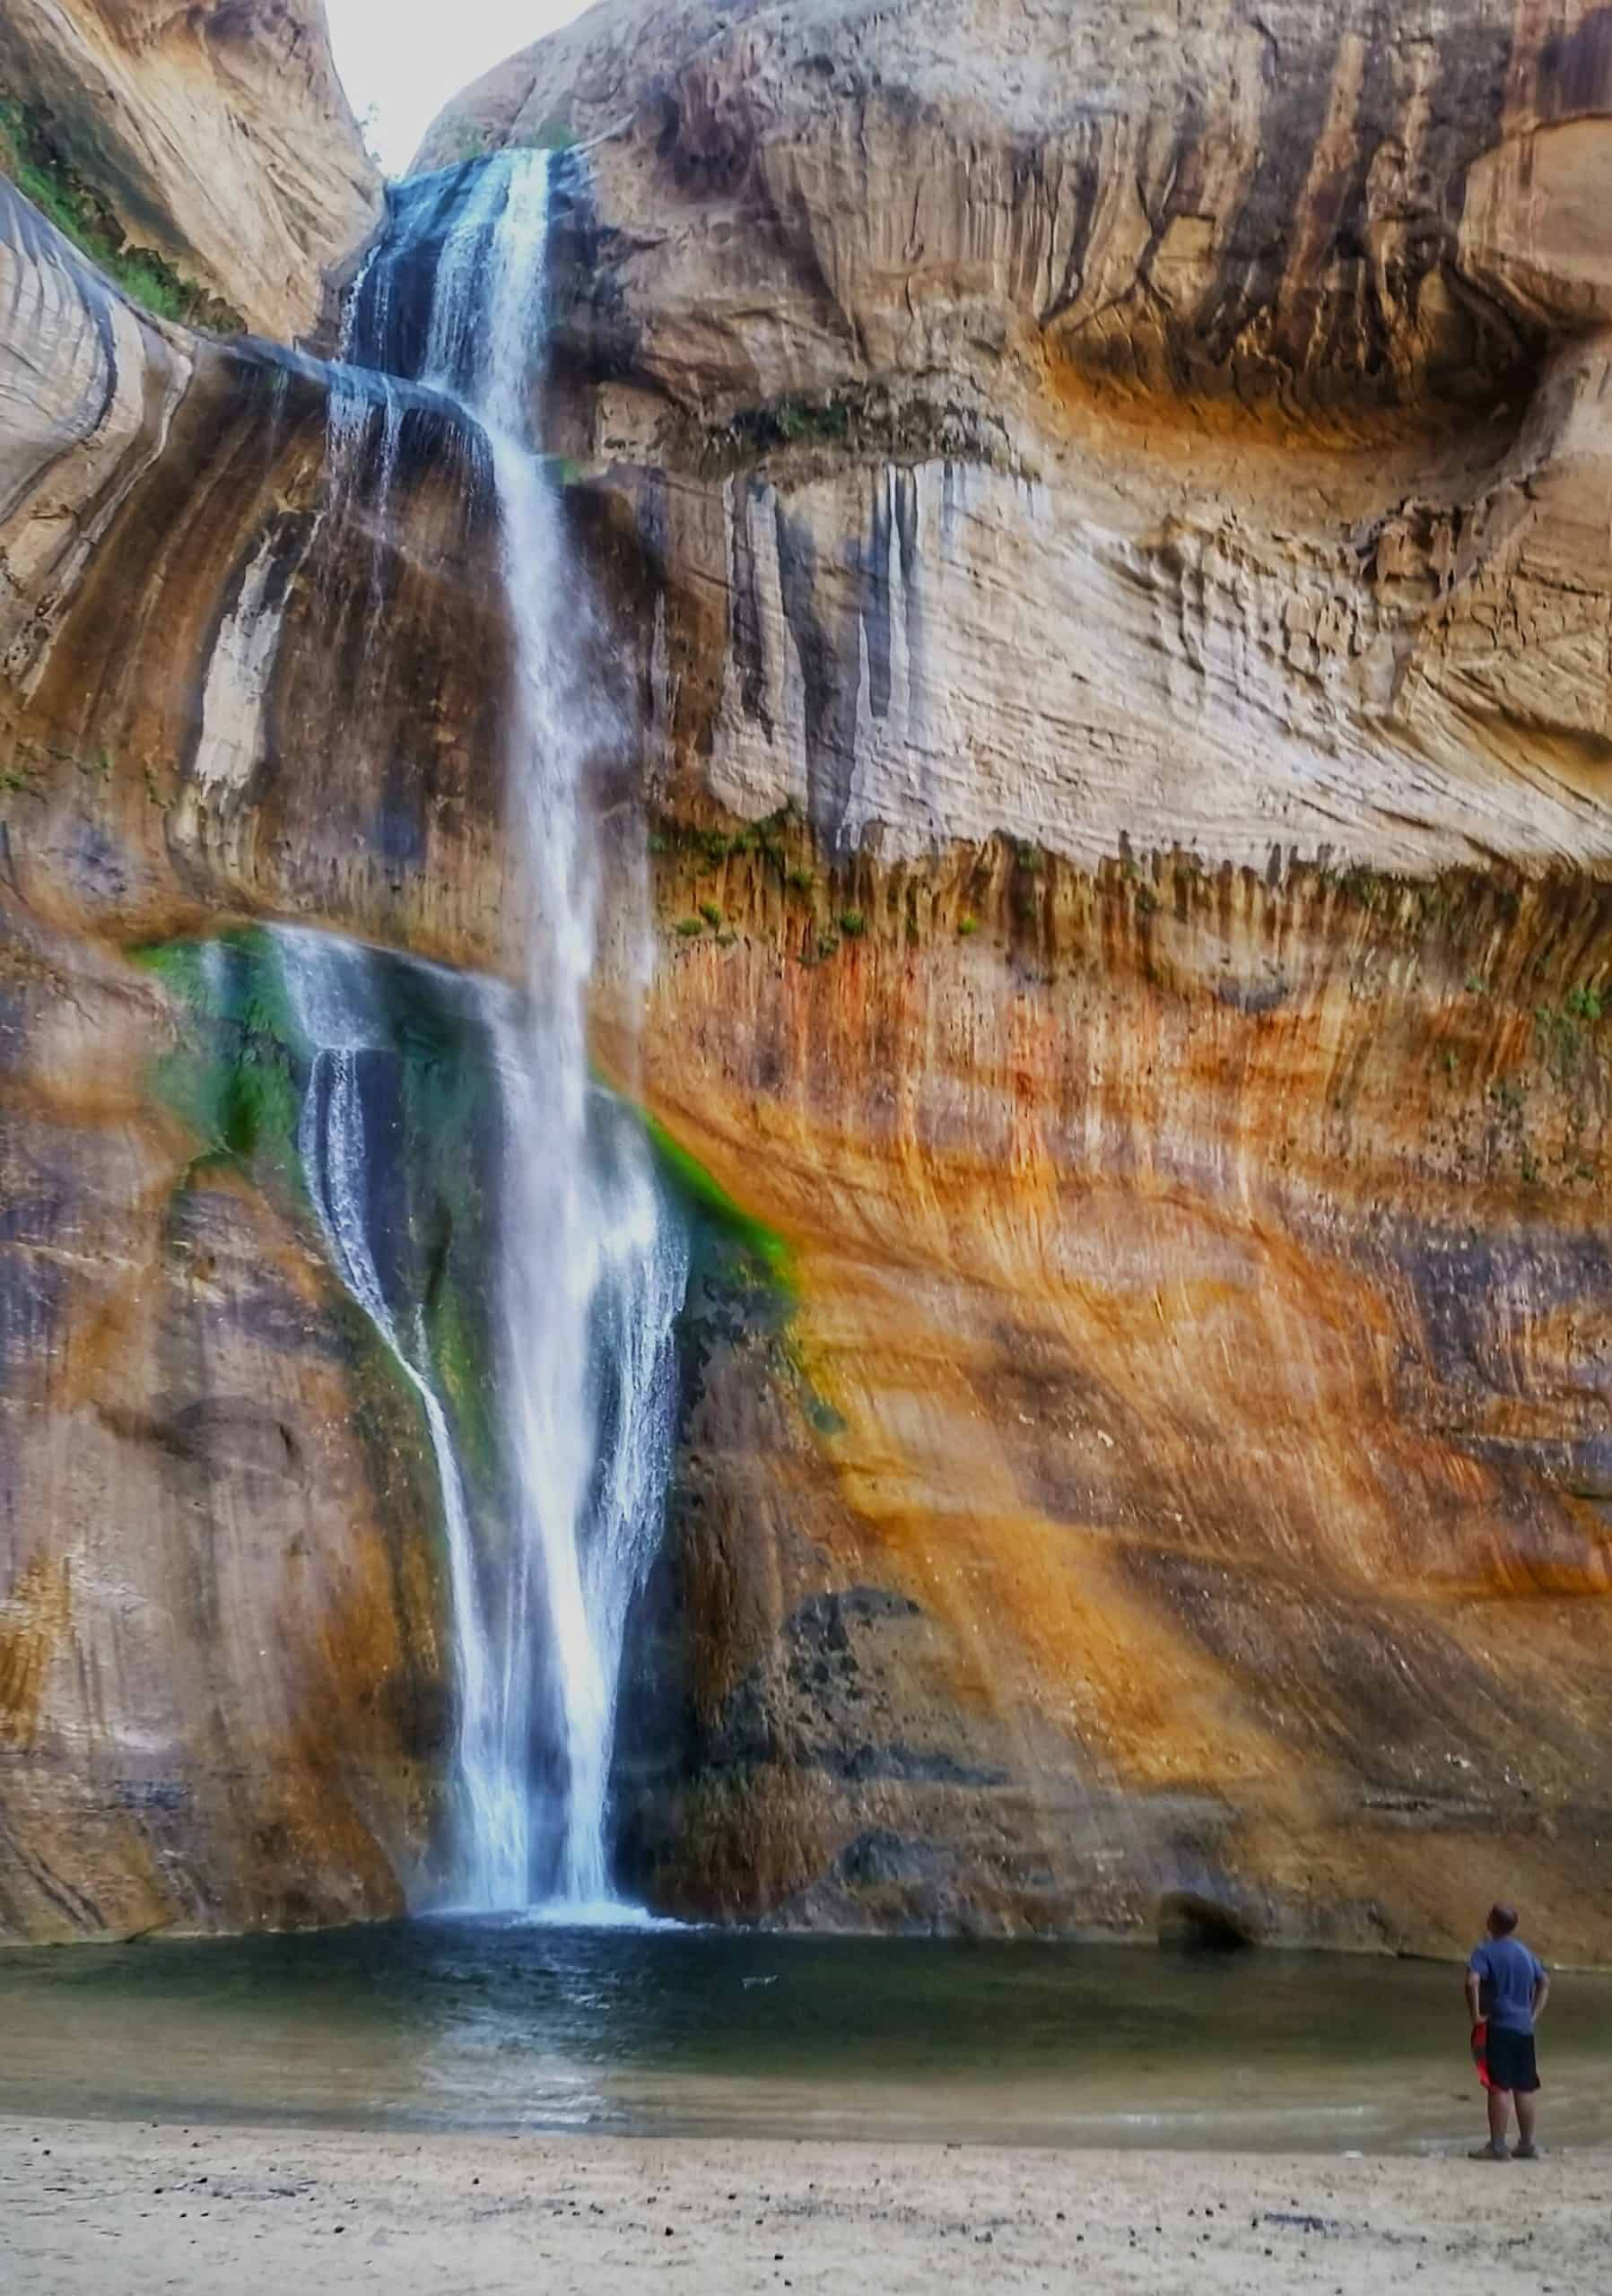
About 20 minutes farther down the road is the Lower Calf Creek Falls trailhead and campground. This is arguably Southern Utah’s best waterfall, and it is well worth the 6.2-mile (10 km) round-trip hike with 531 feet (162 m) of elevation gain. Plan for 3–4 hours, bring plenty of water, and don’t forget your swimsuit!
If you’ve worked up an appetite, backtrack to Boulder for one of the recommendations listed above, or stop at Kiva Koffeehouse, just five minutes down the road. Perched seemingly in the middle of nowhere, it’s one of the most unique coffee stops you’ll find in Utah.
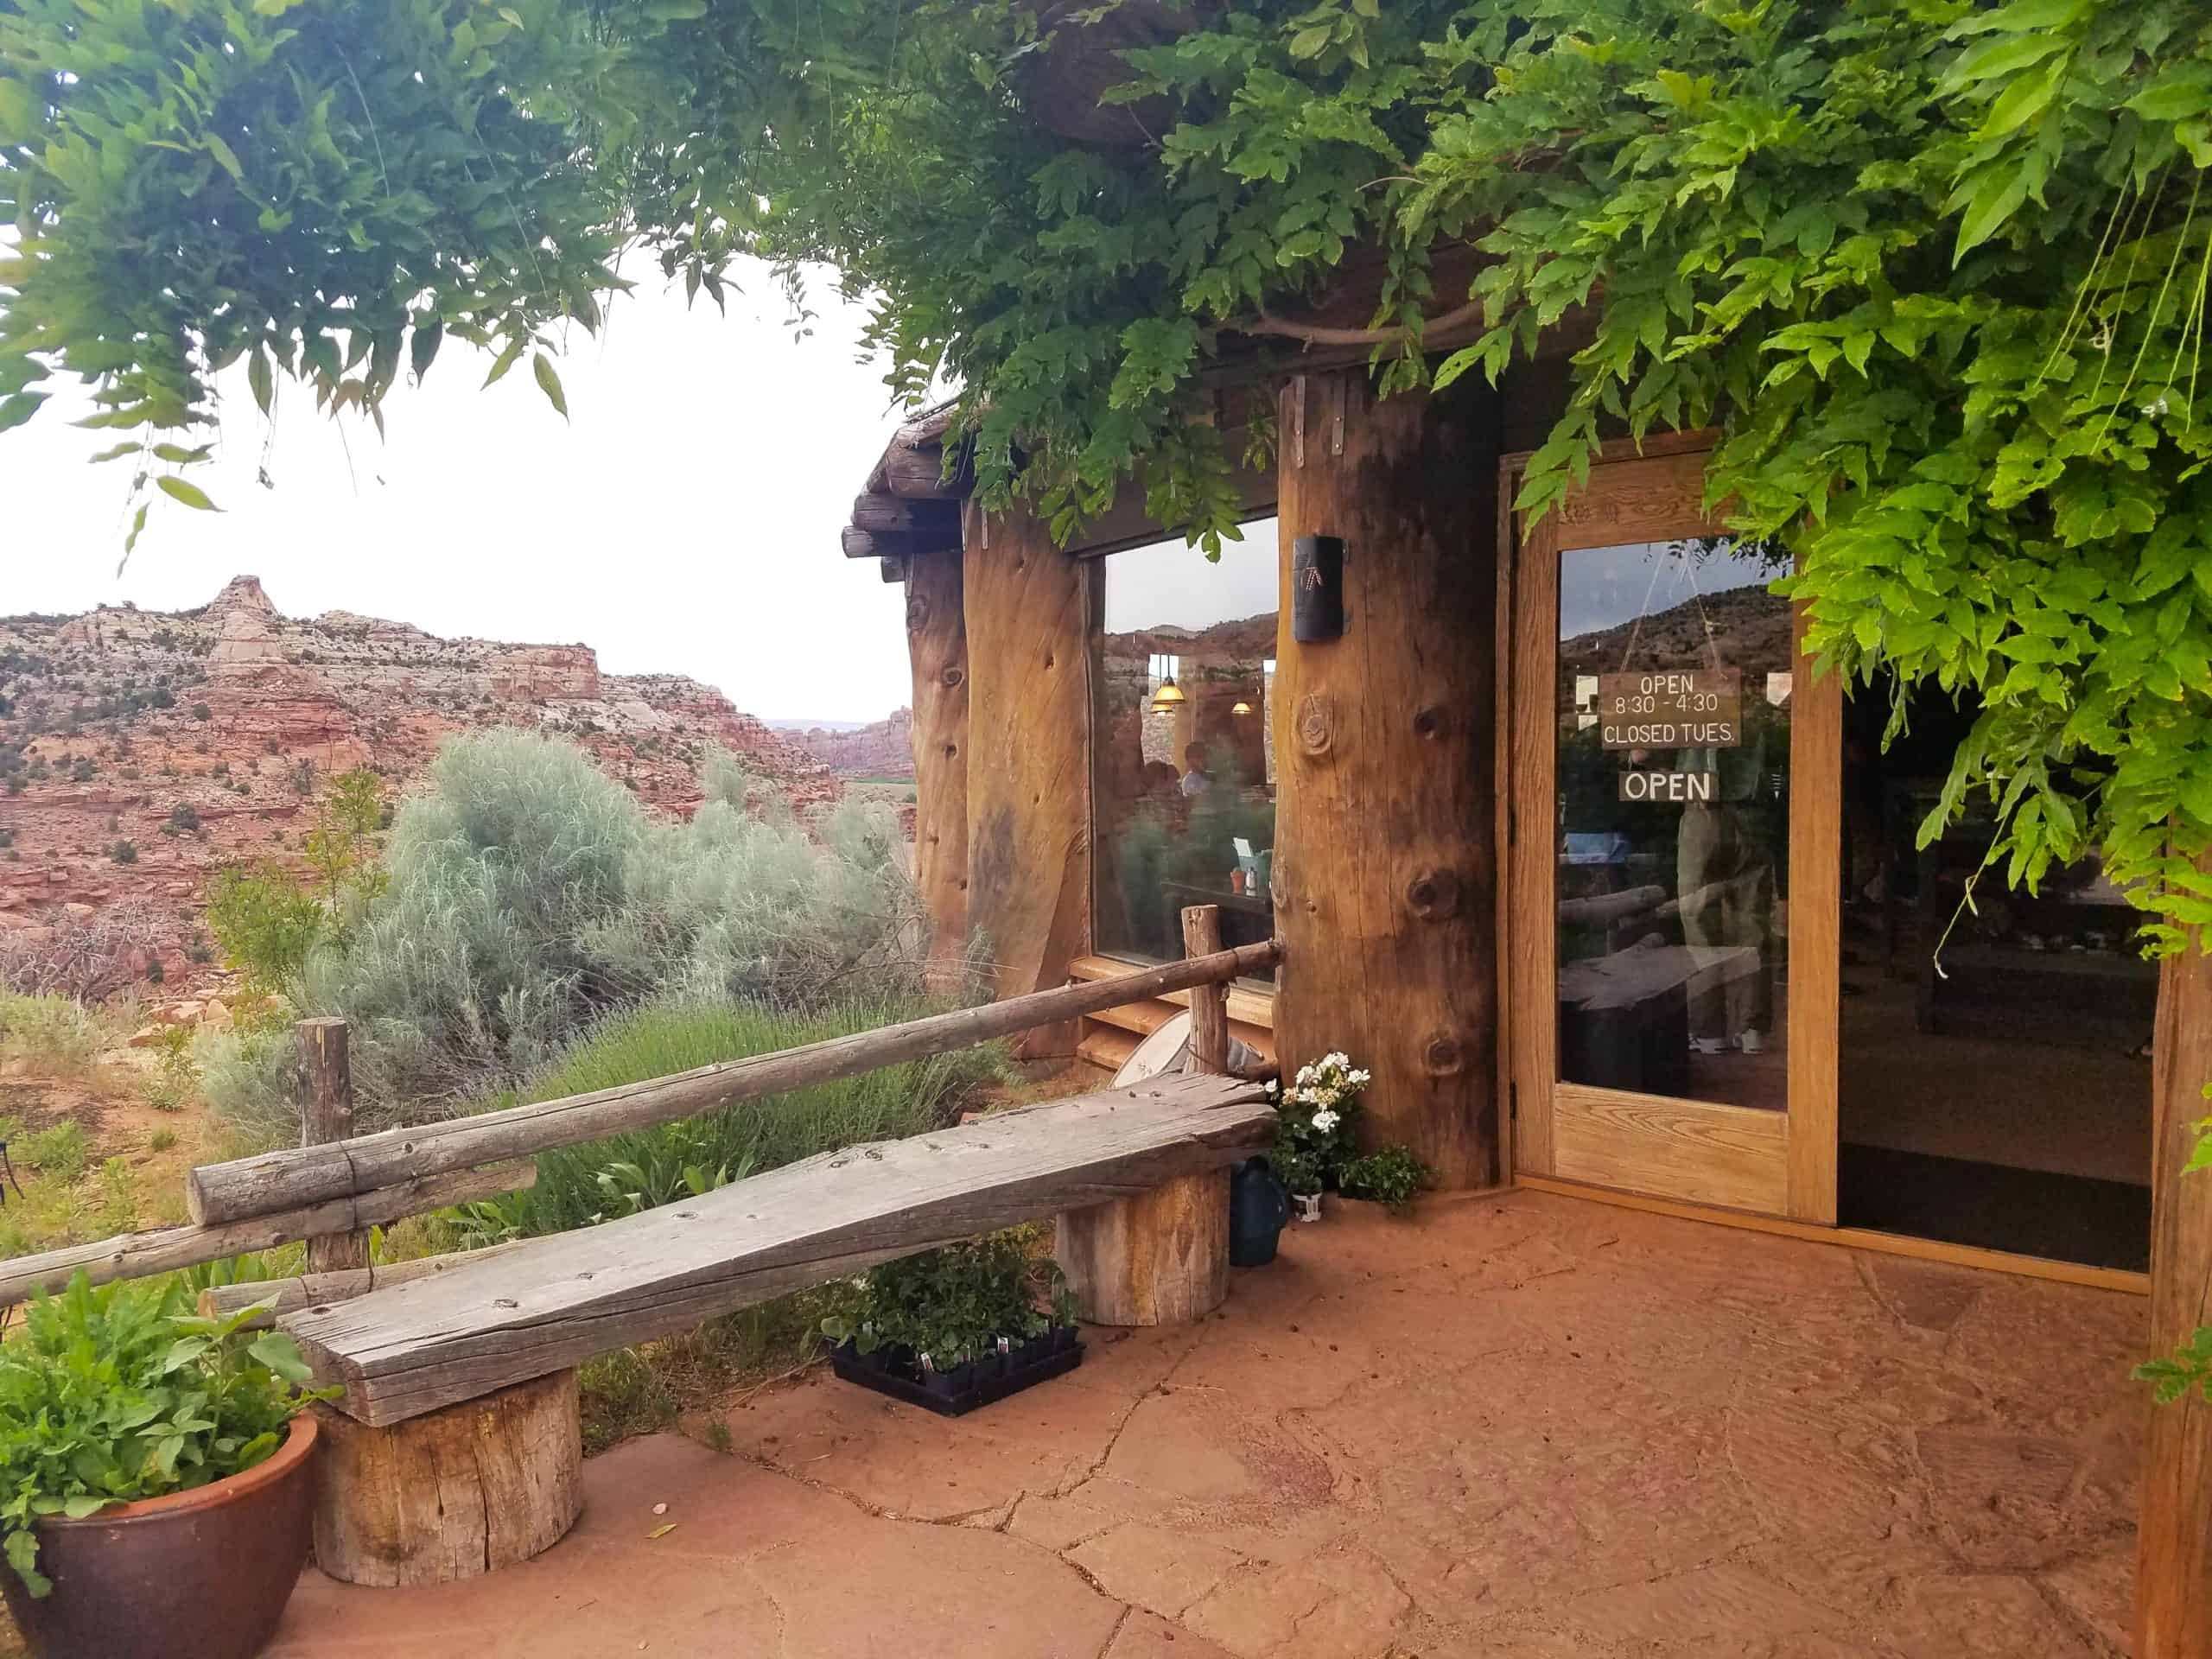
Note: Boulder, Kiva Koffeehouse, and Lower Calf Creek Falls can be done in any order depending on your time and energy. Kiva makes a great pre-hike stop!
Evening
You’ll likely be leaving Lower Calf Creek Falls later in the day, but as you head toward the town of Escalante, watch for scenic pullouts like Head of the Rocks Overlook, one of my favorites. I stop at this stunning overlook every time!
From there, you’ll continue towards Bryce Canyon. This was your brief introduction to The Grand-Staircase Escalante National Monument. It’s a fascinating place, and it will welcome you back anytime!
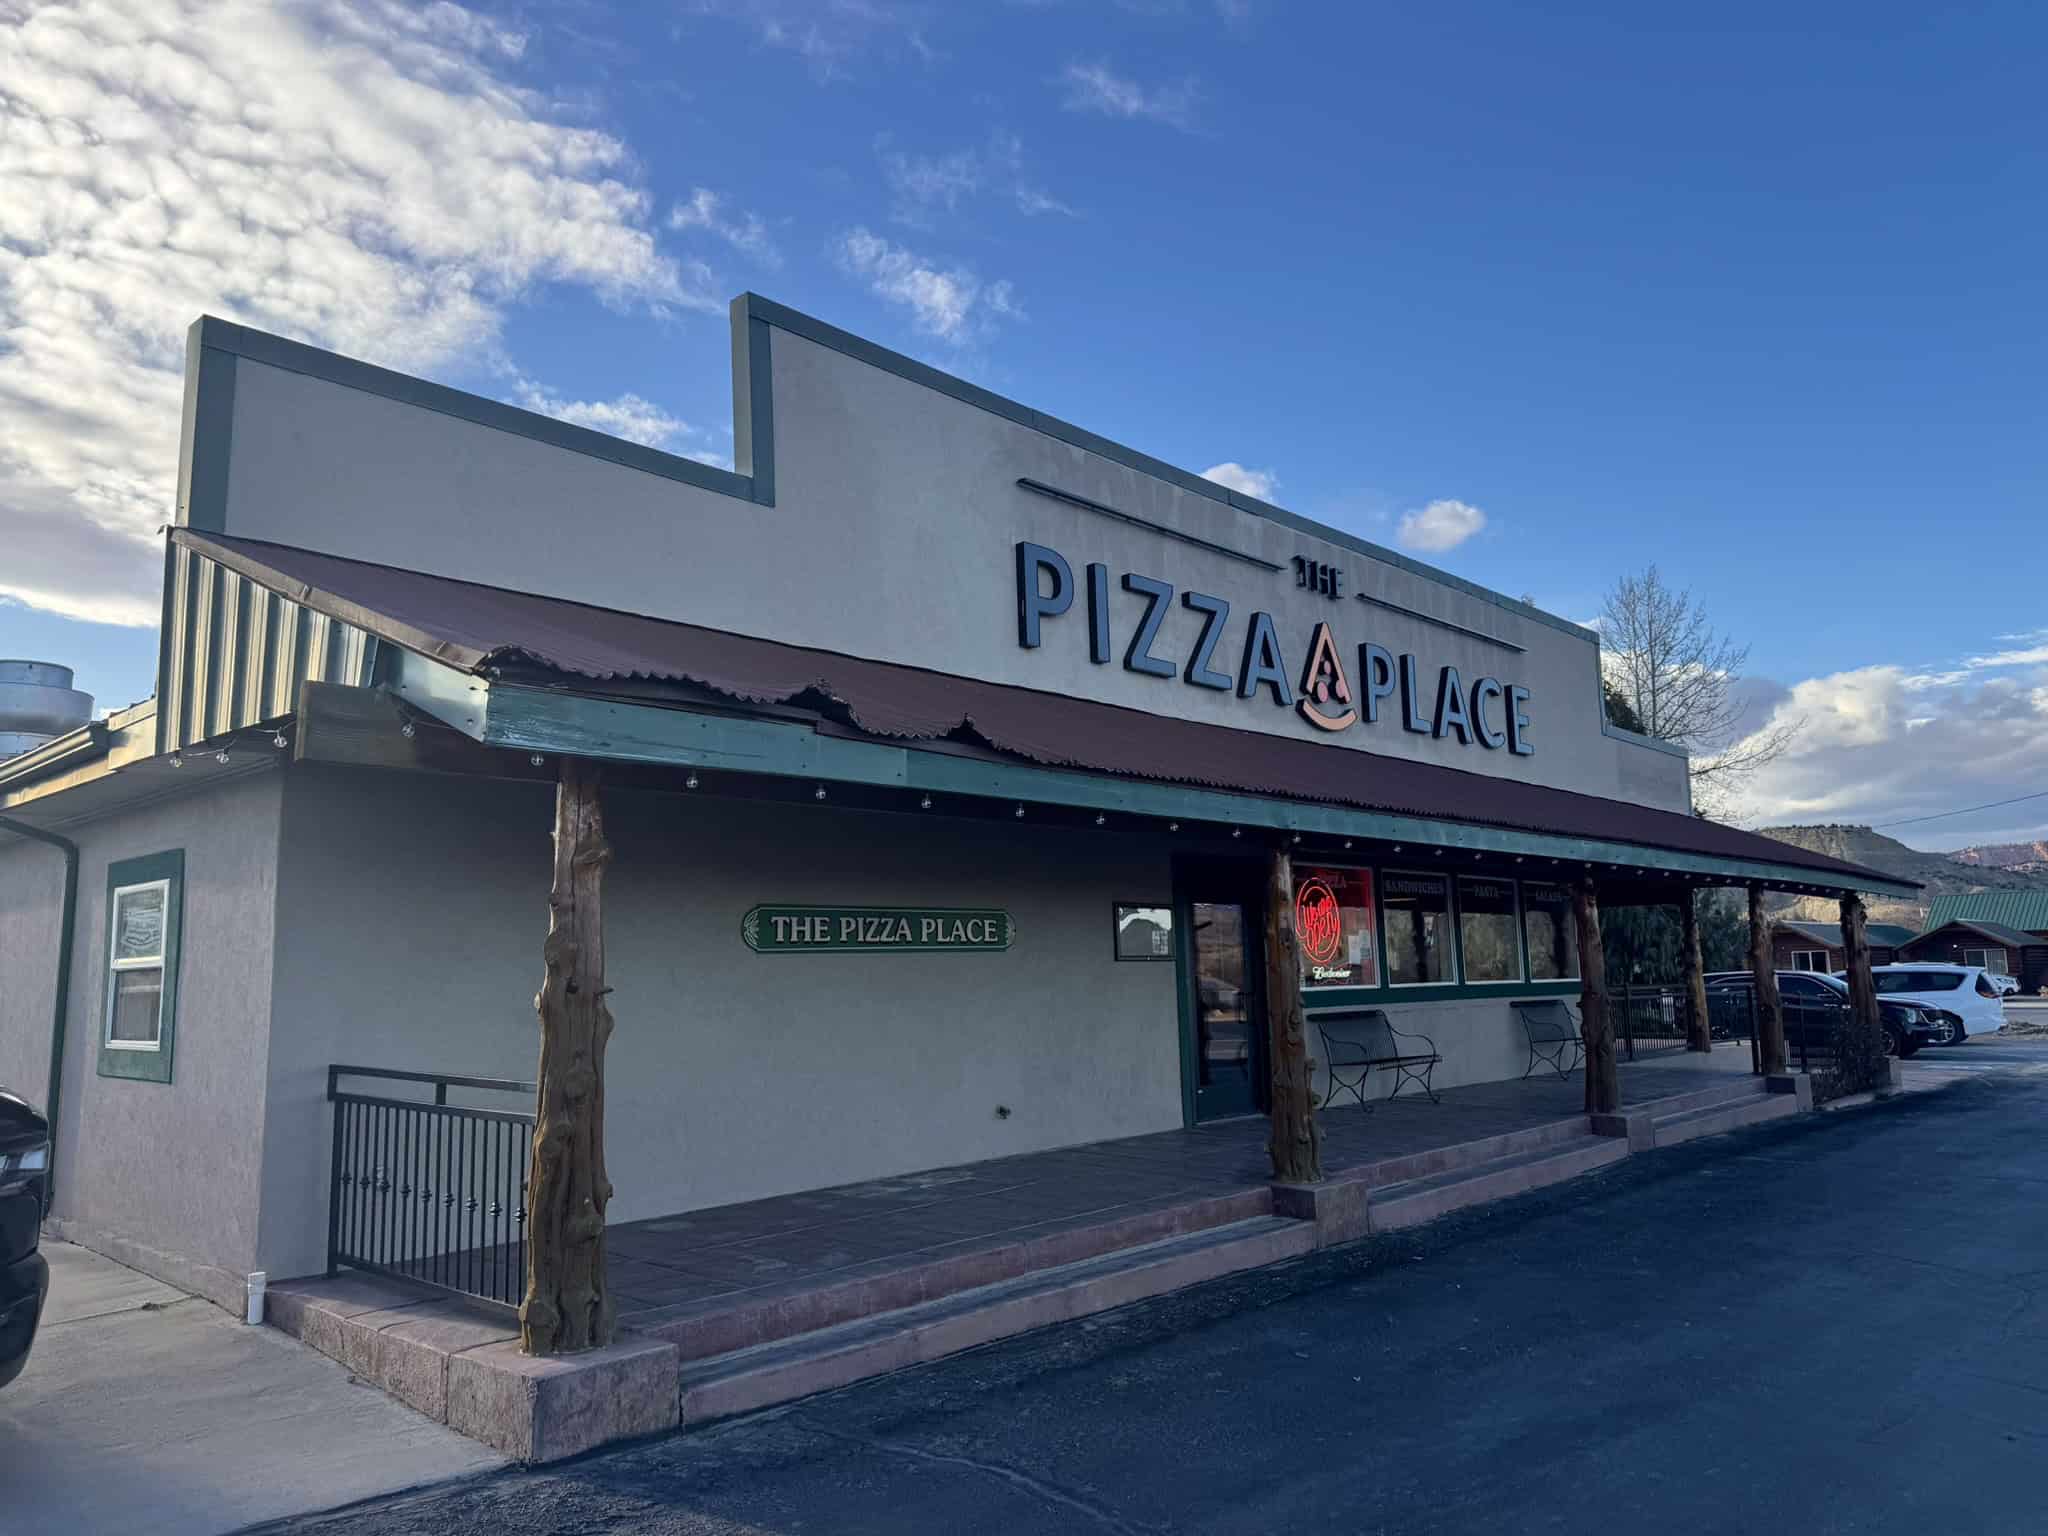
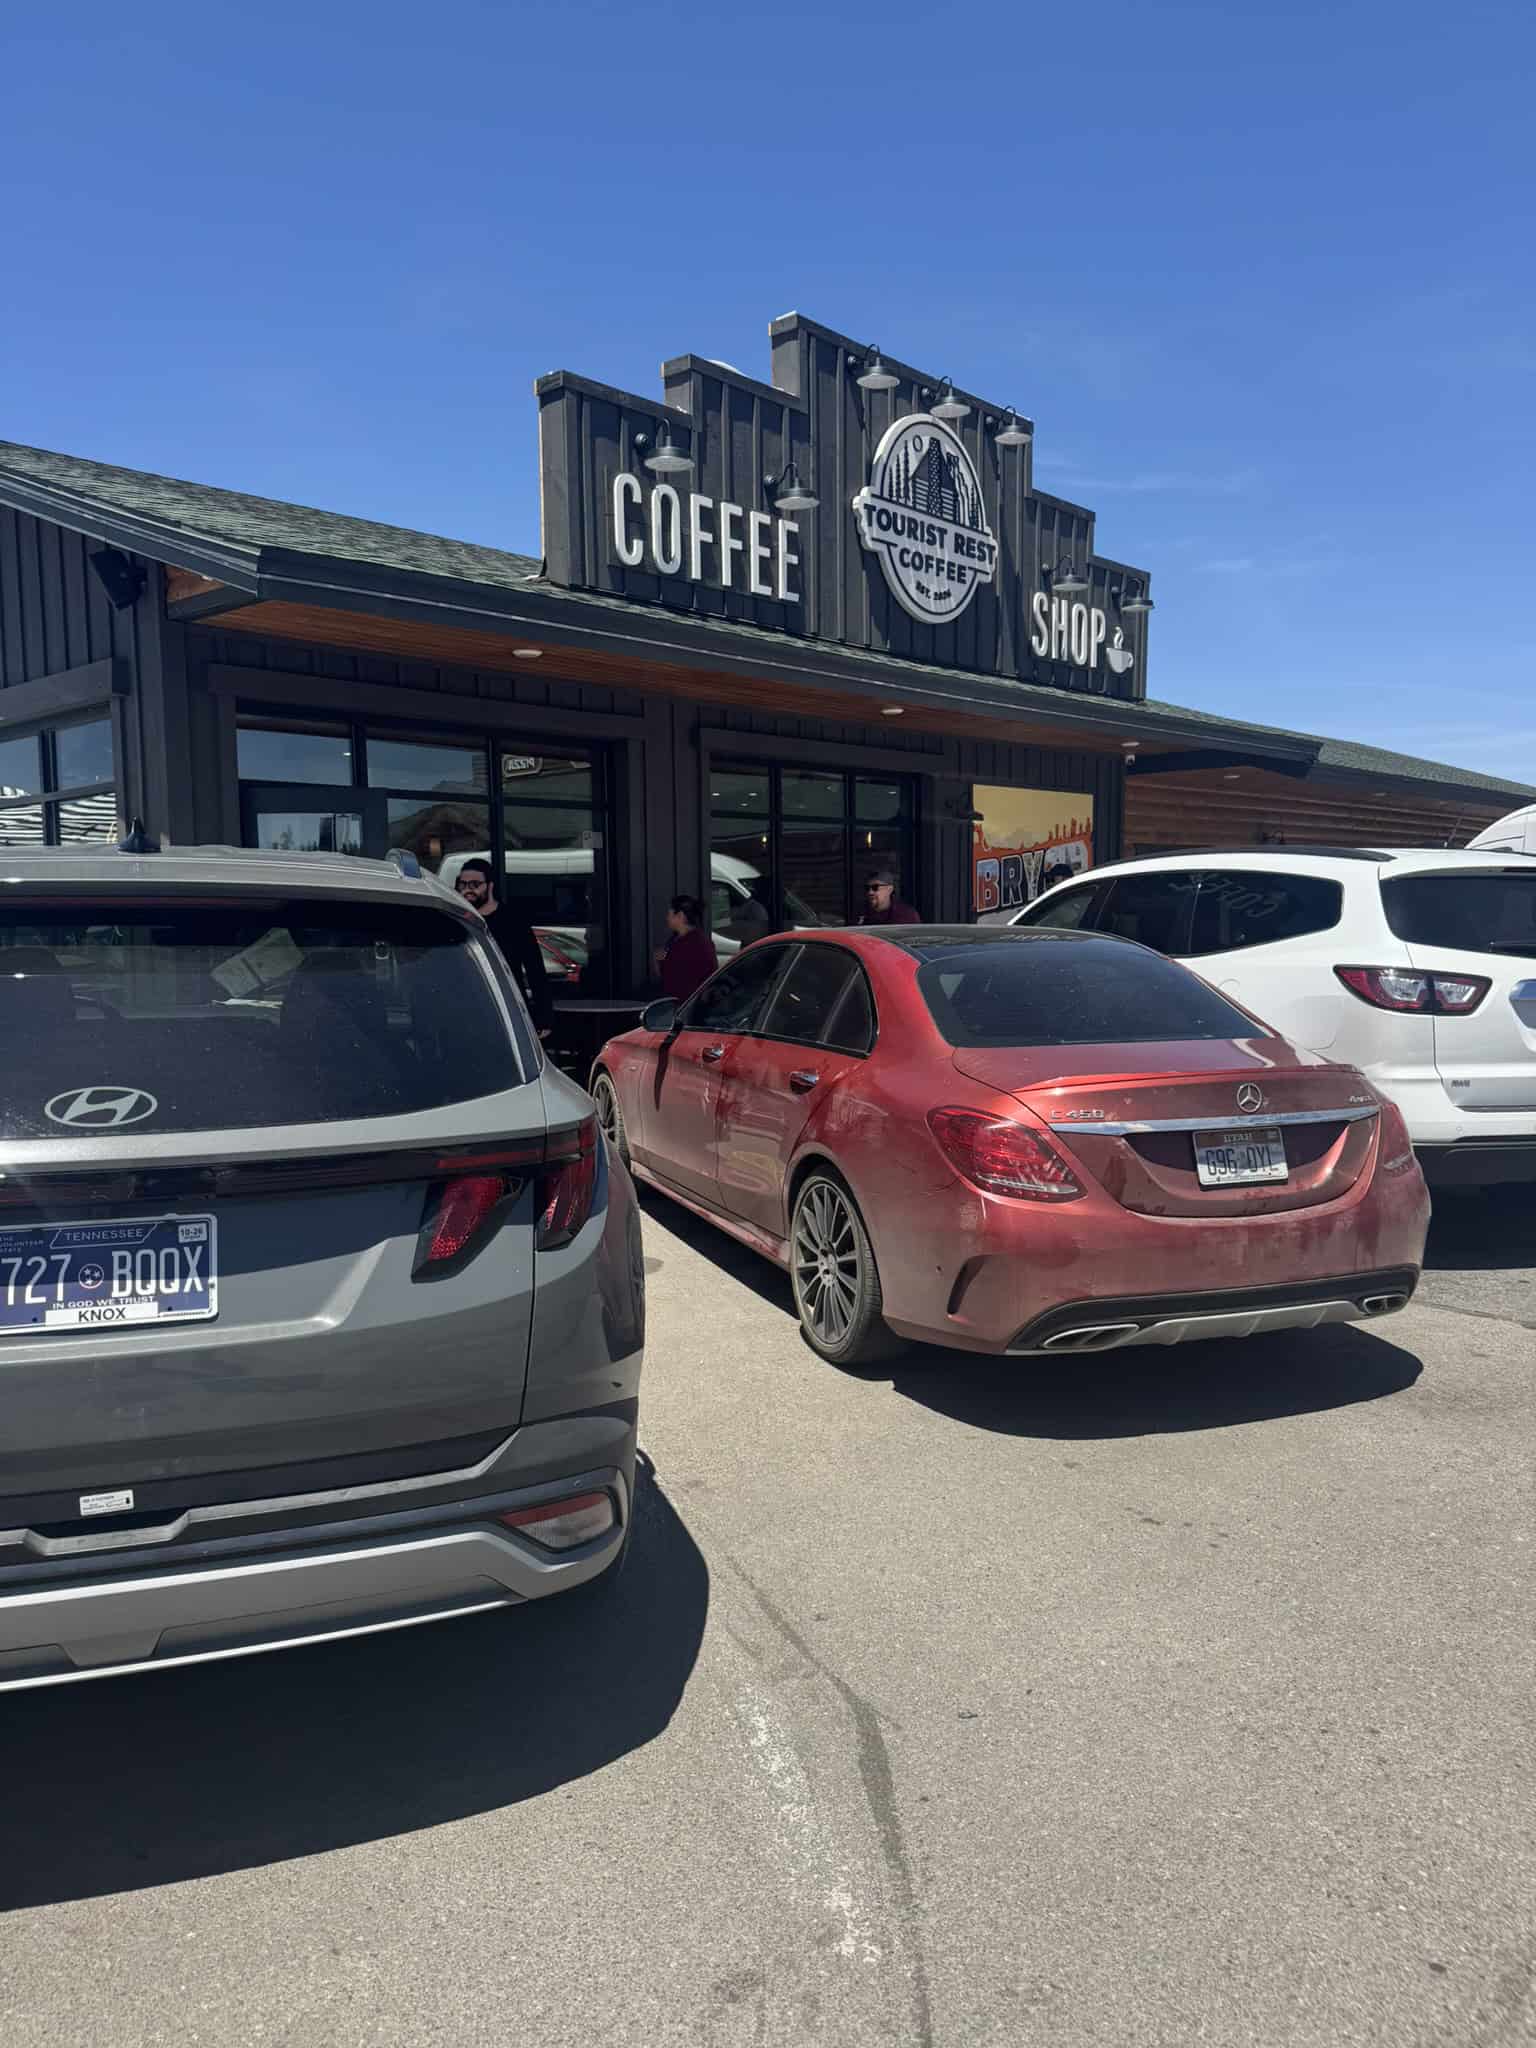
About 10 minutes before you arrive at Bryce Canyon, you’ll pass through the really small town of Tropic. Blink twice, and you might miss it! But I recommend stopping here to eat at the Pizza Place; it’s open pretty late, and the Supreme pizza is just too good! Kick up your feet and relax the rest of the evening; it’s been a long day!

Where To Stay In Bryce Canyon
I recommend spending two nights in Bryce Canyon City as your base and exploring from there.
The Best Western PLUS Ruby’s Inn is the most affordable and convenient place to stay when visiting Bryce Canyon. Located minutes from the park entrance, it offers easy access to sunrise viewpoints, dining options, and tour pickups, making it a practical and popular base for exploring the park. Plus, their free breakfast is really good, and I am a sucker for yummy hotel breakfasts!
For campers, there are two campgrounds in the park: North Campground and Sunset Campgrounds, both of which can be reserved through recreation.gov. Alternatively, Red Canyon Campground is located 20 minutes west of the park, just off Highway 12, and offers a quieter experience.
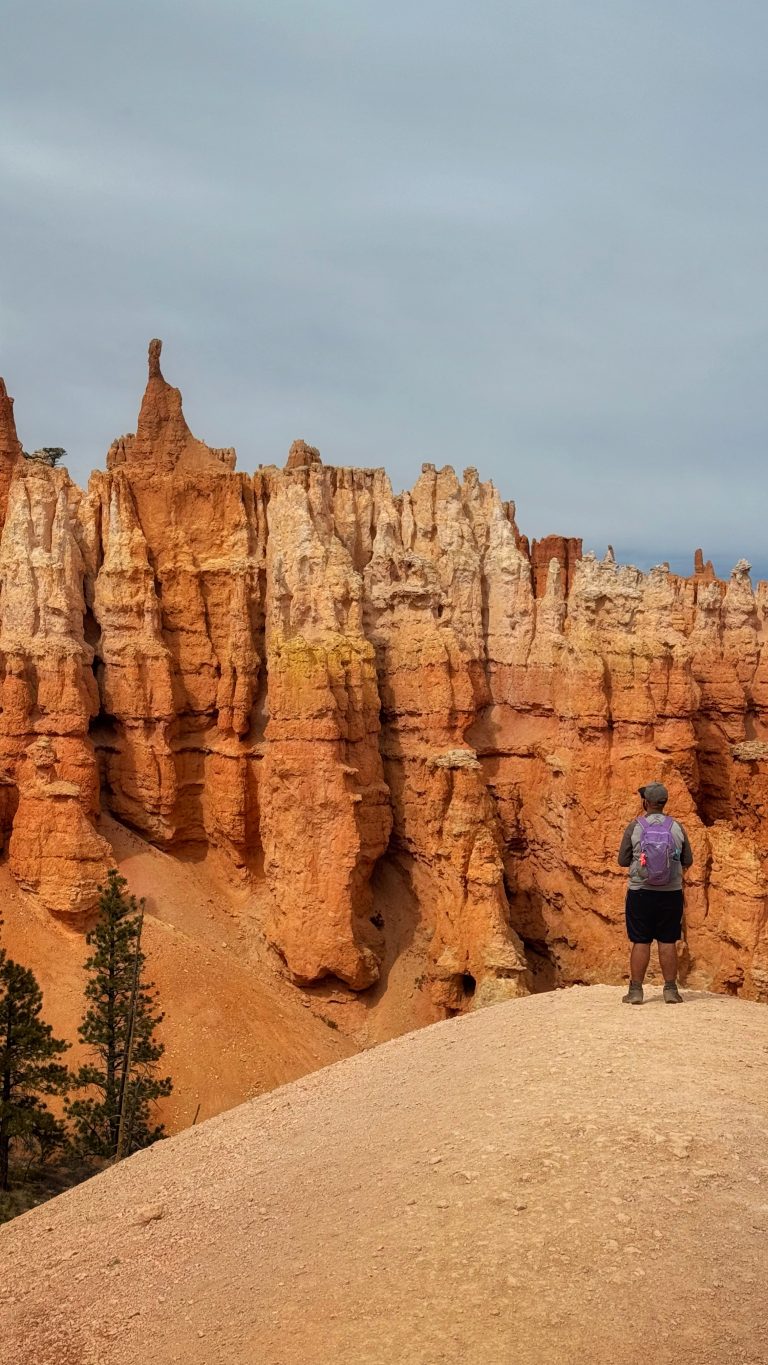
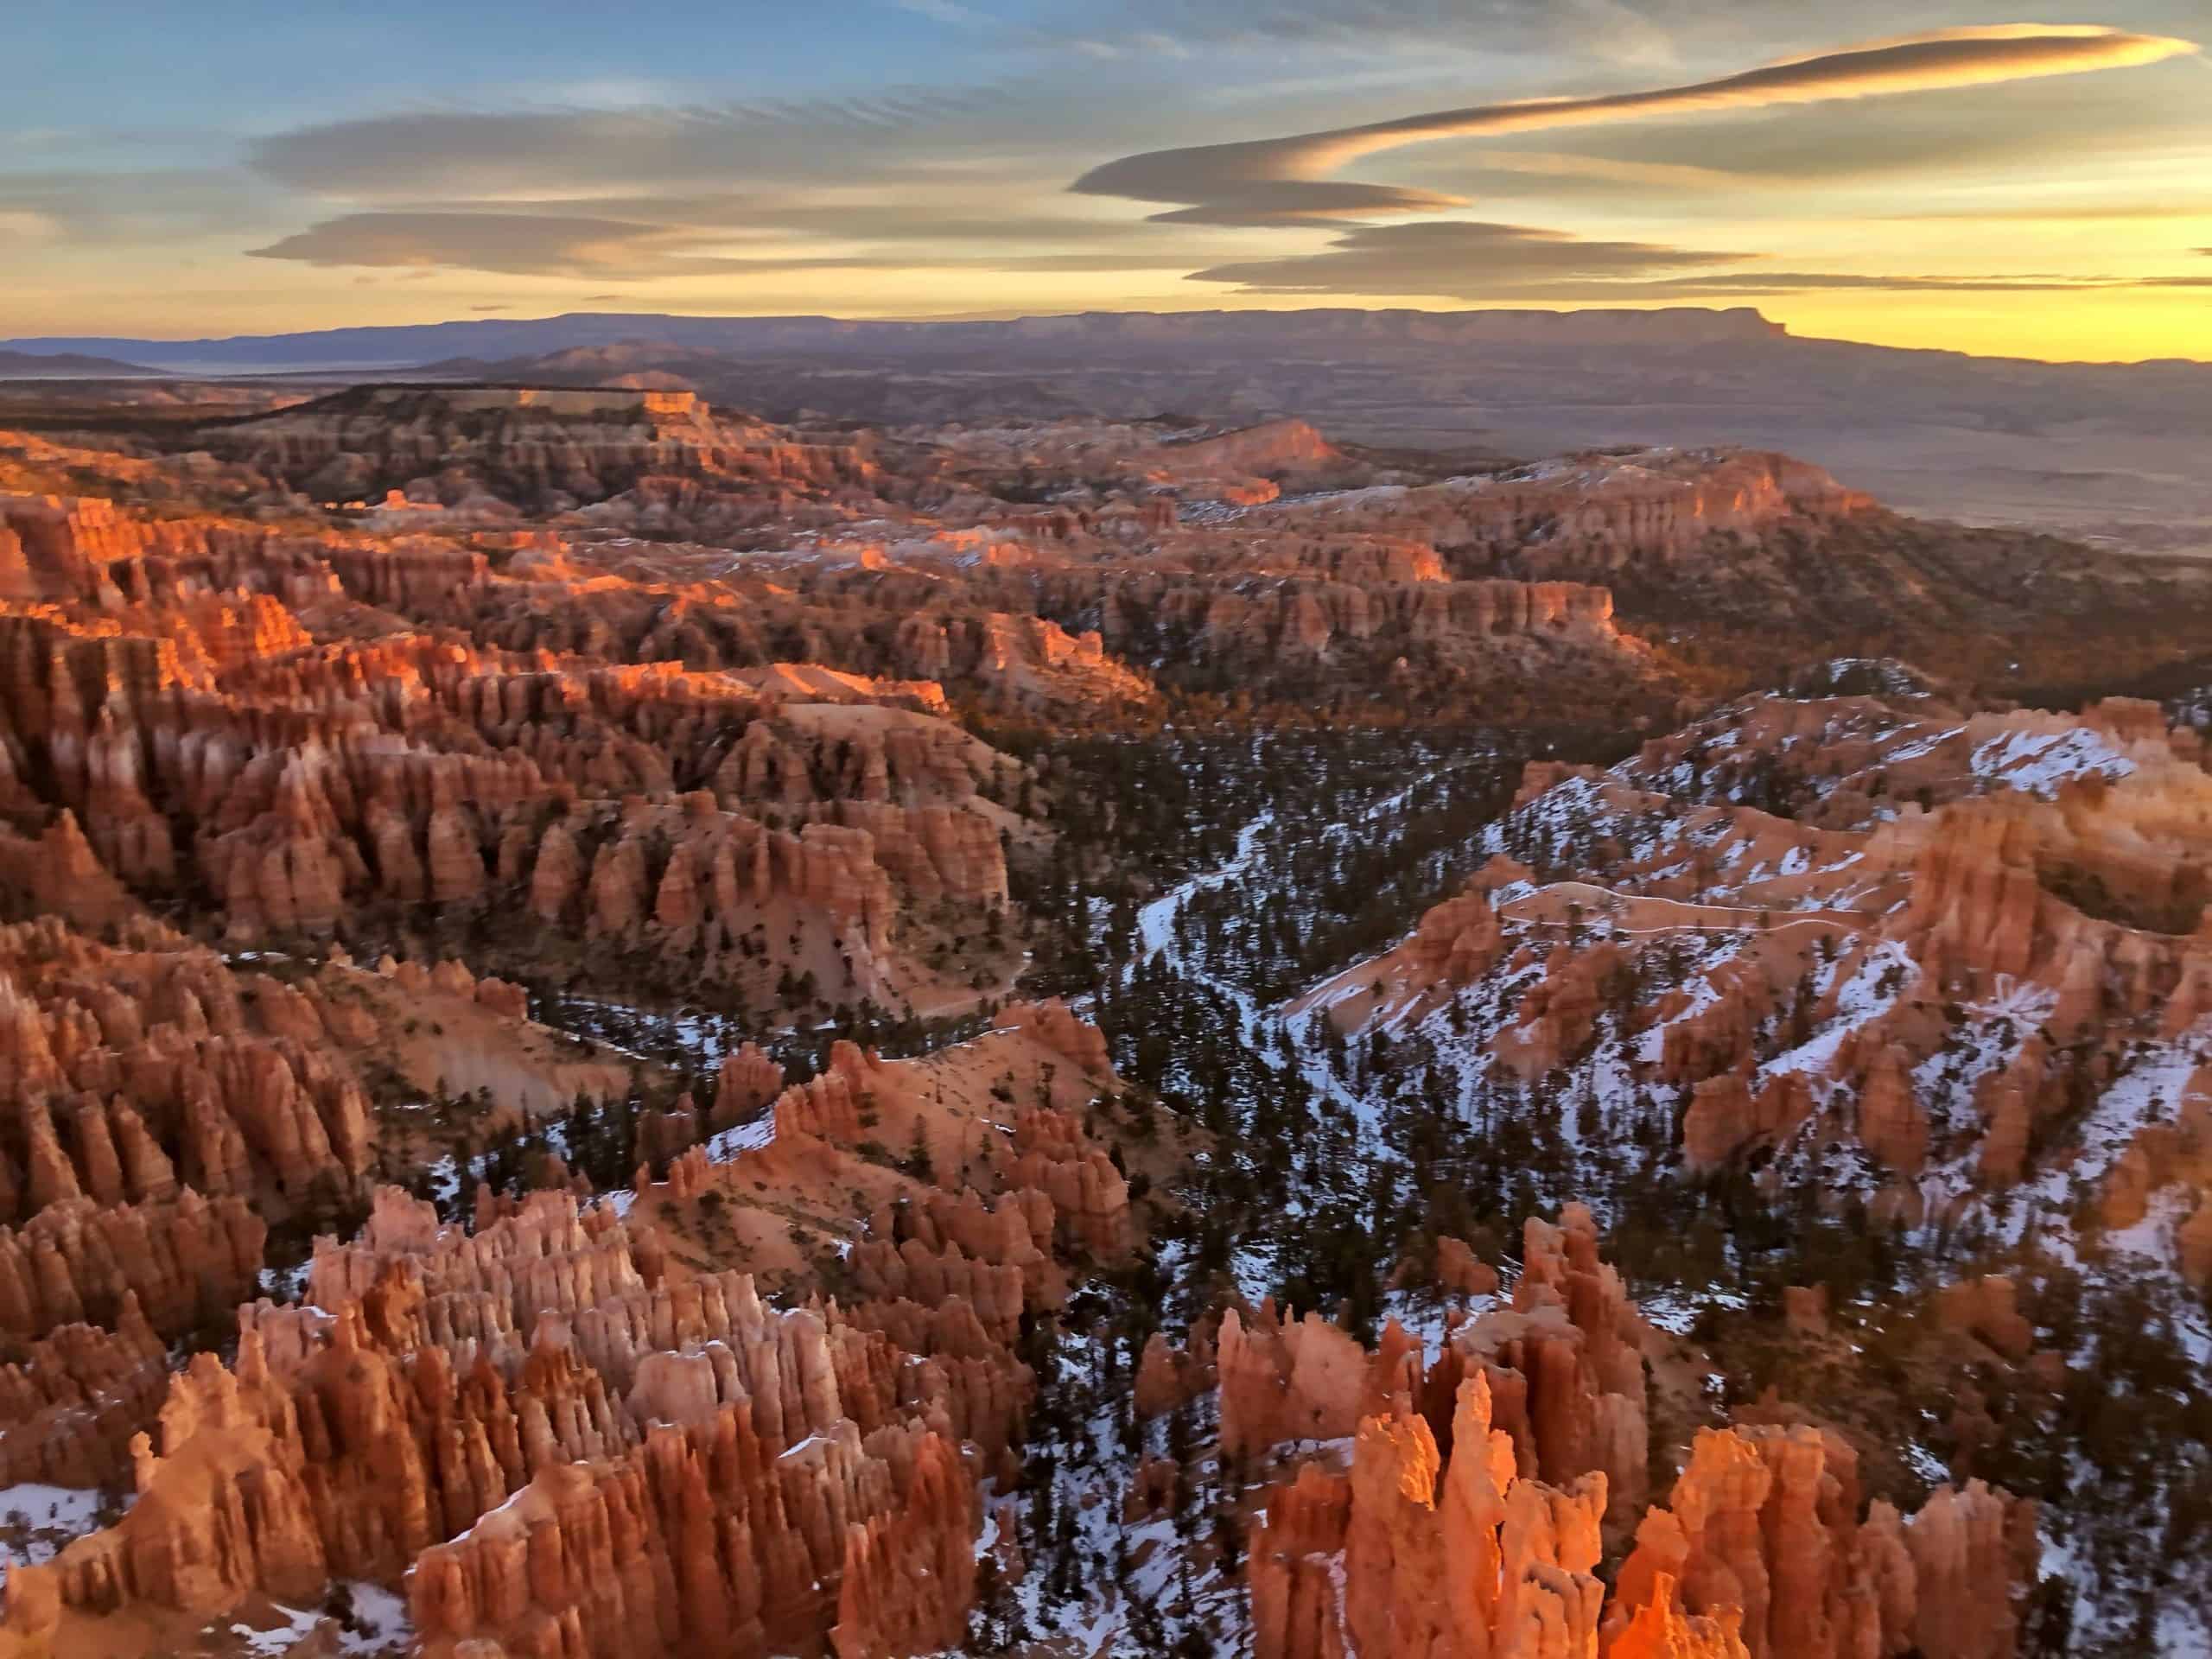
Day Seven: Bryce Canyon National Park
Enjoy the day exploring the most photogenic of the Mighty 5 national parks! Explore by hiking the scenic trails, stopping at the overlooks, and going on a guided tour!
Morning
Update: In 2026, Ruby’s opened a brand new coffee shop, which I had to check out on my last visit. I was delighted to order a Pistachio Latte with a Spinach Feta Pastry, and it was the best way to start the morning! It’s located just a few minutes from the park entrance and boasts a modern minimalist interior.
Grab your morning latte fill at Junty Java, a charming little coffee shop operating out of a small trailer. Another great option is Bryce Canyon Coffee Company in the nearby town of Tropic, about a 10-minute drive away. It’s worth the detour as they also have food on their menu, and both spots make great coffee!
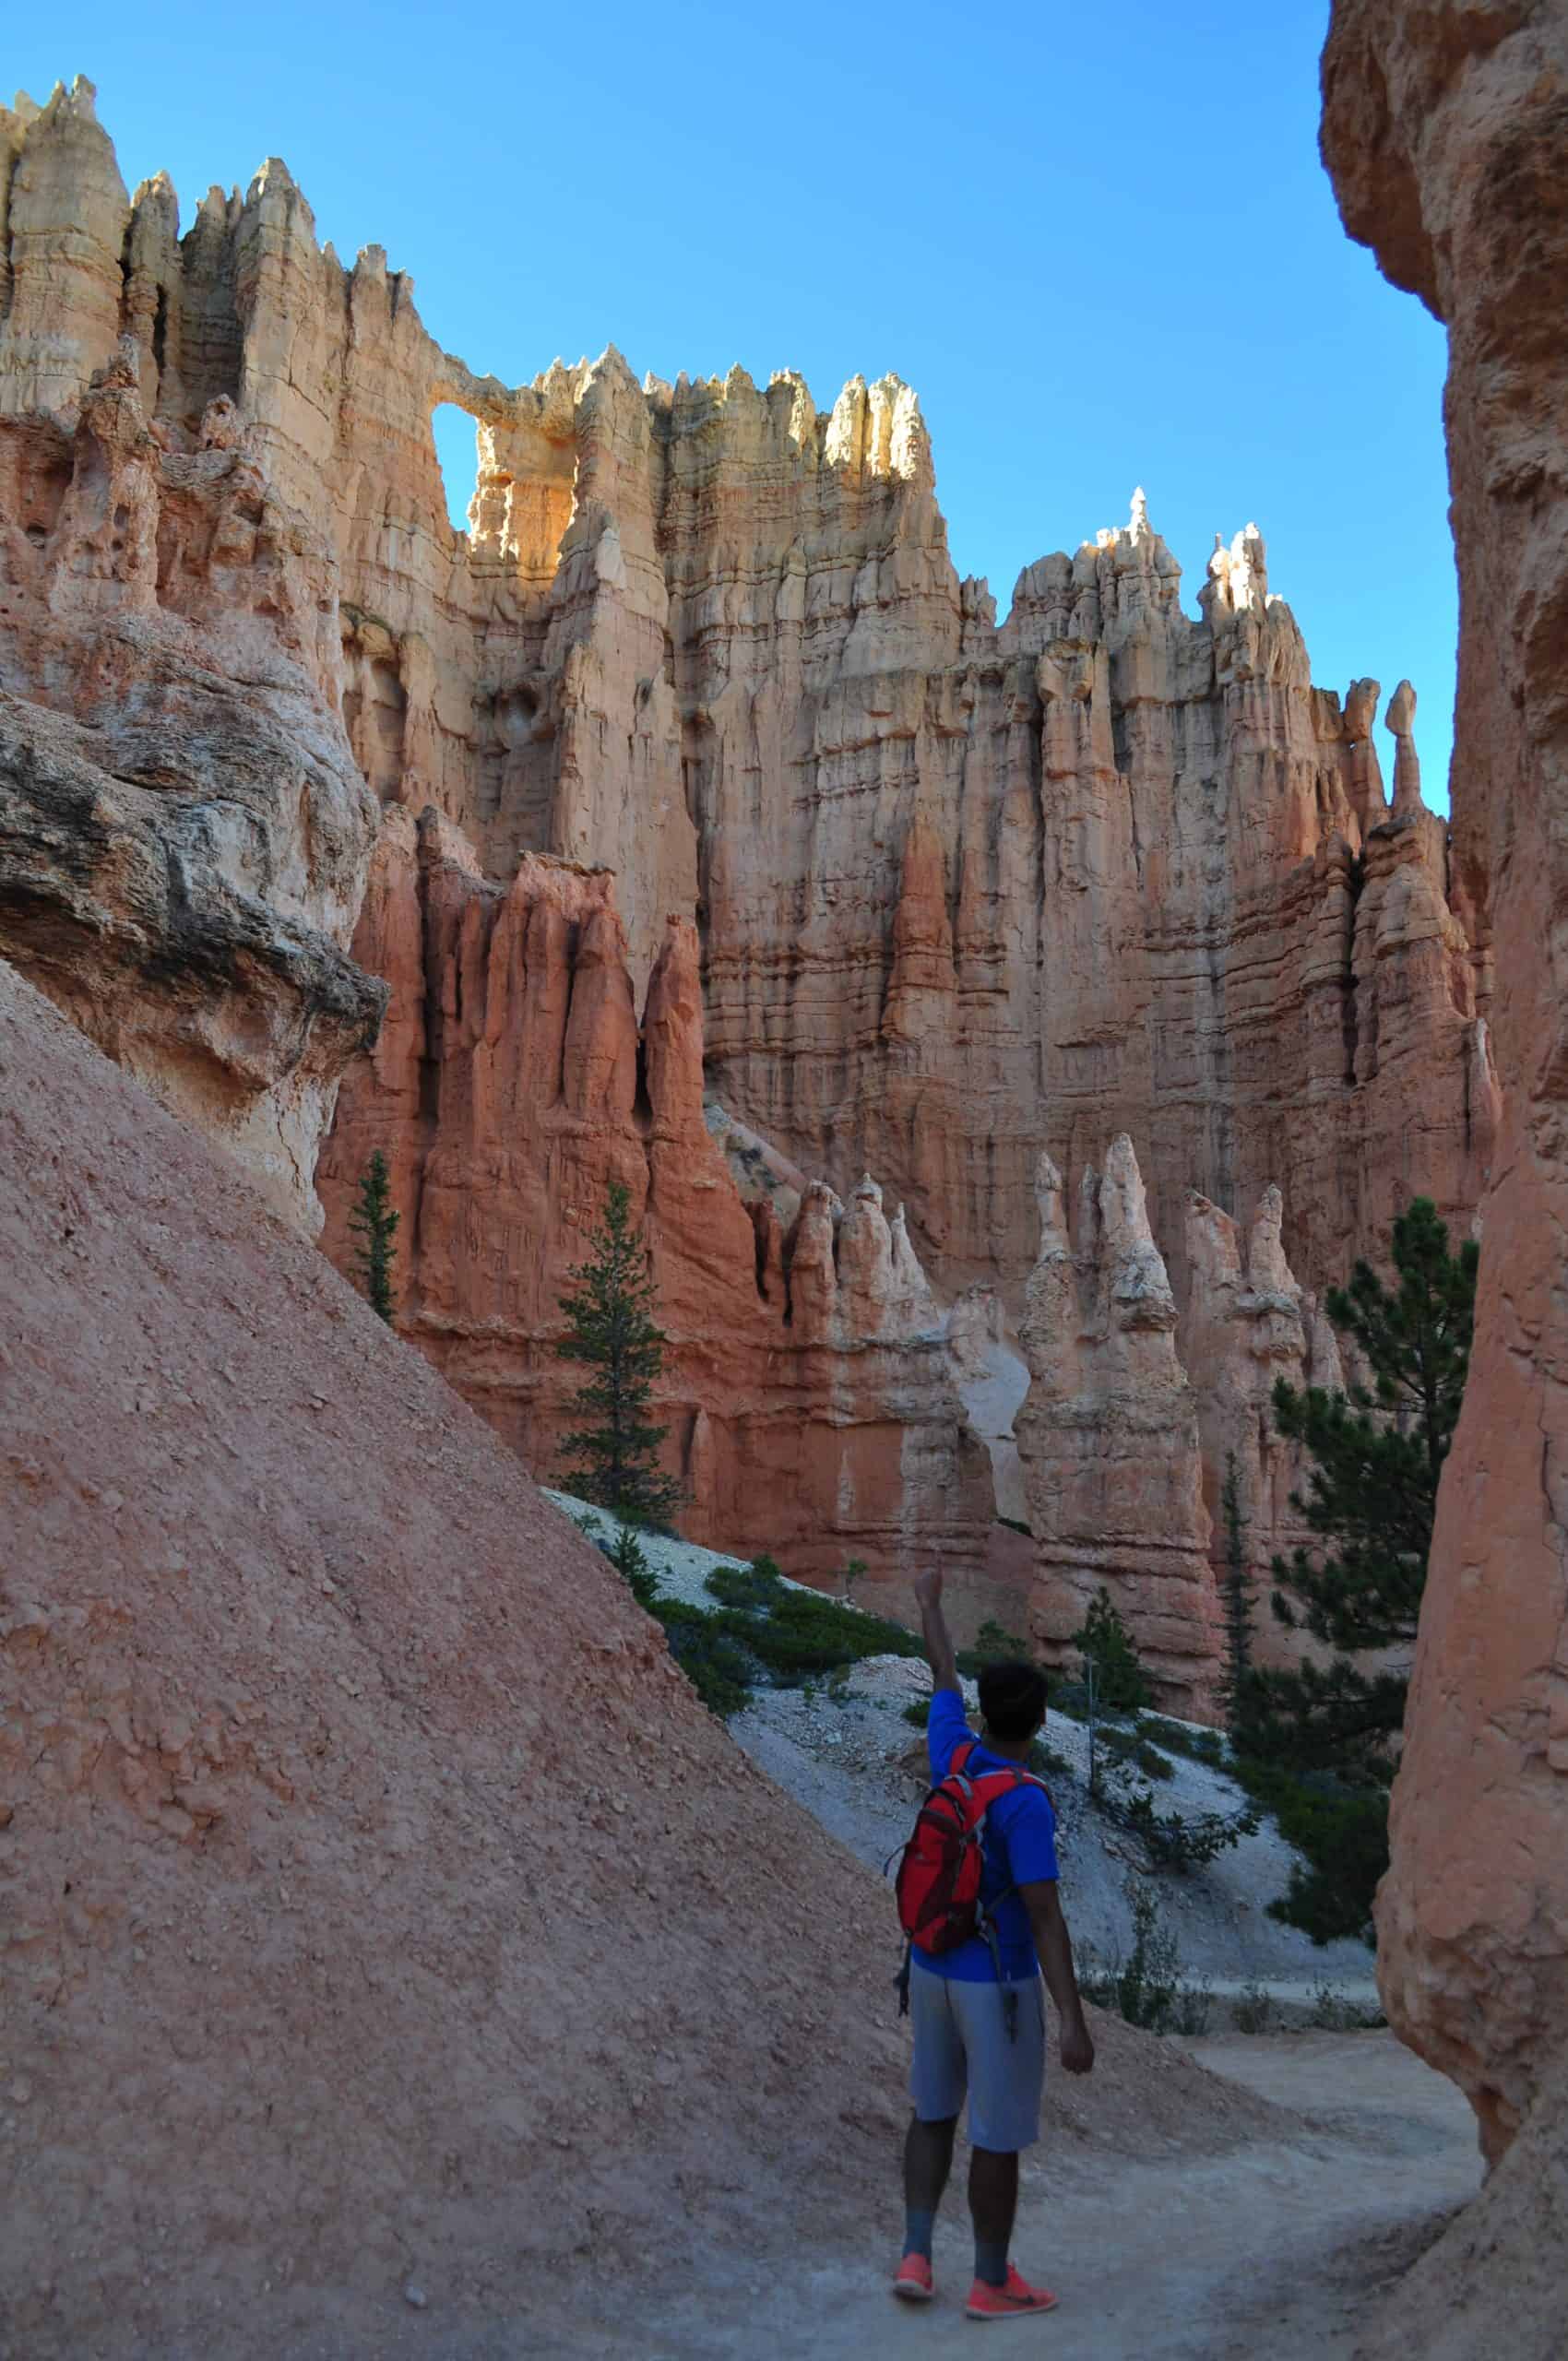
Sunrise at Bryce Canyon is especially magical because you’re standing on the canyon rim, looking east as the sun lights up the hoodoos below. Really, all the overlooks are eyecandy for photographers, but my personal favorite is Bryce Point, with Inspiration Point being a close second!
Once you park at Bryce Point, there are three different overlooks. My favorite is at the north end of the fenced section, but I encourage you to check out all three.
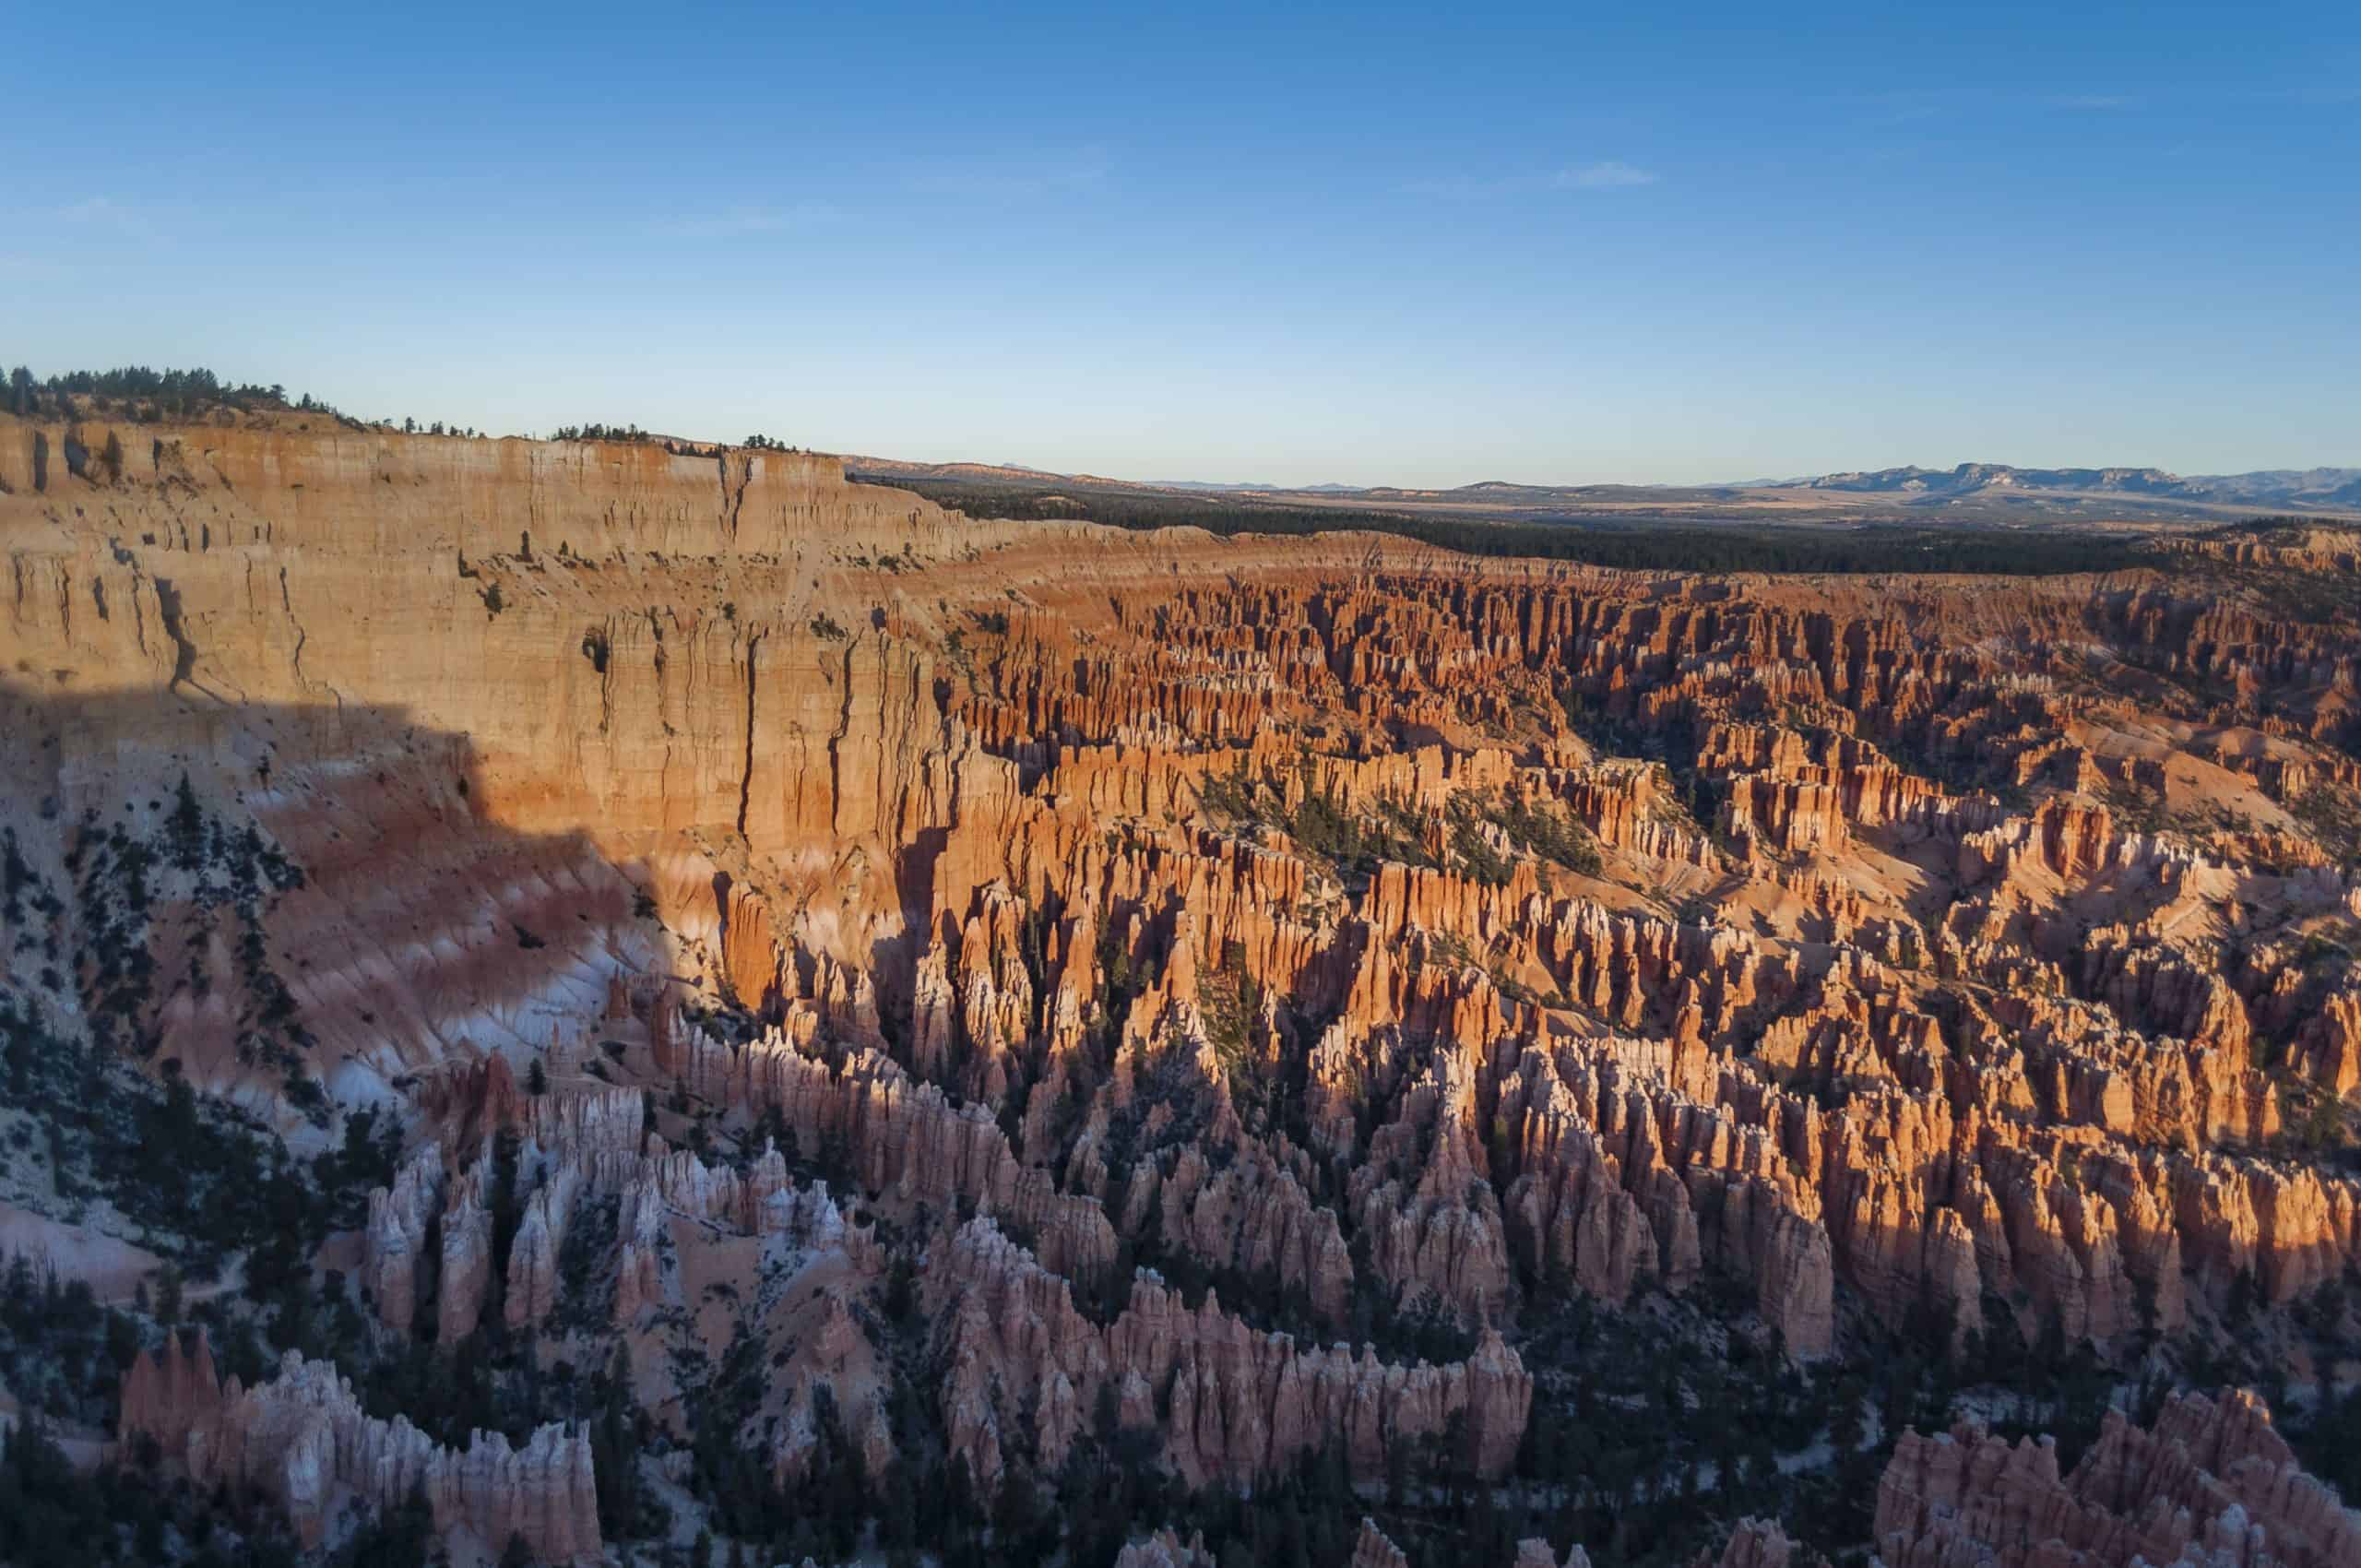
If you have extra time, drive to Sunrise Point and Sunset Point and wander the rim trail between the two for different perspectives!
Continue your morning with a guided Bryce Canyon tour with several departing time options. It’s the easiest way to experience the park’s must-see viewpoints while learning the stories, geology, and hidden details you’d miss on your own, all led by an expert guide.
Afternoon
If you choose the 9:00 a.m. tour, you’ll wrap up around noon. For a convenient and satisfying lunch spot, check out the Valhalla Pizzeria at the Bryce Canyon Lodge. We split a Chicken BBQ pizza, which was both yummy and enough to feed three people!
Now that you’ve experienced the highlights of the park and learned about the history, it’s time to experience the park from below the rim. This is an entirely different and unforgettable perspective.
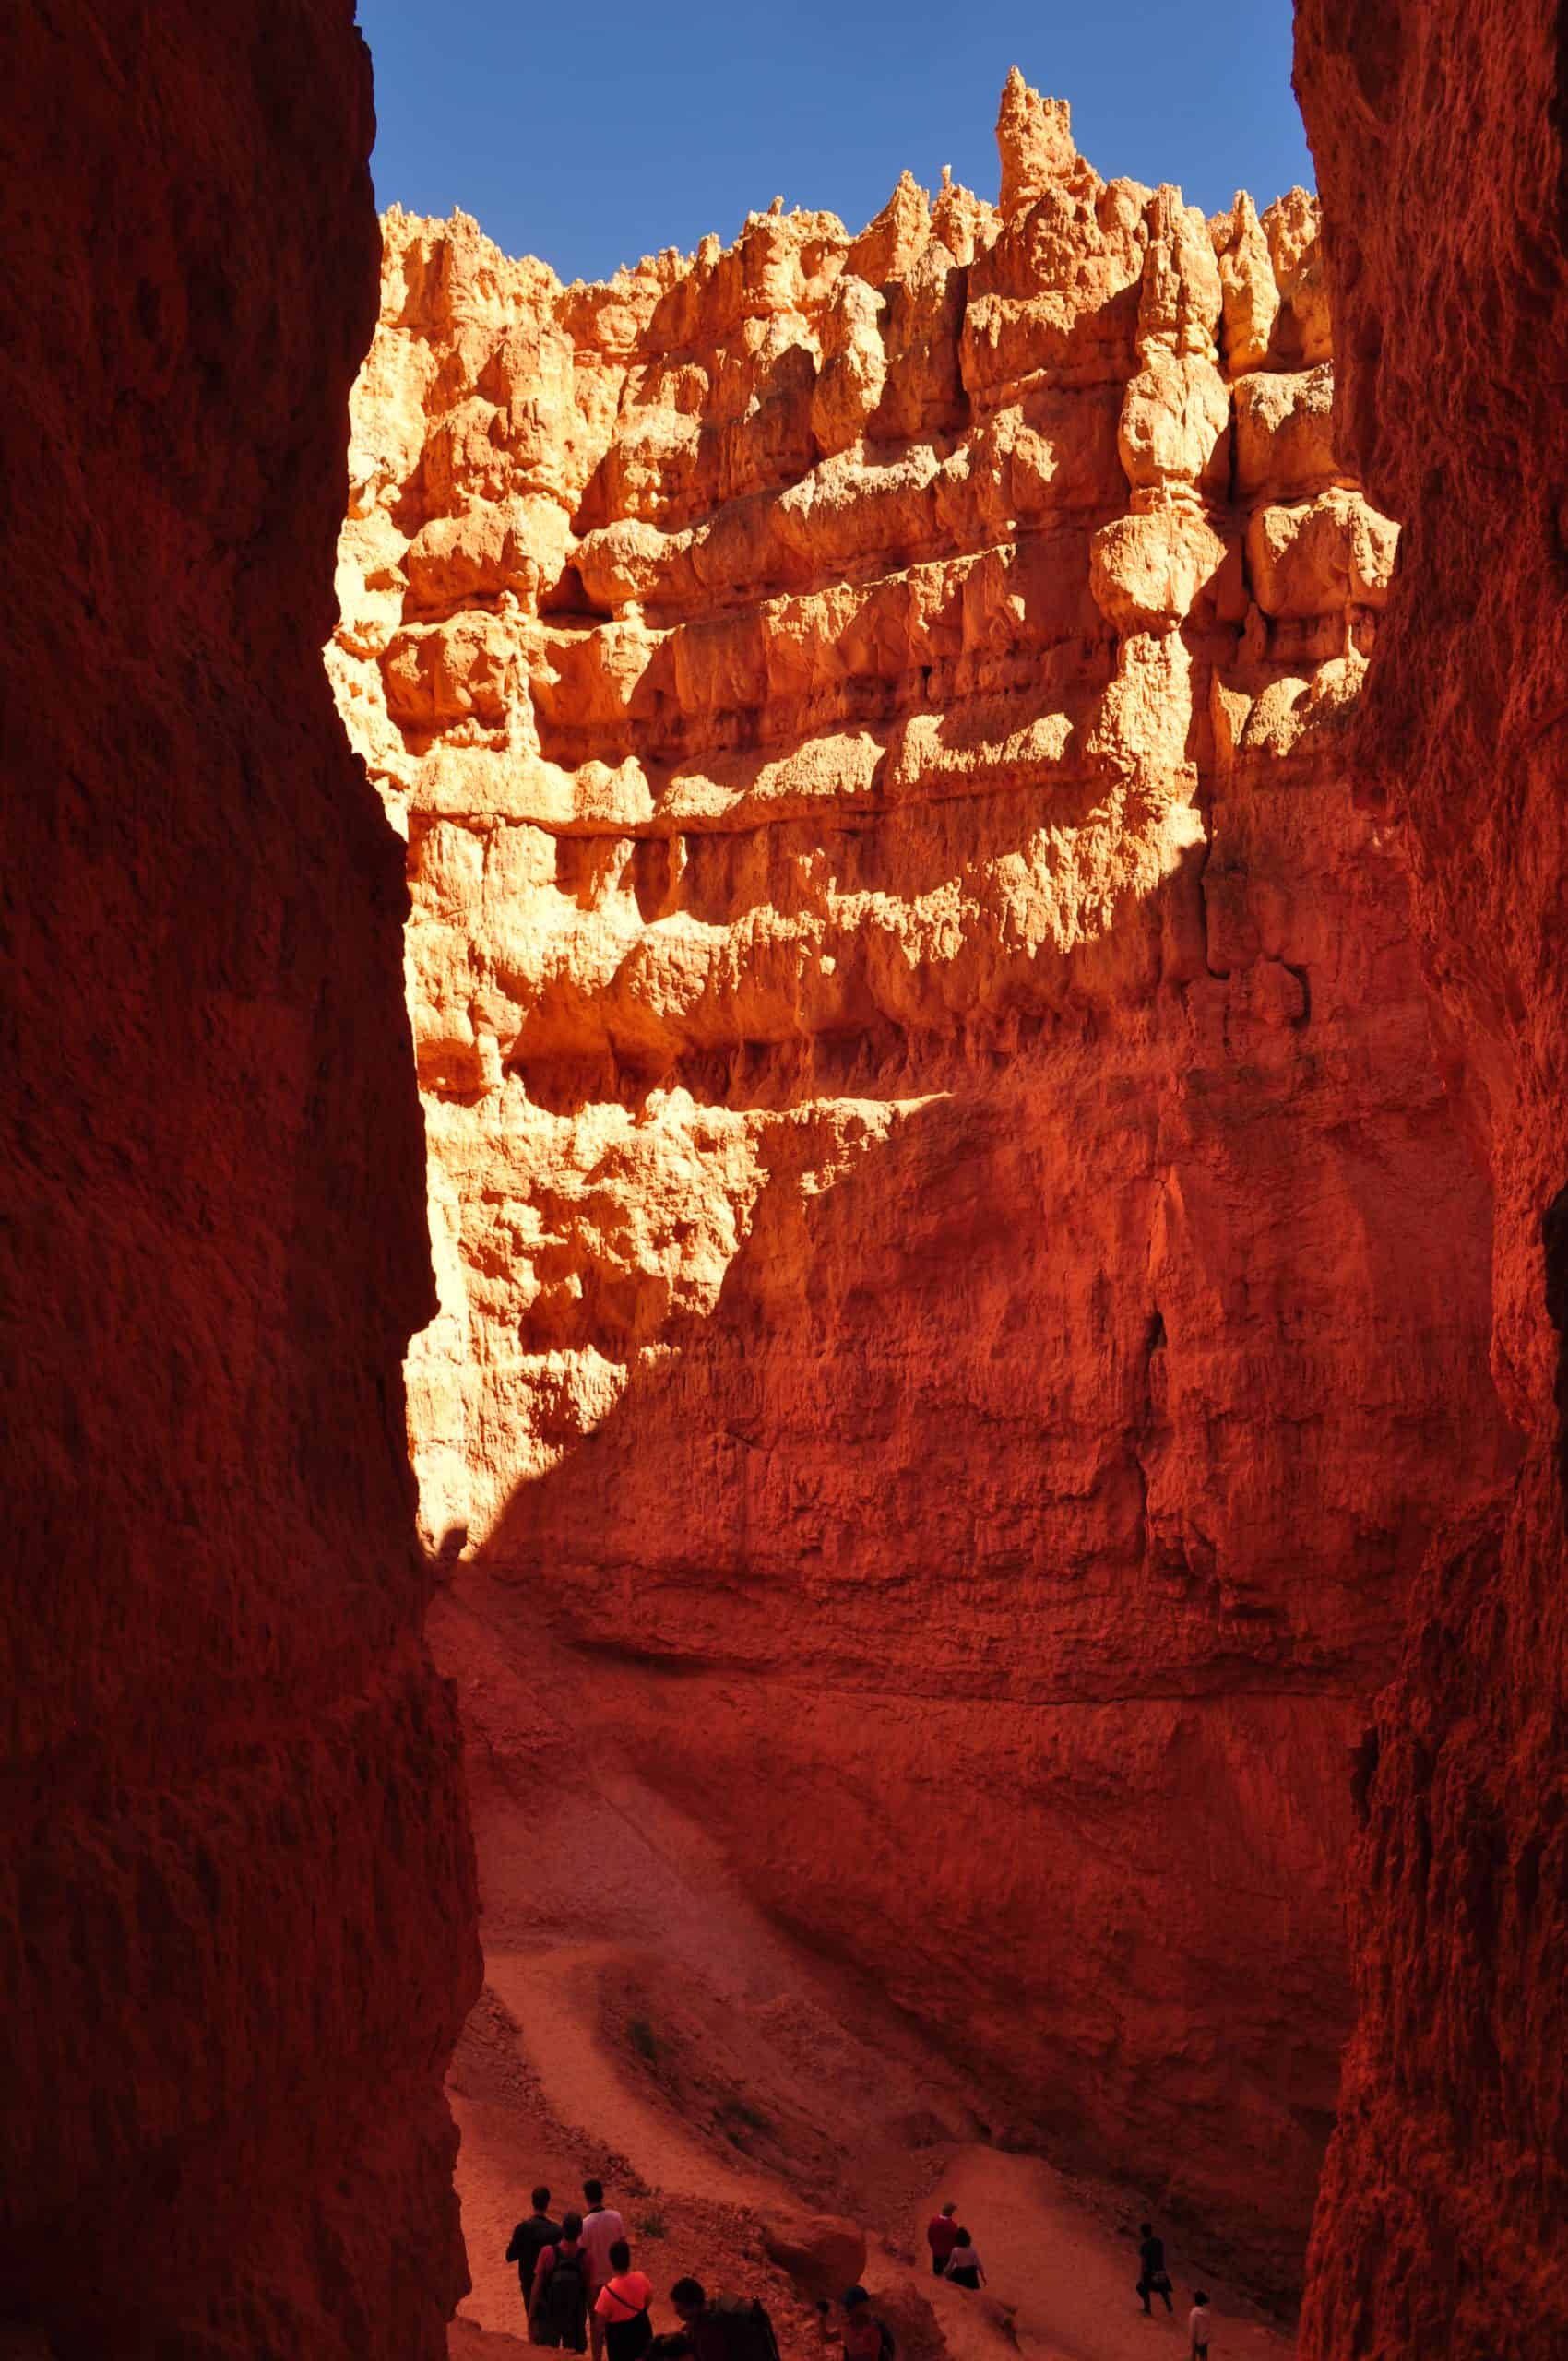
Hike the Navajo Loop, which is arguably Bryce Canyon’s most popular hike. This stunning hike takes you into the heart of what makes this park so unique: the hoodoos. Plan for about 2 hours. The Navajo Loop is home to the famous switchbacks that take you down to “Wall Street” and back up another set of switchbacks from “Twin Bridges.”
Wall Street is closed in the winter, but the Twin Bridges switchbacks are a great alternative!
Pro Tip: Extend the above hike by adding in the Peekaboo Loop. This is called the Figure Eight Trail and gives a more immersive experience. You’ll see all the highlights plus some hidden gems! Plan for about 4–6 hours.
Evening
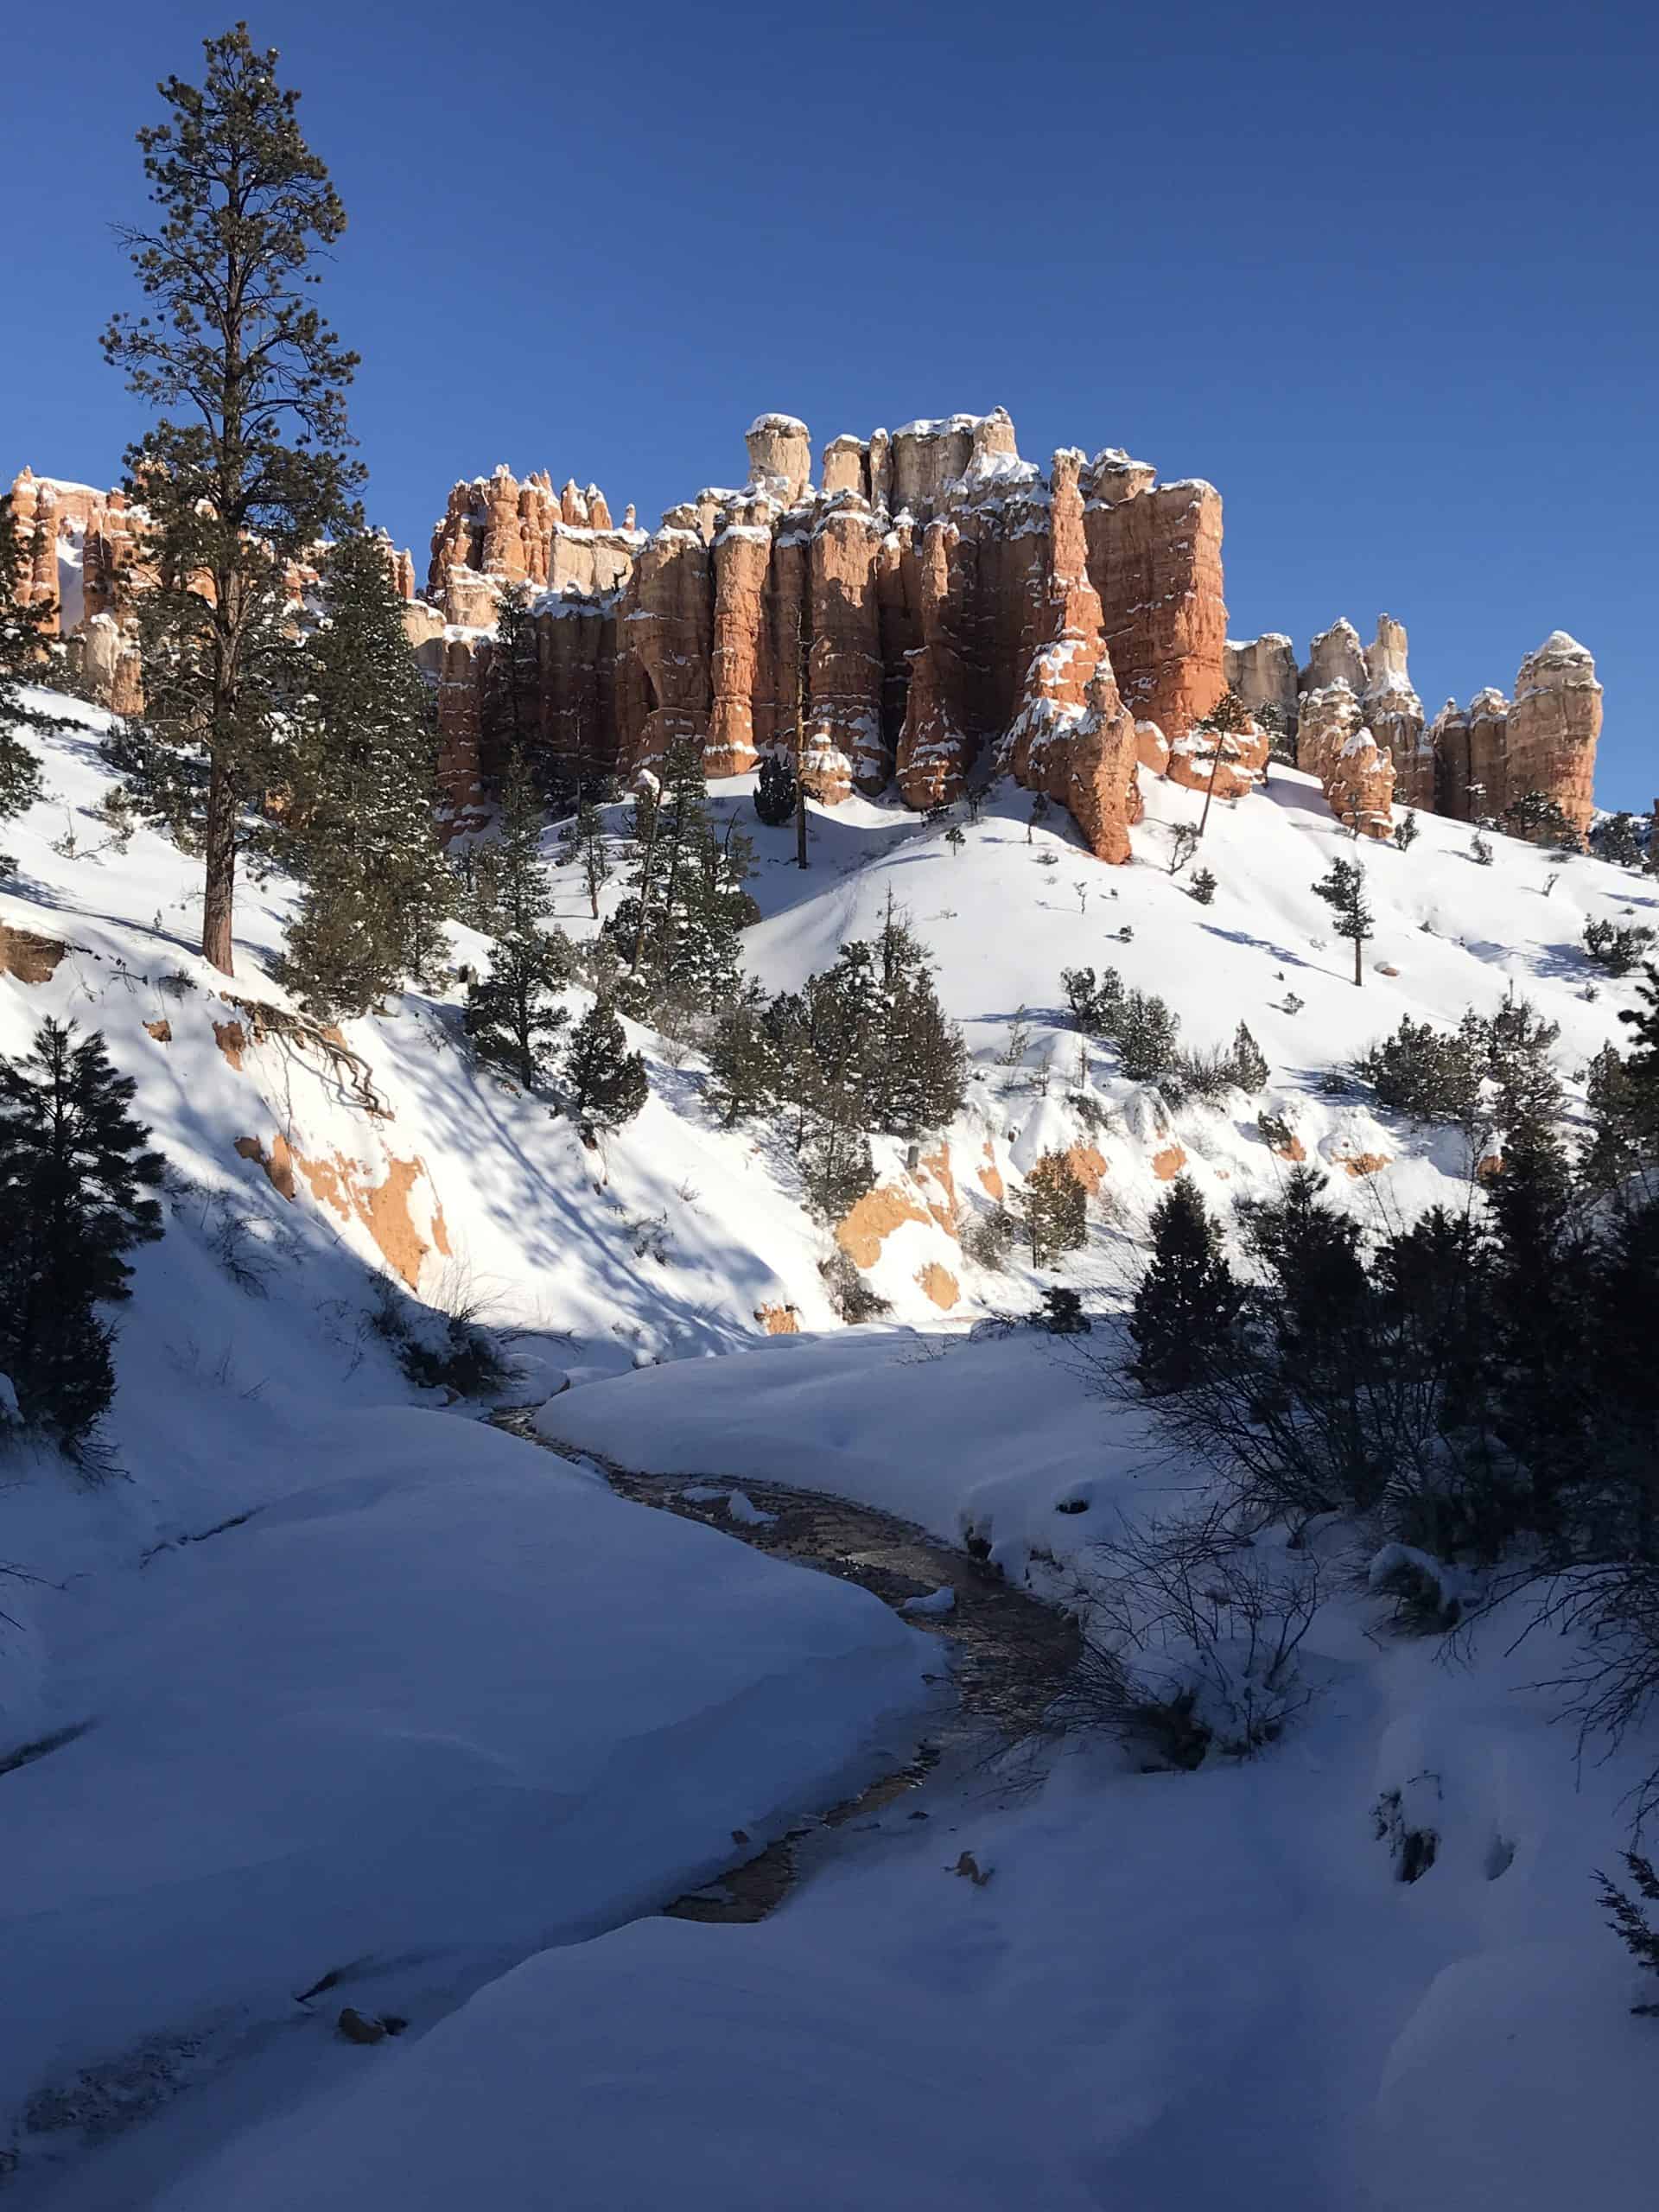
For those with a little energy left, consider hiking the Mossy Cave Trail near Tropic, which is a quick 1-mile (1.45 km) hike that leads to a small cave and a waterfall.
I’ve only seen it in winter when it’s frozen, and it was quite magical! I can only imagine how beautiful it is in the summer.
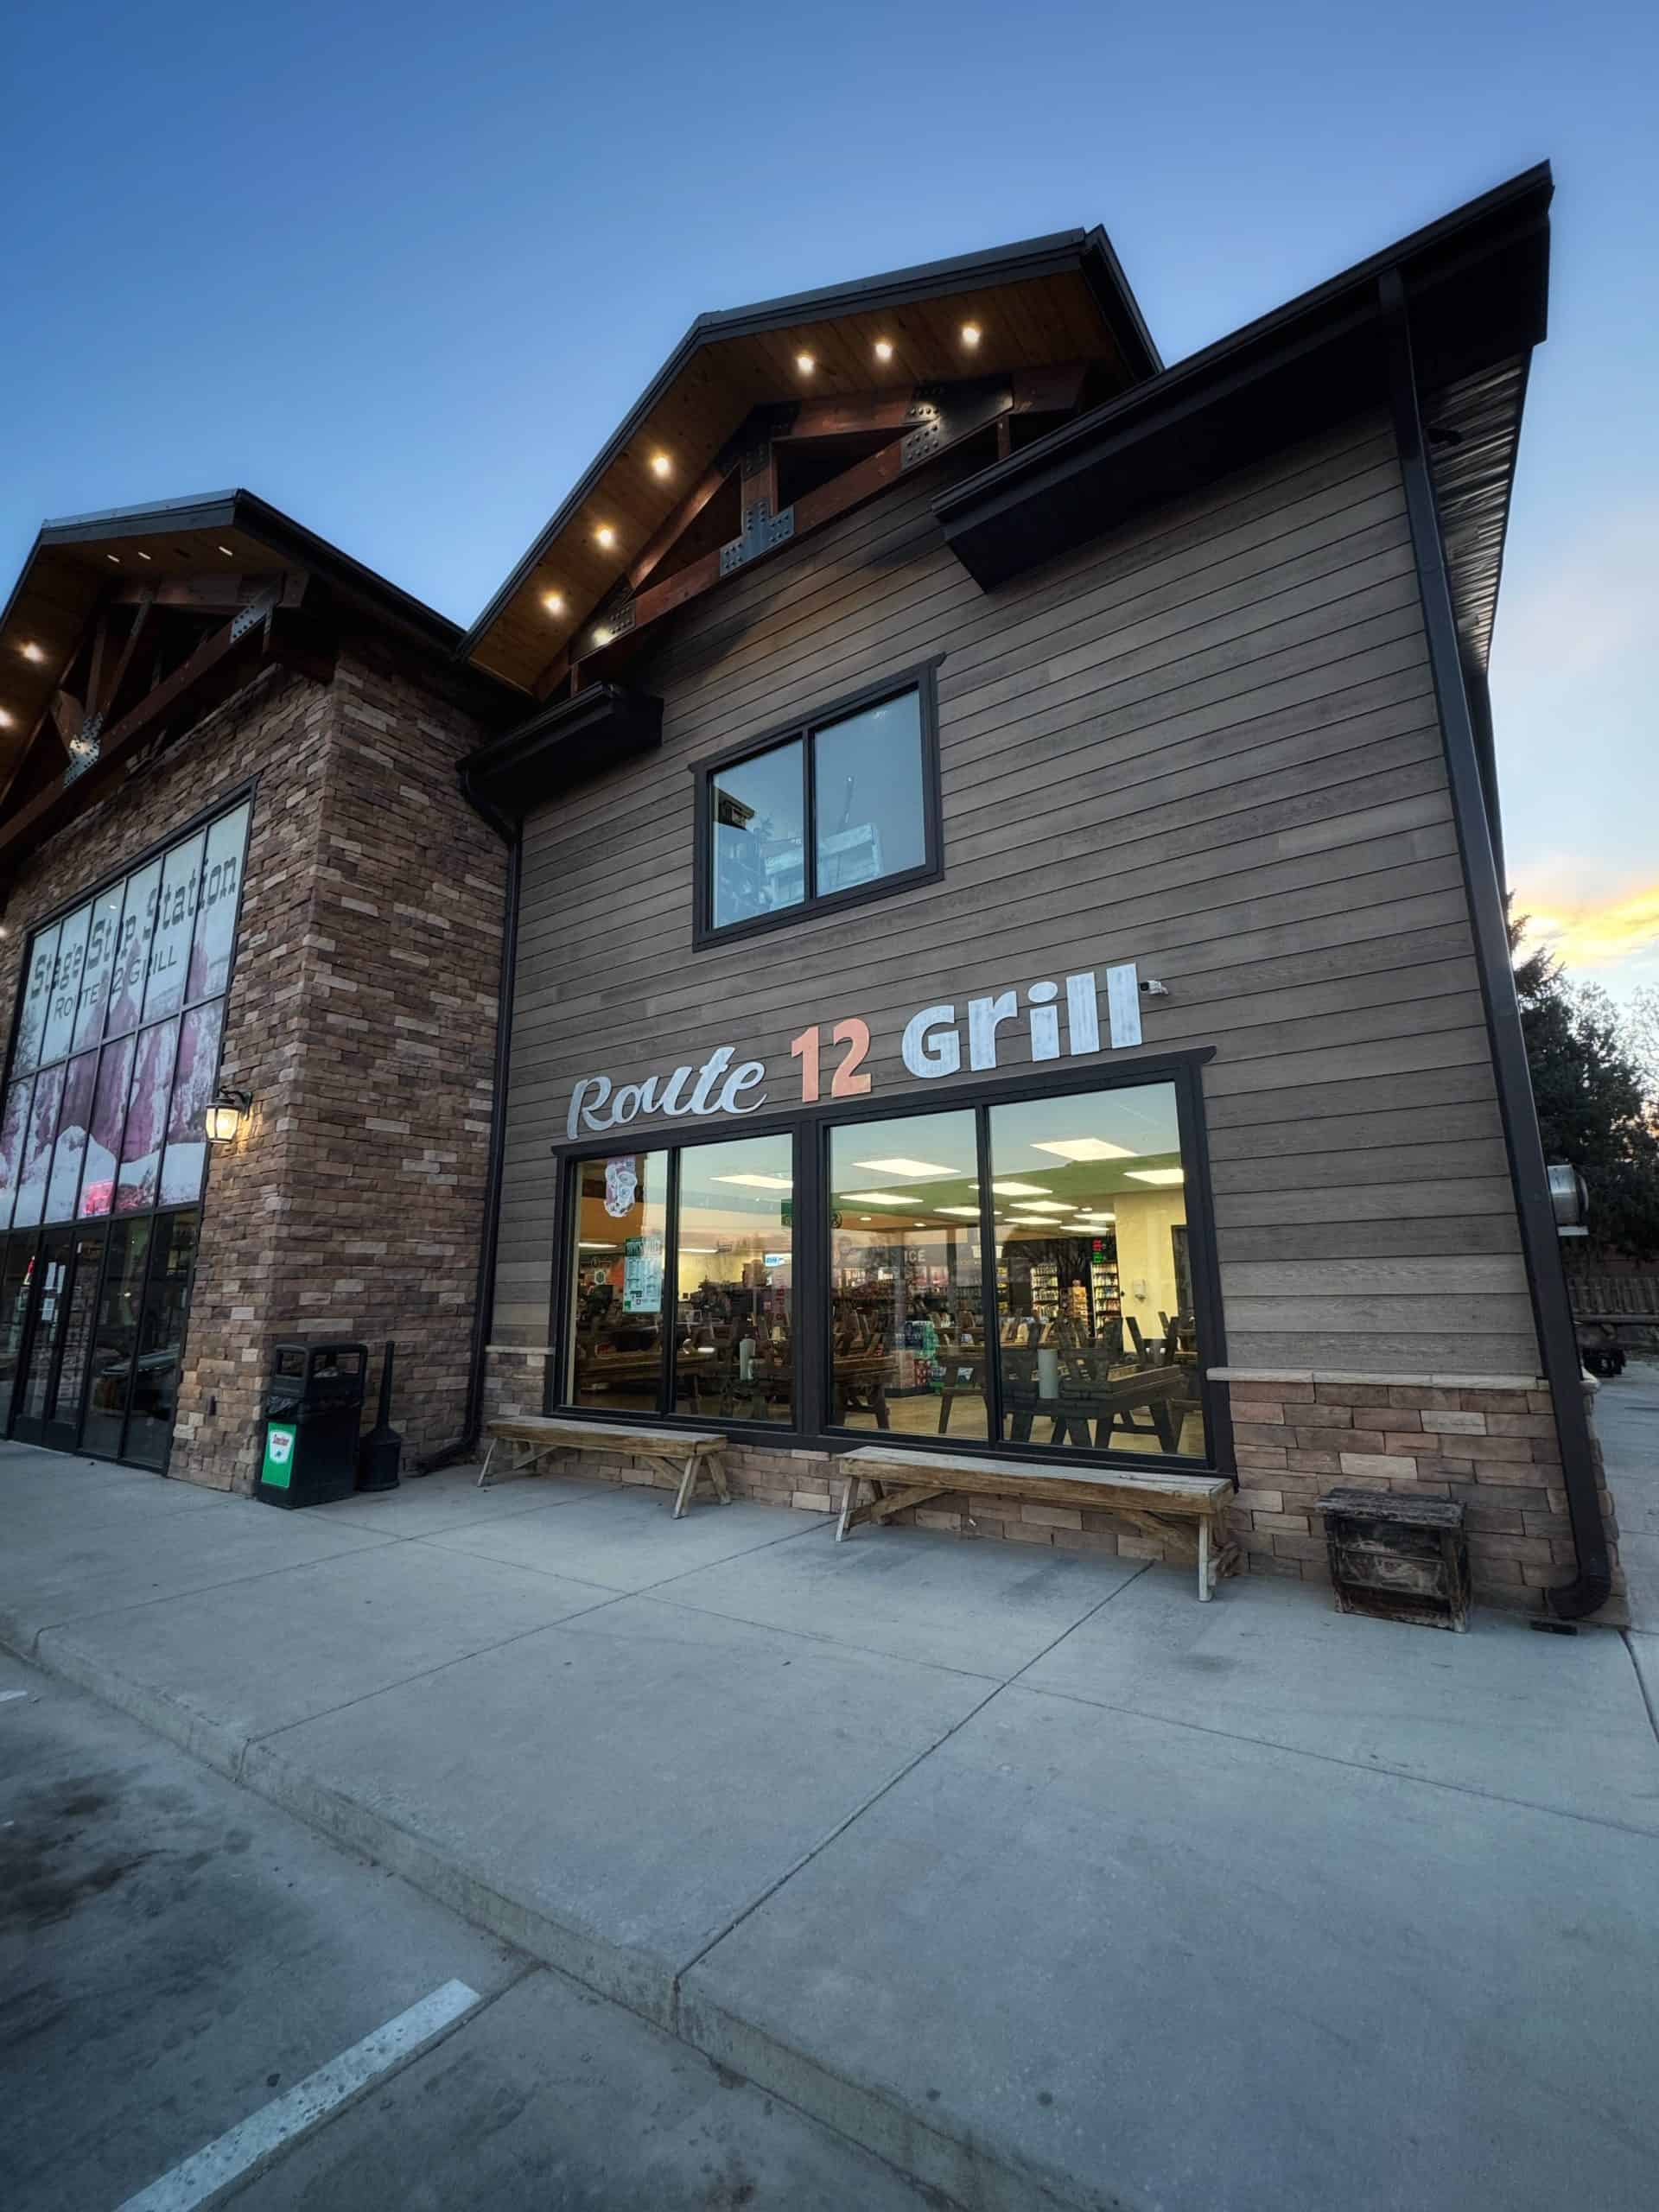
For dinner, head to Route 12 Grill in Tropic. It’s tucked inside a gas station, but don’t let that fool you; the food is surprisingly good and well worth the stop. Try the BBQ chicken fries for a hearty meal!
Day Eight: Bryce Canyon to Zion (2 hours)
Grab breakfast and go on a thrilling helicopter tour before hitting the road to Zion National Park. Hike Canyon Overlook en route to your stay in Zion, and take on a stunning sunset hike before finishing the day with a warm, cozy dinner!
Morning
If you’re staying at Ruby’s Inn, breakfast is included, and it’s one of the better hotel breakfasts I’ve had the pleasure of enjoying!
One of the best ways to experience Southern Utah’s unique landscape is from the air. A helicopter tour with Bryce Canyon Helicopters offers an unforgettable, bird’s-eye perspective of the places you explored on foot the day before.
The experience lasts about an hour total, with roughly 30 minutes in the air, so bring your camera and soak in the sweeping views as knowledgeable, friendly guides bring the landscape to life.
Afternoon
The drive from Bryce Canyon to Springdale takes about two hours, and you’ll enter Zion National Park through the East Entrance. This drive is extremely scenic, so take your time enjoying the views!

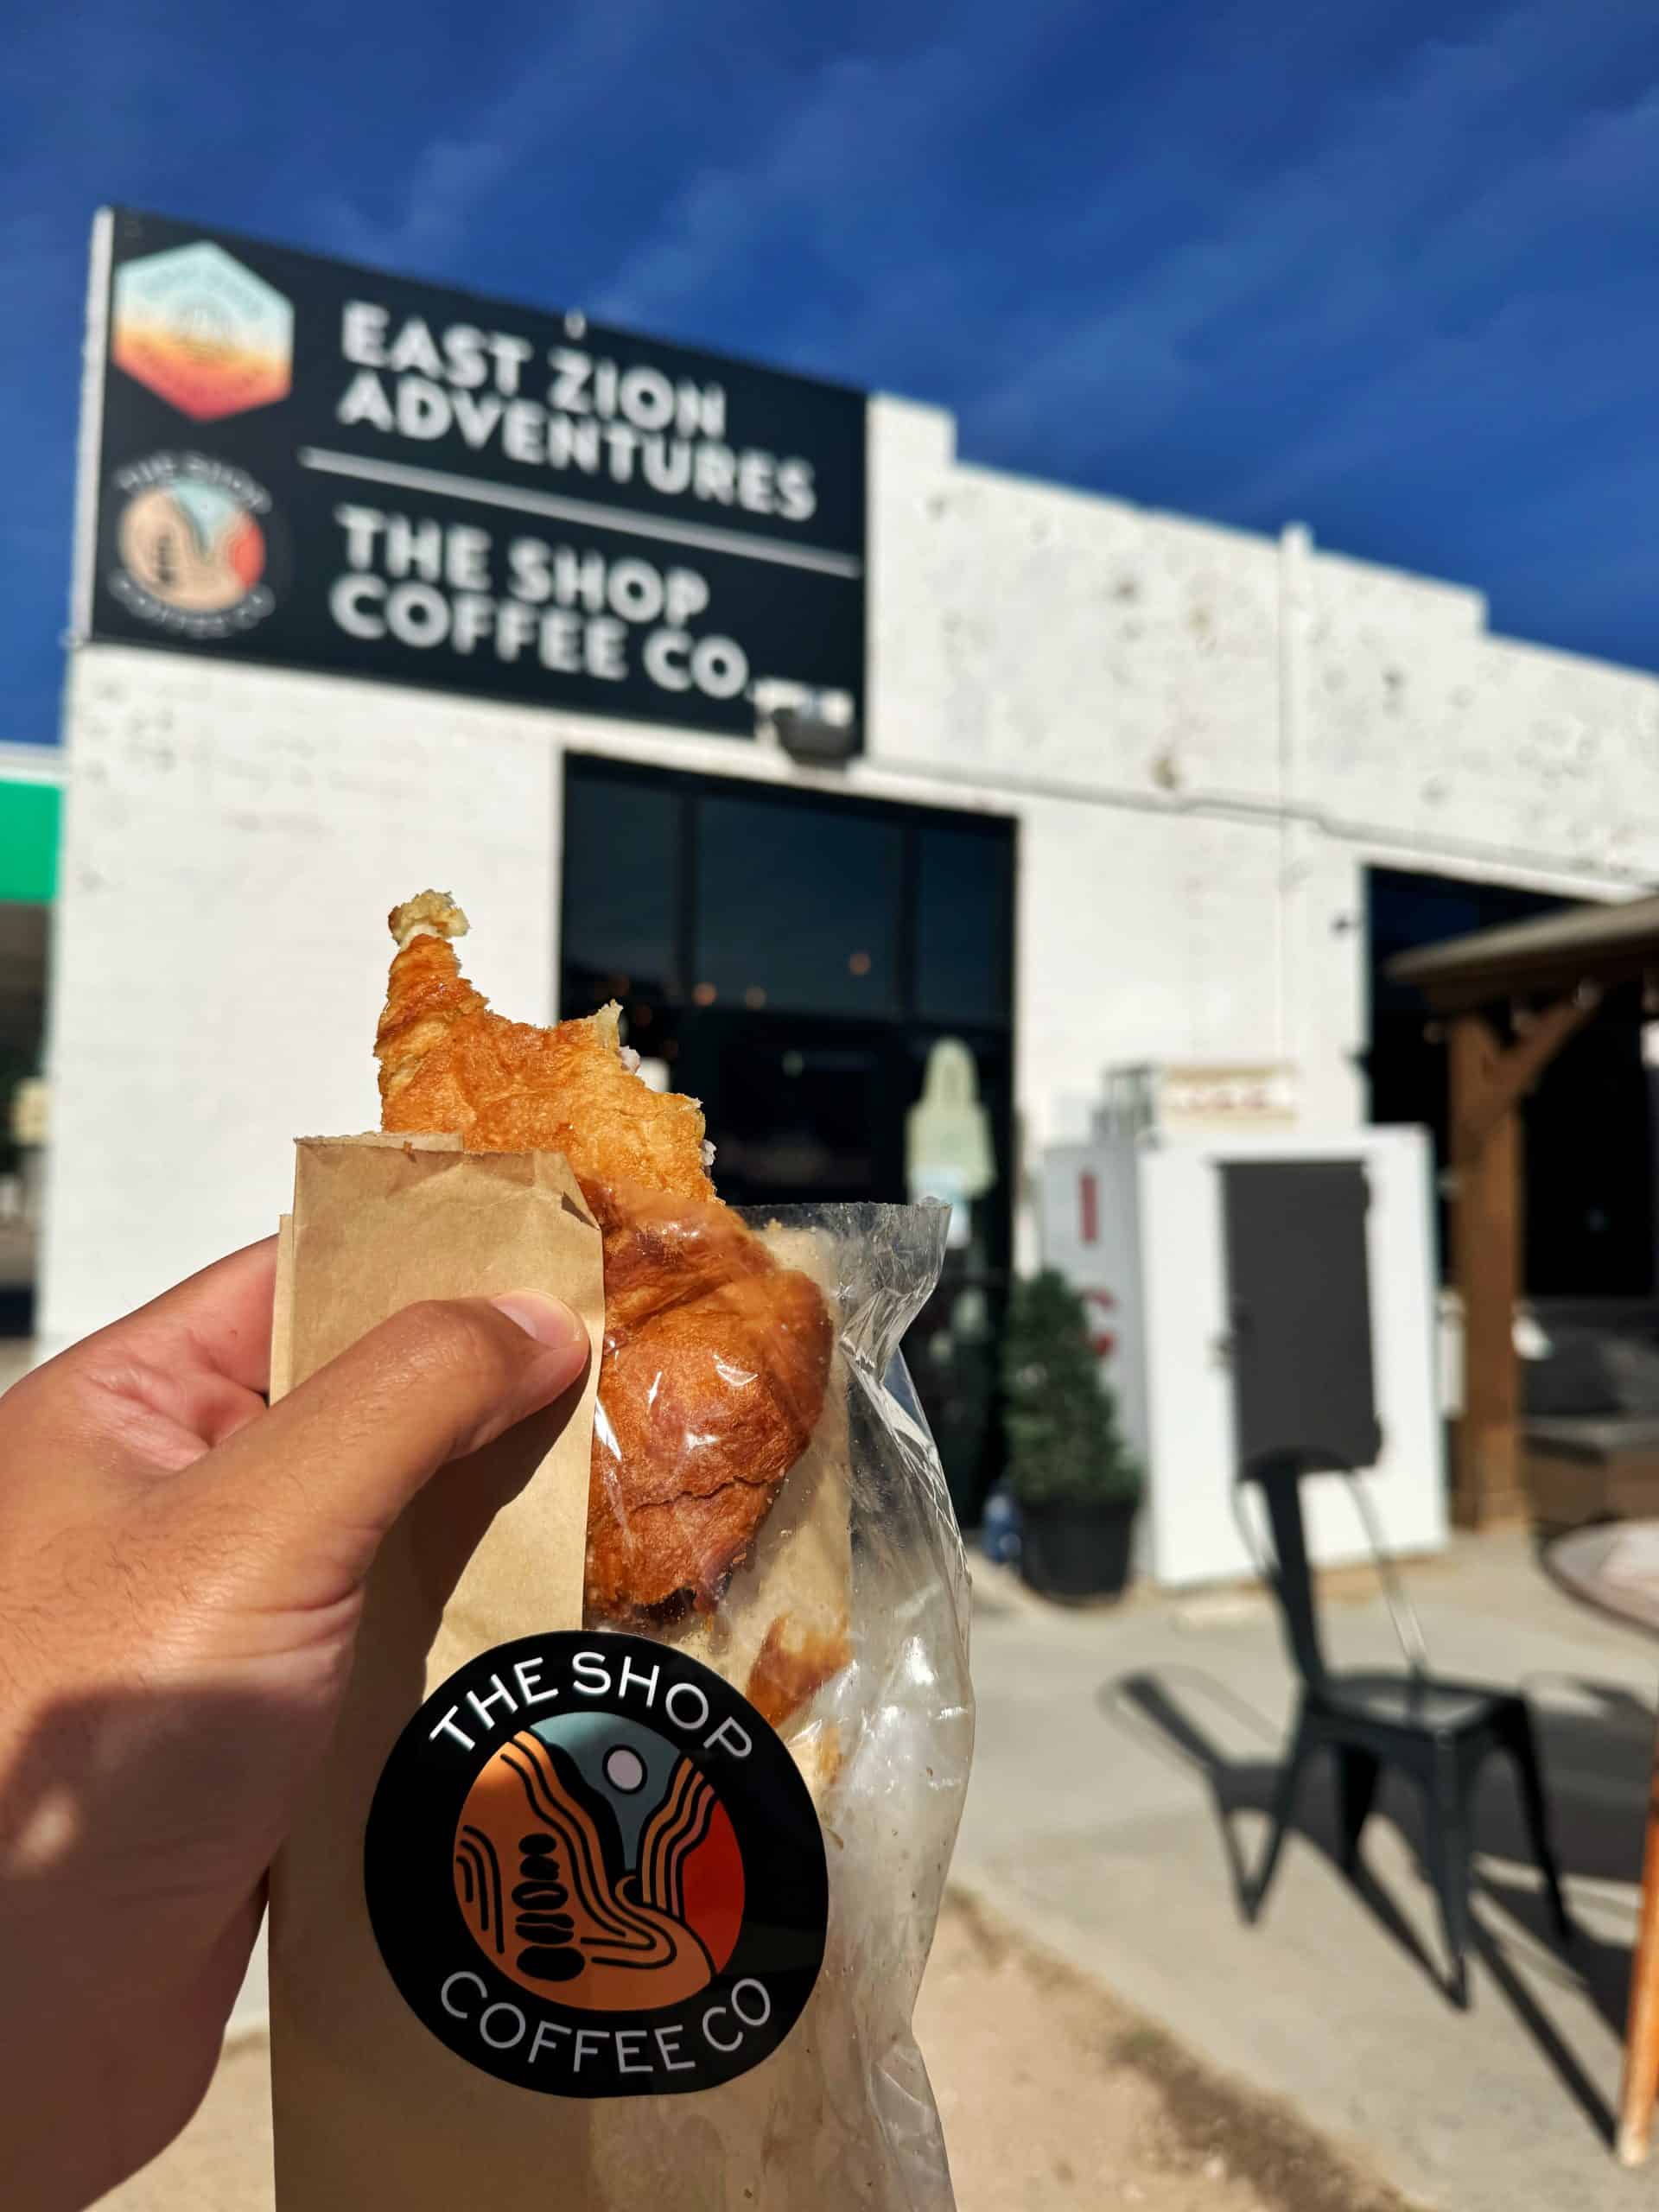
Your best bet for lunch is in the small town of Orderville, where, on a recent visit in March 2026, I stopped at The Shop Coffee Co and ordered a dirty Horchata Chai Latte with a Ham and Cheese Croissant, both of which were divine! This made up for “Archie’s Food to Die For” being closed, because I’ve had their Utah Philly before, and it is delicious!
From here, it’s 20 minutes to Zion’s east entrance, and the park begins to deliver views immediately! Just before you enter the famous Zion-Mount Carmel Tunnel, you’ll find the trailhead for the Canyon Overlook hike. This short trail takes an hour to complete and delivers some of the best bang-for-your-buck views in the park.
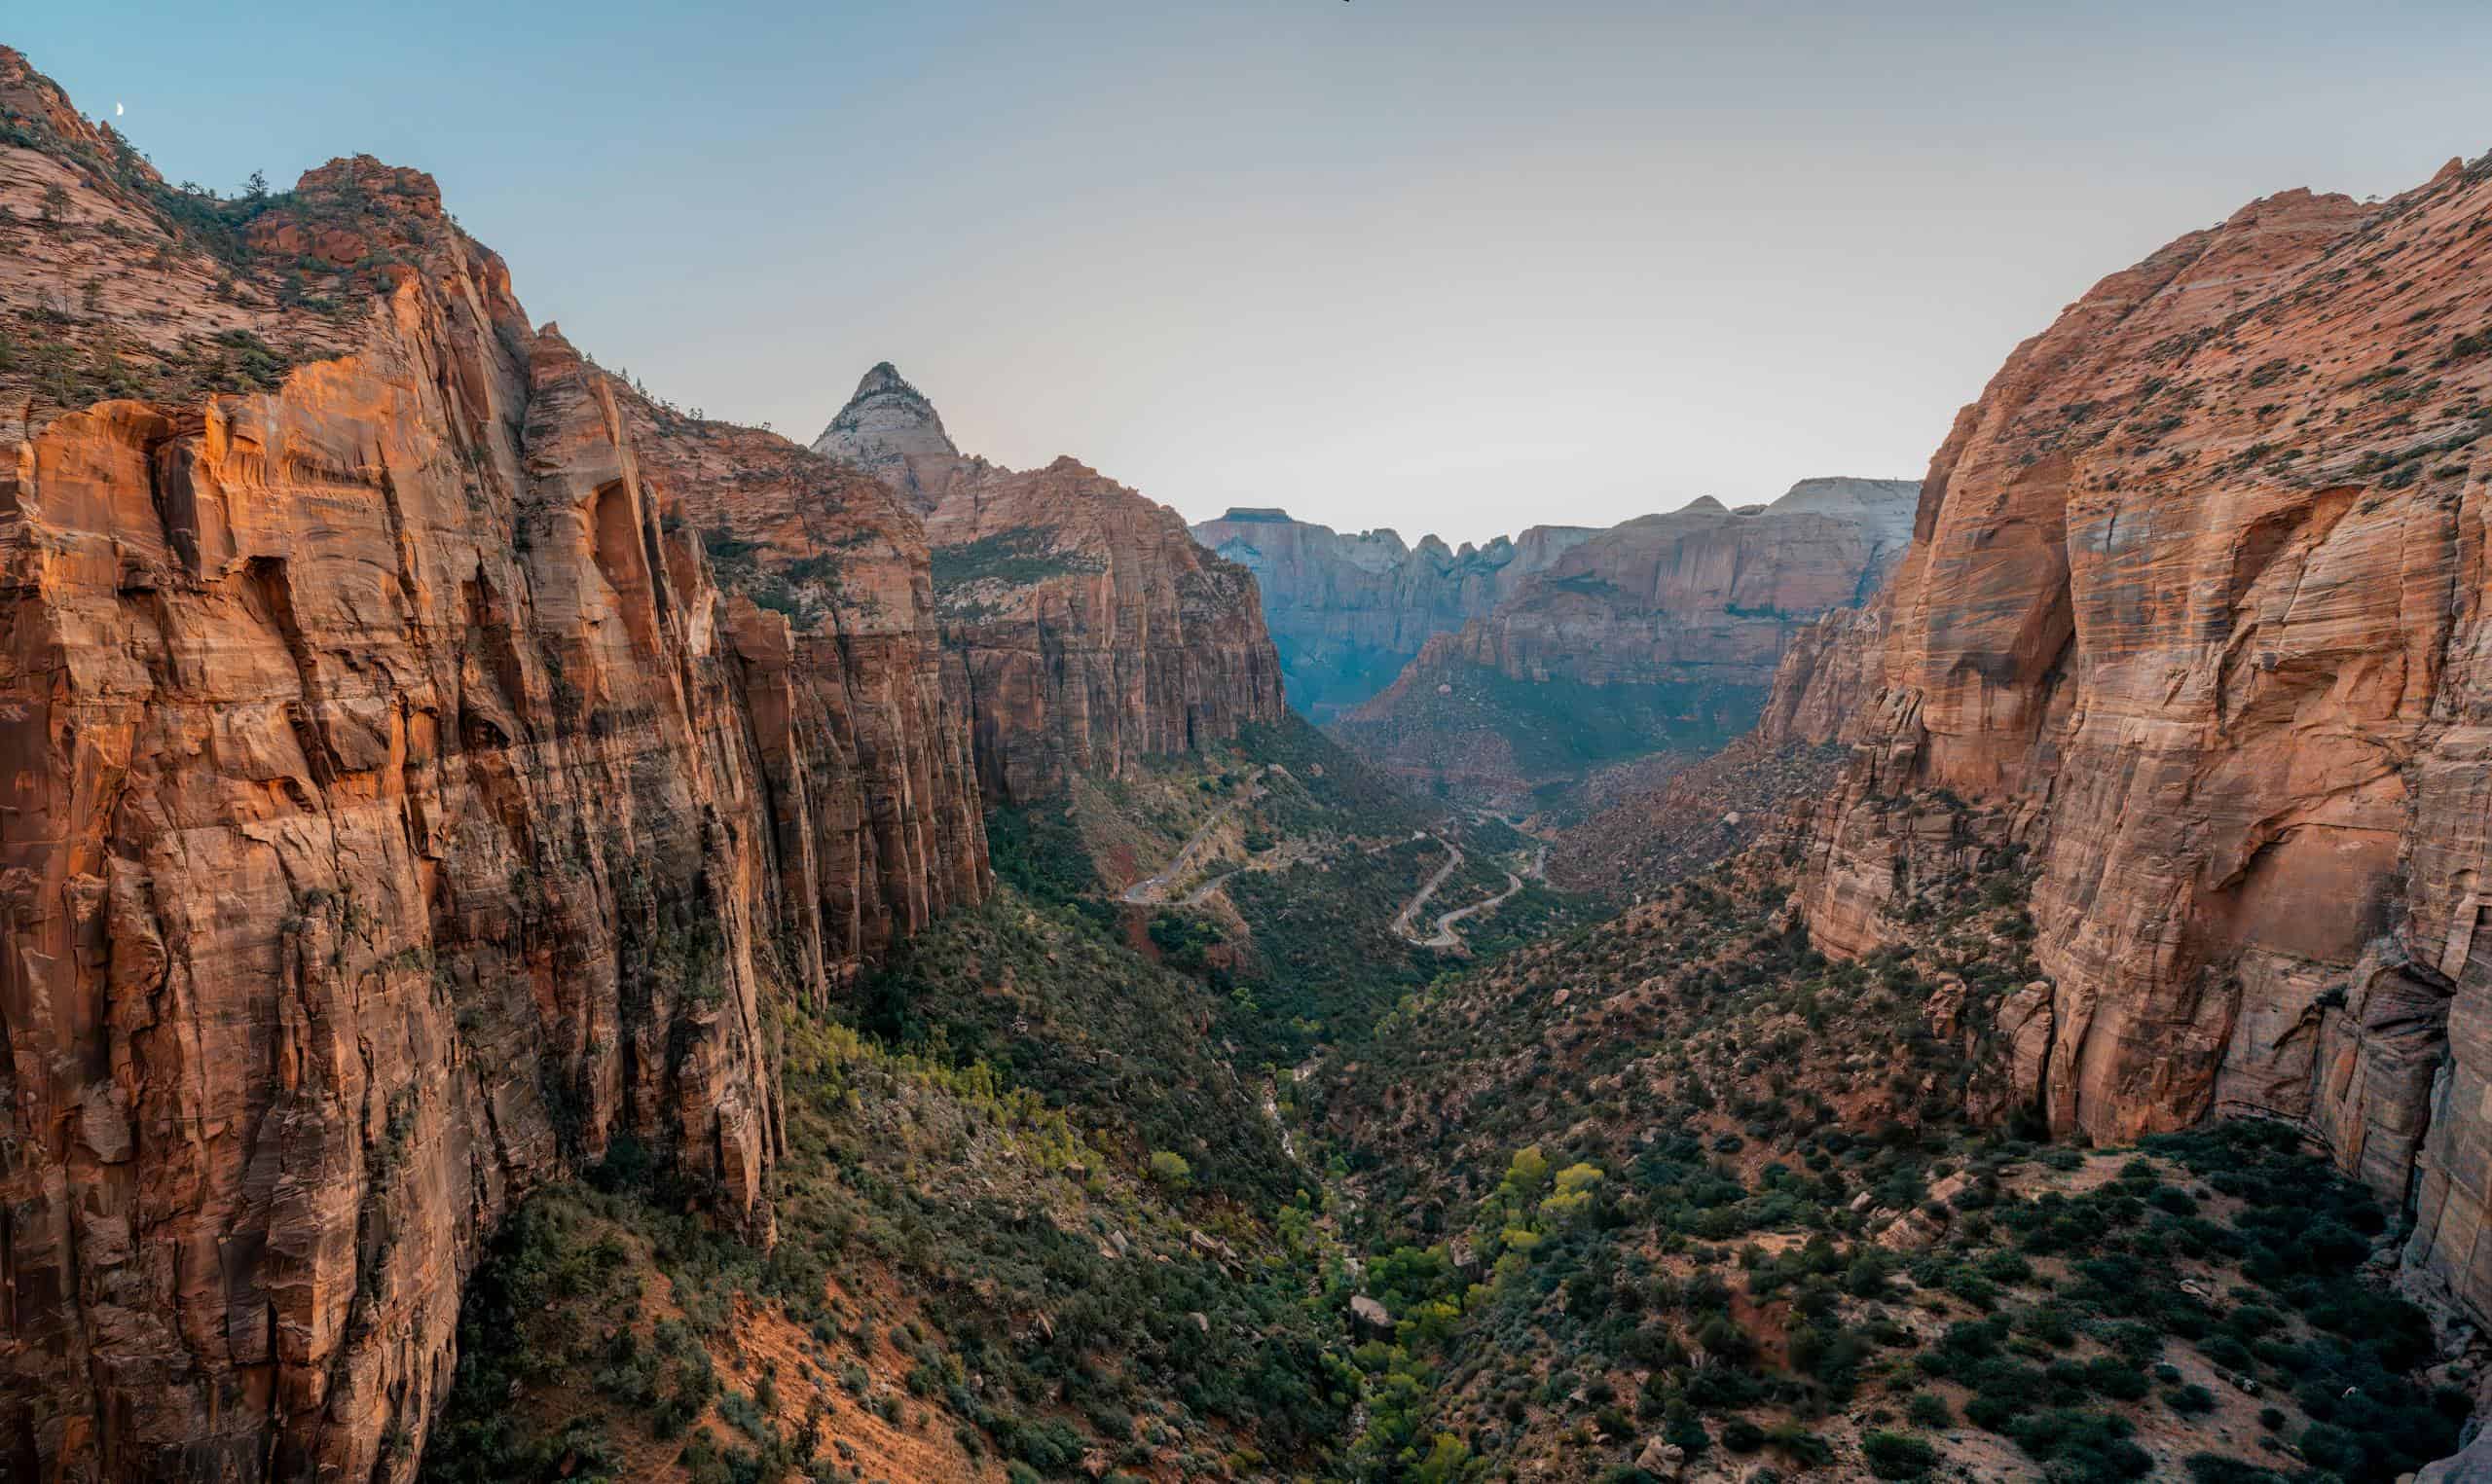
The only downside is that the parking is very limited at the actual trailhead. Coming in from the east can be tricky because you’ll see the overflow parking first. Don’t wait until you get to the marked trailhead; use the overflow parking or pull off along the road where permitted.
Important: Do not attempt a three-point turn inside the tunnel; if you enter it, you are committed; there’s no flipping around until you exit and find a pullout. If there’s one stretch of this road trip worth previewing on Google Street View, this is it
Pro Tip: Have your camera ready as you approach the light at the end of the tunnel. Entering Zion from the east delivers one of the most dramatic “wow” moments of the entire trip!
Evening
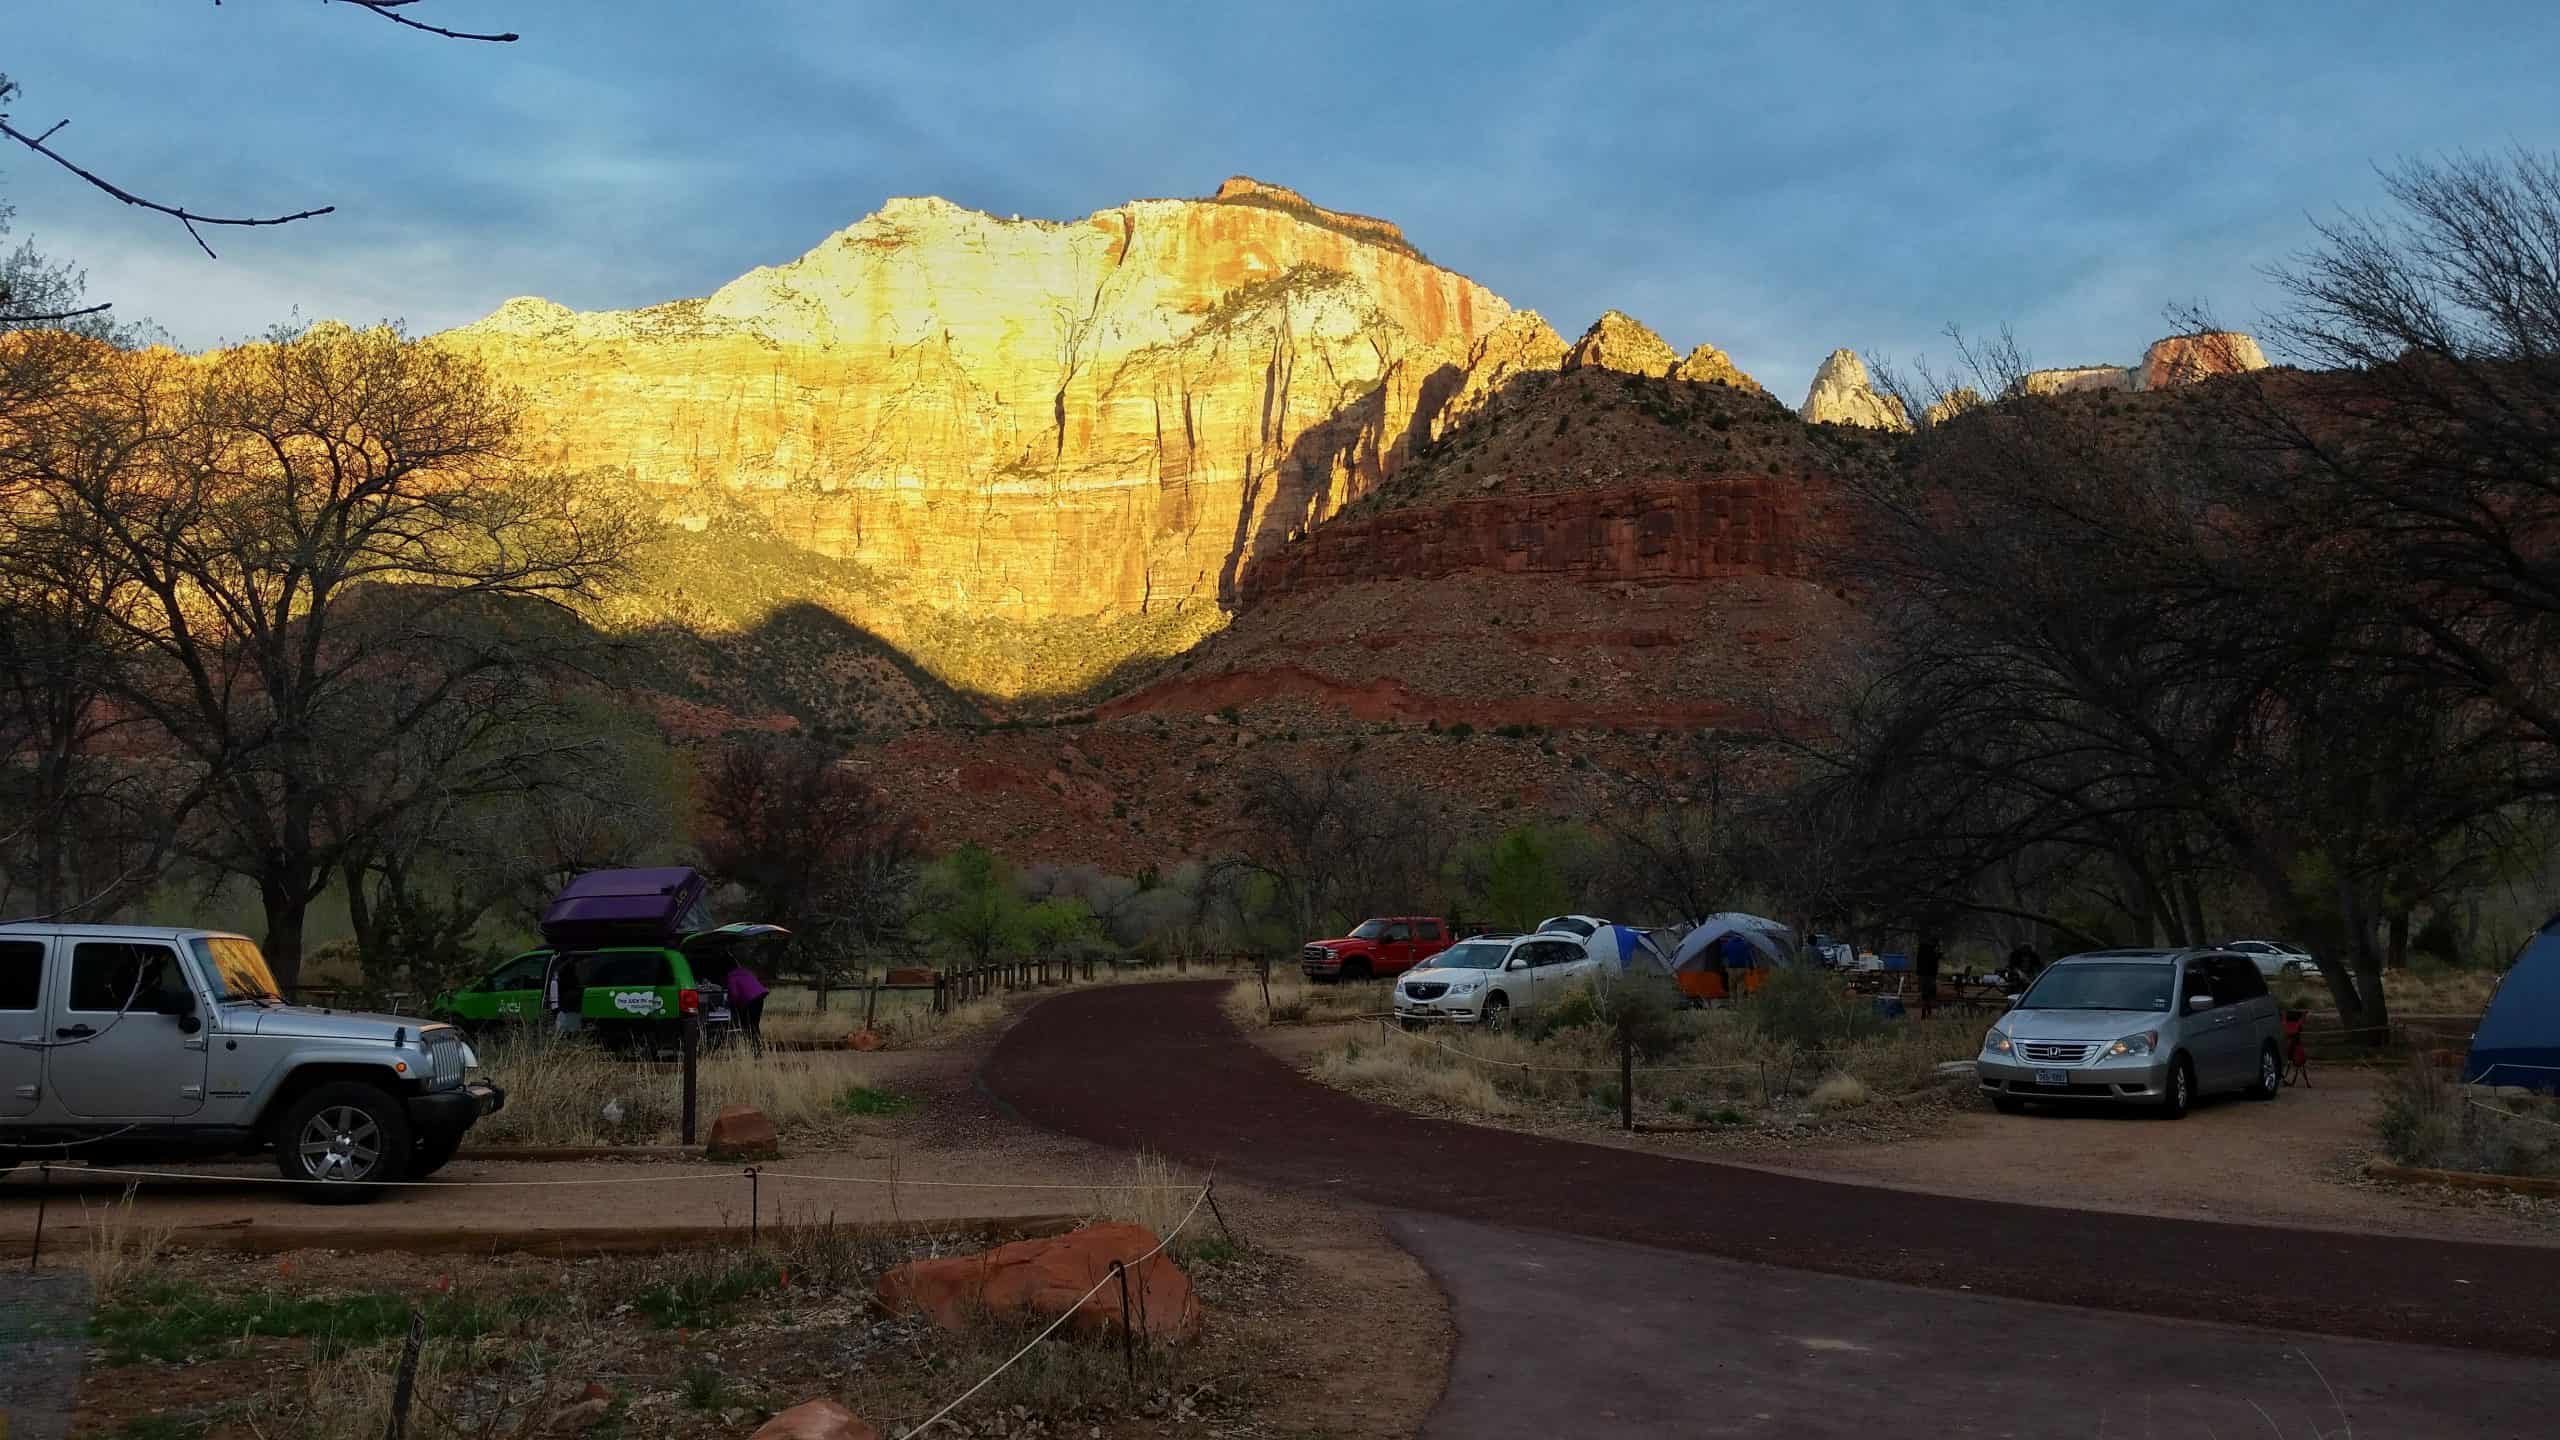
Check into your stay, and if you still have daylight left, consider squeezing in an evening hike. There are plenty of great options, including two hikes that start near Watchman Campground. Park at the Zion Canyon Visitor Center for direct access to the hikes.
My Recommendation: Go with the Watchman Trail if you love sunsets!
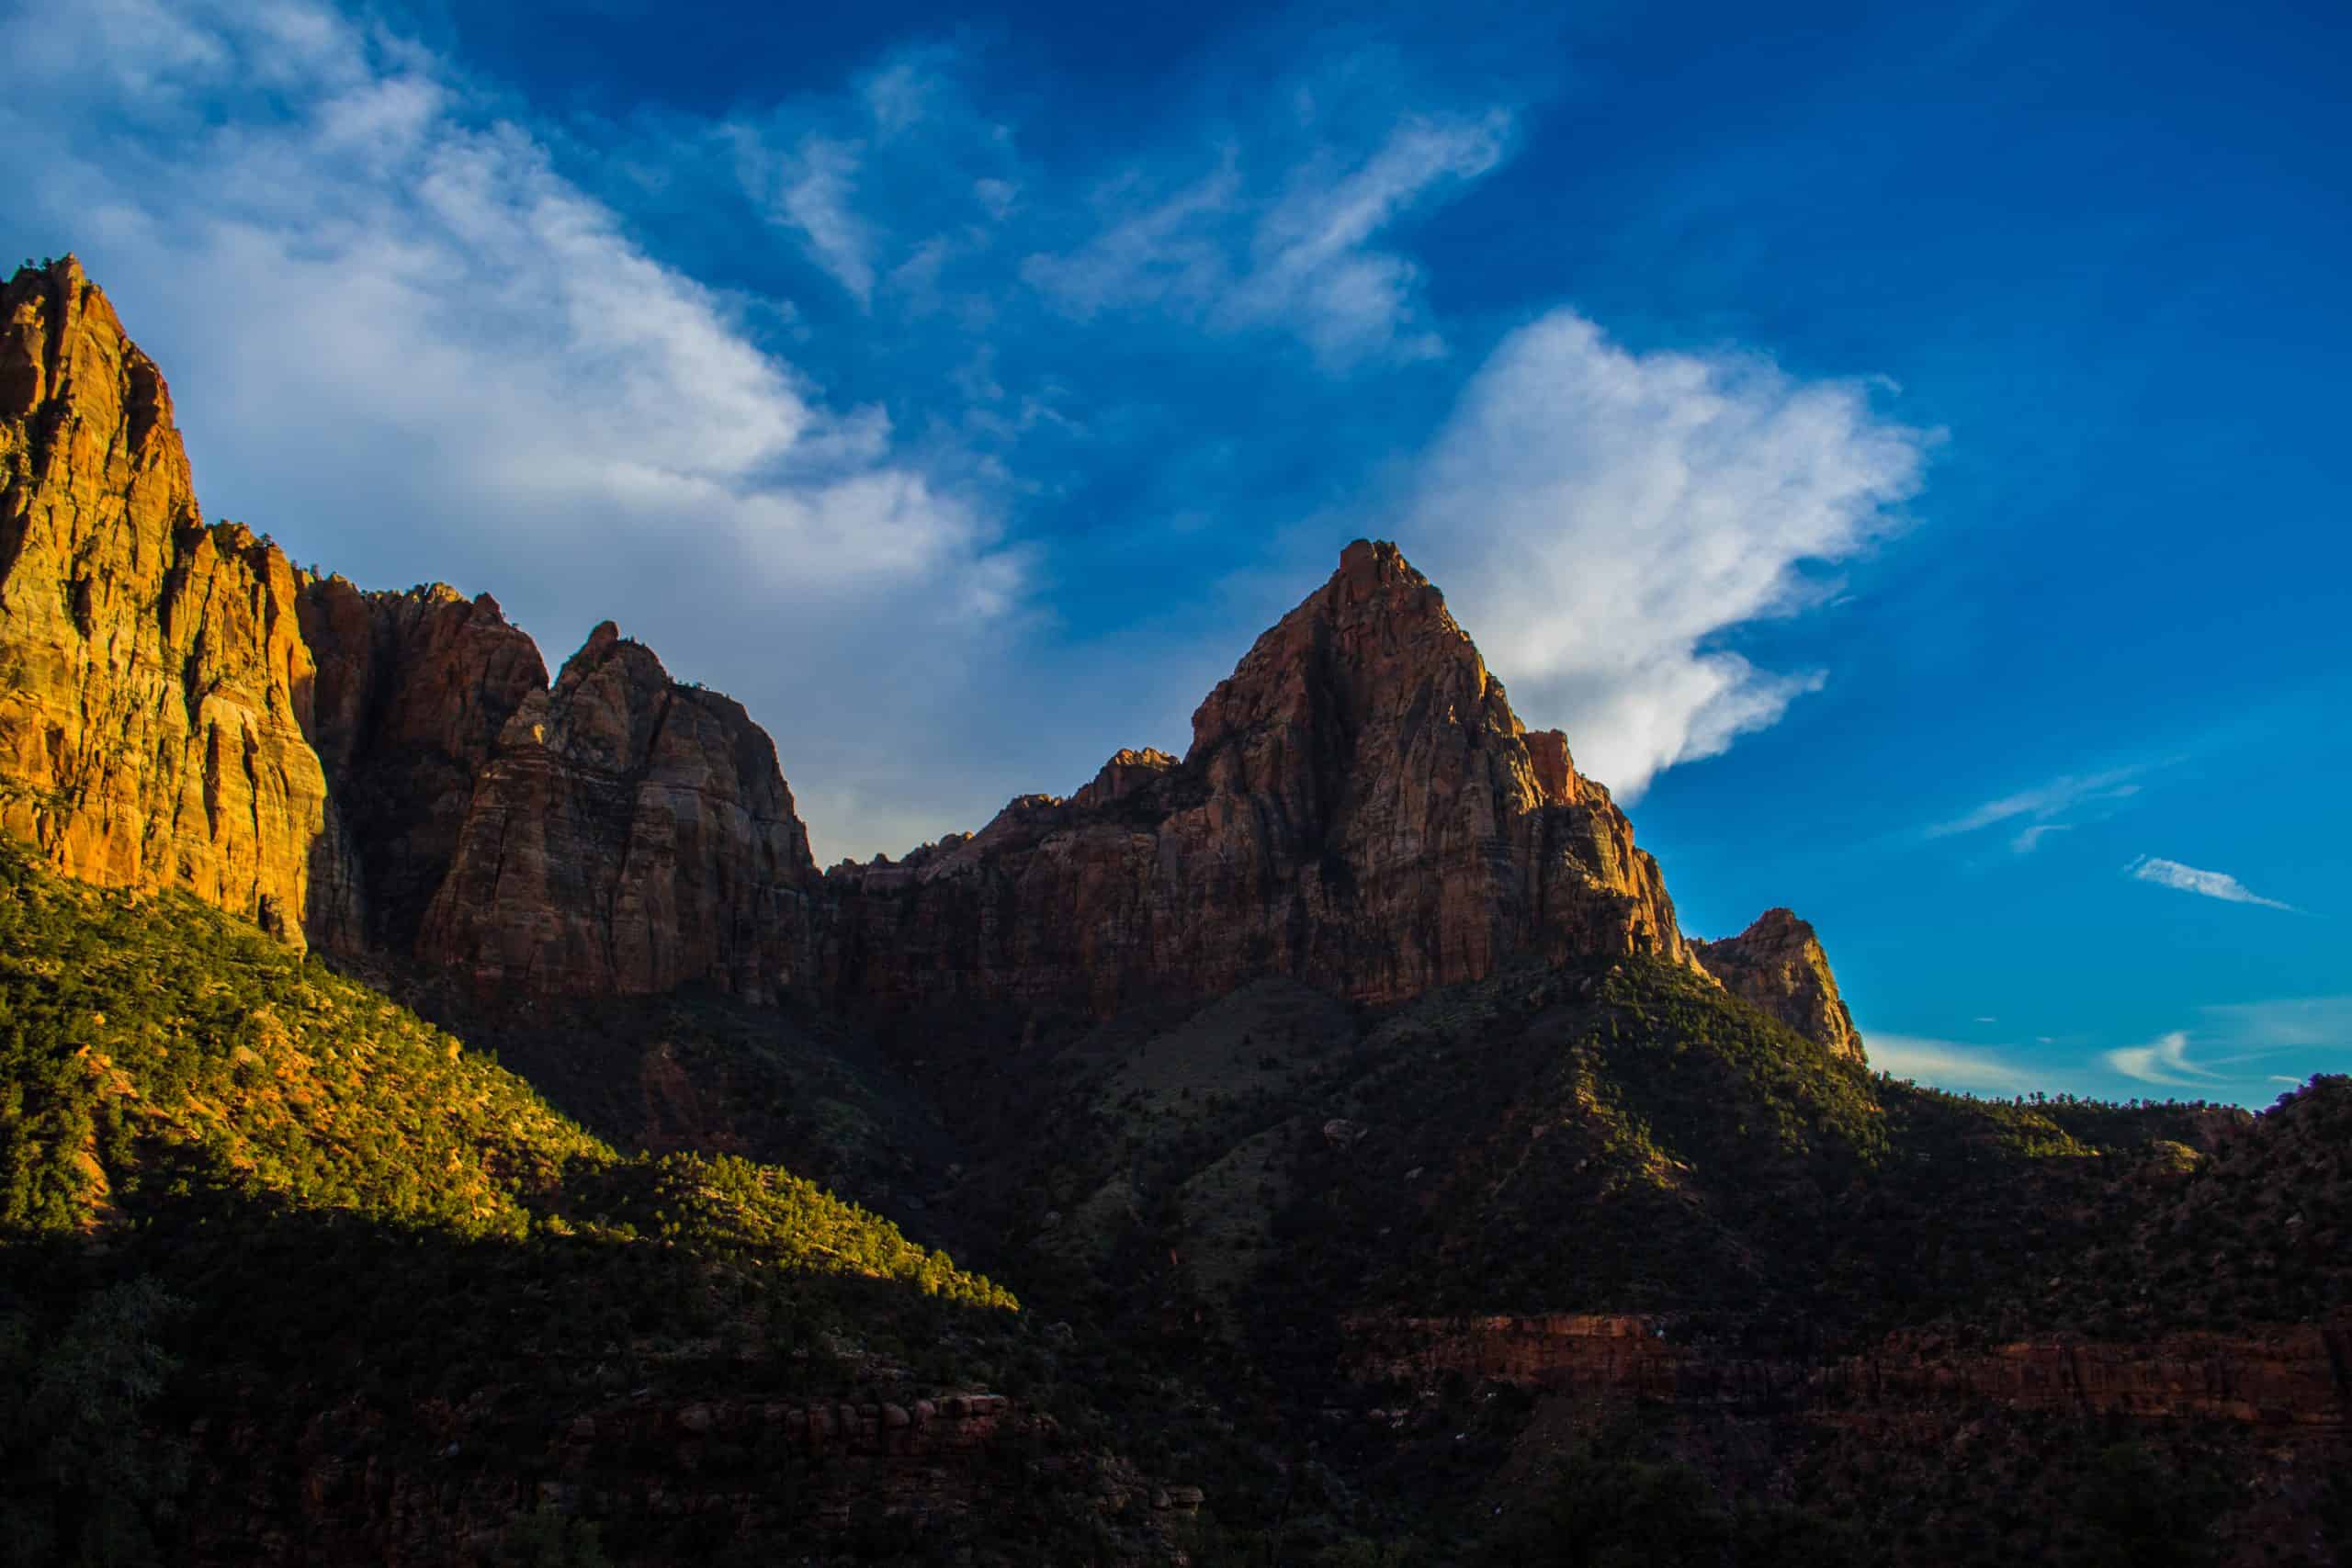
Don’t miss the scenic Watchman Trail, which leads to an up-close view of the commanding Watchman rock formation. This 3.3-mile (5.3 km) hike gains 646 feet (197 m) of elevation and can be completed in under 2 hours. I truly believe this hike flies under the radar, and most visitors don’t know about it!
The Pa’rus Trail is an underrated trail, perfect for walking or biking, and runs along the Virgin River for a scenic introduction to the park’s rugged landscape. It is a paved 3.5-mile (5.6 km) round-trip hike with about 150 feet (45 m) of elevation gain, but you can make it as short as you’d like!
Pro Tip: Hike the Pa’rus Trail one way and catch the Zion Shuttle back.
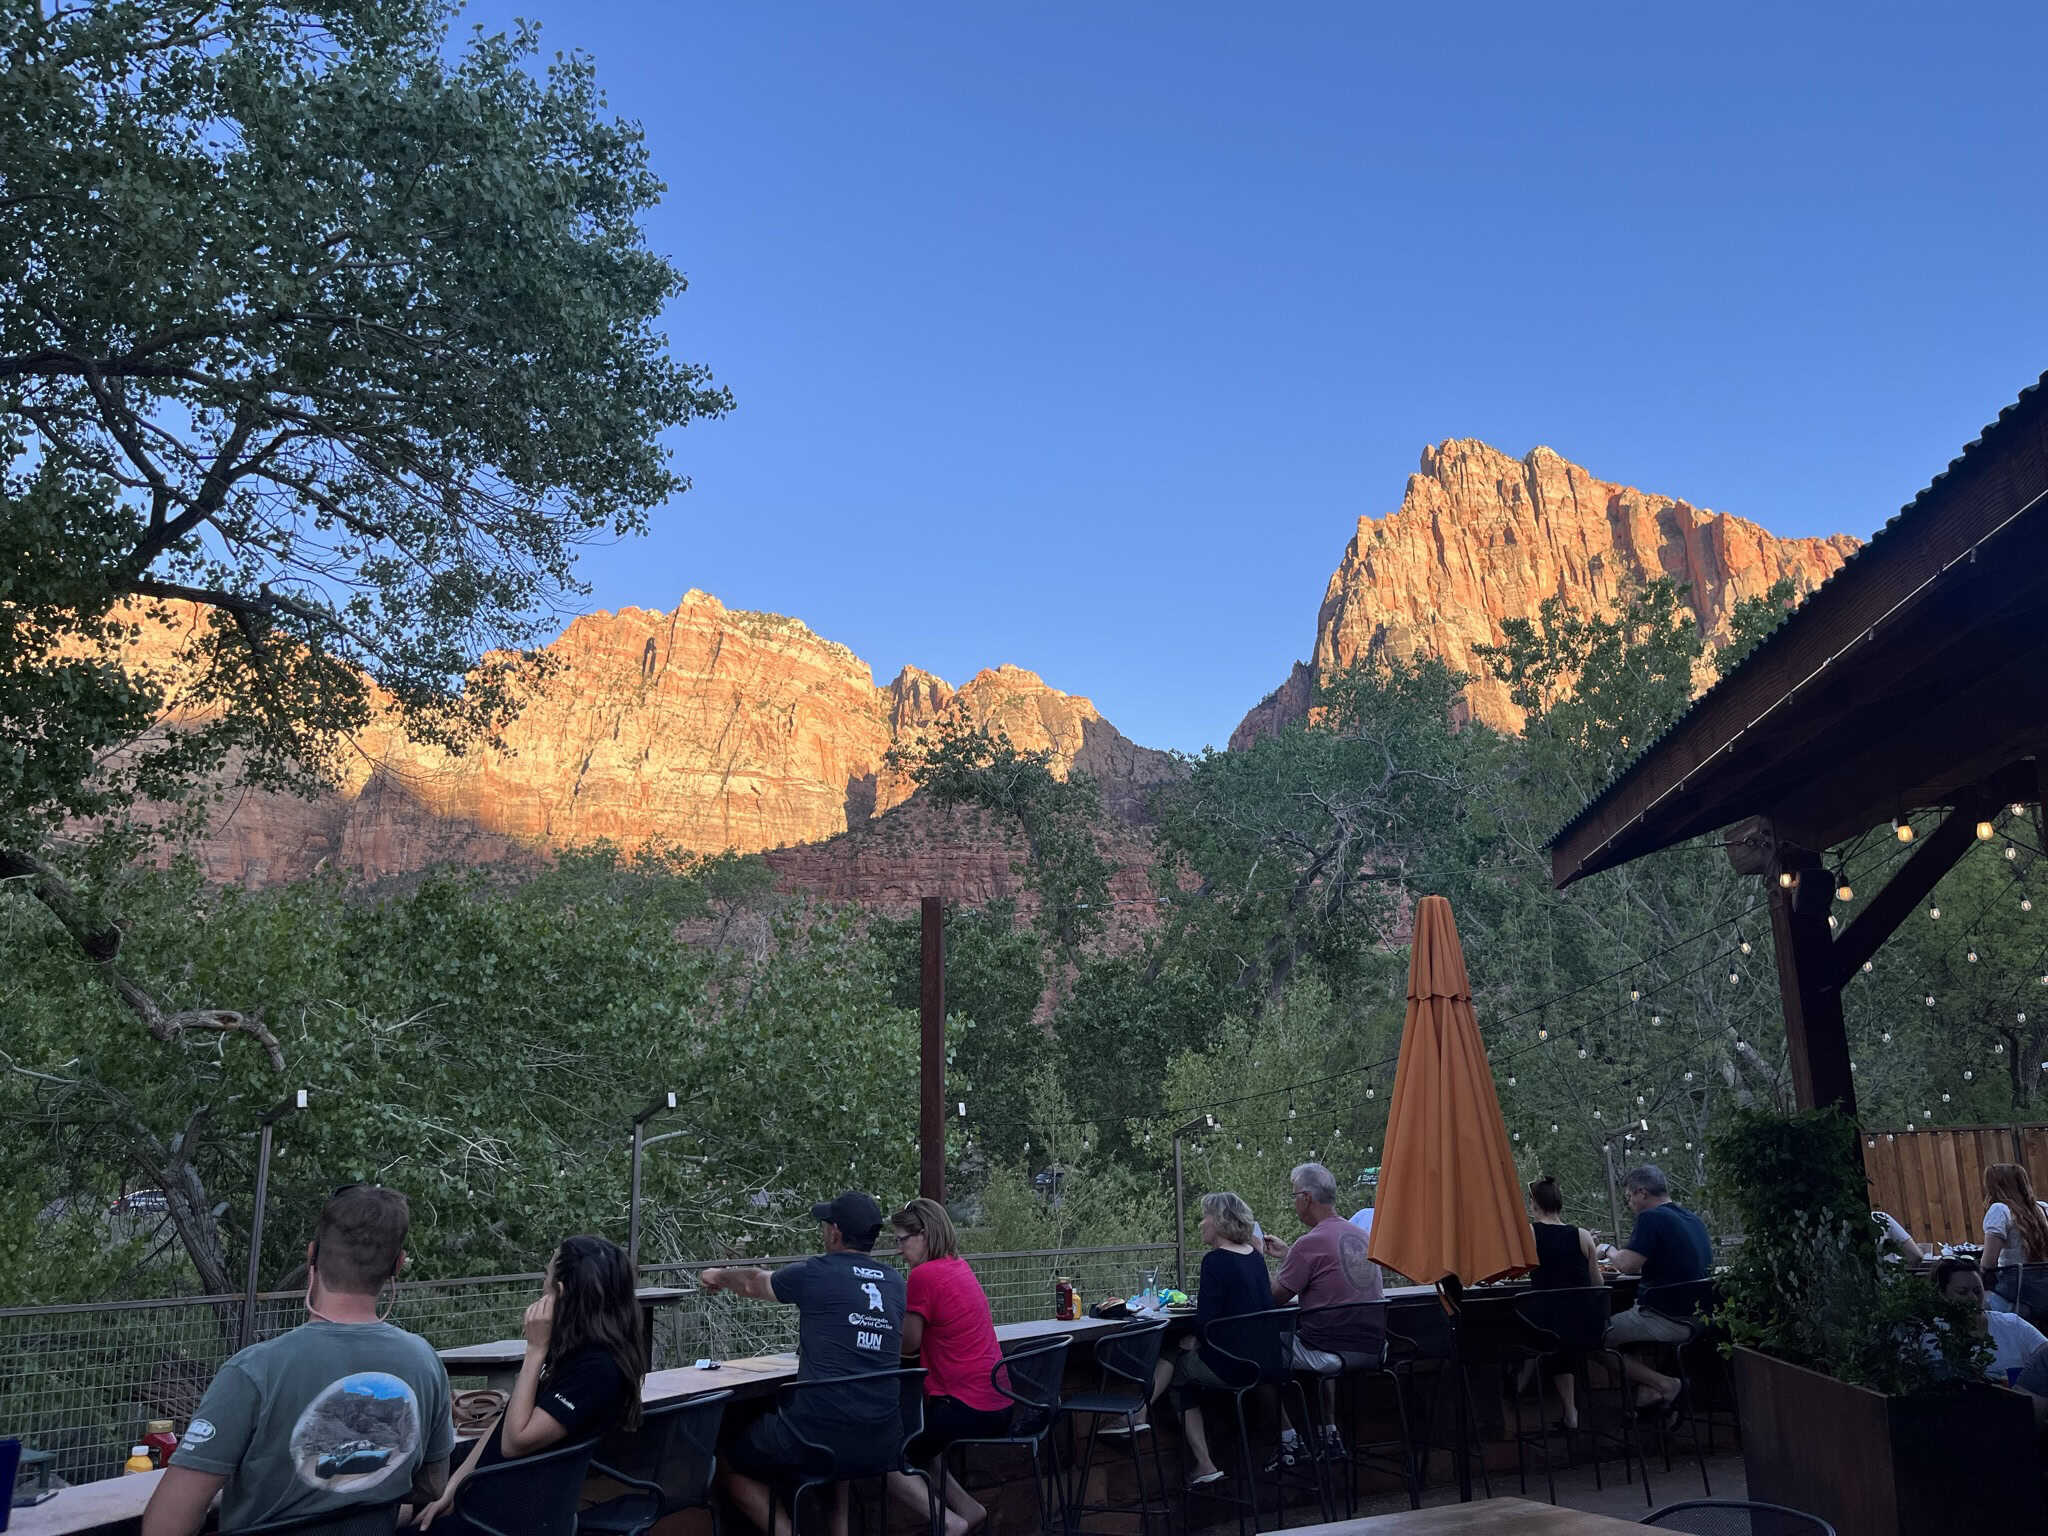
End your day at the Zion Canyon Brewpub in Zion Canyon Village for great beer, food, and an amazing view from the outdoor seating! Our waitress recommended the Zion Brew Burger, which contains this delicious “bacon jam”! They also provide suggestions on beer-burger pairings.
Where To Stay In Zion National Park
I recommend spending two nights in Springdale as your base for exploring Zion, since the town is conveniently located at the park’s southern entrance.
Springdale is home to a plethora of beautiful and unique stays! I recommend staying at The Bungalows, which offers a charming, cozy stay with free parking and easy access to the Springdale shuttle, removing the hassle of finding parking in this small, busy town. I really enjoyed this stay, and it really has everything you need!
However, if you know me, you know that I prefer a more down-to-earth experience! Zion Glamping Adventures offers just that, with cozy and unique glamping spots, complete with beds, private outdoor spaces, and fire pits. This is perfect for those who want adventure without sacrificing amenities.
Note: This glamping option is located about an hour south of Zion, in the small town of Hilldale. But they’re 100% worth the extra drive!
There are two campgrounds at the south entrance of the park, both of which can be reserved through recreation.gov. The Watchman Campground and South Campground are both within walking distance of the Zion Shuttle.
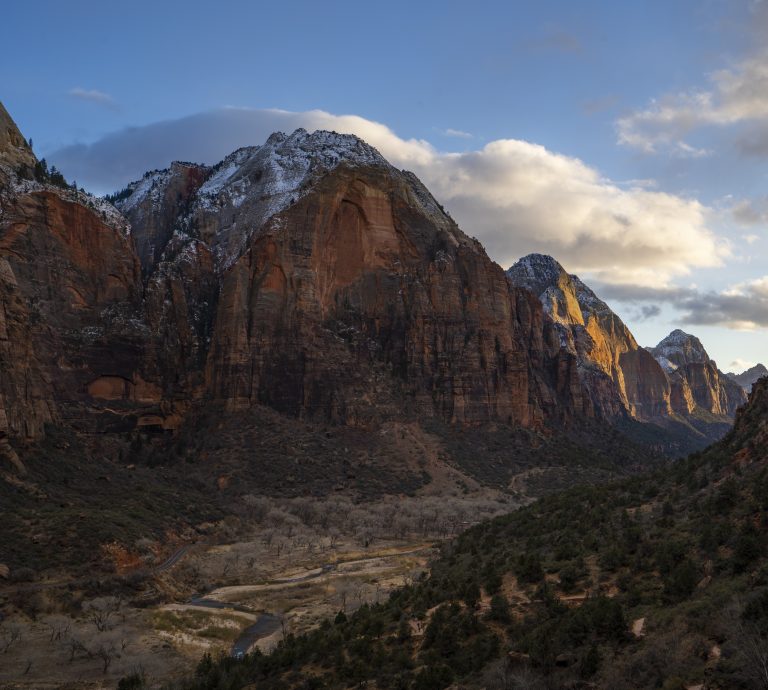
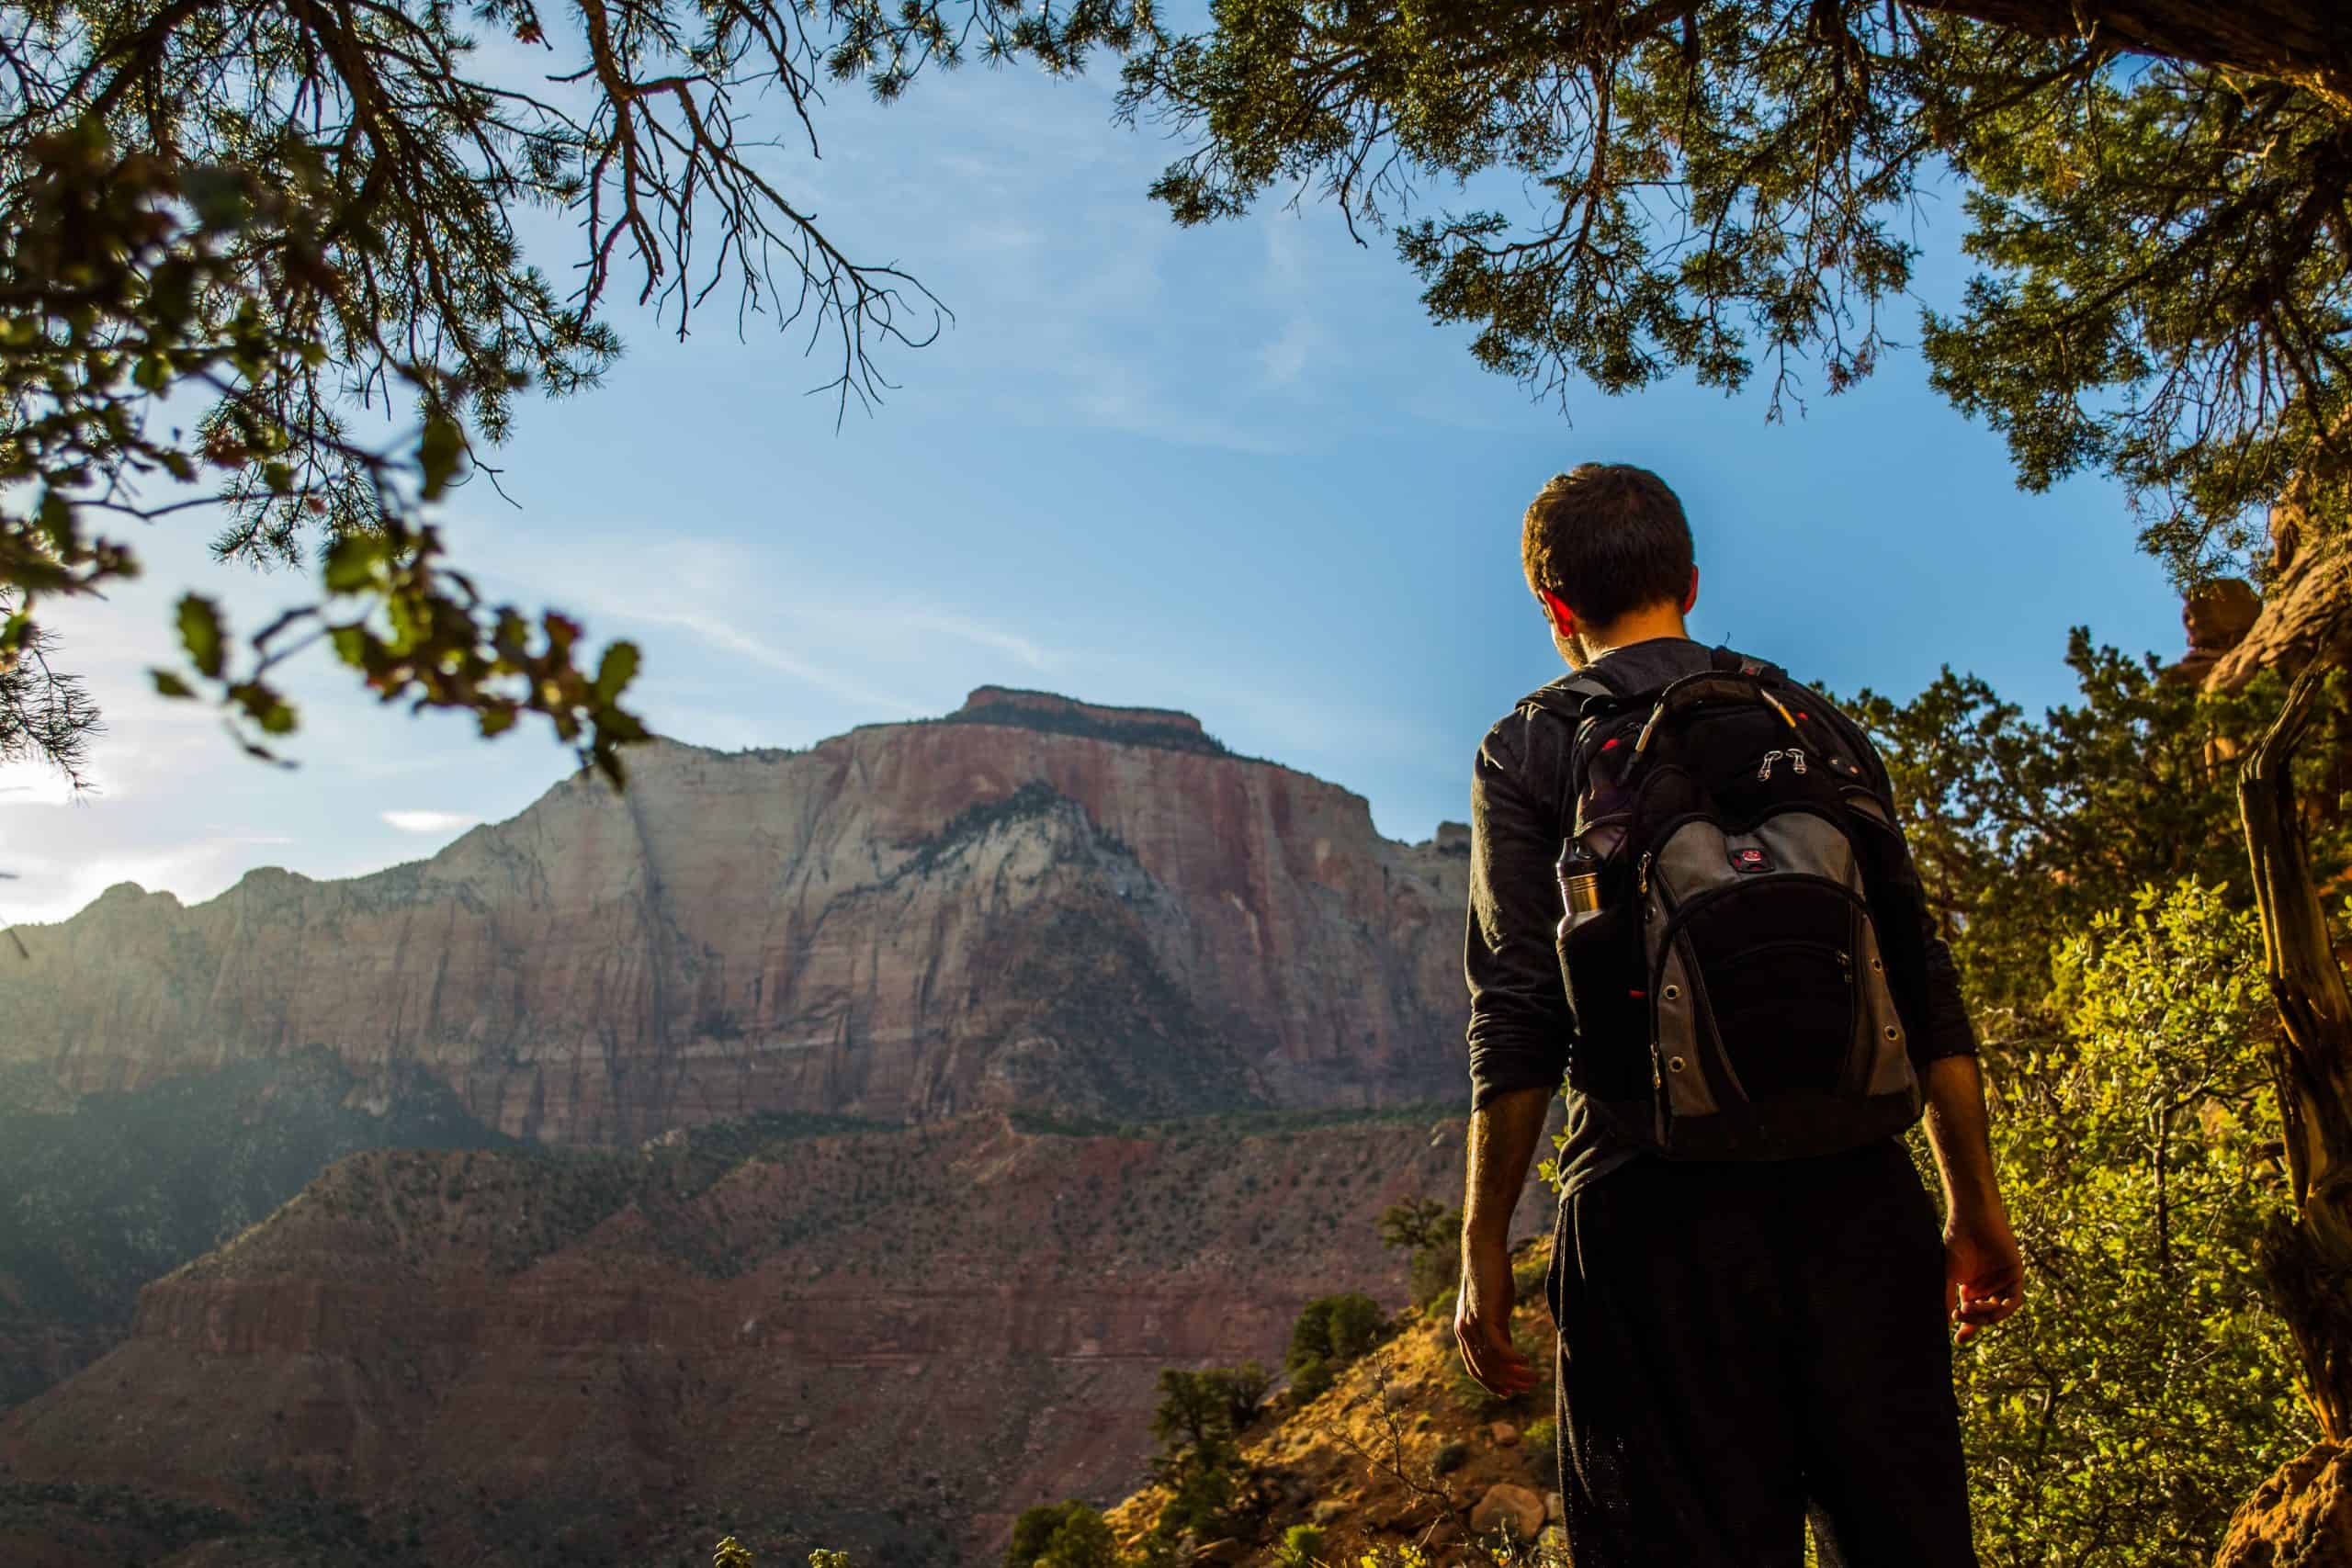
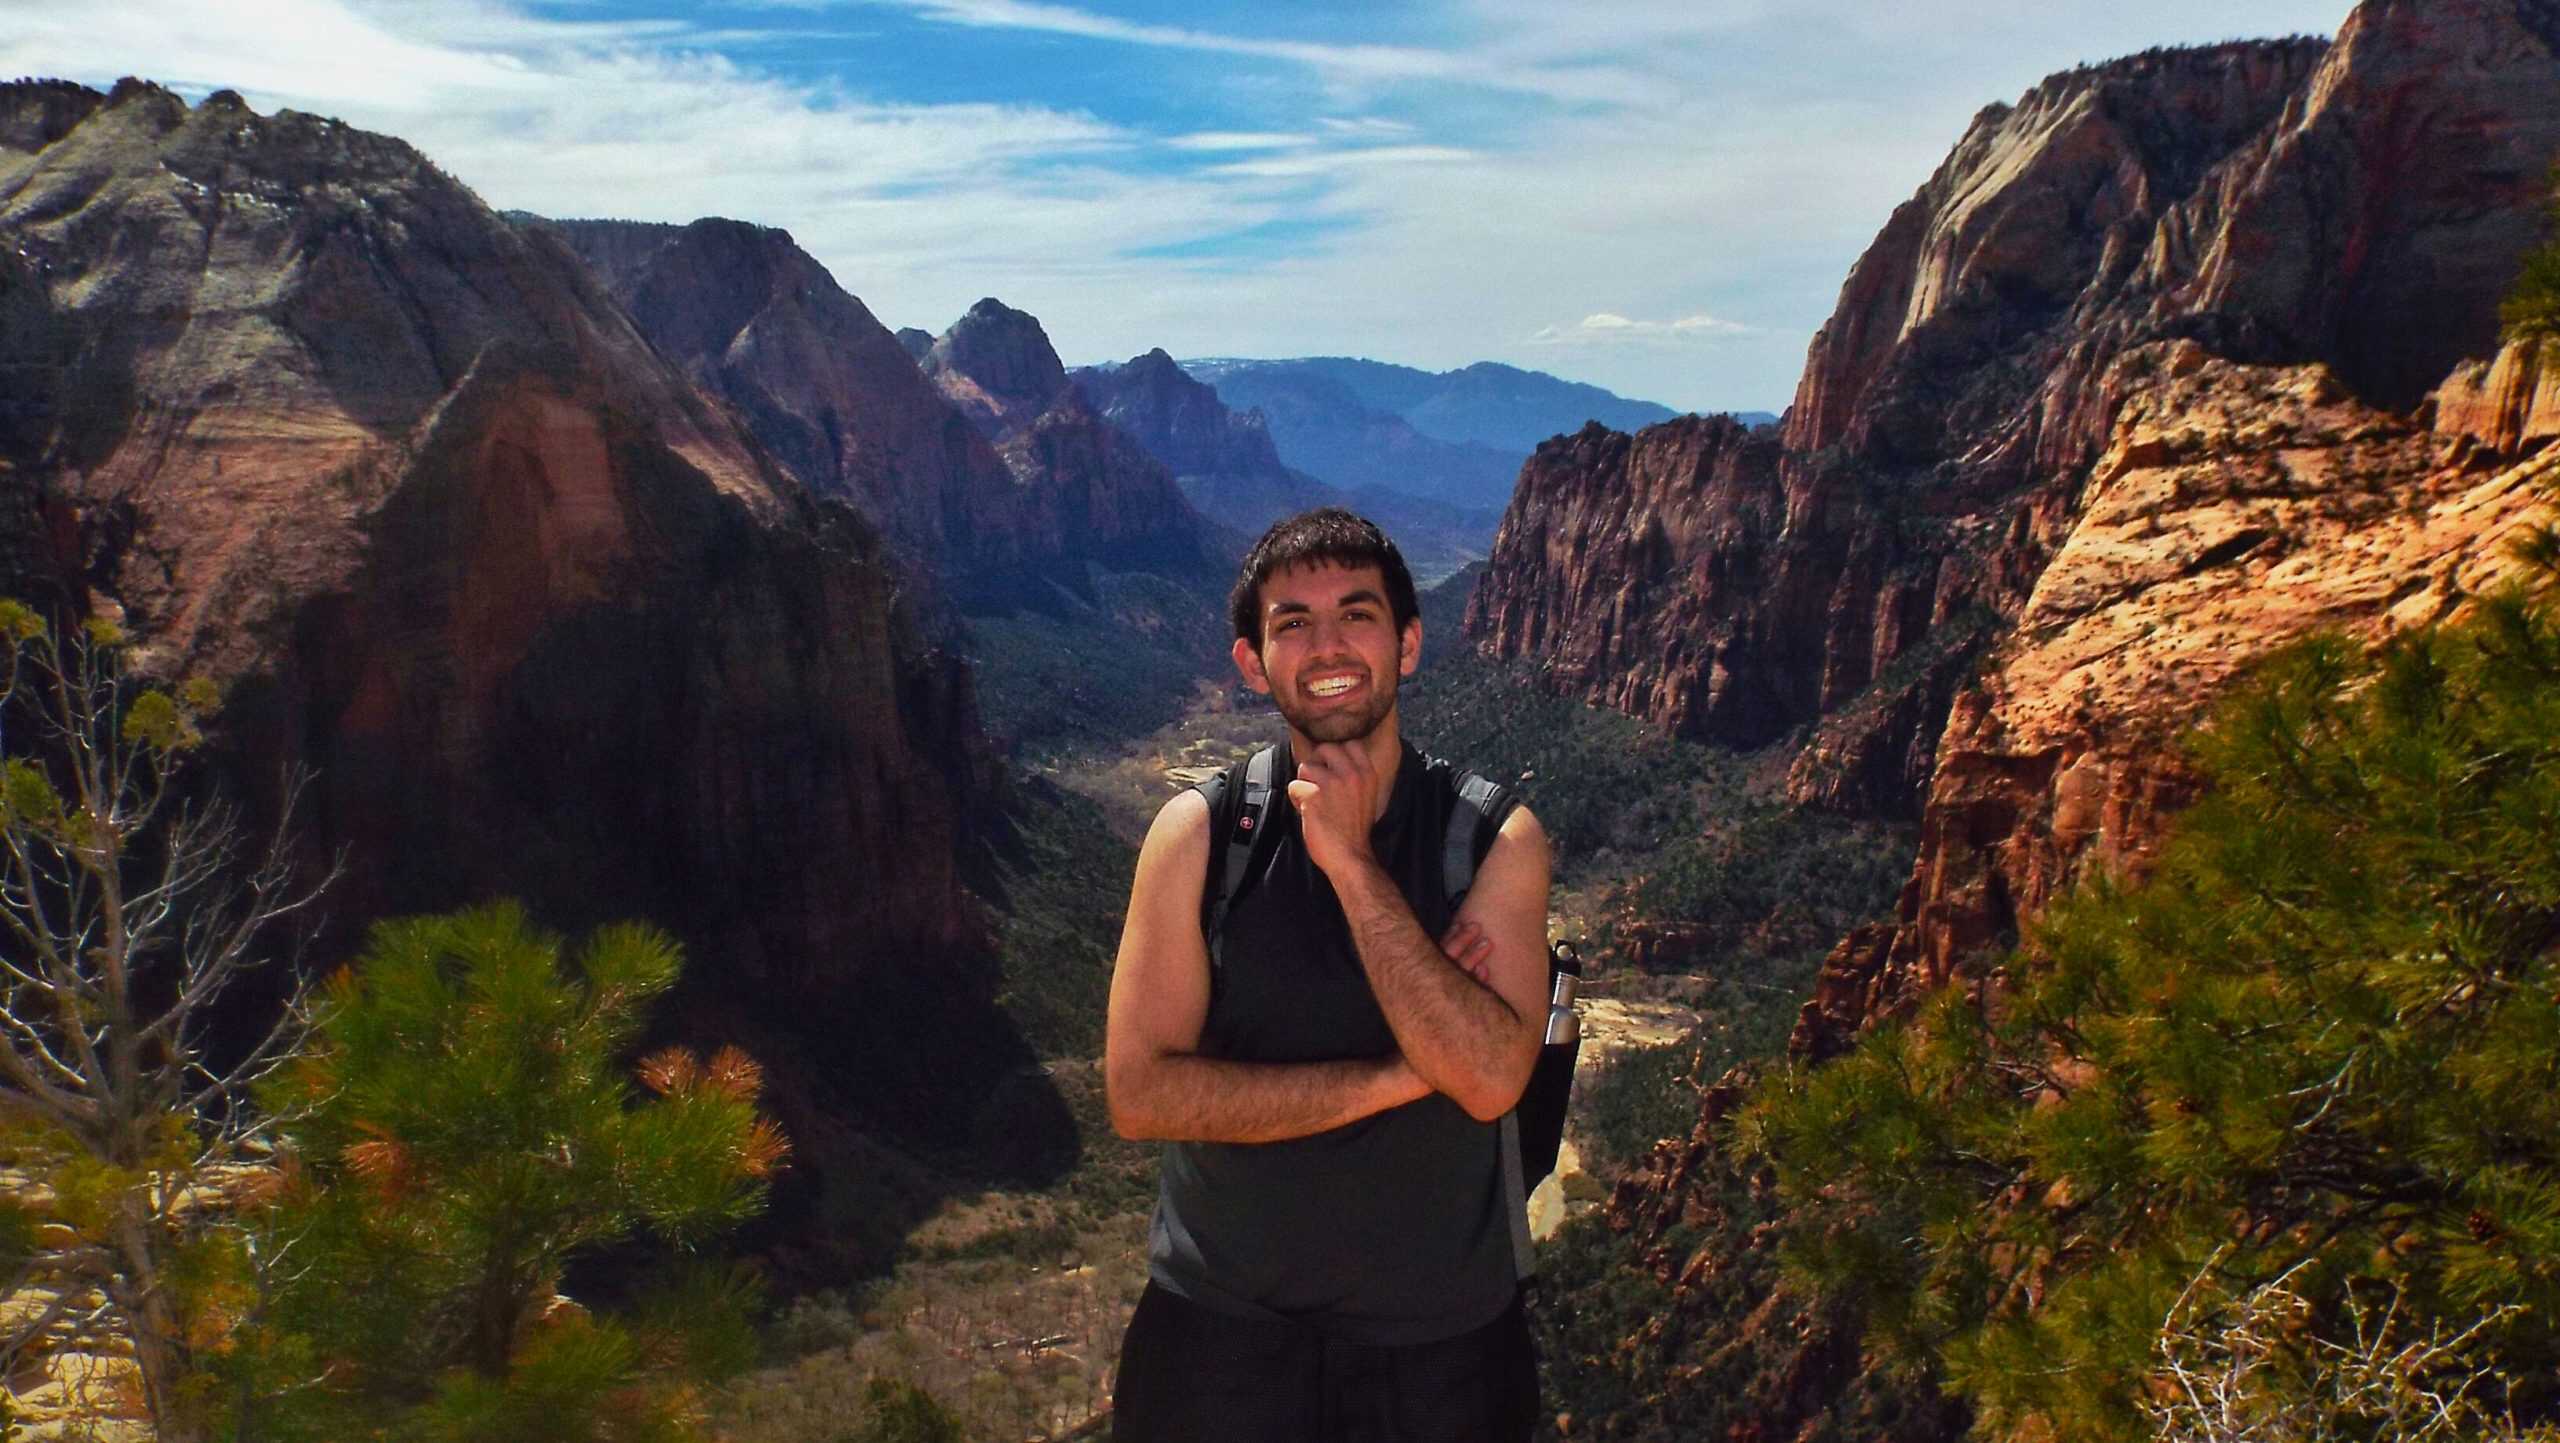
Day Nine: Zion National Park
Spend the entire day exploring Zion Canyon, soaking in its history, iconic sights, and “once-in-a-lifetime” hikes through some of the most breathtaking landscapes in the park.
Morning
The first Zion Canyon shuttle leaves the visitor center at 7:00 a.m and I recommend arriving at least 30 minutes early. If you’re not an early riser, Springdale runs its own free shuttle that connects directly to the visitor center, and often, you can walk to a bus stop from your stay.
This is Zion Canyon Village, which is home to several shops and restaurants, including Perks at Zion, which is a cozy spot for locally roasted coffee, smoothies, and fresh breakfast bites. It’s perfect for fueling up before a big hiking day.
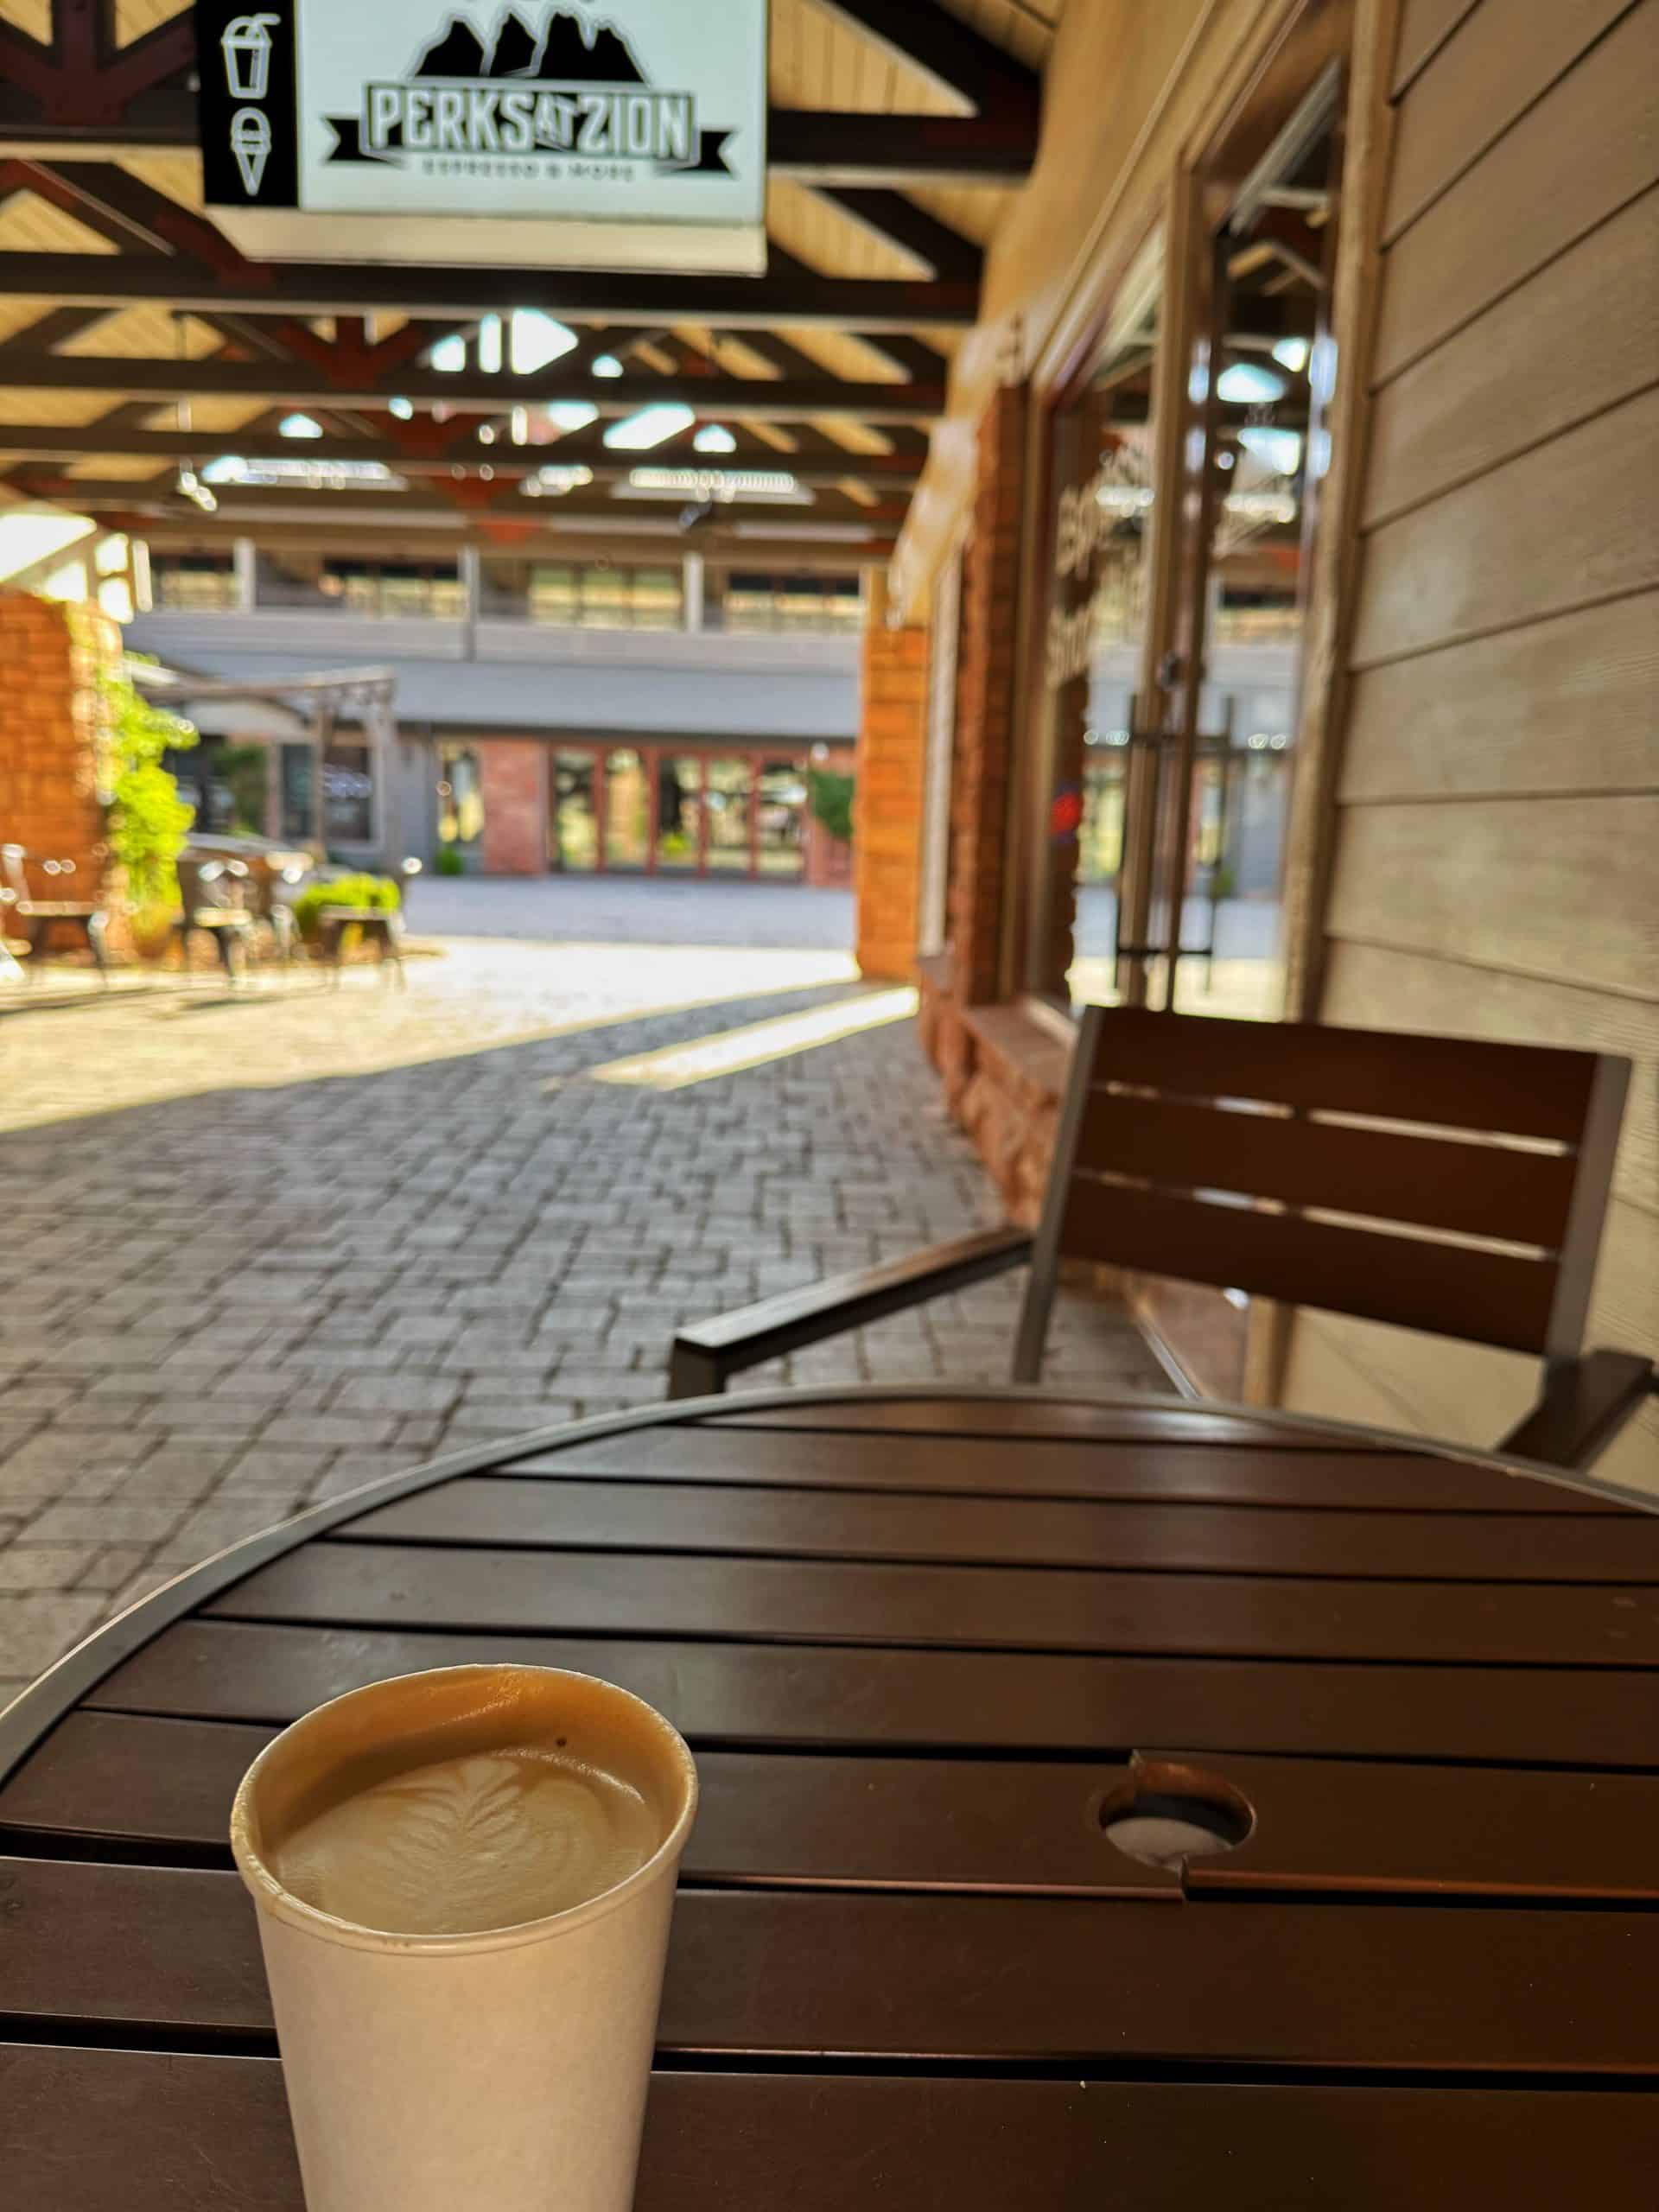
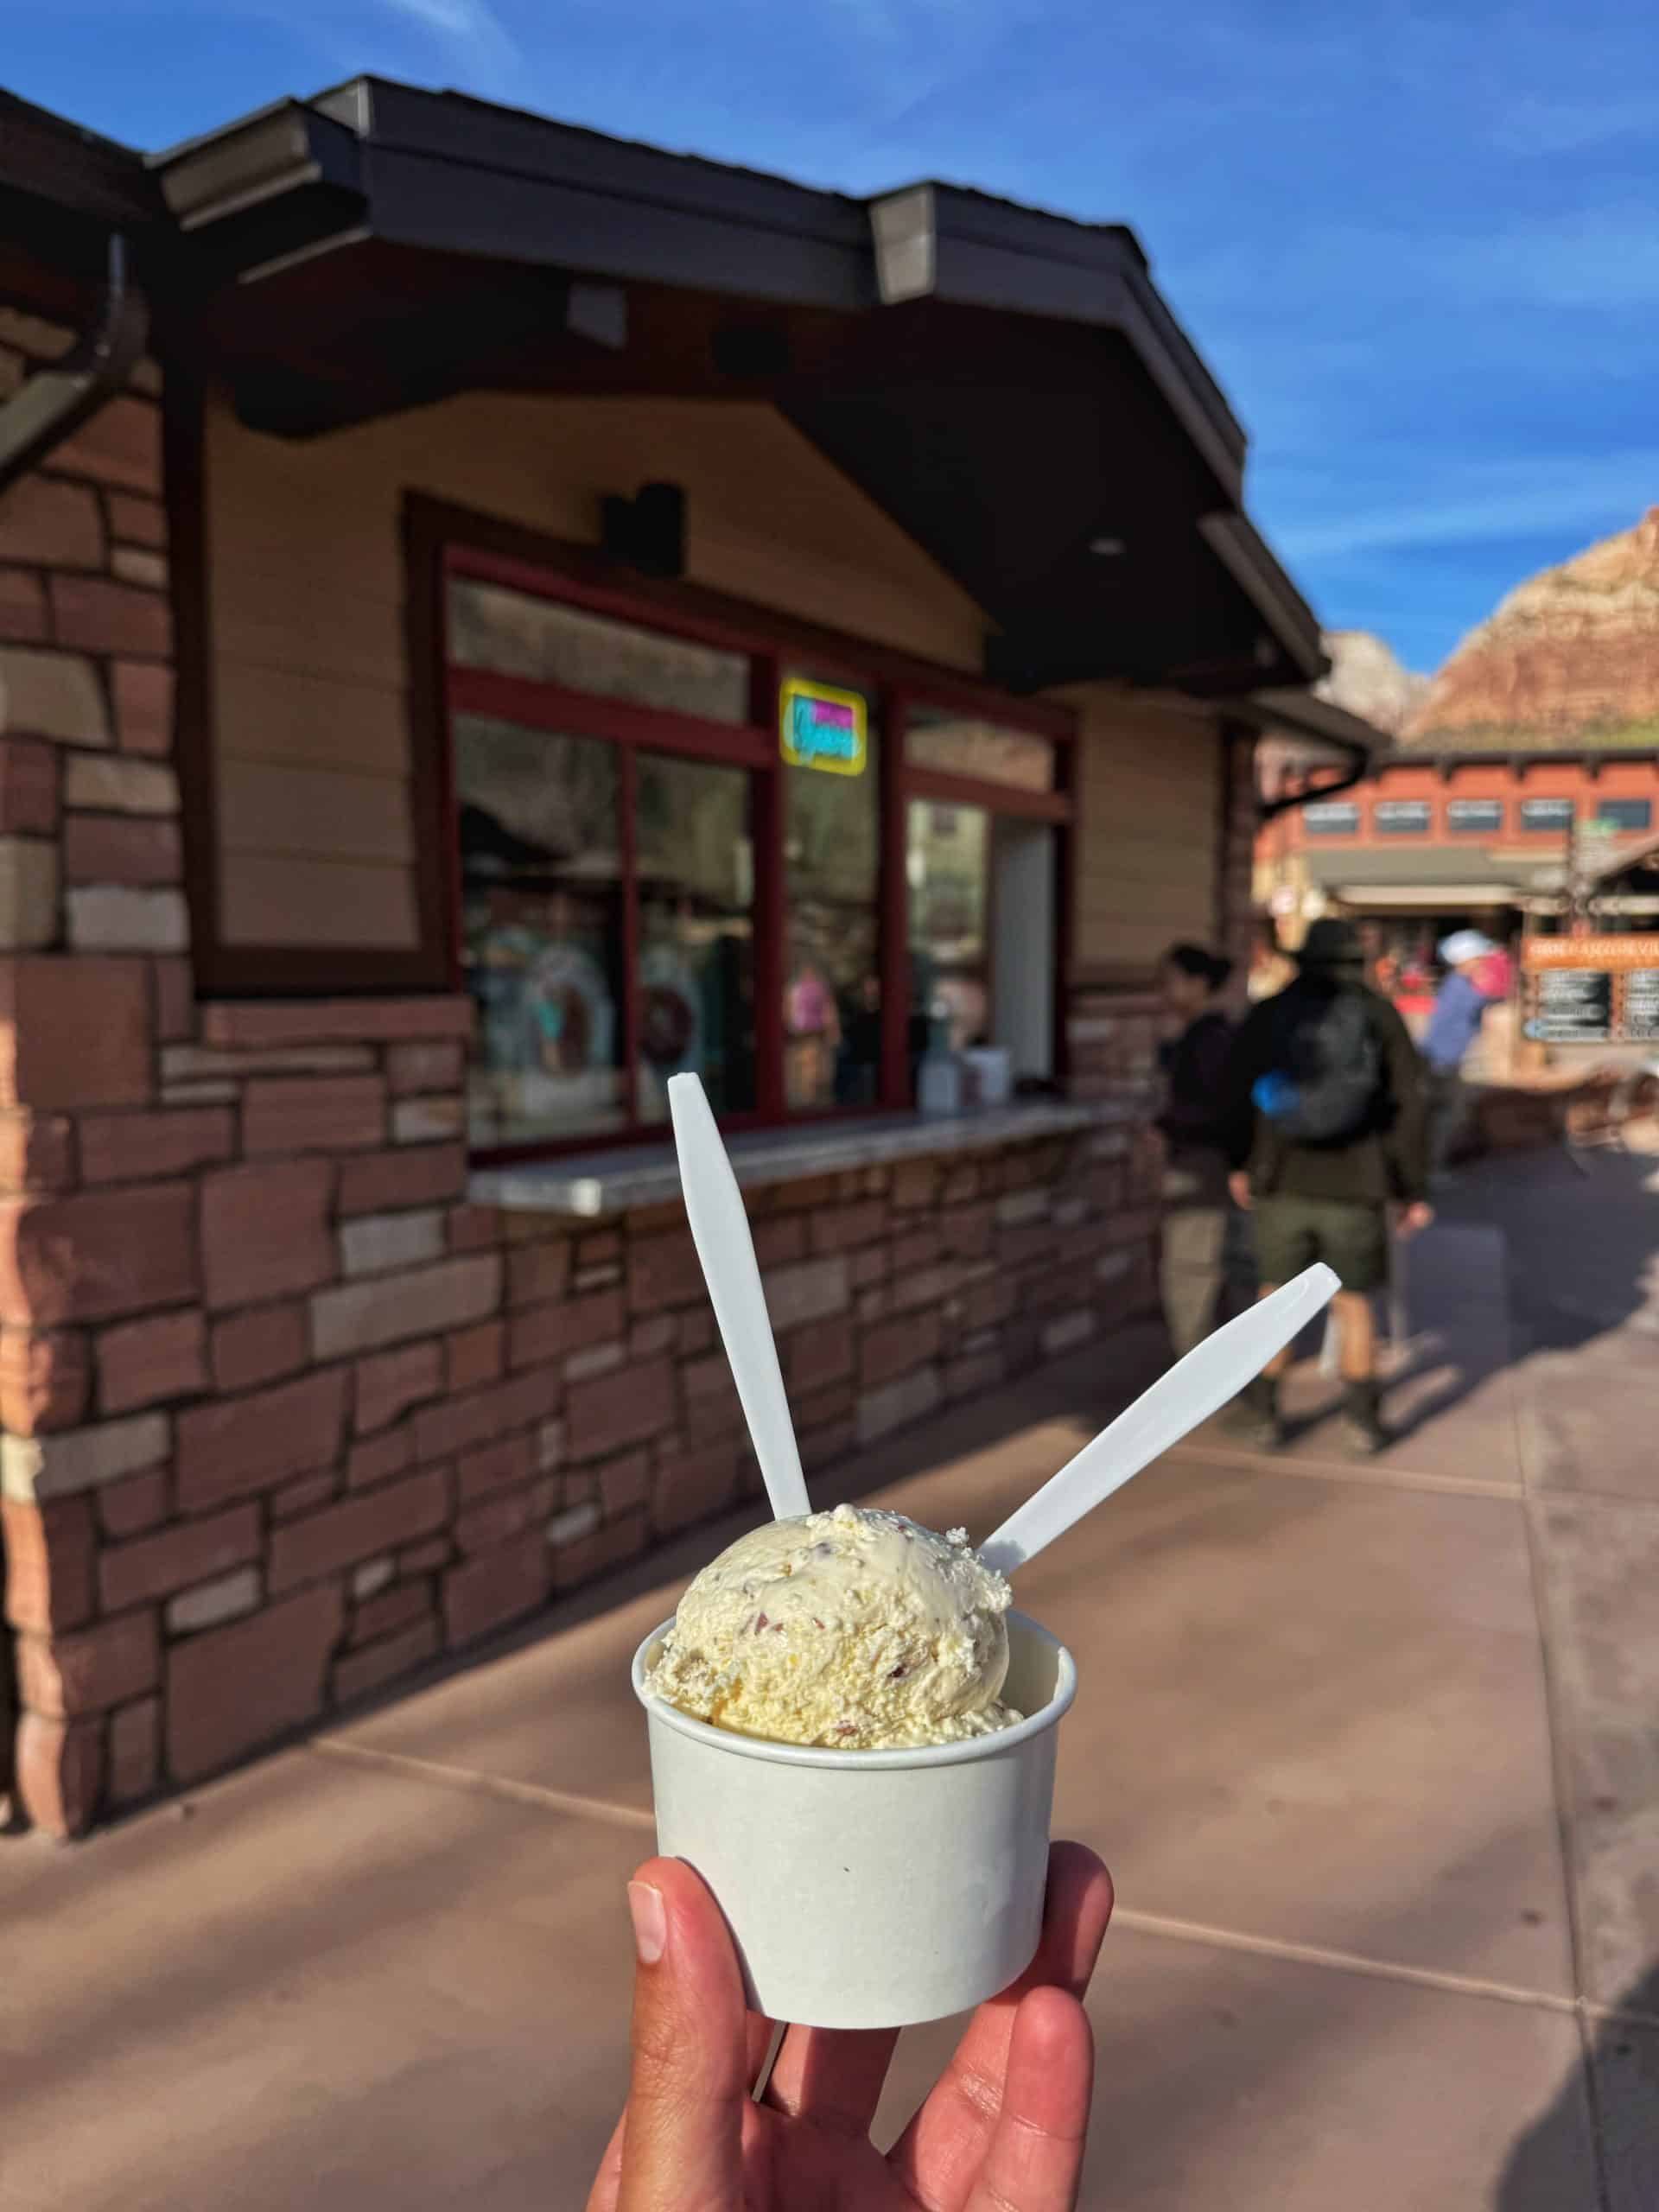
Try your favorite flavored latte or a fun seasonal themed drink. Don’t forget to grab the Denver omelet wrap on the way out; you won’t regret it! And if you don’t feel guilty about indulging in Gelato for breakfast, don’t miss out on Desert Ice. Although they’re known for their namesake treat, we opted for Gelato instead.
Do you want to skip the crowded shuttles and limited space? I highly recommend opting for this guided e-bike tour instead. You’ll enjoy a more comfortable ride, better access to viewpoints, and the freedom to focus on Zion’s incredible scenery.
It’s a stress-free way to experience Zion at its best! This exact activity is on my 2026 bucket list!
Afternoon
Over the years, the Zion shuttle system has become very efficient, reliable, and hassle-free. While it doesn’t provide the same level of freedom as taking an e-bike up the canyon, it works exceptionally well in managing the sheer volume of people who visit the park. In fact, I believe other parks should model the Zion shuttle for managing the crowds!
Bonus: the shuttle includes recorded commentary that shares insights into Zion’s geology and history. I love the Native American name for Zion Canyon. Try memorizing it during your visit: Mukuntuweap, which means “straight canyon.”
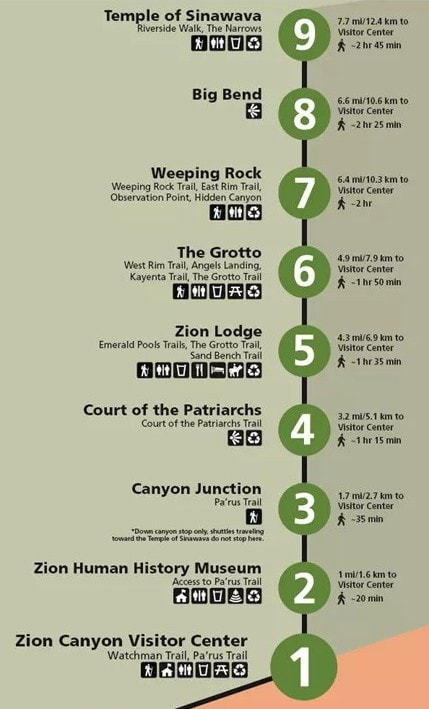
There are nine shuttle stops in Zion Canyon. Stops 1–3 are accessible by foot via the Pa’rus Trail or by car, but if you’re driving, you must continue east toward the Zion–Mount Carmel Tunnel. The shuttle continues north into Zion Canyon.
Stops 4–9 make up the heart of the canyon, each offering iconic hikes and viewpoints. Here are some of the most popular:
- Angels Landing – Permit Required. (Stop 6)
Zion’s most iconic hike, featuring the infamous “chain section” along a knife-edge spine. This 5-mile (8 km) round-trip hike gains about 1,800 feet (550 m), and it’s a bucket list hike for many! - Emerald Pools
Zion’s second most popular hike, it features a tall seasonal waterfall that falls directly into a gorgeous emerald colored pool! I suggest hiking it point-to-point, clockwise, starting at the Zion Lodge (stop 5) and ending at The Grotto (stop 6). - Weeping Rock – (Stop 7)
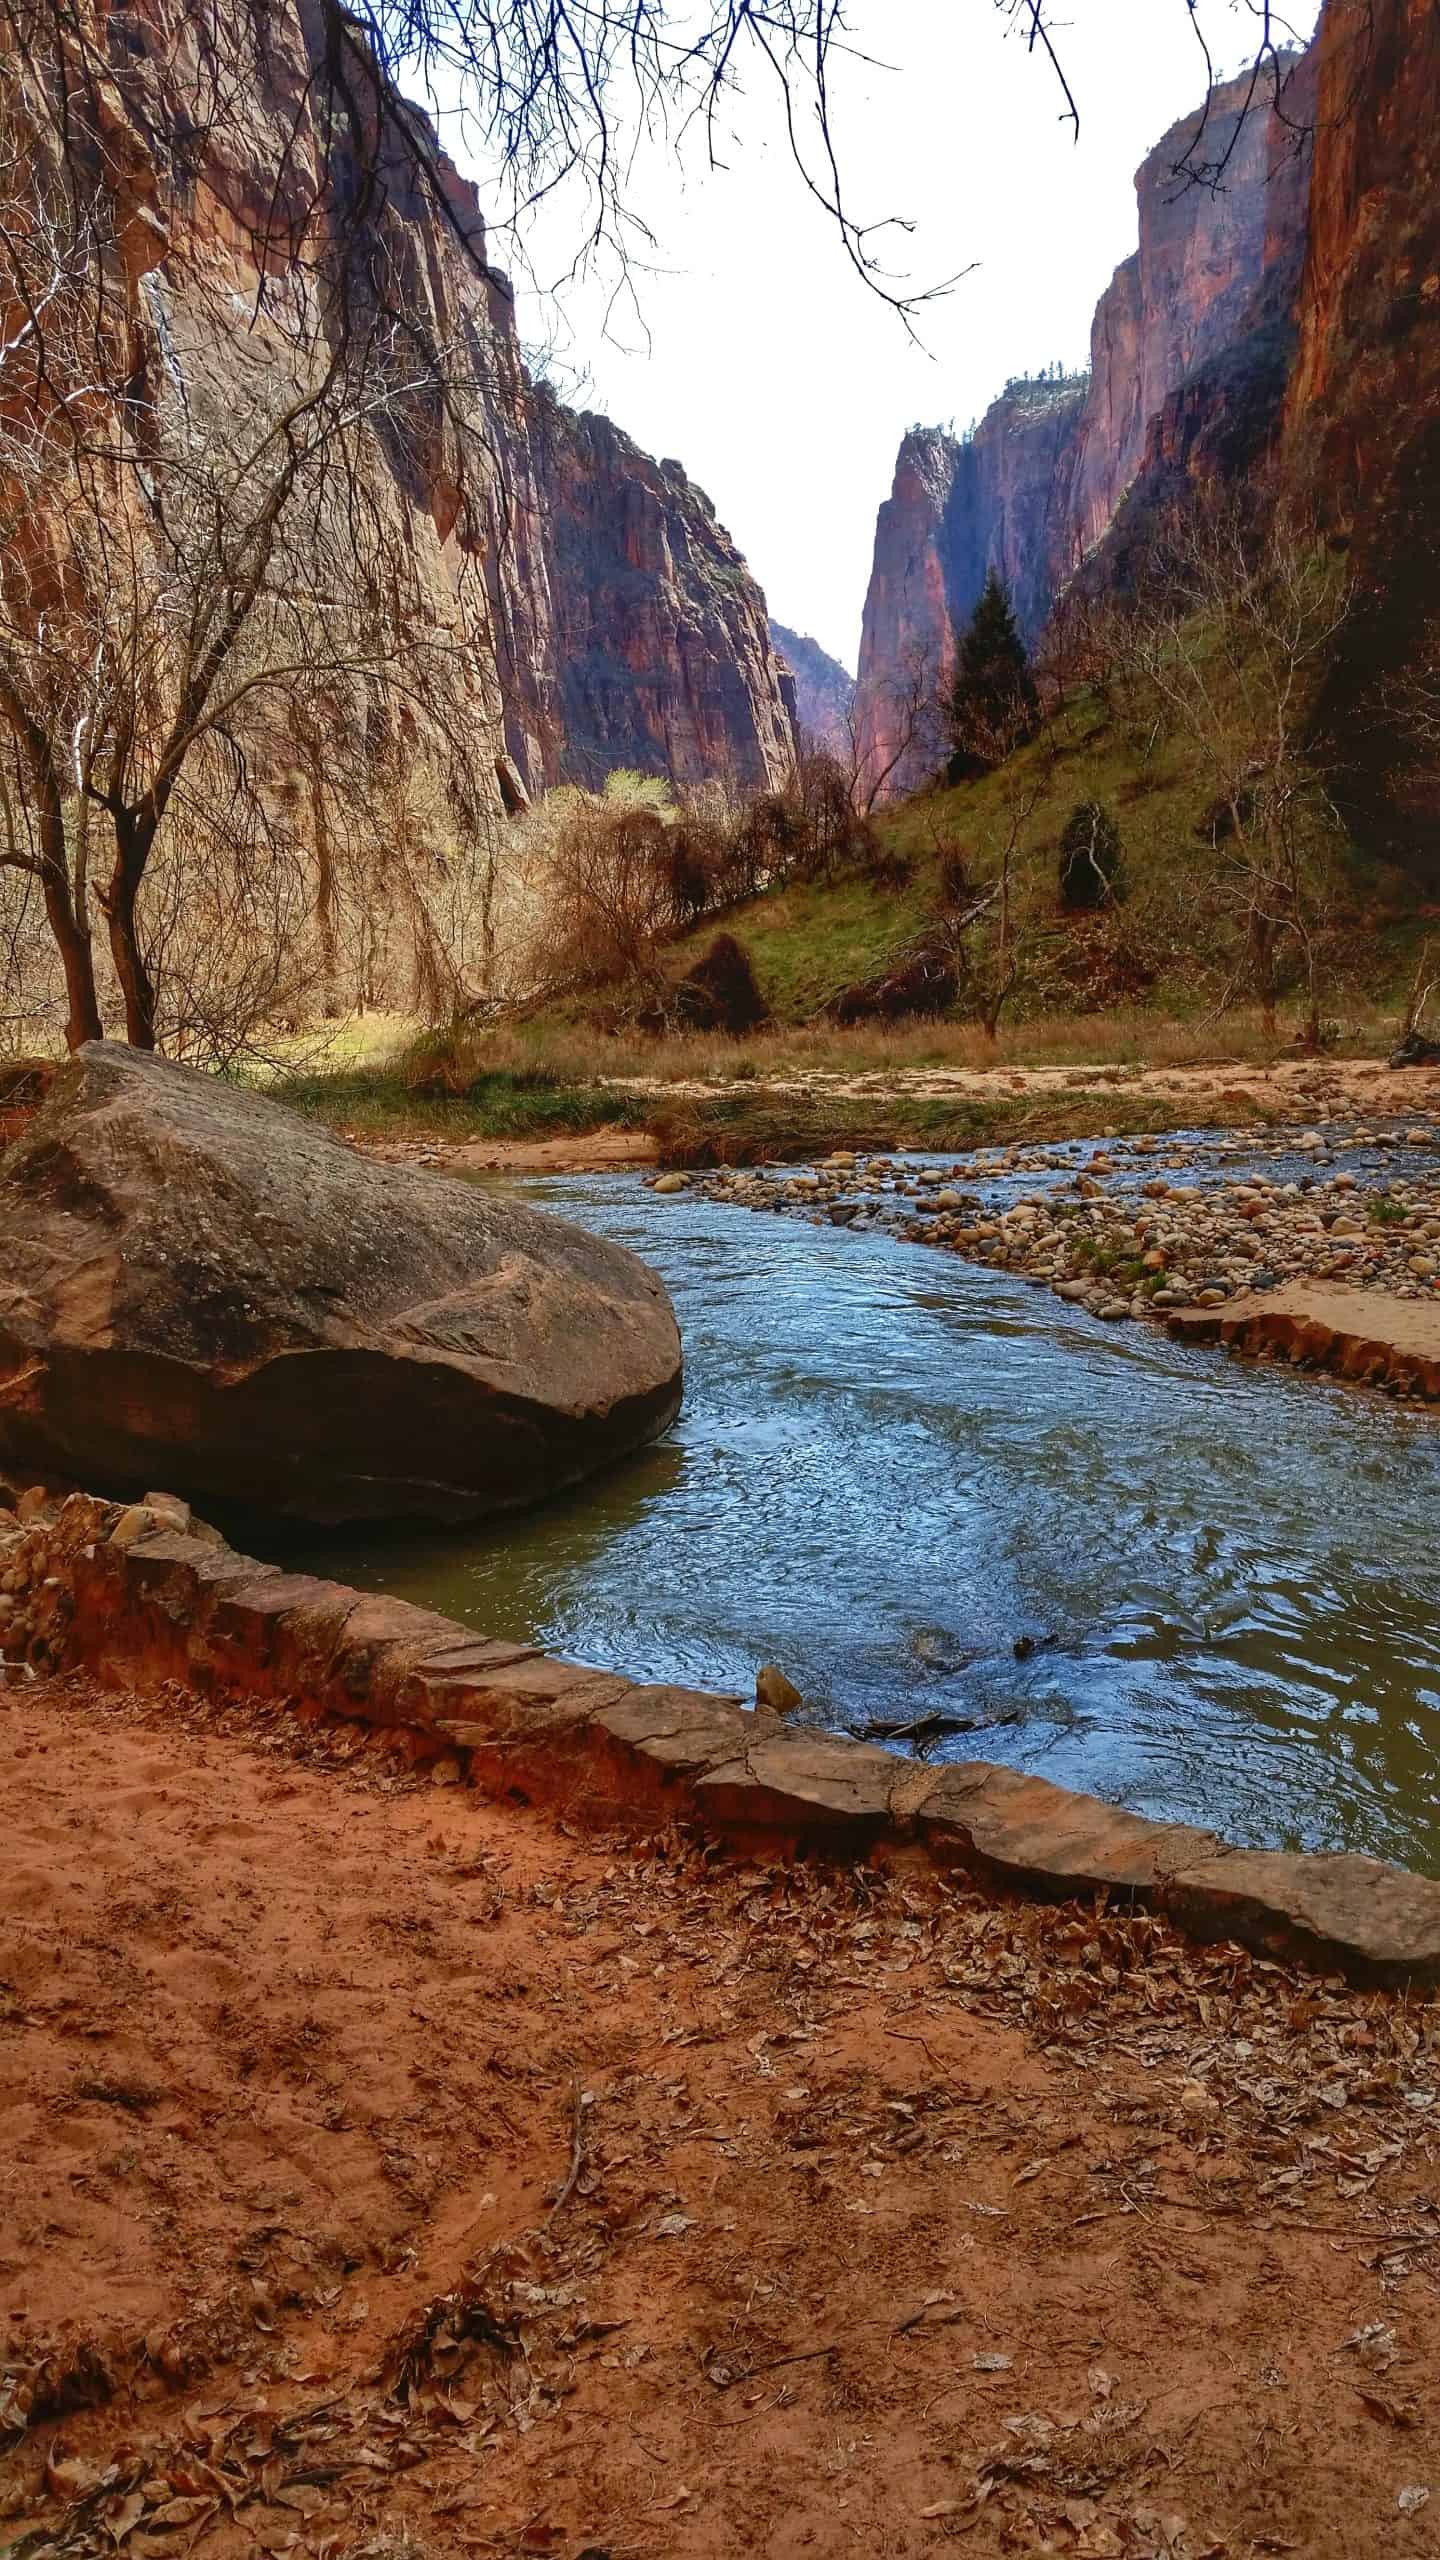
A short but steep walk to a unique feature where water from snowmelt and rain seeps through the Navajo Sandstone and flows directly out of the rock face, creating the illusion that the cliff itself is “weeping.” - Riverside Walk – (Stop 9)
A paved, scenic stroll that leads to the start of The Narrows. Imagine towering sandstone walls on either side alongside the Virgin River, creating an unforgettable scene and providing the perfect introduction to slot-canyon hiking.
My Recommendation: For someone with serious FOMO, here’s how I tackle Zion in a day: start early with Angels Landing, then loop in Emerald Pools and finish at Zion Lodge for a refuel at Castle Dome Café. Continue with Weeping Rock, then Riverside Walk into The Narrows as far as you can go, before catching the shuttle back to Springdale.
Are The Narrows the reason why you’re in Zion? Do you want to truly experience them? Skip the logistics and go with Cedar & Sage Boutique Trekking. Their guided tour includes gear, lunch, expert knowledge, and a more intimate experience, letting you focus on the adventure and not the planning.
Evening
For Pizza lovers, check out Onyx Pizzeria! They are a little pricier but have some unique pizza combinations! Can you really go wrong with a warm slice of pizza after a long day of hiking?
Day Ten: Zion to Salt Lake City (~5 hours)
Check out one final local breakfast spot before hitting the road. If time allows, take the short detour to Kolob Canyons and/or hike Kanarraville Falls, before making the drive back to Salt Lake City to end your trip!
Morning
For coffee lovers, don’t miss out on Canyon Coffee for your favorite latte and a quick bite. For breakfast lovers, MeMe’s Café is your spot. Grab a breakfast crepe paired with their in-house roast coffee.
Once fueled up, start your drive back toward Salt Lake City, and if timing allows, end your trip with a bang at Kolob Canyons! This lesser-visited, northernmost section of Zion National Park sits just off I-15 and is accessible by a completely separate road.
The scenic drive is only about 10 minutes one-way, yet the towering red cliffs easily rival Zion Canyon. making it a high-reward stop with minimal detour!
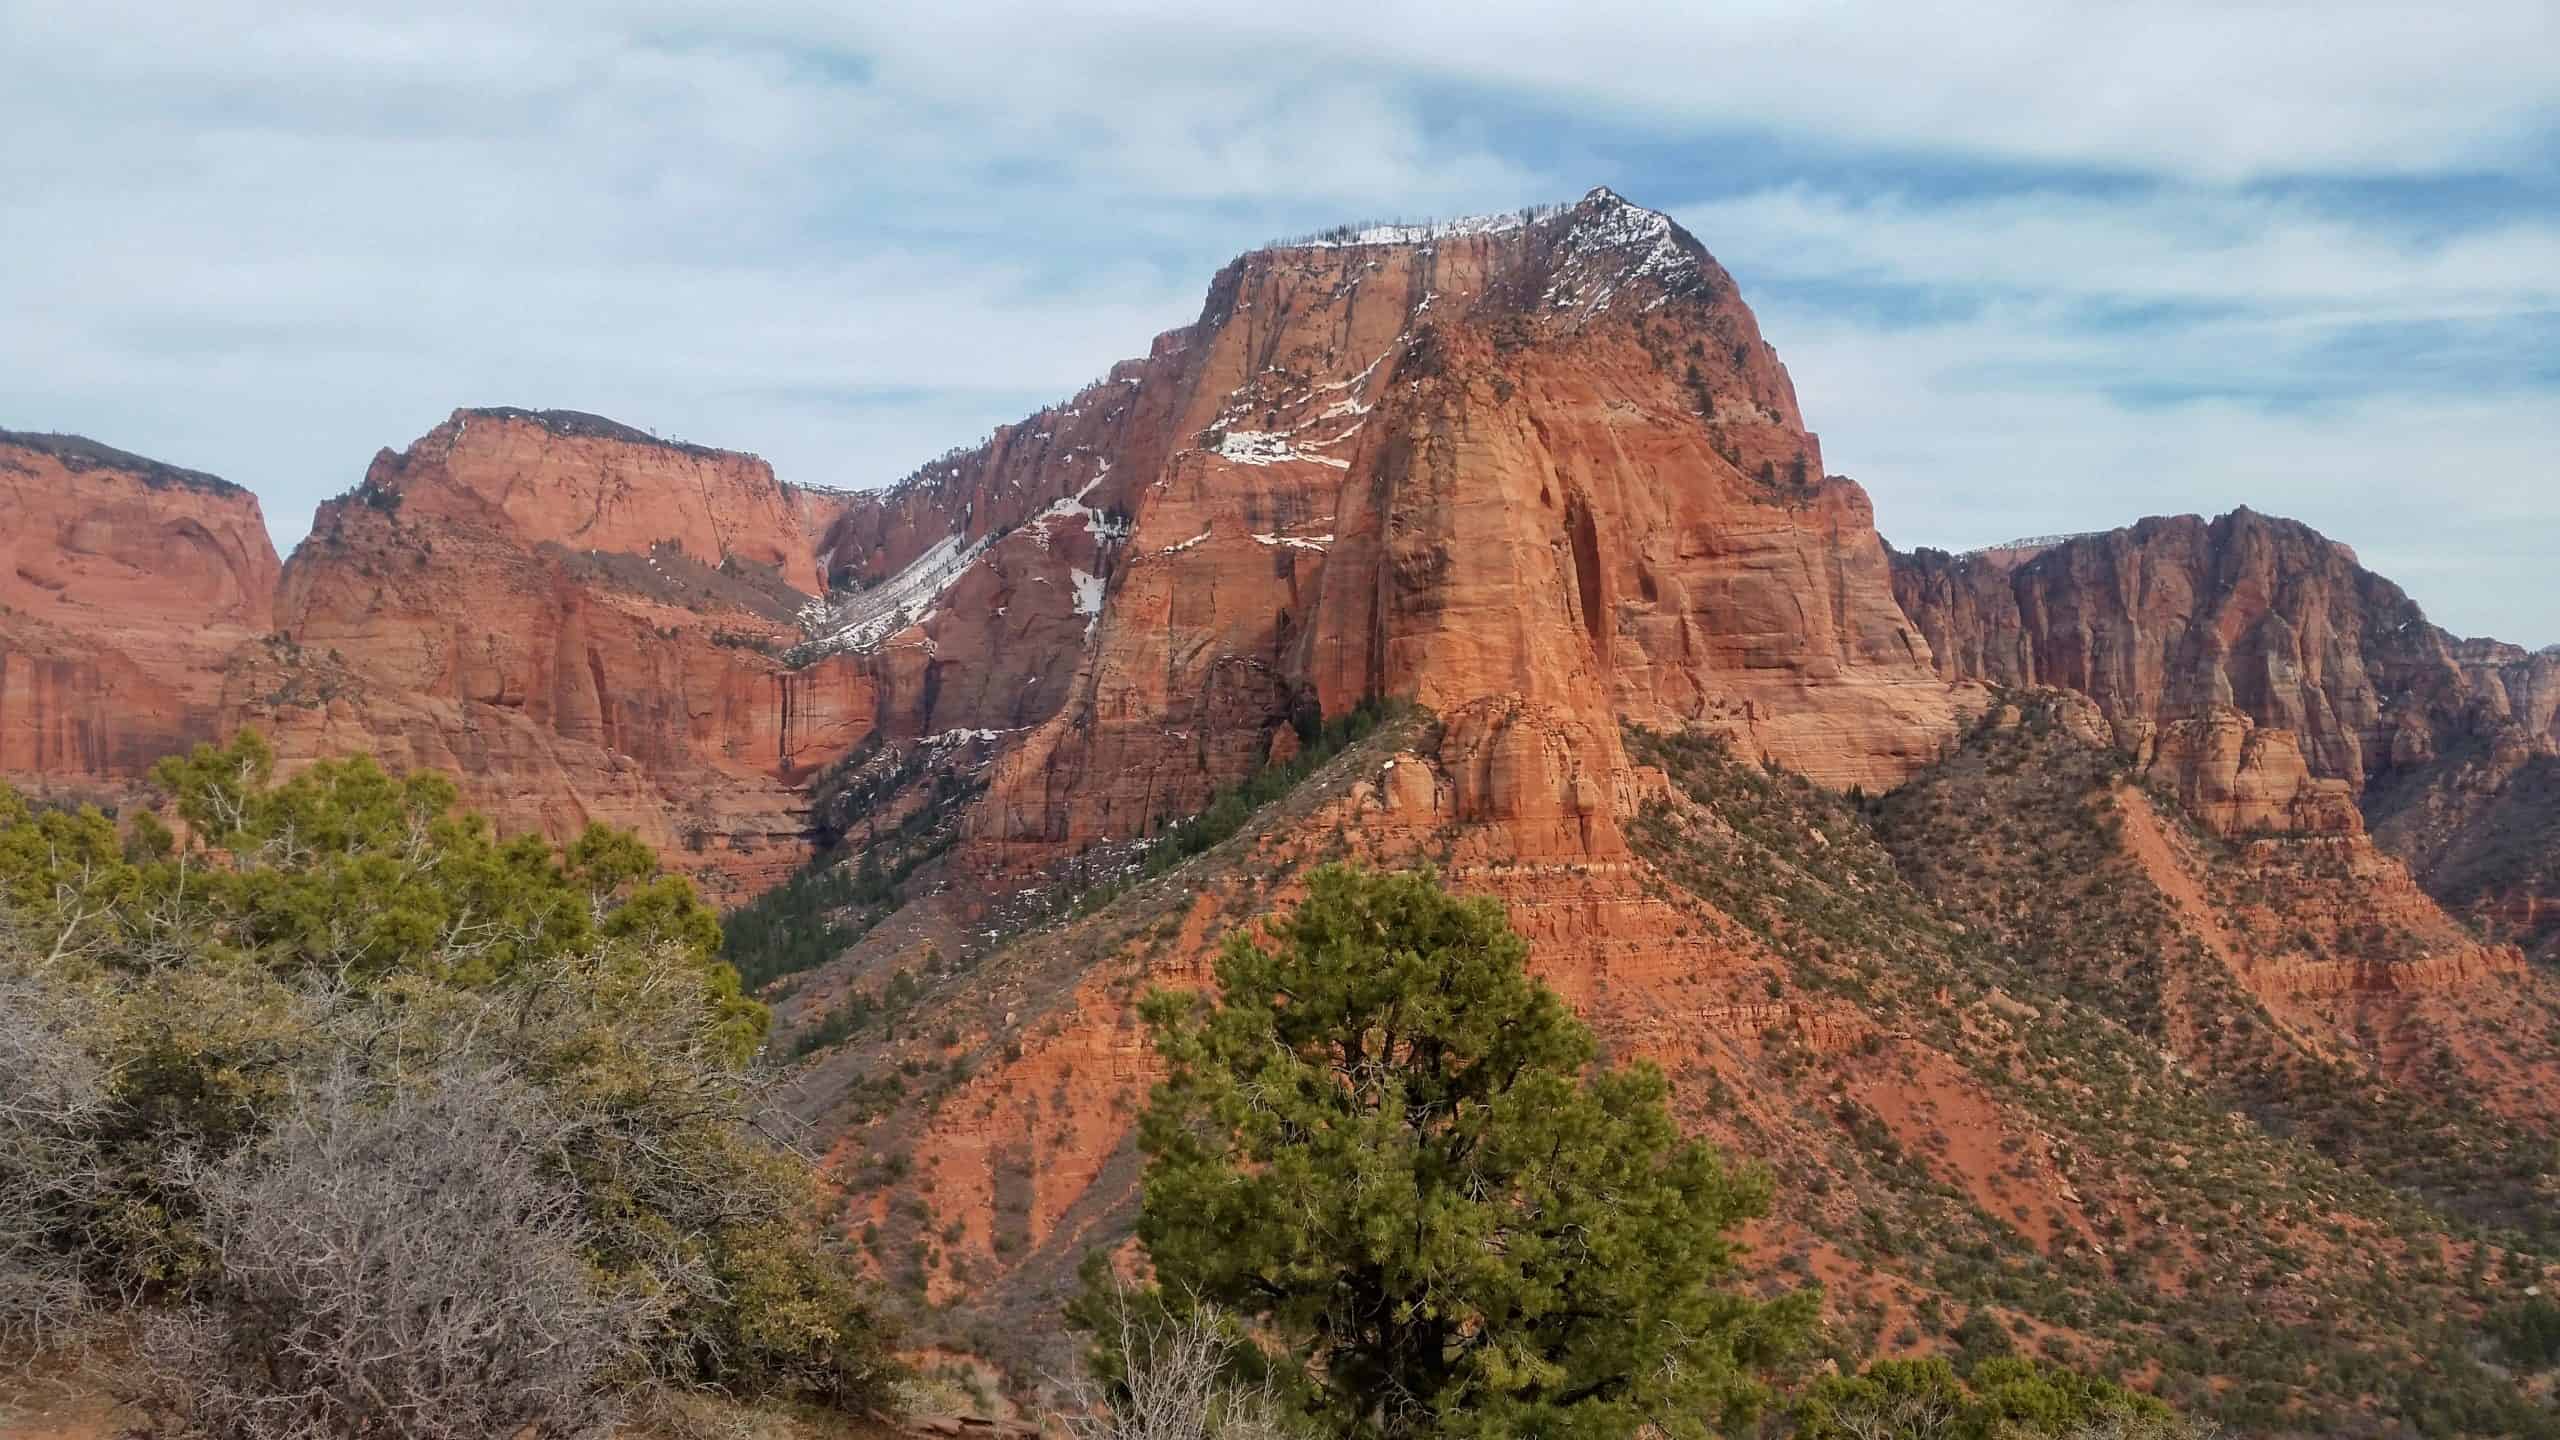
When you reach the end of the Kolob Canyon road, explore the Timber Creek Overlook Trail, a short hike with a big reward!. The trail is 1.2 miles (1.9 km) round trip with 255 feet (78 m) of elevation gain and delivers sweeping views over Kolob Canyons.
For years, I passed by the Kolob Canyons exit but never stopped. However, once I did, it instantly landed on my “must-return” list!
Afternoon
Just 10 minutes north of Kolob Canyons, and only about five minutes off I-15, is the small town of Kanarraville, which is home to its namesake waterfall. Kanarra Falls is one of Utah’s most unique hikes, winding through a stunning slot canyon with flowing water, ladders, and dramatic sandstone walls.
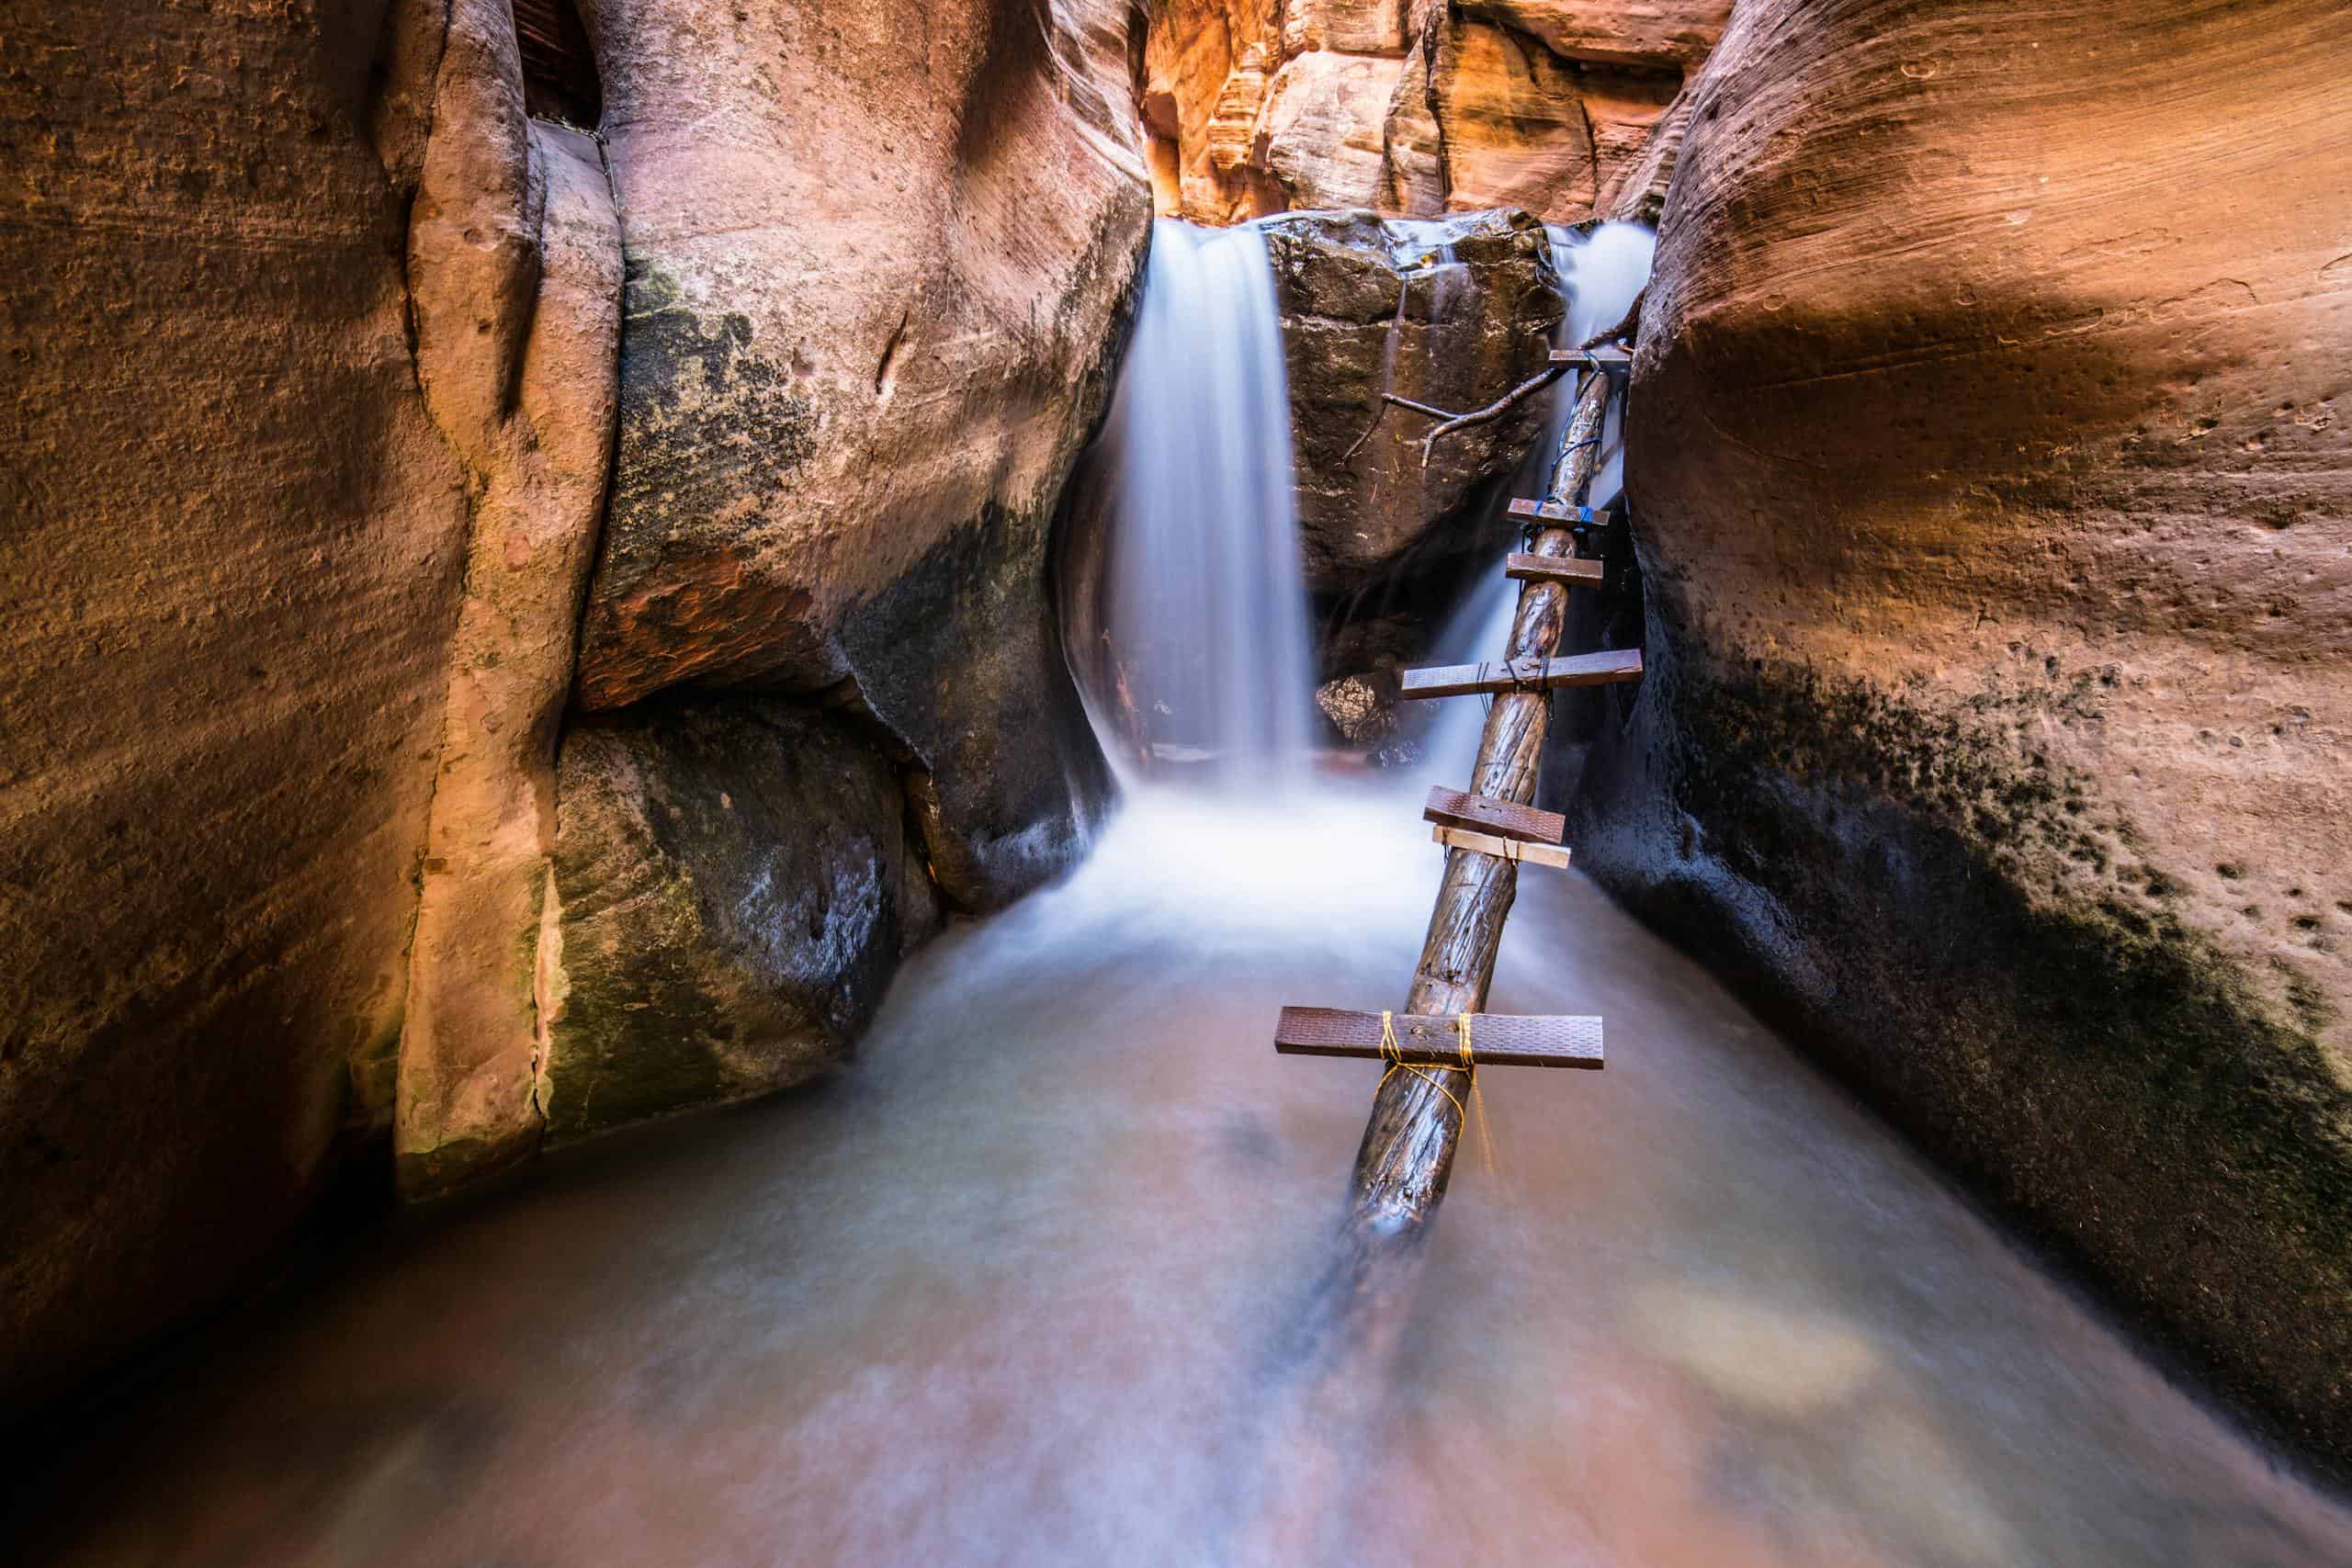
The hike is 3.7 miles (6 km) round-trip with 656 feet (200 m) of elevation gain, but plan for 3–4 hours since much of the route is slow going. I highly recommend water shoes, and it’s essential to check conditions before you go. Flash floods are possible year-round, and high water runoff is common in spring (April–May).
⚠️ Permit Required: A permit is mandatory for this hike. In the offseason, I managed to grab a permit the day prior, but during peak summer months, plan well ahead as permits can sell out.
Grab lunch before making the drive back to Salt Lake City. Sushi Burrito in Cedar City is my go-to for a quick bite! Yes, it’s sushi in burrito form, and it’s surprisingly delicious, filling, and perfect for the road.
Evening
If you’re anything like me, waking up early and hitting both of these highlights would be the ultimate way to end this trip! Just be sure to give yourself plenty of buffer time for the drive back to Salt Lake City, as I-15 near Lehi can get traffic bottlenecks. I recommend planning to return your rental car 2–3 hours before your flight
Years ago, I found myself in a position to check these two places off my bucket list! I left Zion at 7 am, grabbed coffee, and made it to Kolob by 8:30. I left Kolob at 10:30 am, arrived at Kanarraville for my 11 am permit time. I was done with the hike by 2 pm, got lunch in Cedar City, and was home in Salt Lake by 6 pm.
Depending on your flight time, your easiest dinner option may actually be at the airport. Sometimes convenience wins on travel days!
Utah Mighty 5 Road Trip Tips
Having explored the Mighty 5 many times, I’ve compiled these handy tips to help your road trip go smoothly.
Extend Your Stay
If possible, add a few extra days to explore the parks more in depth and make time for bonus stops along the way. Utah’s five national parks only cover a fraction of the state; hidden gems like Goblin Valley, Grand Staircase–Escalante, and countless other spots end up being just as memorable.
Buy A National Parks Pass
I highly recommend purchasing an Annual National Park Pass. You’ll be visiting five national parks, and individual entry fees run about $30-35 per park, nearly $150 total. The annual pass costs just $80, making it an easy and worthwhile savings.
Stock Up On Supplies
Stock up on groceries and supplies in Salt Lake City before hitting the road. Moab is the last reliable place to resupply; after that, you’ll mostly find small, remote general stores that are limited and often expensive.
Don’t Skip Canyonlands Or Capitol Reef
Don’t overlook the two lesser-known parks: Canyonlands and Capitol Reef. Both parks are very underrated, with Canyonlands offering some of the most remote and awe-inspiring backcountry.
When To Visit
I personally avoid visiting the Mighty 5 in the summer, as temperatures often soar above 100°F (38°C). One exception: slot canyon hikes with water, like The Narrows or Kanarraville Falls, which can be more enjoyable (and refreshing) during hotter months. Conversely, Winter offers far fewer crowds, shorter days, and colder temperatures! Don’t be fooled by the desert landscape. Bryce Canyon often records colder temperatures than Salt Lake City!
Be Prepared!
Bring lots of water, especially in the summer. 1L of water for every hour hiked is recommended (even more in the summer). National Parks always have water filling stations, so be sure to ask the park rangers. Also pack sunscreen, bug spray, and other essentials. Familiarize yourself with the 10 essentials.
FAQs
Have questions about making the most of your Mighty 5 trip? Here are some of the most frequently asked questions and answers.
How many days do you need for The Mighty 5?
This depends on how much you want to see and explore, but a week is the bare minimum. With seven days, you get at least one full day in each park, but I believe the 10-day is the ideal amount of time to do the Mighty 5 justice!
What is the best order to visit the Utah national parks?
This depends on your starting point. If you are coming in from the North (Salt Lake City) or West (Denver), then the best order goes: Moab (Arches/Canyonlands) -> Capitol Reef -> Bryce Canyon -> Zion. If you are coming in from the South (Las Vegas), then the order is simply reversed.
What is the best month to travel to Utah?
For those who love milder temperatures, the best month to take on this mighty five roadtrip is October. Generally, September to November and April to June are the best months to see Southern Utah. The summer months bring extreme heat, and the winter months can bring cold weather and snow.
Final Thoughts
There you have it! 10 days well spent exploring some of the most unique and breathtaking landscapes in the country. While I truly believe 10 days is the ideal time needed to experience the parks in depth, seven days will still let you hit the highlights.
You’ll often hear suggestions to skip Capitol Reef, rush through Bryce Canyon in a few hours, or breeze through Highway 12. However, if you can add in a few extra days, I strongly recommend it! Utah is a vast landscape that deserves a little extra time to really be explored.
I hope this itinerary helps you plan an unforgettable adventure. Travel thoughtfully, respect the land, and be a good steward of these incredible places. Utah is calling your name, and I hope you answer. 🌄