Hiking In Canyonlands National Park: Complete Guide 2026

As an outdoor enthusiast, I find hiking in Canyonlands National Park to be incredibly exciting, memorable, and full of adventure! The park is located about a four-hour drive from Salt Lake City and just half an hour from Moab. It lives up to its name: truly a land of seemingly endless canyons.
This area holds some of the most underrated scenery in Utah! With endless canyon networks, towering mesas, sweeping vistas, unique rock formations, and landscapes that feel almost otherworldly, this park should be on your bucket list.
As a weekend warrior, living in Salt Lake City has allowed me to visit Canyonlands dozens of times over the years. Today, I am here to share this complete hiking guide with you from all those years of exploring. Let’s dive in!
Hiking In Canyonlands National Park
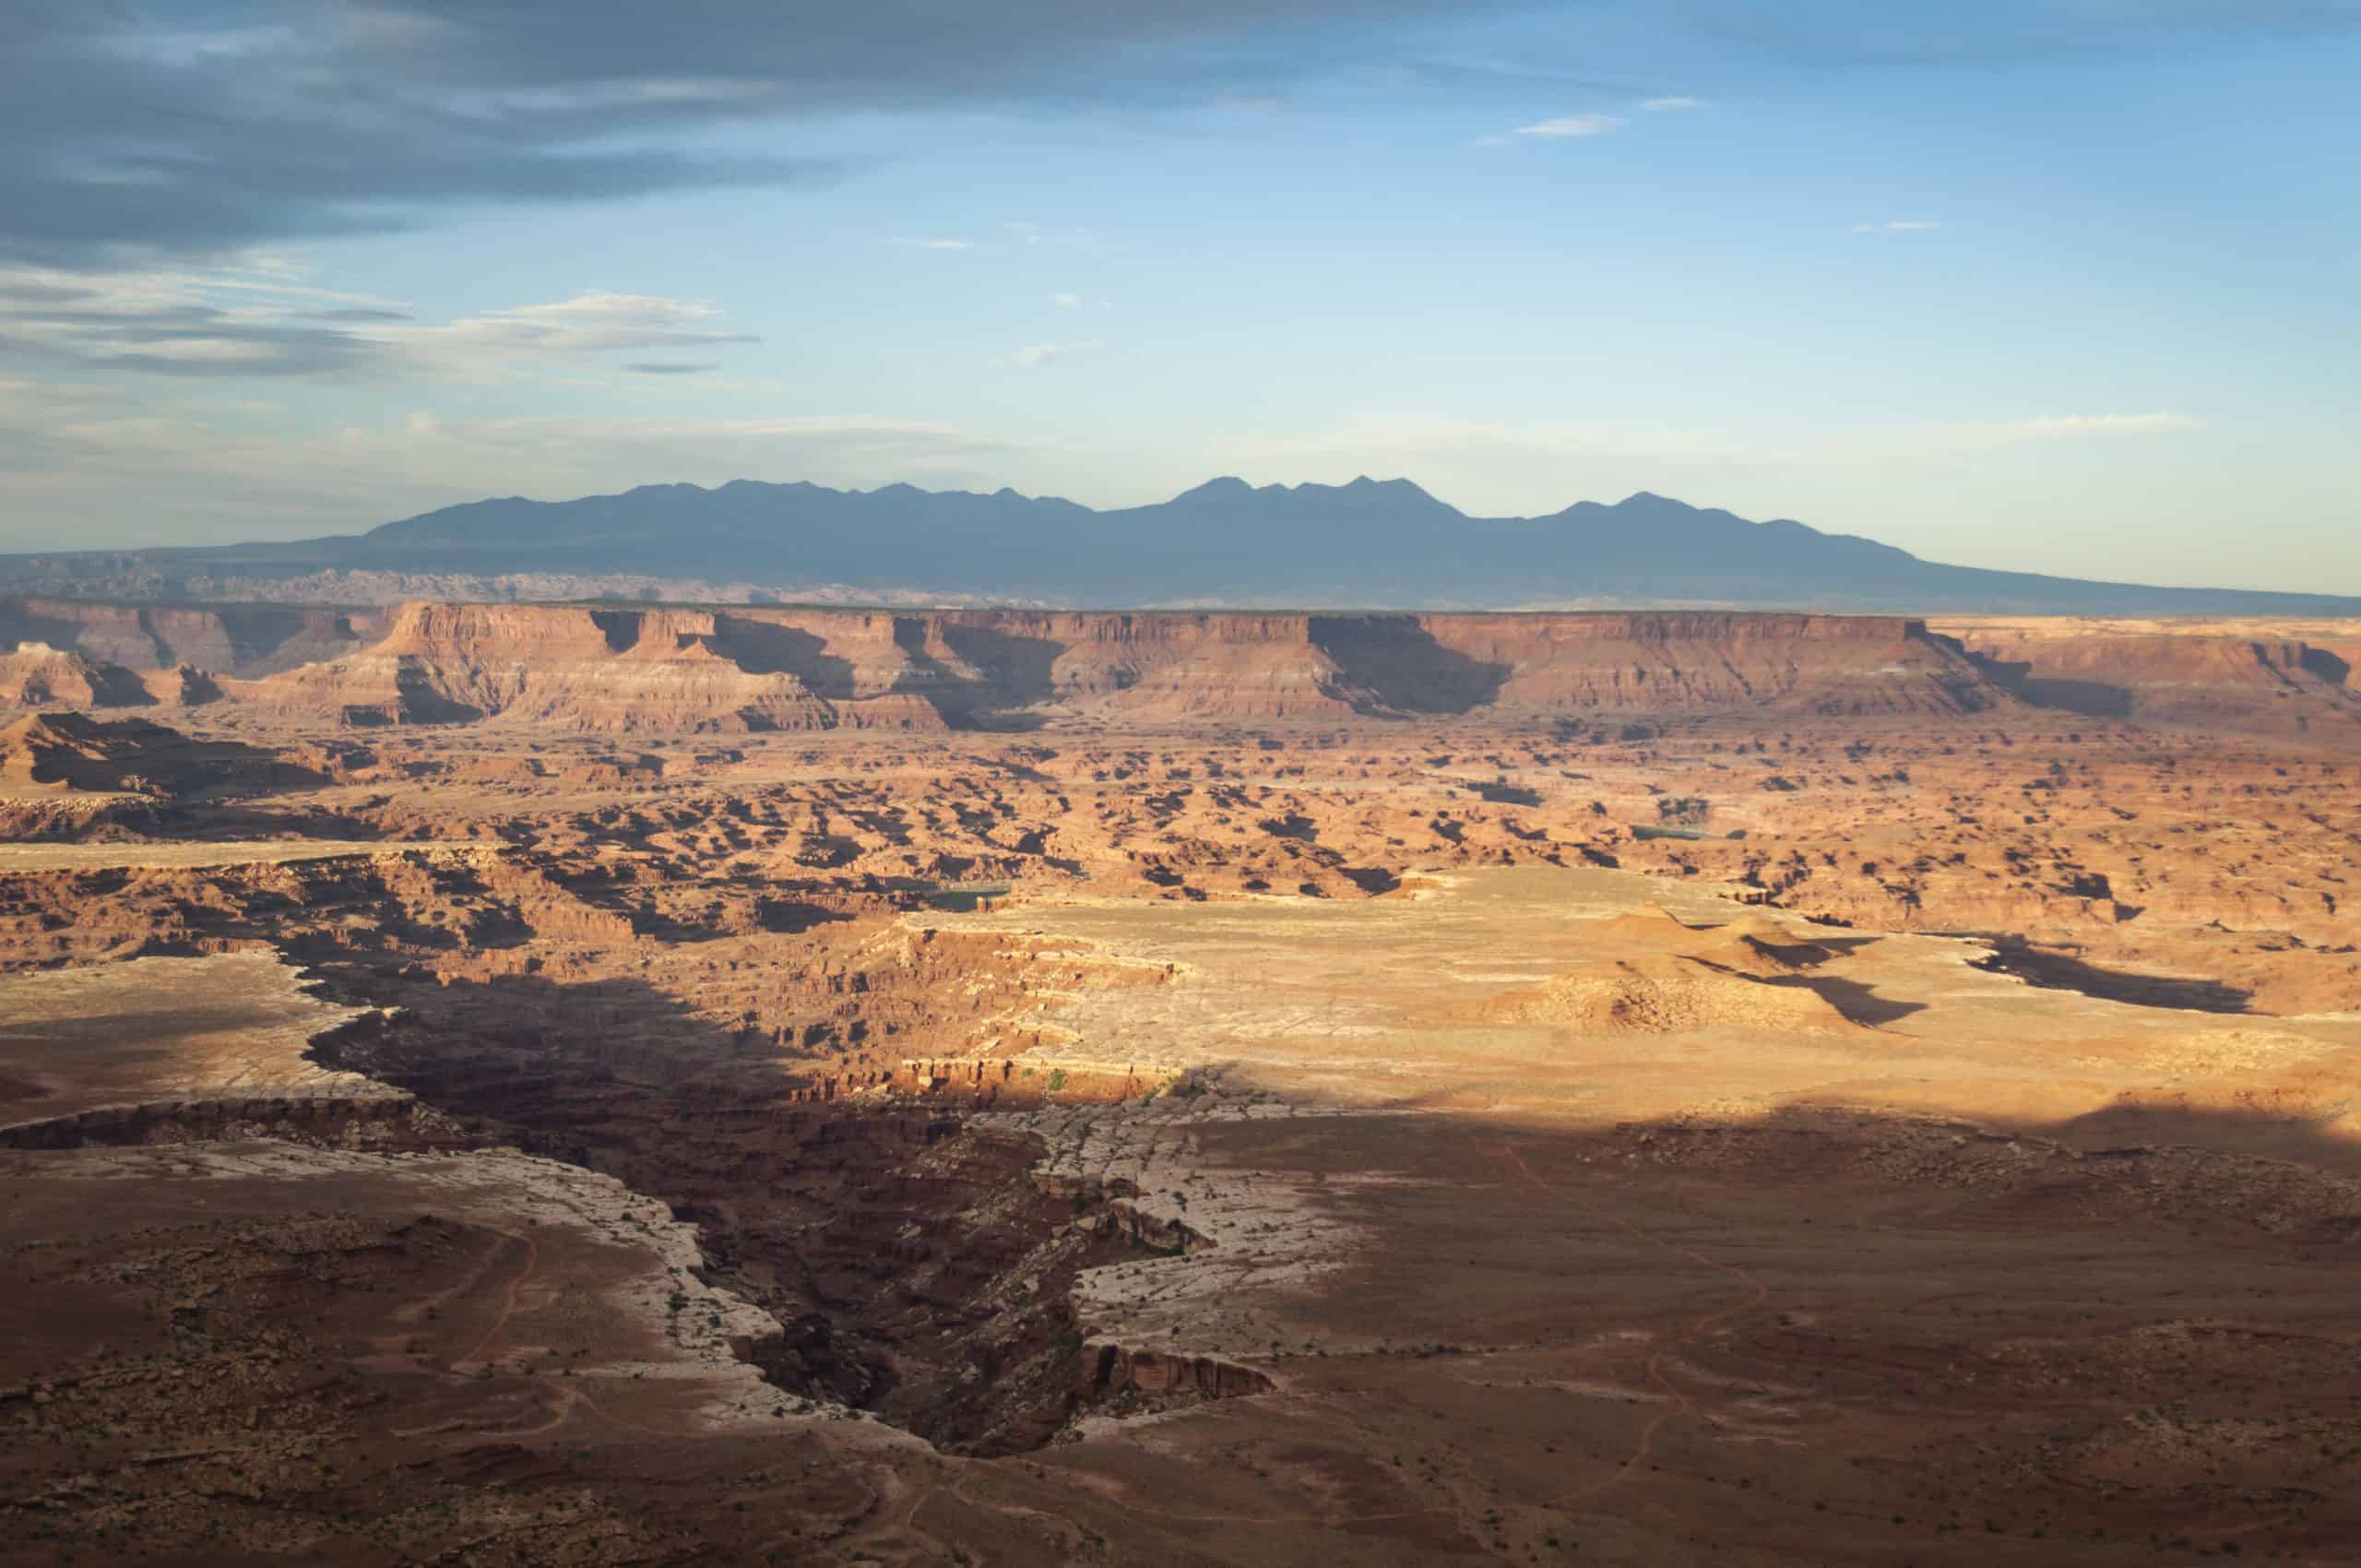
Canyonlands National Park is divided into three districts: Island in the Sky, Needles, and The Maze. While every section has its own beauty, Island in the Sky remains the most popular and easiest to reach. It’s best suited for first-time visitors looking for dramatic views and easier hikes.
The name comes from the mesa that you are driving up on; from below, it looks like an “Island” in the sky. While most of the hikes are up on the rim or “island”, you can either hike below the rim or drive with an off-road vehicle.
For more solitude, go to the Needles District, with longer hiking trails that require route-finding, scrambling, and a sense of adventure! And if even that feels too populated, push further into The Maze, which is pretty much all backcountry, only accessible by off-roading and backpacking.
15 BEST Canyonlands Hiking Trails
I have yet to visit the Maze, so my top recommendations for the best hiking trails in Canyonlands National Park are in the Needles and Island in the Sky districts.
1. Druid Arch (Needles District)
While most visitors stick to Canyonland’s Island in the Sky District, Druid Arch, located in the lesser-visited Needles District, is easily my favorite hike in the park! I hiked to this gem in 2020 and quickly realized that it’s not a trail, but a route-finding adventure, marked by rock cairns scattered across the terrain, which can be easy to miss!
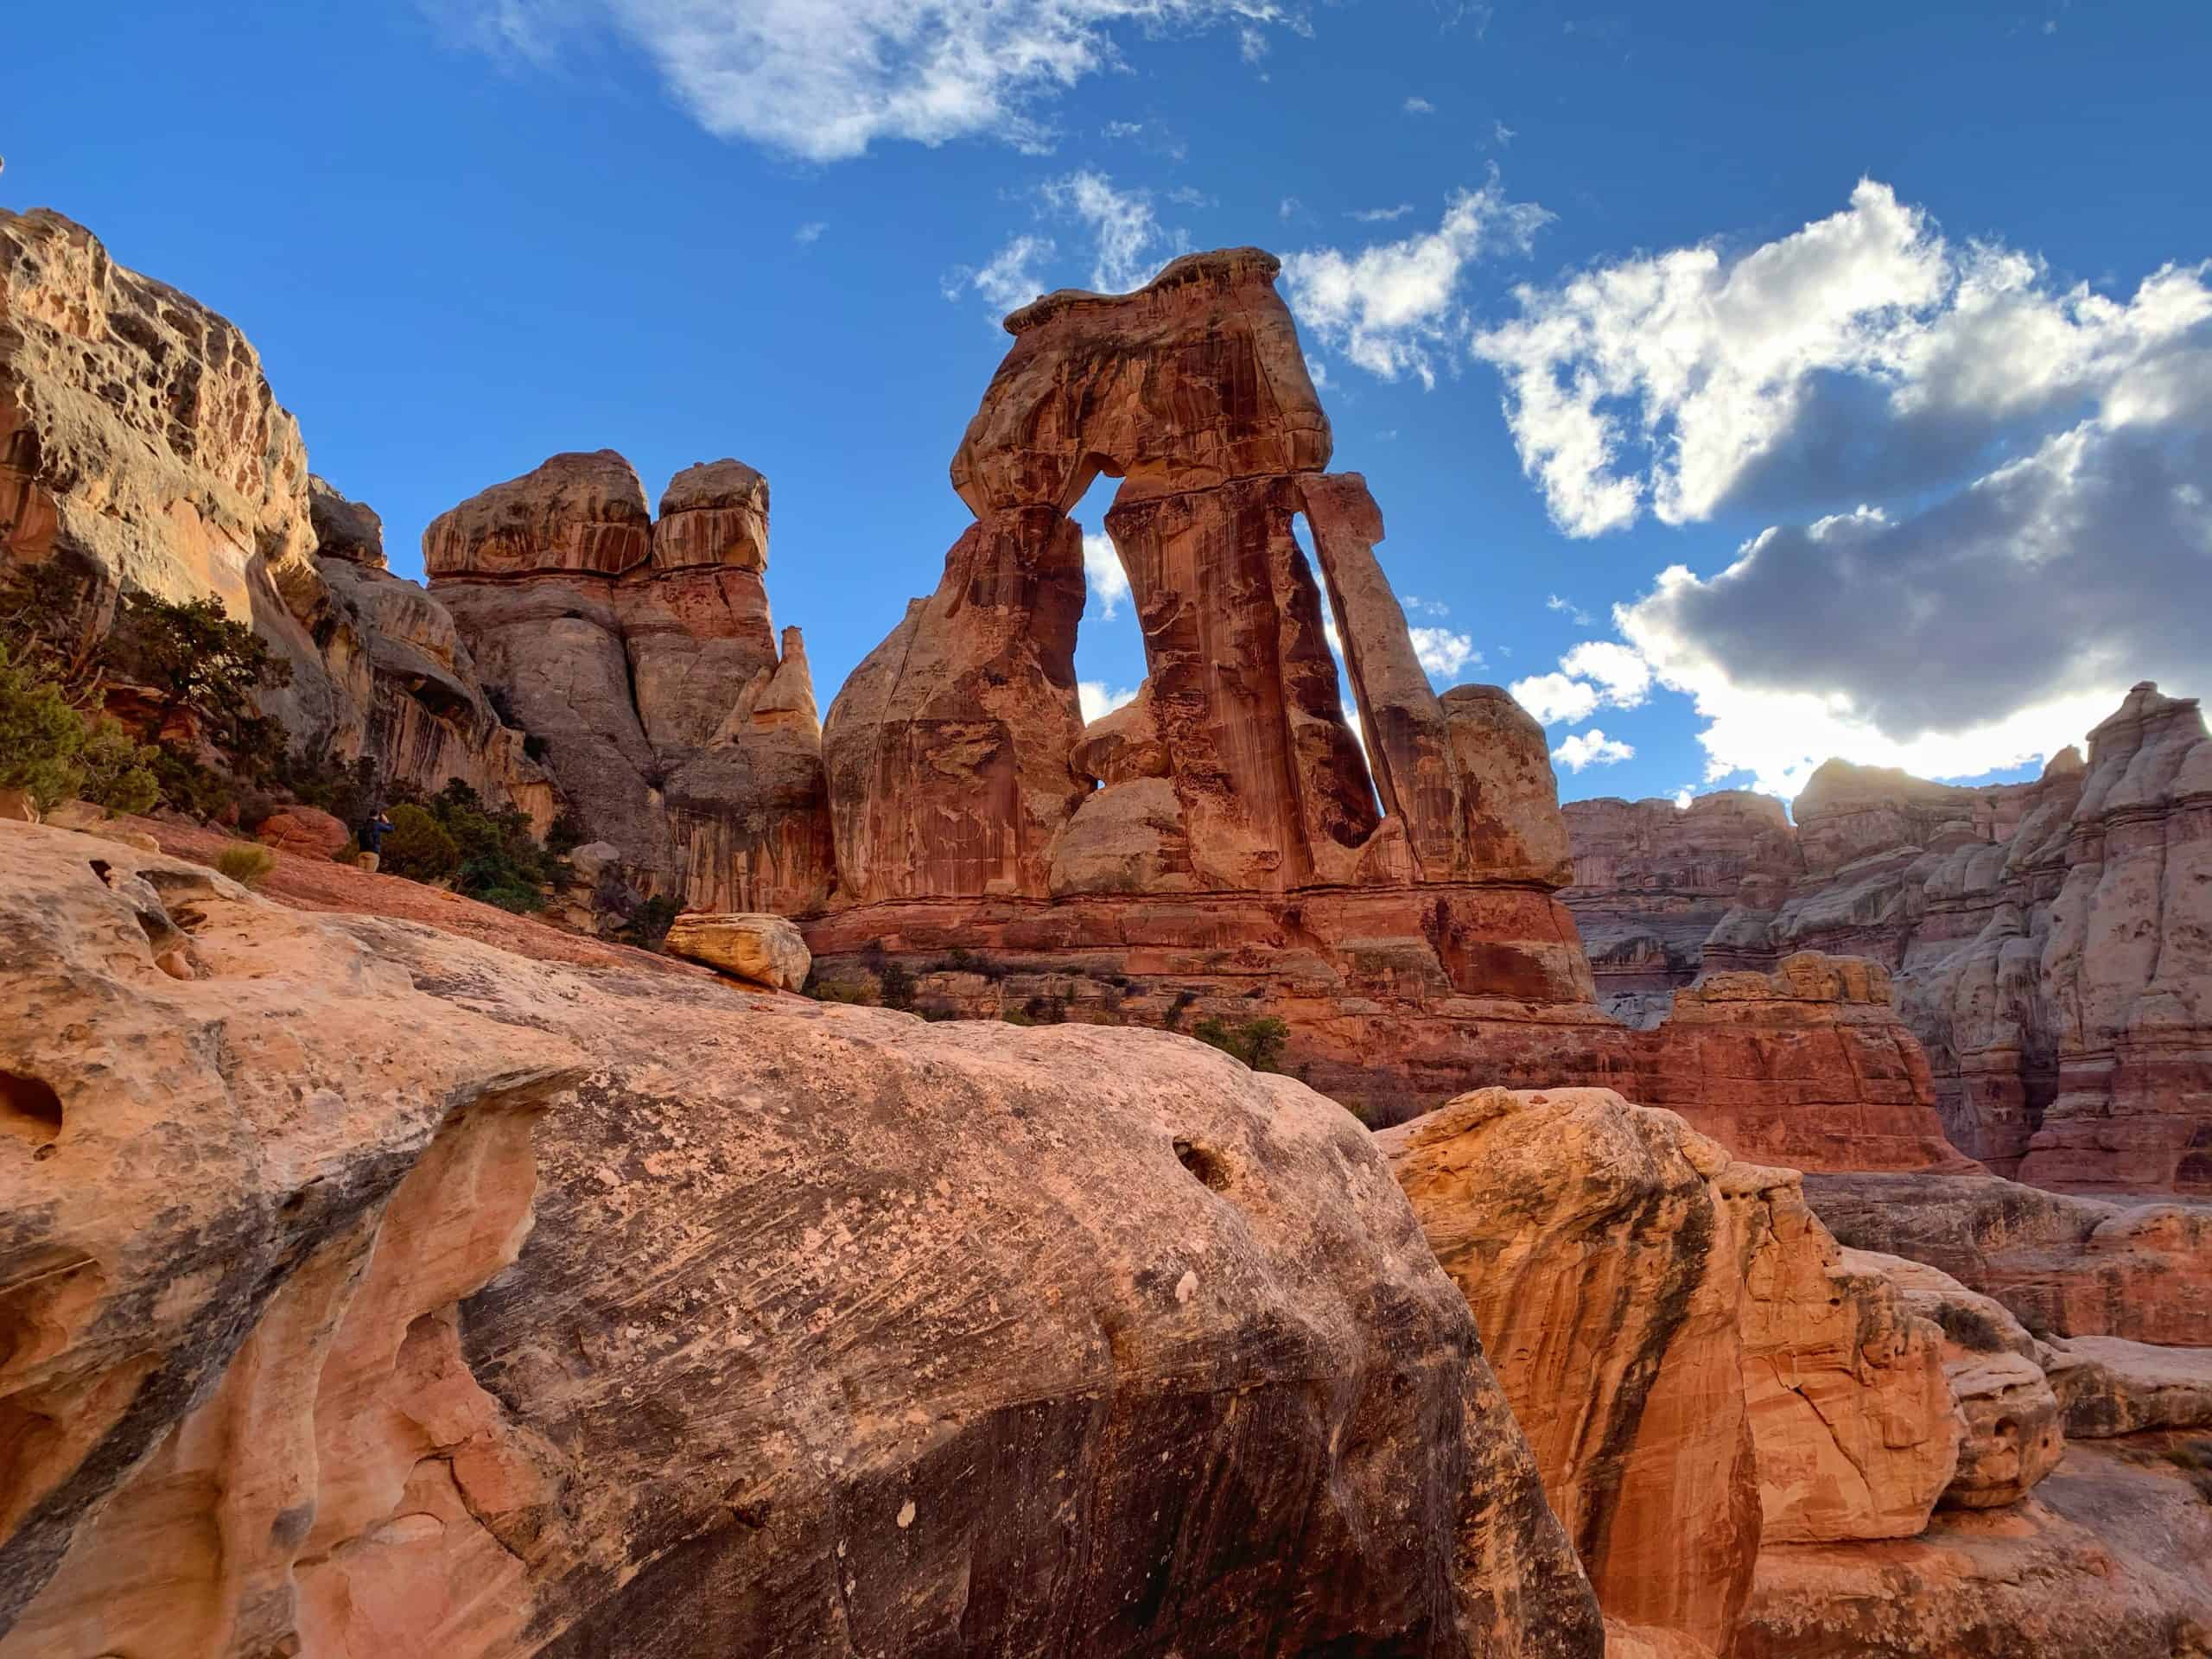
The payoff is well worth it: a massive natural arch that looks even more impressive in person than in photos. Because this area is remote and exposed, pack extra water (seriously, bring more than you think you’ll need!)
Pro-Tip: Don’t underestimate the distance. It took me nearly seven hours to complete the hike. I recommend starting early, bringing plenty of snacks, and pacing yourself to fully enjoy this hike!
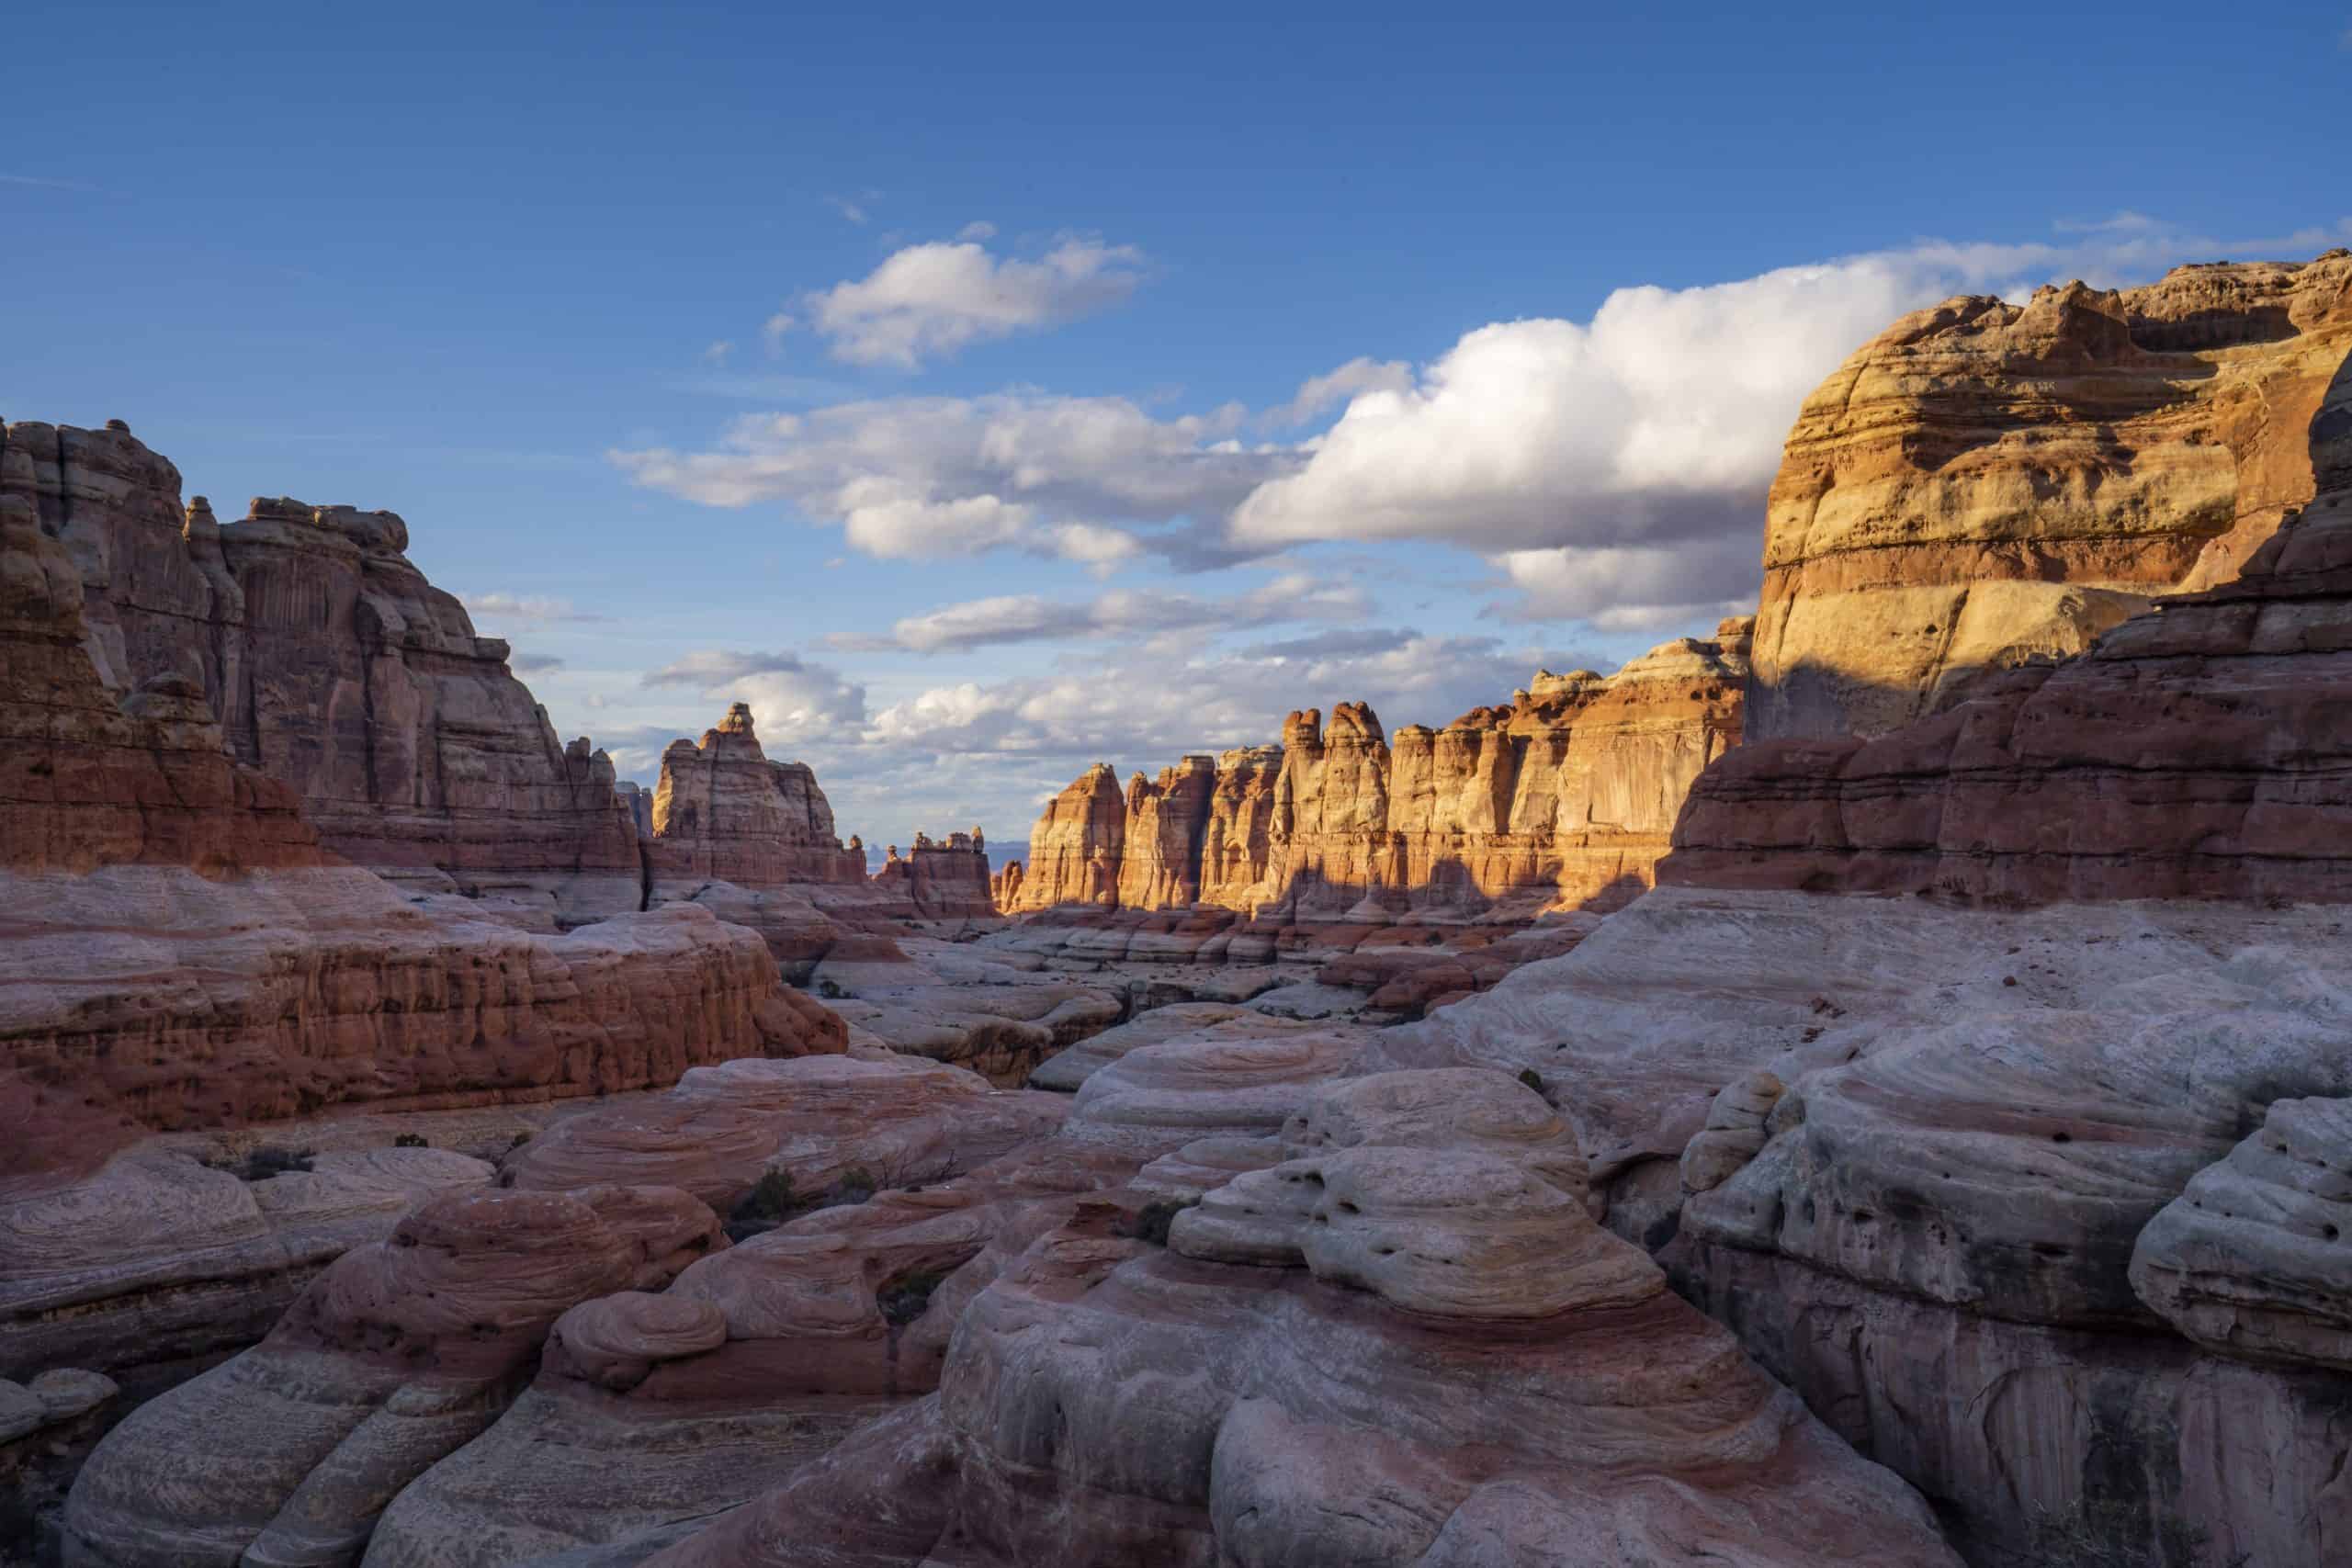
2. Chesler Park Loop Trail (Needles District)
The hike shares the first two miles with the Elephant Canyon trail, which leads to Druid Arch. While I haven’t been lucky enough to spend the night in Chesler Park, we hiked to the Chesler Park viewpoint as a detour en route to Druid Arch, so it is possible to do both in one day!
Once you enter Chesler Park, the world becomes your oyster. For dayhikers, the loop trail around Chesler Park delivers the best bang for your buck, but for backpackers, endless trails branch out from here!
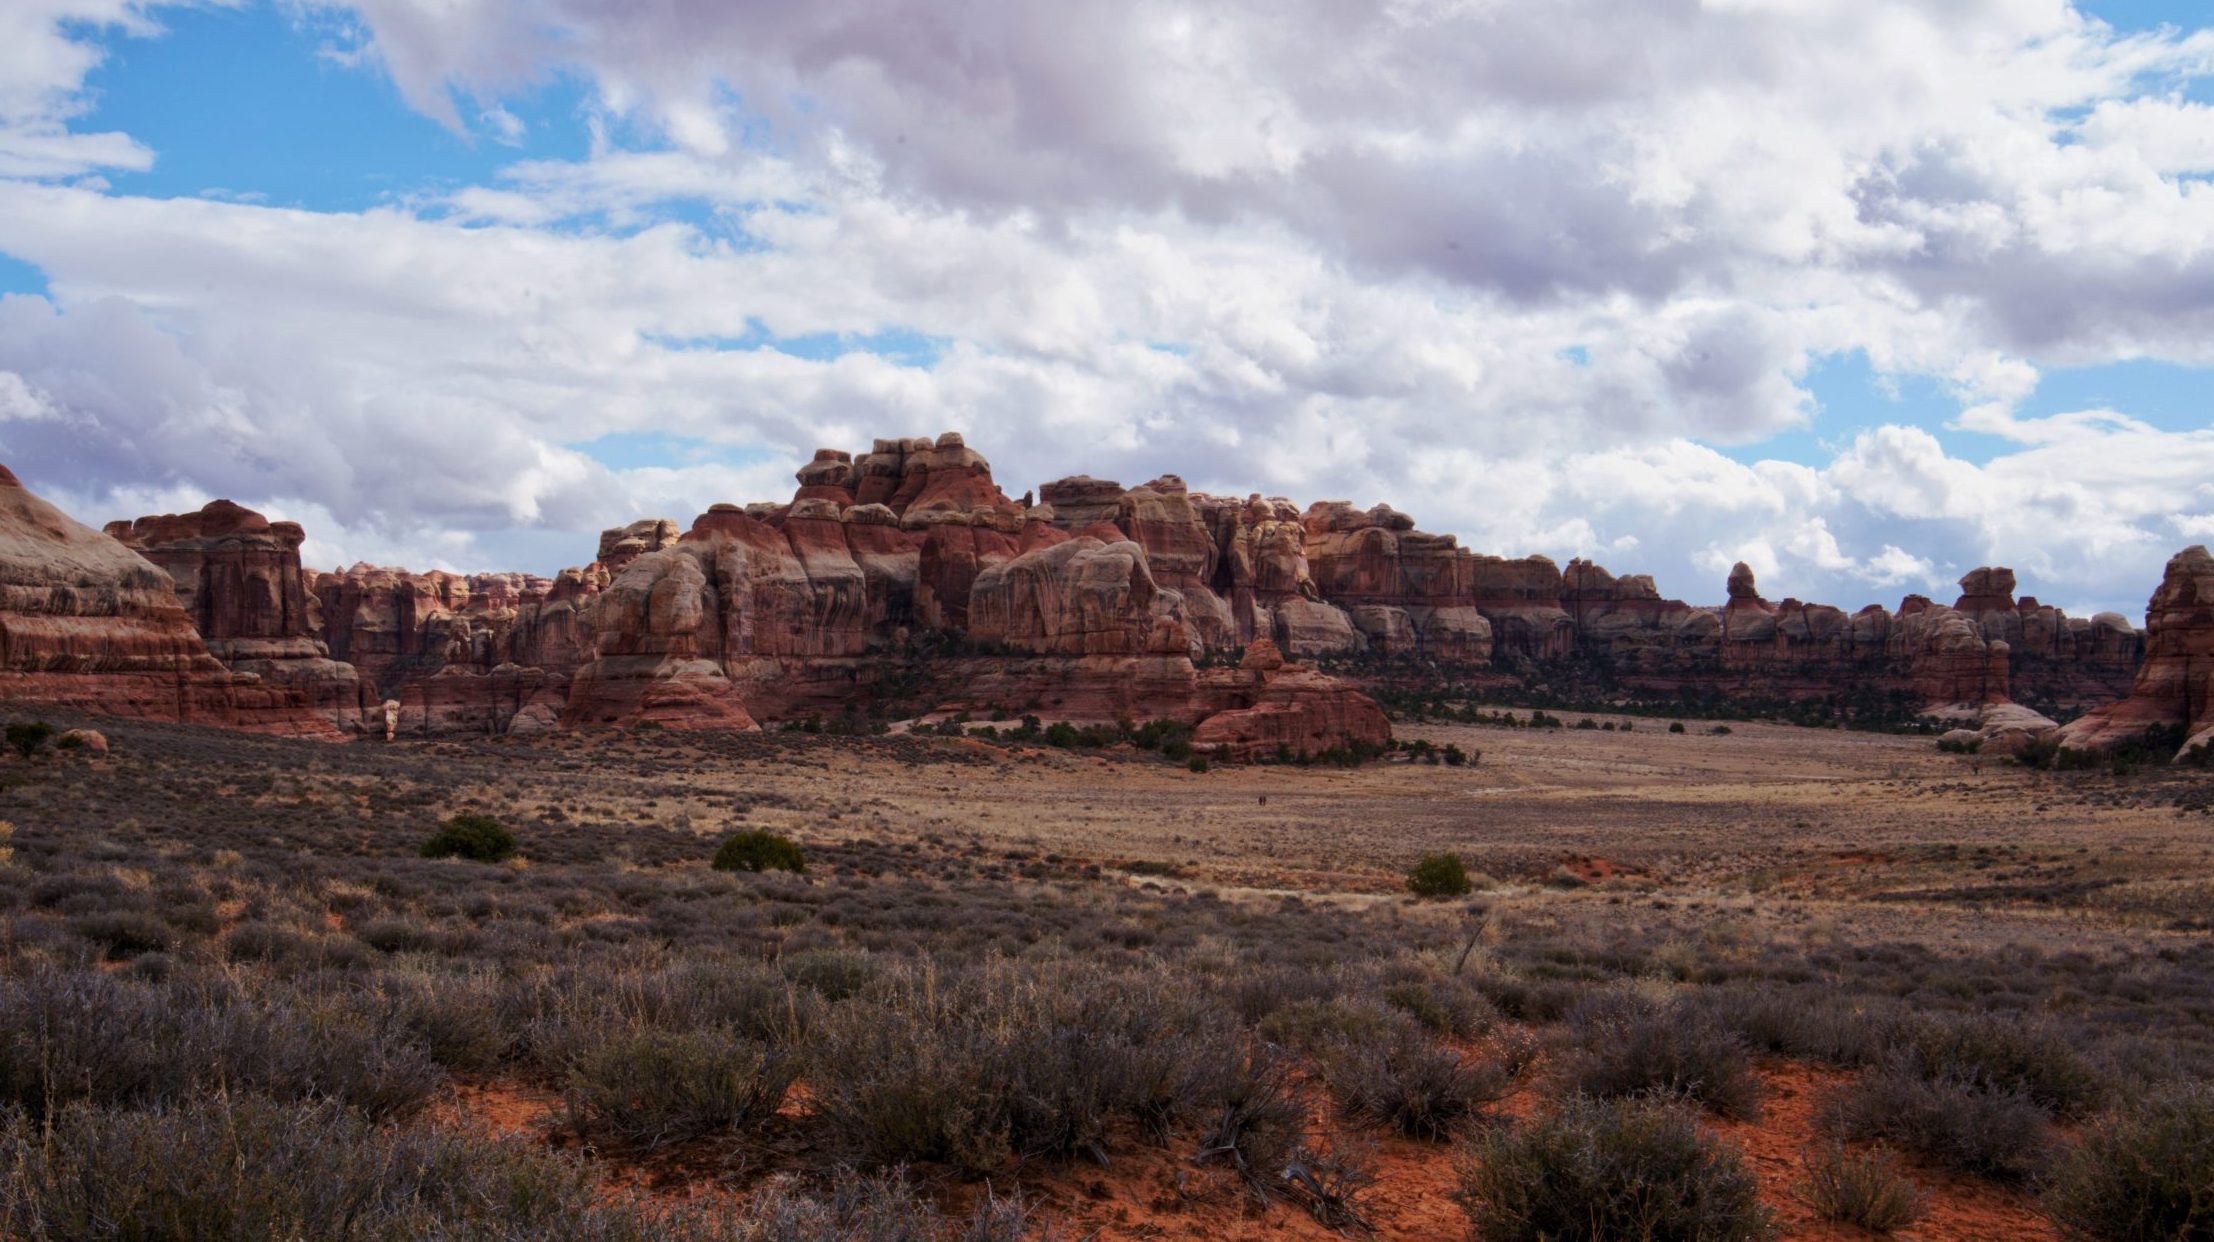
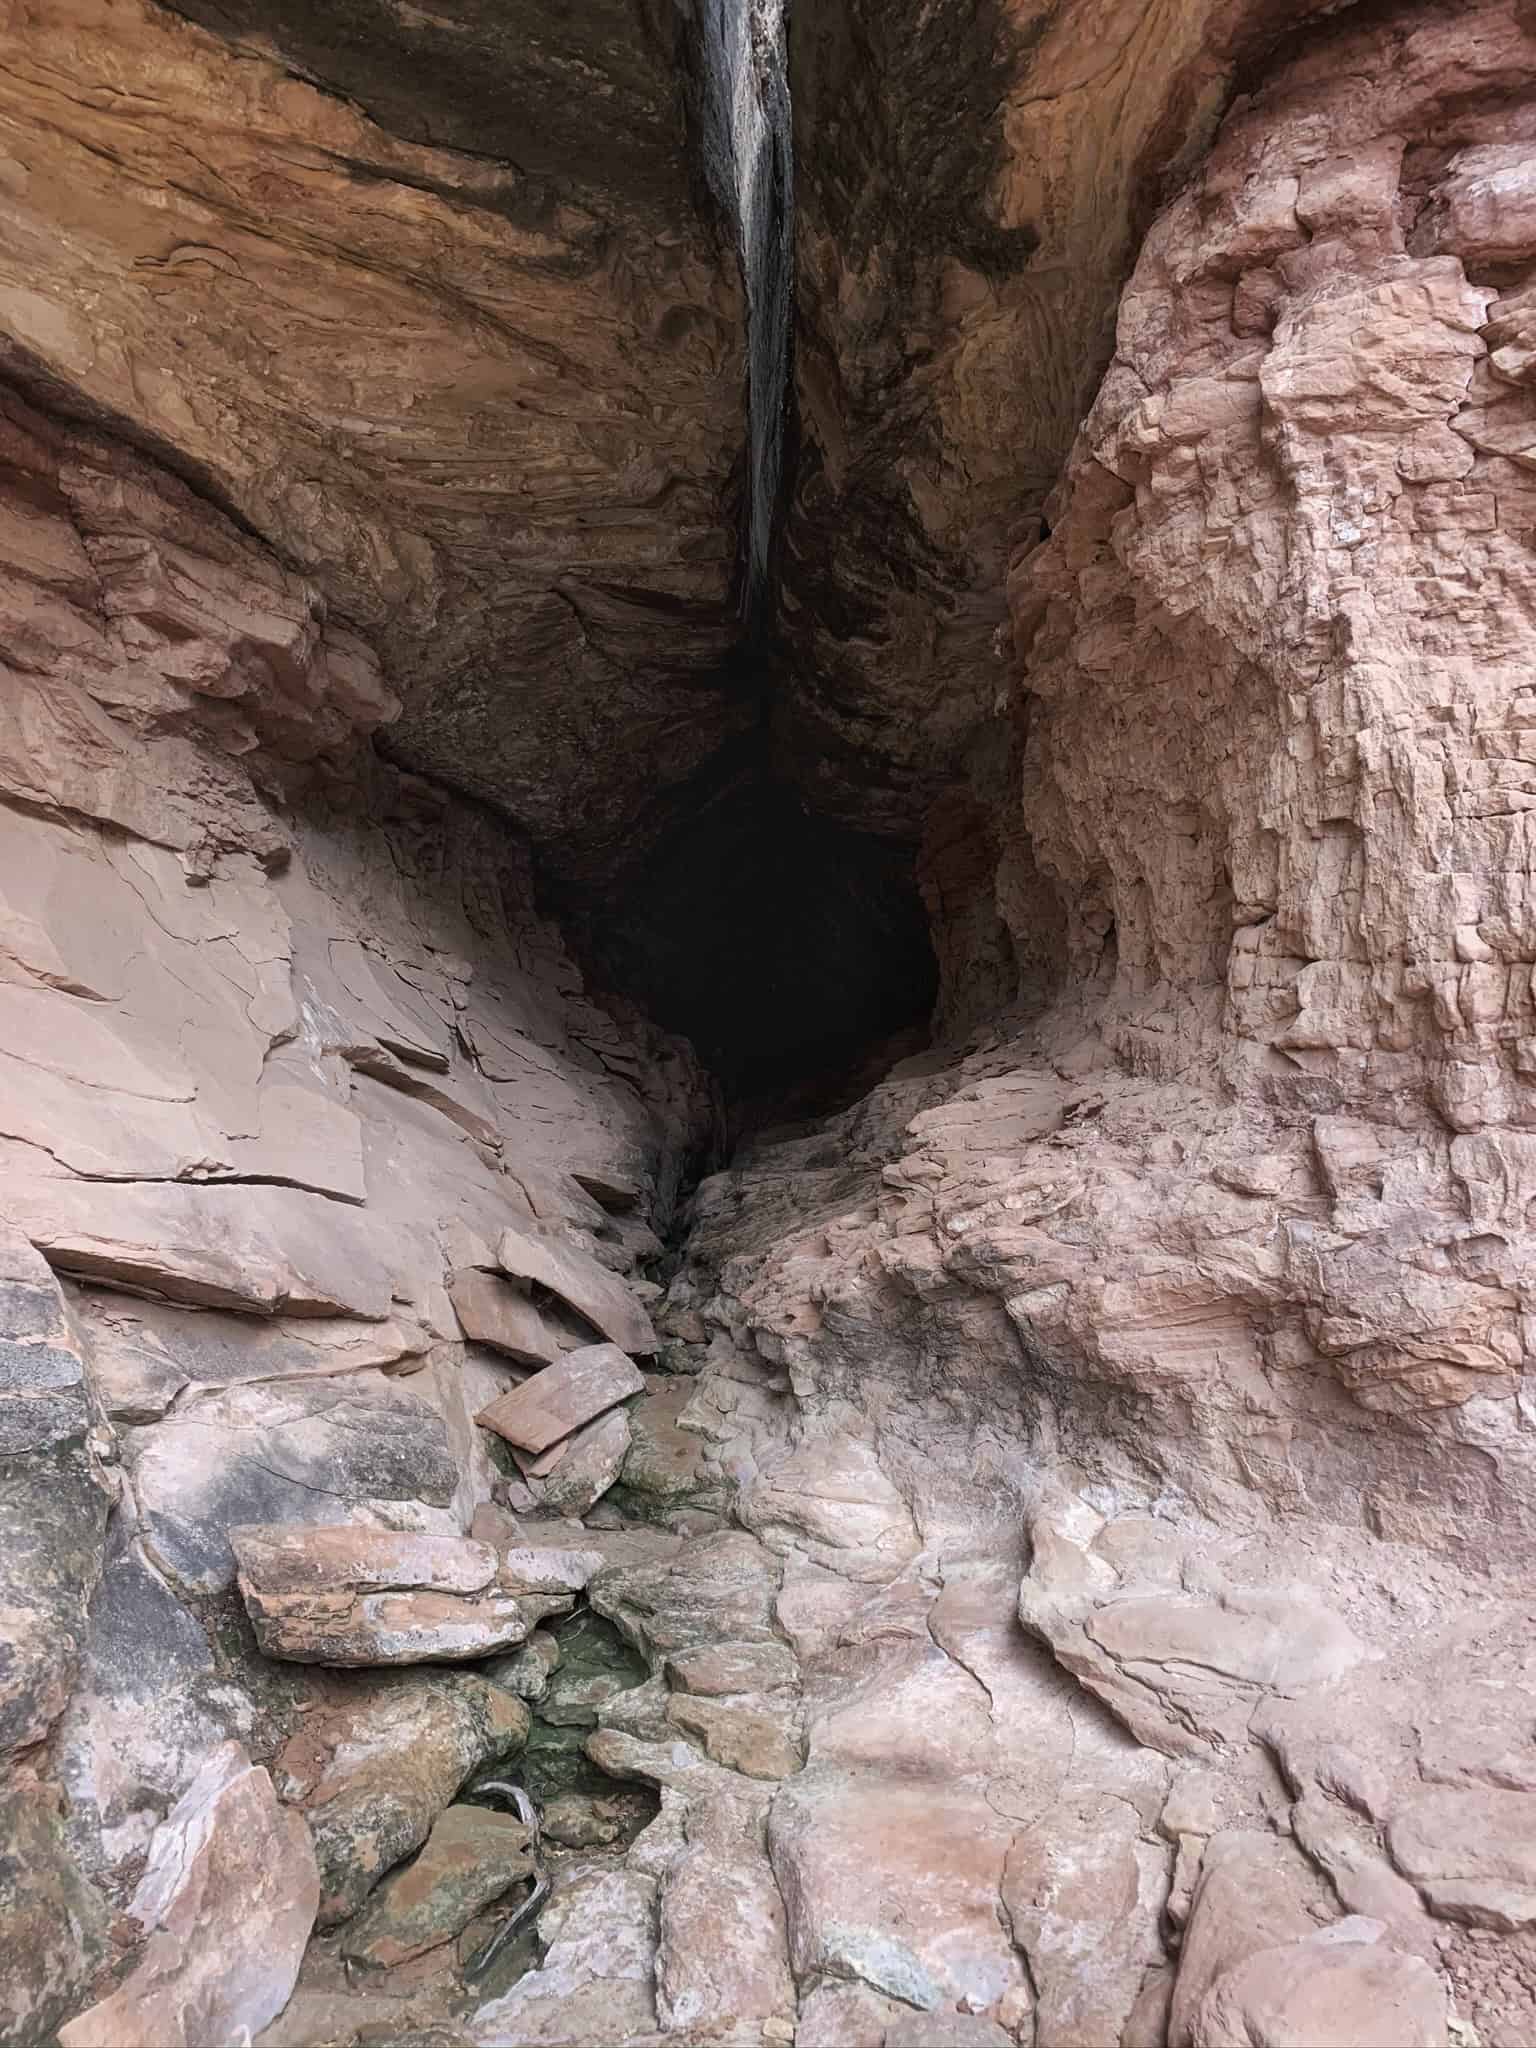
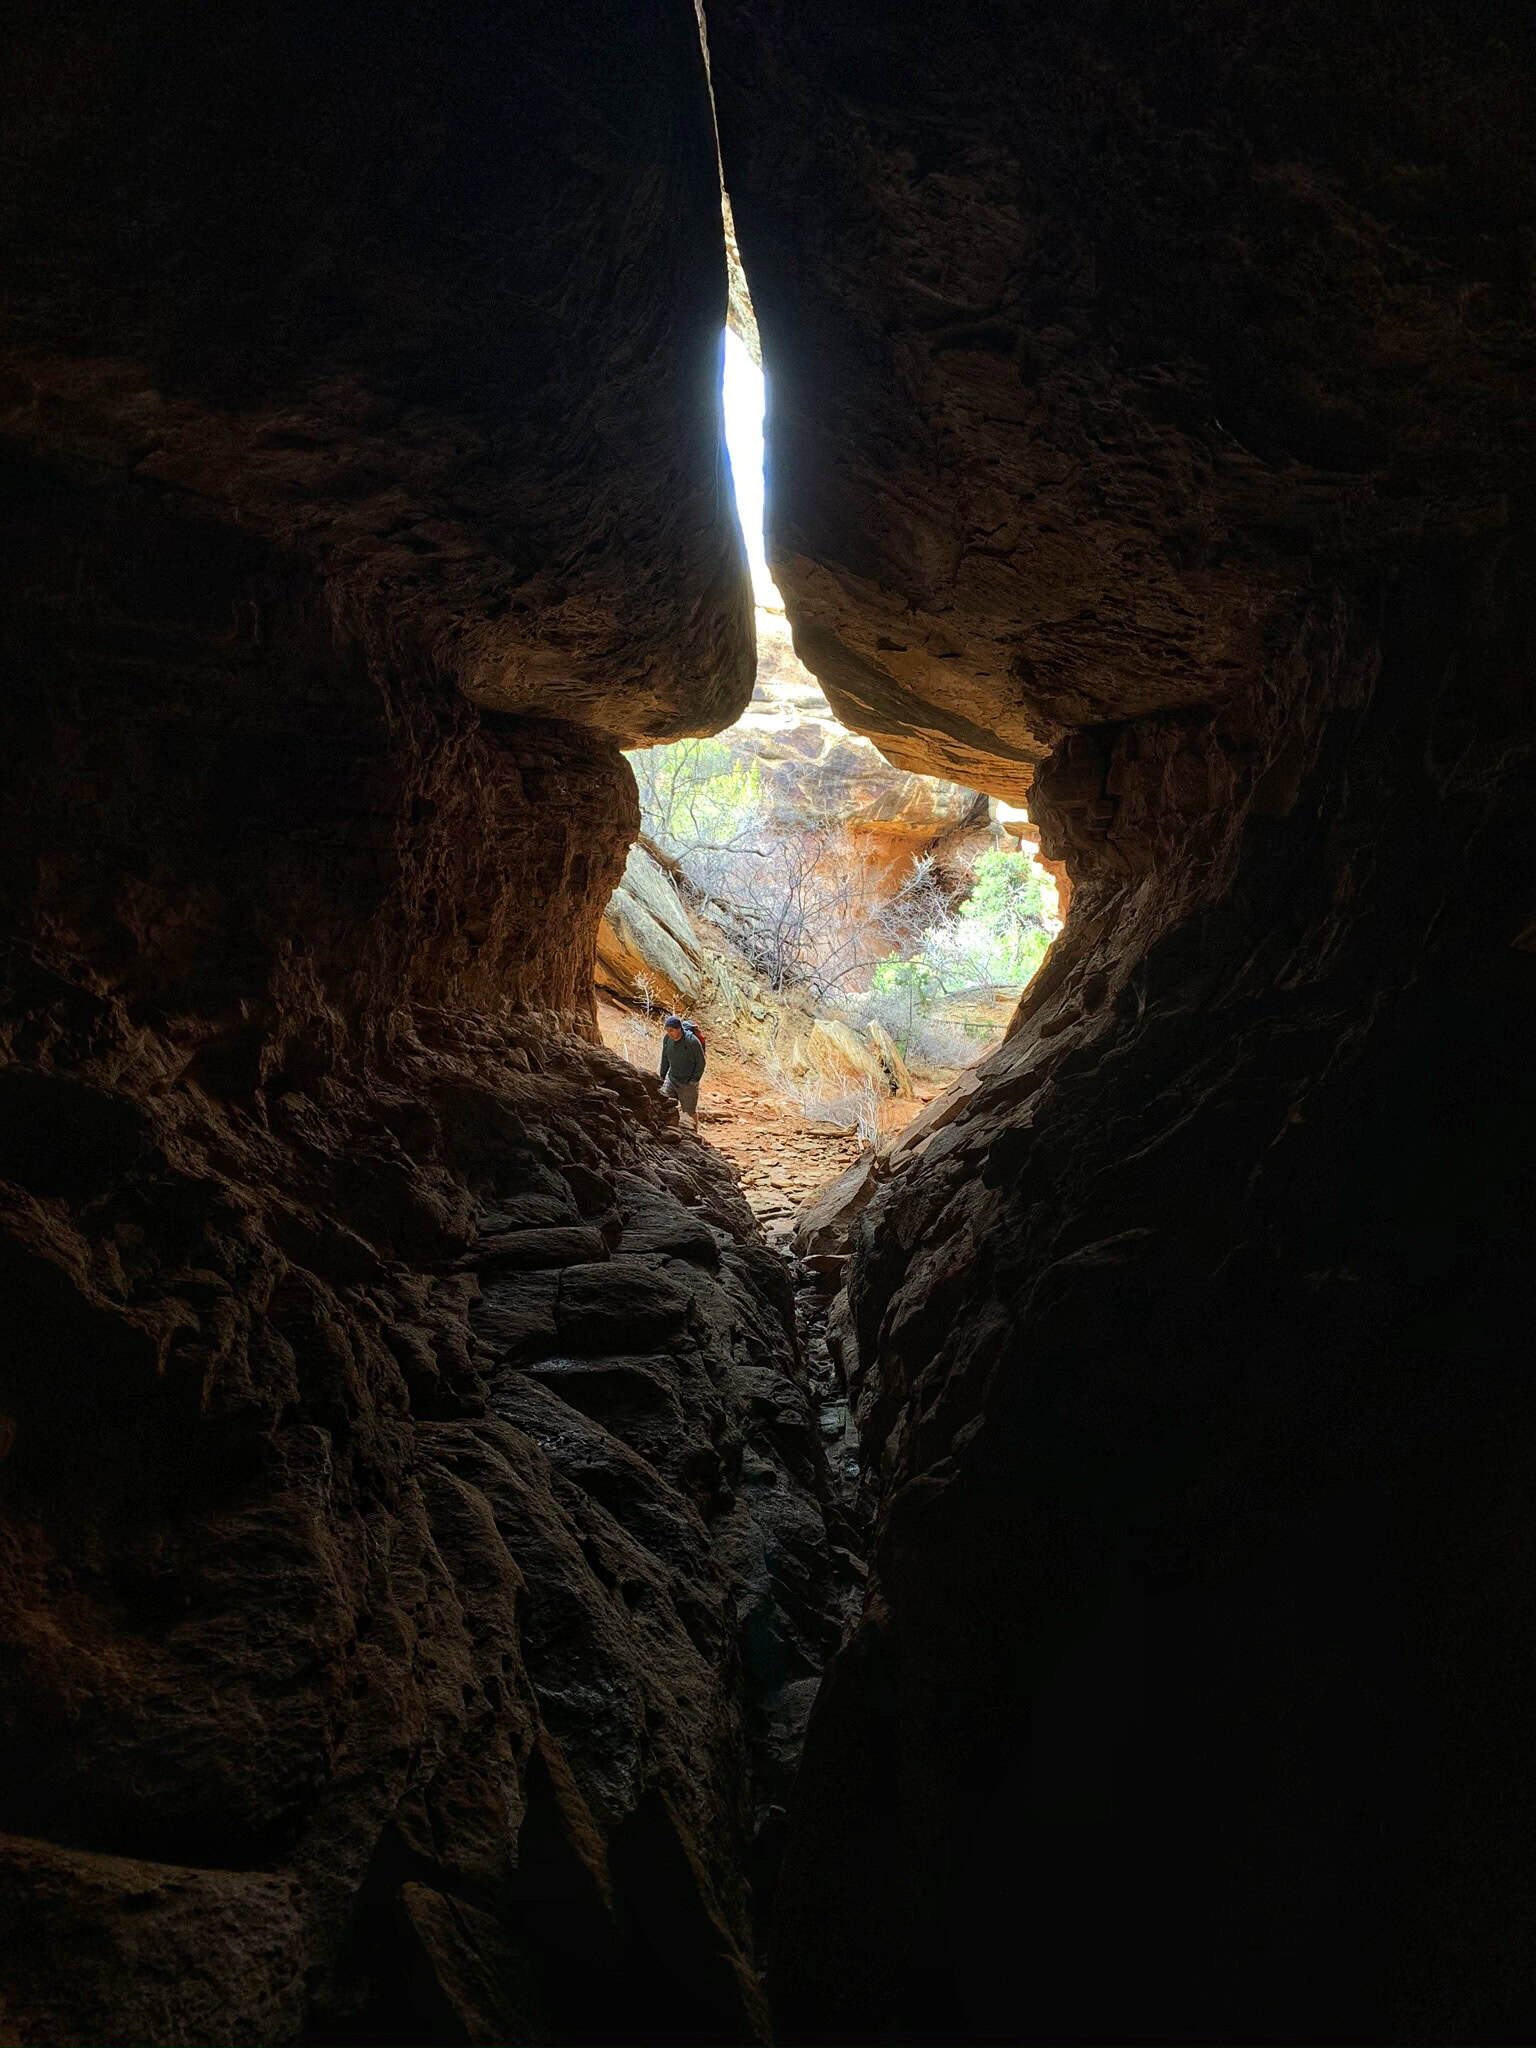
So what makes Chesler Park so unique? Imagine colorful needle-like formations surrounding a circular grassy meadow – an unlikely combo. The loop trail also passes through several “joints,” which are mini-slot canyons. We had to pass through one of these, and it was super fun! I yearn to go back and explore this area deeper.
Pro-Tip: For those only spending a day here, I suggest following my 2020 route by adding in the Chesler Park Viewpoint and Druid Arch. AllTrails underestimates the mileage; it’s about 12 miles (9.3 km) and 2000 feet (610 m)
3. Confluence Overlook Trail (Needles District)
This hike is very high on my Canyonlands bucket list ever since I learned about it! A unique geographical point in Canyonlands is the confluence of two big rivers: the Green River, which originates in the Wind River Mountains of Wyoming, and the Colorado River, which originates in the Rockies of Colorado.
This hike takes you to an overlook of that confluence and is a sight to behold! Just like the other hikes in the Needles District, this trail is a mixture of dirt trails, following rock cairns, and climbing ladders
It’s best suited for hikers comfortable with light scrambling and navigation. With an early start, plenty of water, and sun protection, the payoff is worth it with unbelievably scenic and uncrowded views that make the effort unforgettable.
4. Gooseberry Trail (Island In The Sky)
In the Island in the Sky District, five trails take you from the rim down to the canyon floor, with this trail being the shortest and steepest!
The hike is no joke as the first mile is very rocky and descends rapidly, about 1,100 feet (335 meters) over loose rock and down a series of steps.
The reward? Stunning views that rival those of the Grand Canyon and a unique and close-up view of Gooseberry Canyon itself. This hike is a great, budget-friendly option if you don’t have access to a four-wheel-drive vehicle or want to skip rental fees.
For the more adventurous, you can follow the White Rim Road all the way to Monument Basin, which is a stunning canyon that easily holds its own against Arizona’s Monument Valley. I’ve also mapped out an off-trail shortcut to get there faster, and I’ll share details once I’ve had a chance to hike it!
Pro-Tip: Avoid this one in the summer heat and remember, you’ll be hiking uphill on the way out: save your energy for the climb out!
5. Lathrop Trail (Island In The Sky)
This trail also takes you below the rim, but it’s much longer. The good news is you don’t have to commit to the full distance, as there are three natural stopping points along the way: the Lathrop Canyon Overlook, the top of Lathrop Canyon, or all the way down to the Colorado River.
Hiking to the overlook is absolutely worth it for the views, but beyond that is really up to personal preference. This route is fantastic for an introductory backpacking trip where you can pitch your tent along the Lathrop Canyon road (permit required). But much like the Gooseberry Trail, the descent down the main canyon is still very steep!
And if you’d rather skip the long hike, an off-road vehicle gives you access to the White Rim Road to Gooseberry Canyon, from where you can also drive down the canyon to the Colorado River. There are pit toilets available at the end of the road as well
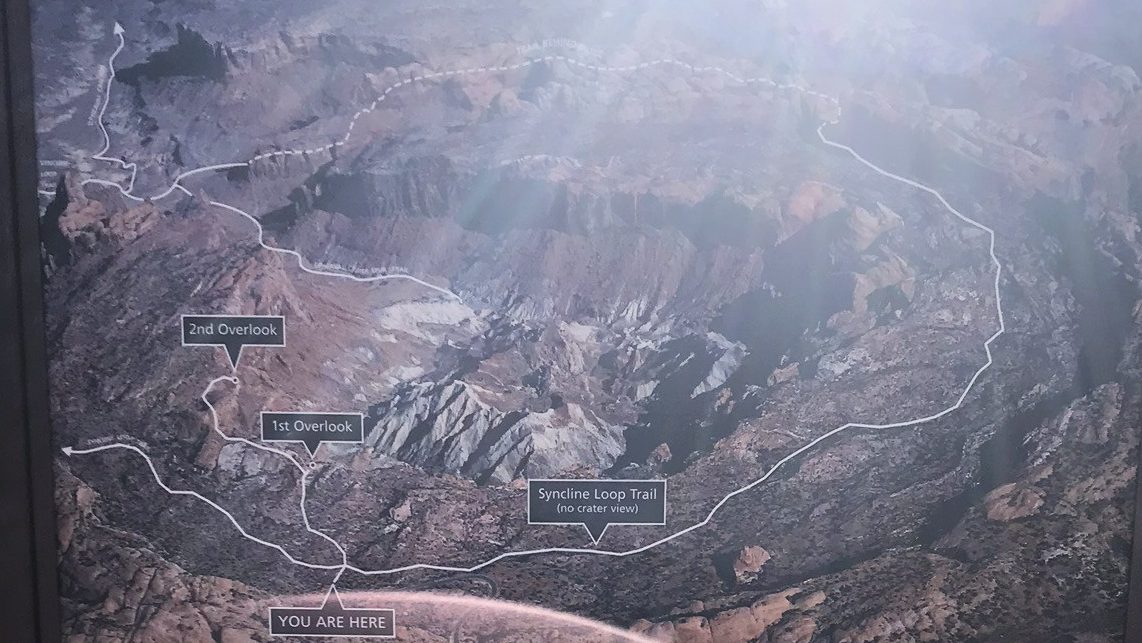
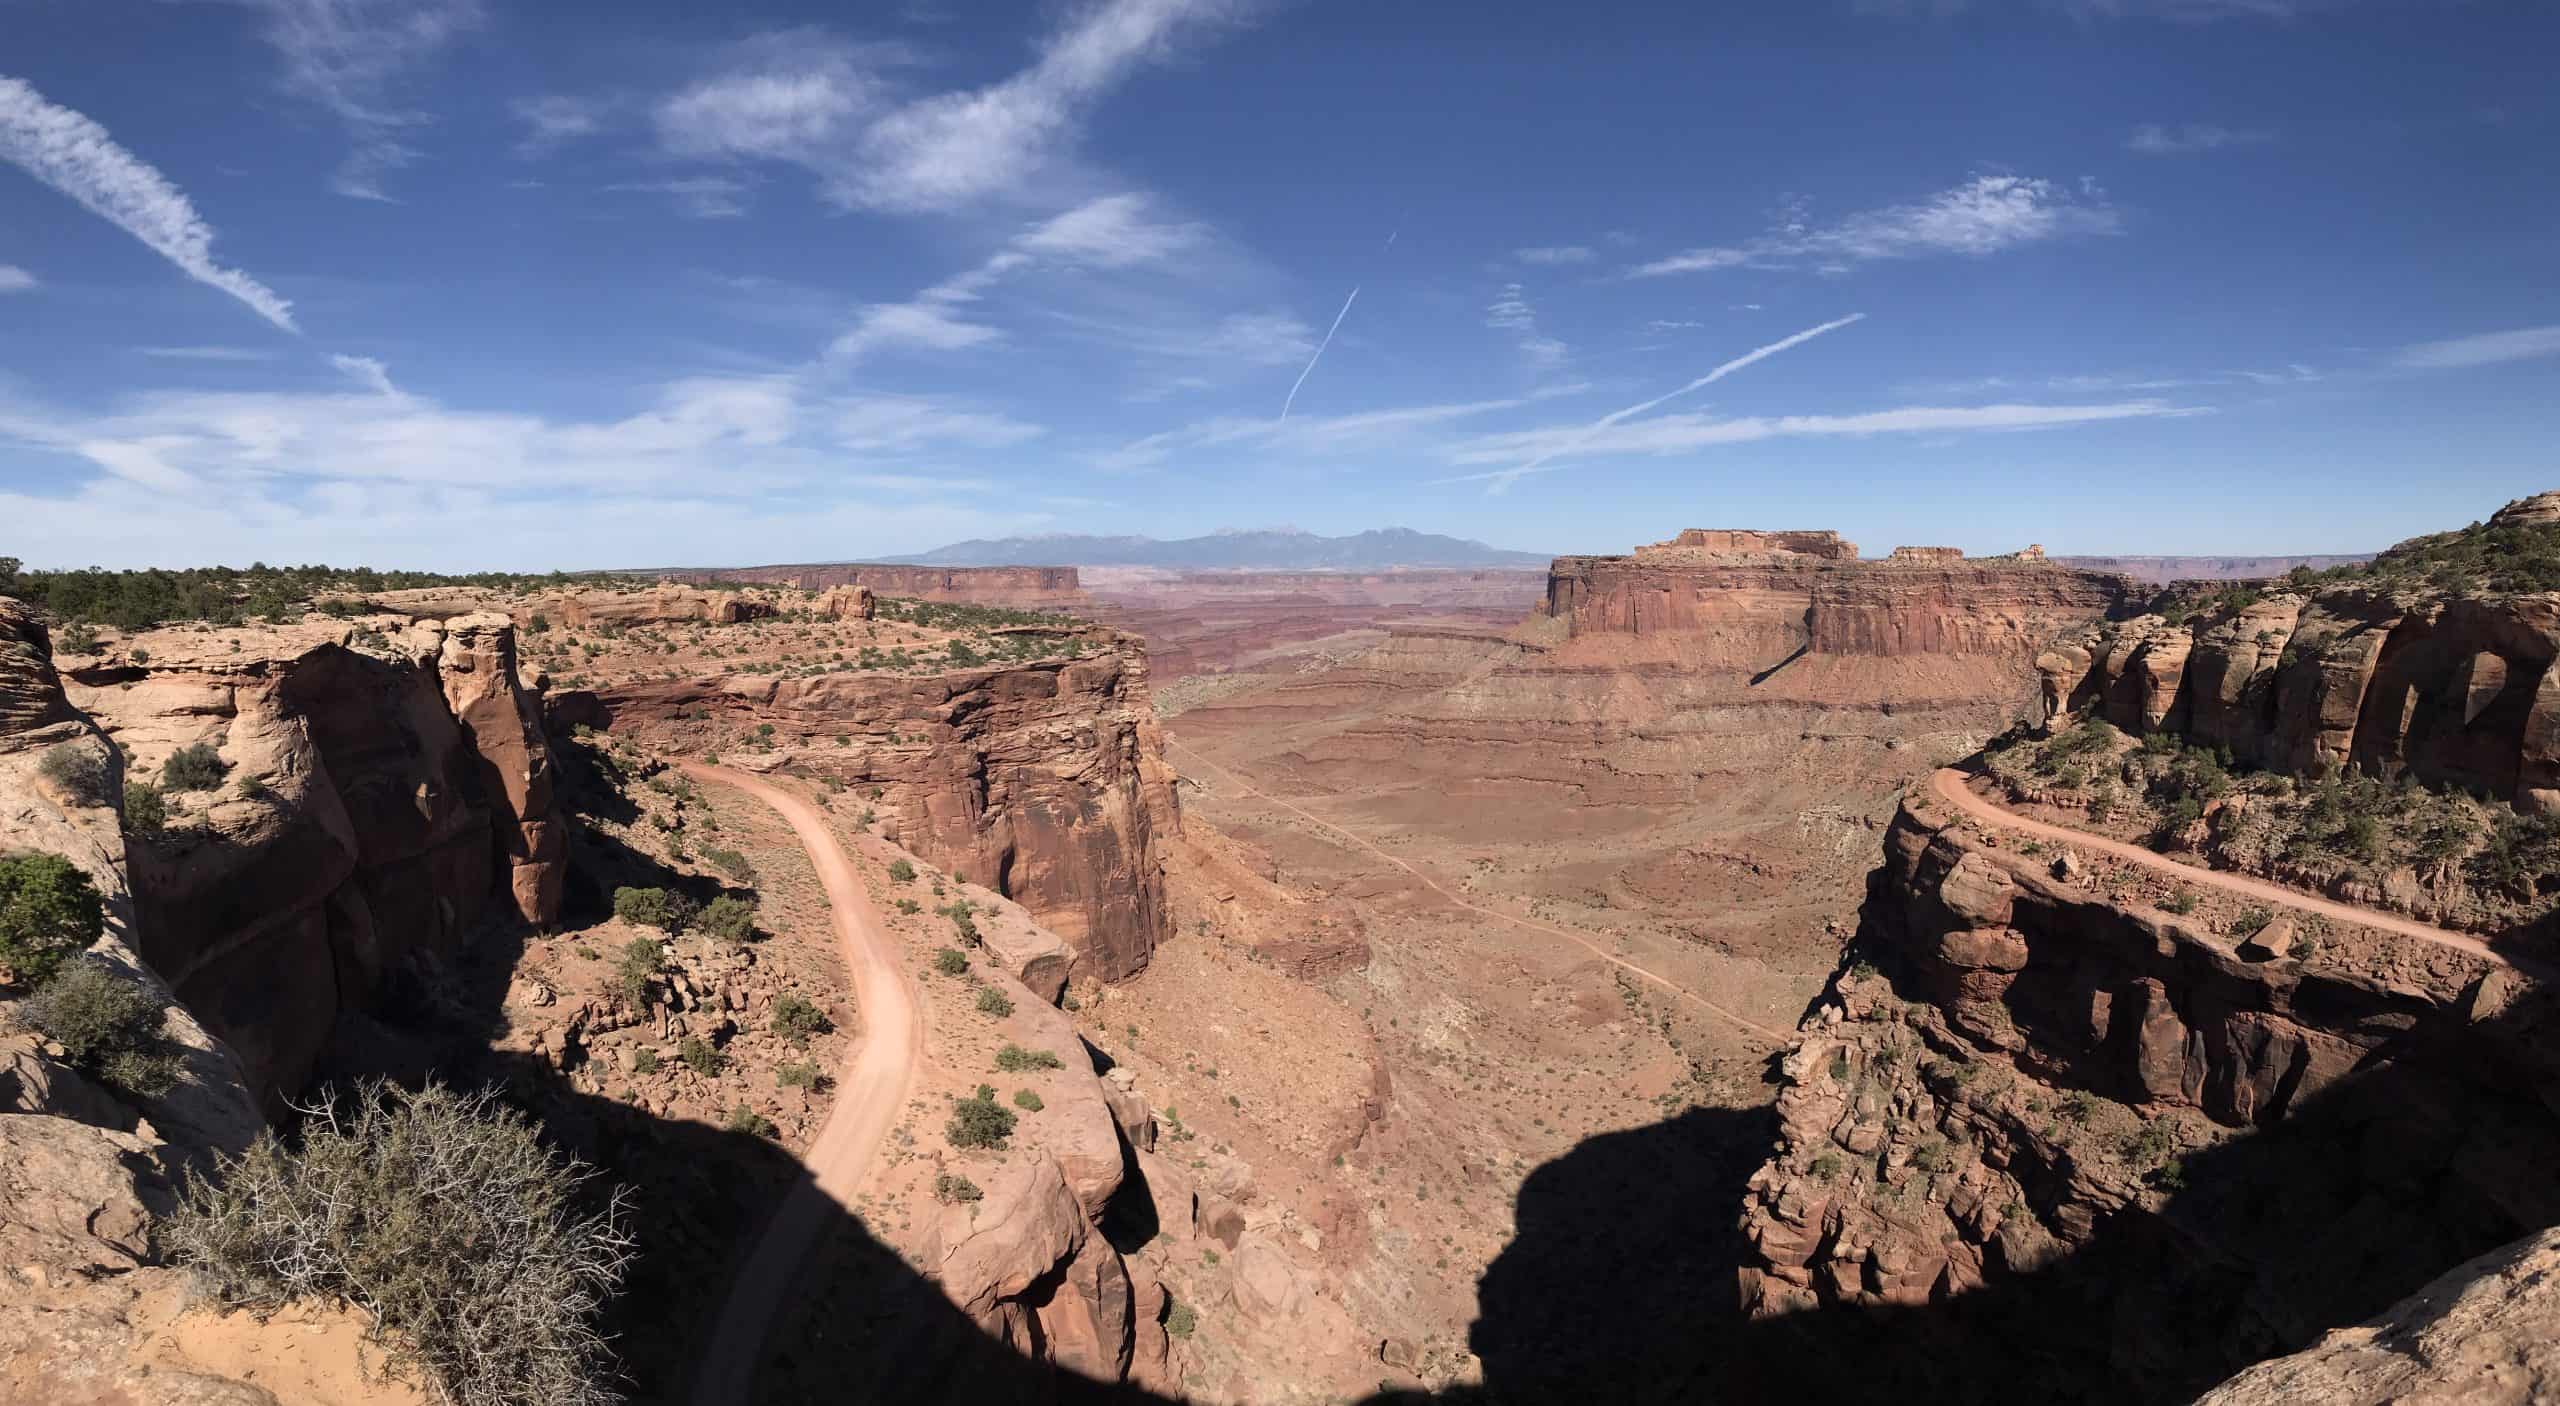
6. Syncline Loop (Island In The Sky)
This hike circles the Upheaval Dome, but don’t let that fool you: it’s a tough, rugged, and strenuous hike! About 3.5 miles in (going clockwise), you’ll reach the Syncline Campground, where a spur trail branches off toward the crater itself. This detour adds roughly three miles round-trip and follows the canyon inward.
The scenery is genuinely striking, with layered rock formations and deep canyon walls that shift dramatically as you move along the route. It’s also remarkably quiet and isolated, giving you that otherworldly feeling! If you pack enough water and take your time on the climbs, it’s easily one of the most rewarding hikes in the park.
7. Aztec Butte Trail (Island In The Sky)
This short hike starts gently and ends with an exciting Class 2–3 sandstone scramble. I highly recommend wearing sturdy shoes with a solid grip. Once you reach the top, the payoff is immense with a sweeping view toward Trail Canyon, making every step worth it.
If you’re hiking with kids or prefer an easier route, turn left at the junction 0.3 miles in towards ancient Granaries, a much gentler scramble that reveals historic Anasazi and Fremont storage structures tucked beneath a natural rock overhang.
Subscribe Here!
If you’re enjoying this content, sign up for My Weekly newsletter!
Easy Canyonlands Hikes
The Island in the Sky District is home to a variety of easier hikes suited for all skill levels. You can simply walk up to several overlooks or take on trails that typically take one to two hours for the average hiker.
8. Mesa Arch (Island In The Sky)
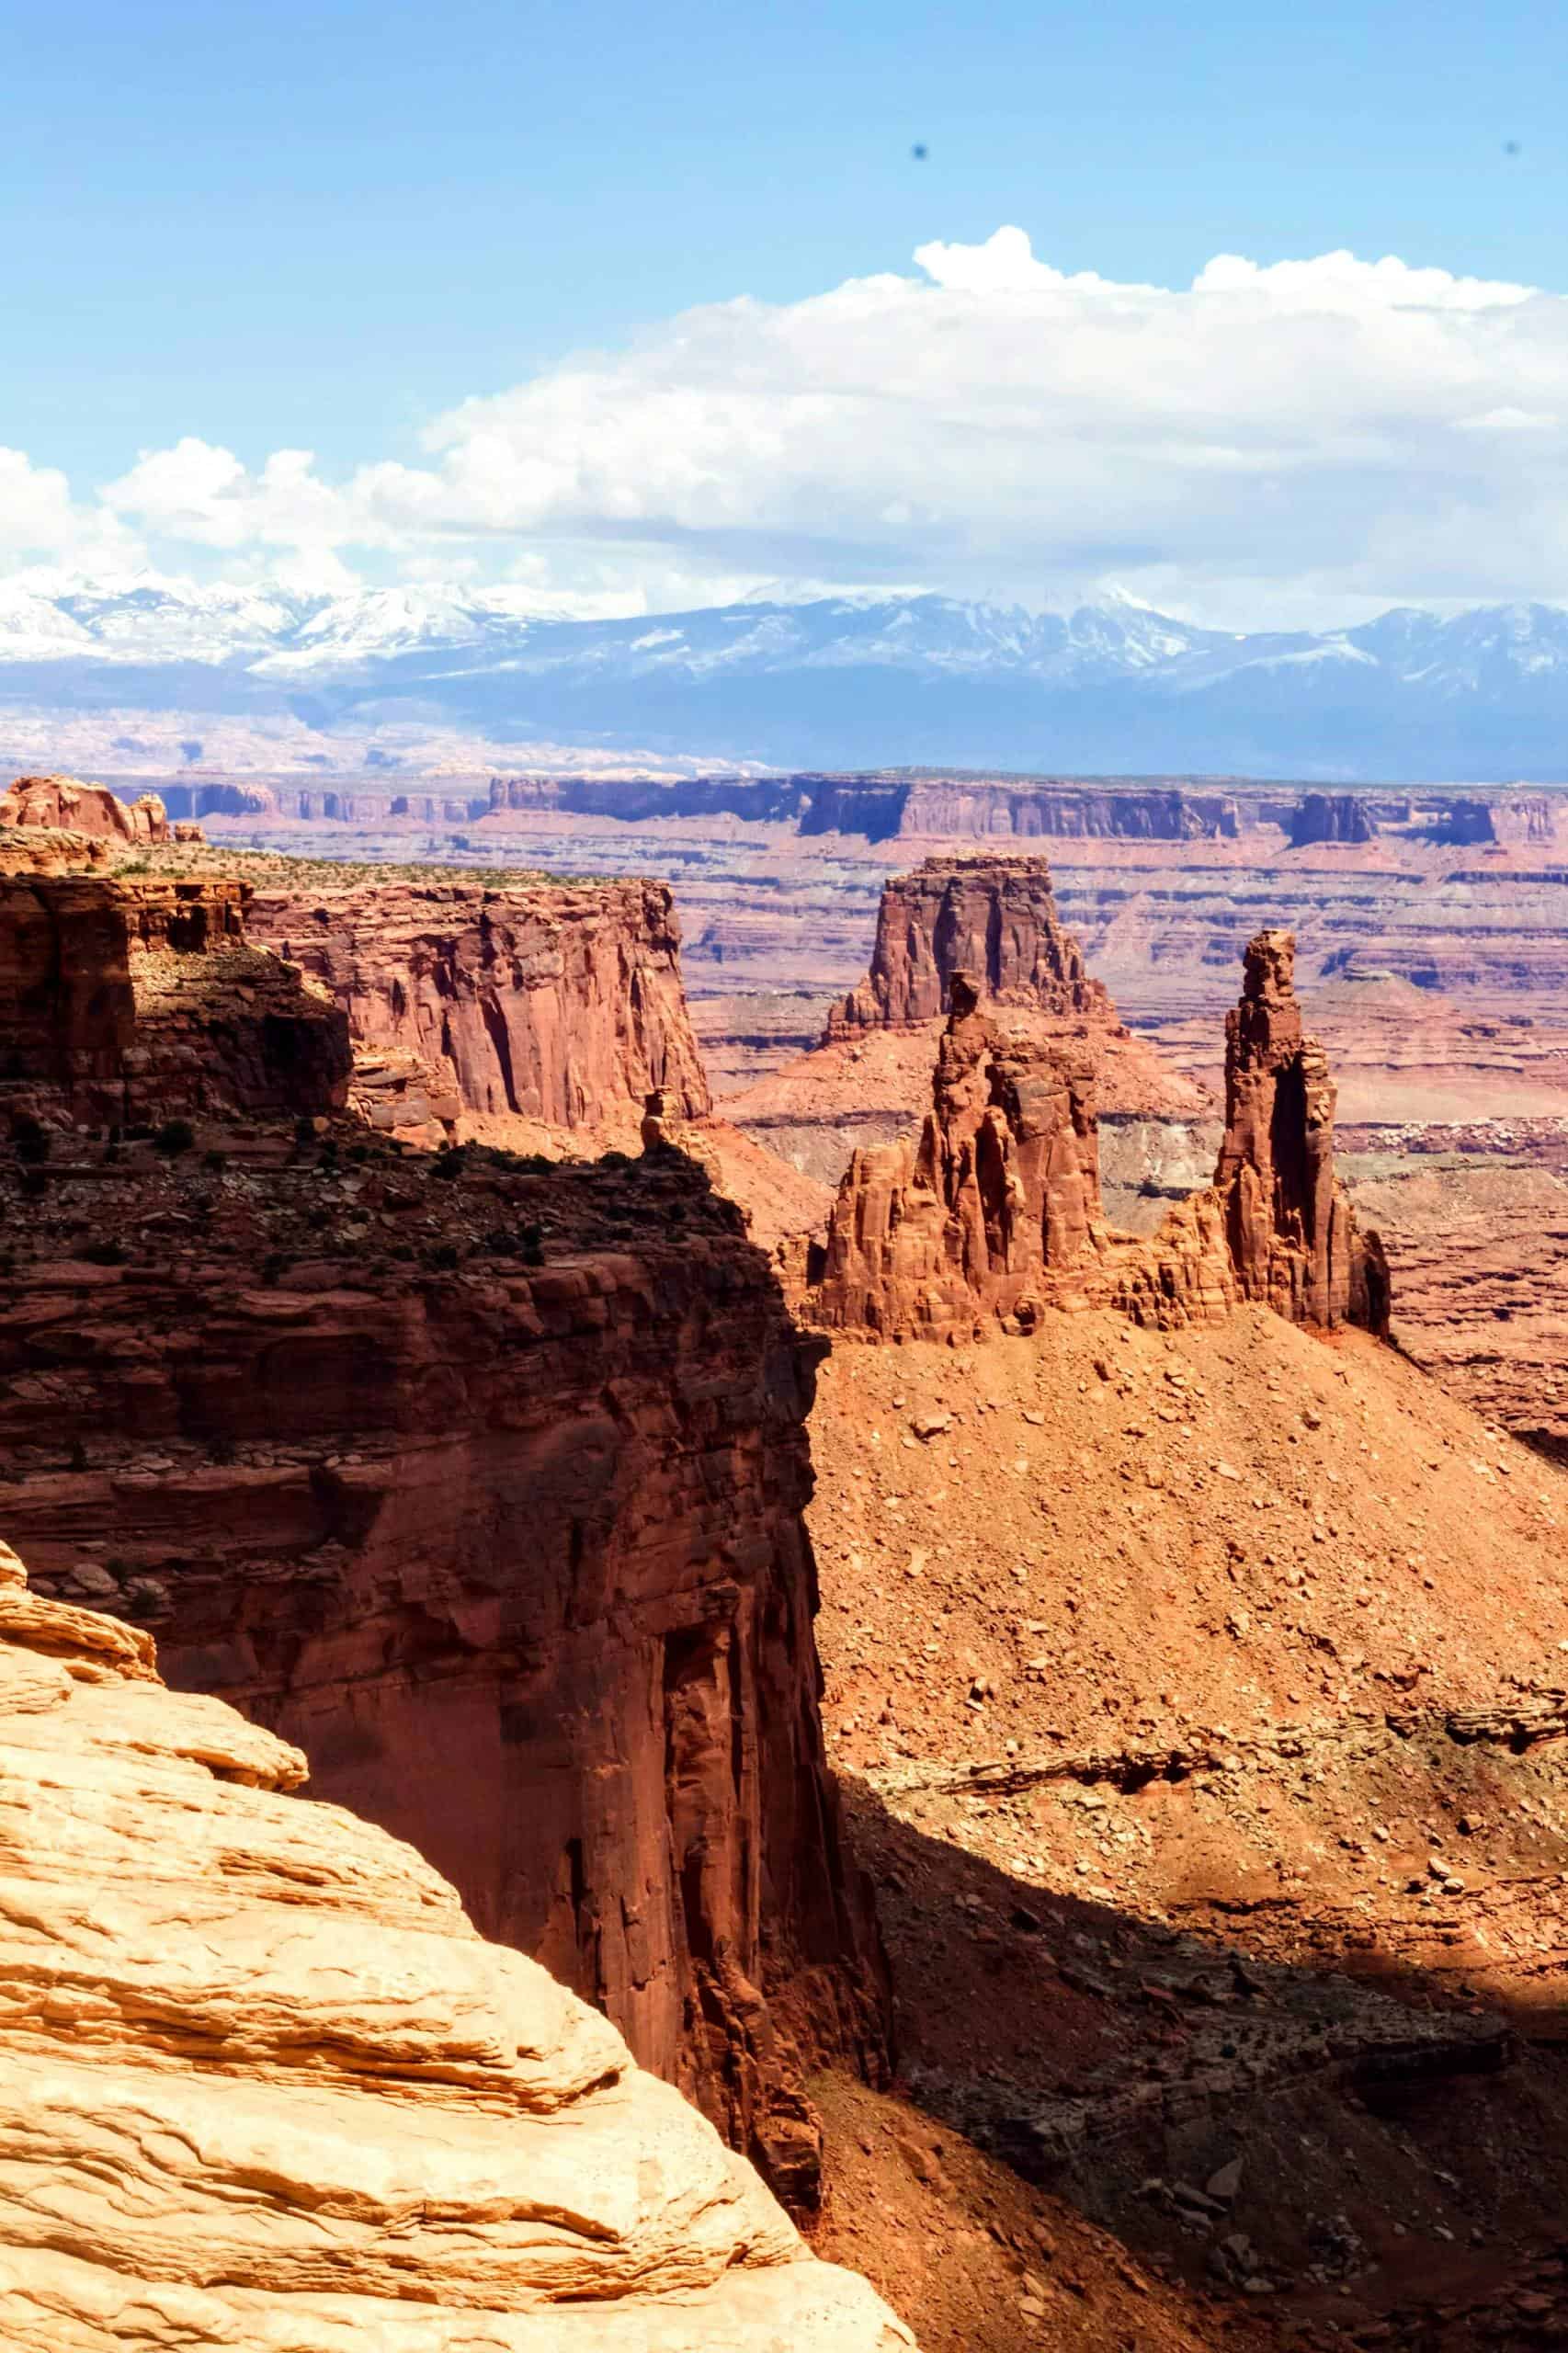
In the Island in the Sky District, Mesa Arch is undoubtedly the coolest and, as a result, most popular arch in Canyonlands National Park! The arch stands at the edge of a mesa, and below it, over a thousand-foot drop to the canyon floor! It perfectly frames the La Sal Mountains off in the distance, showcasing the stunning canyon country!
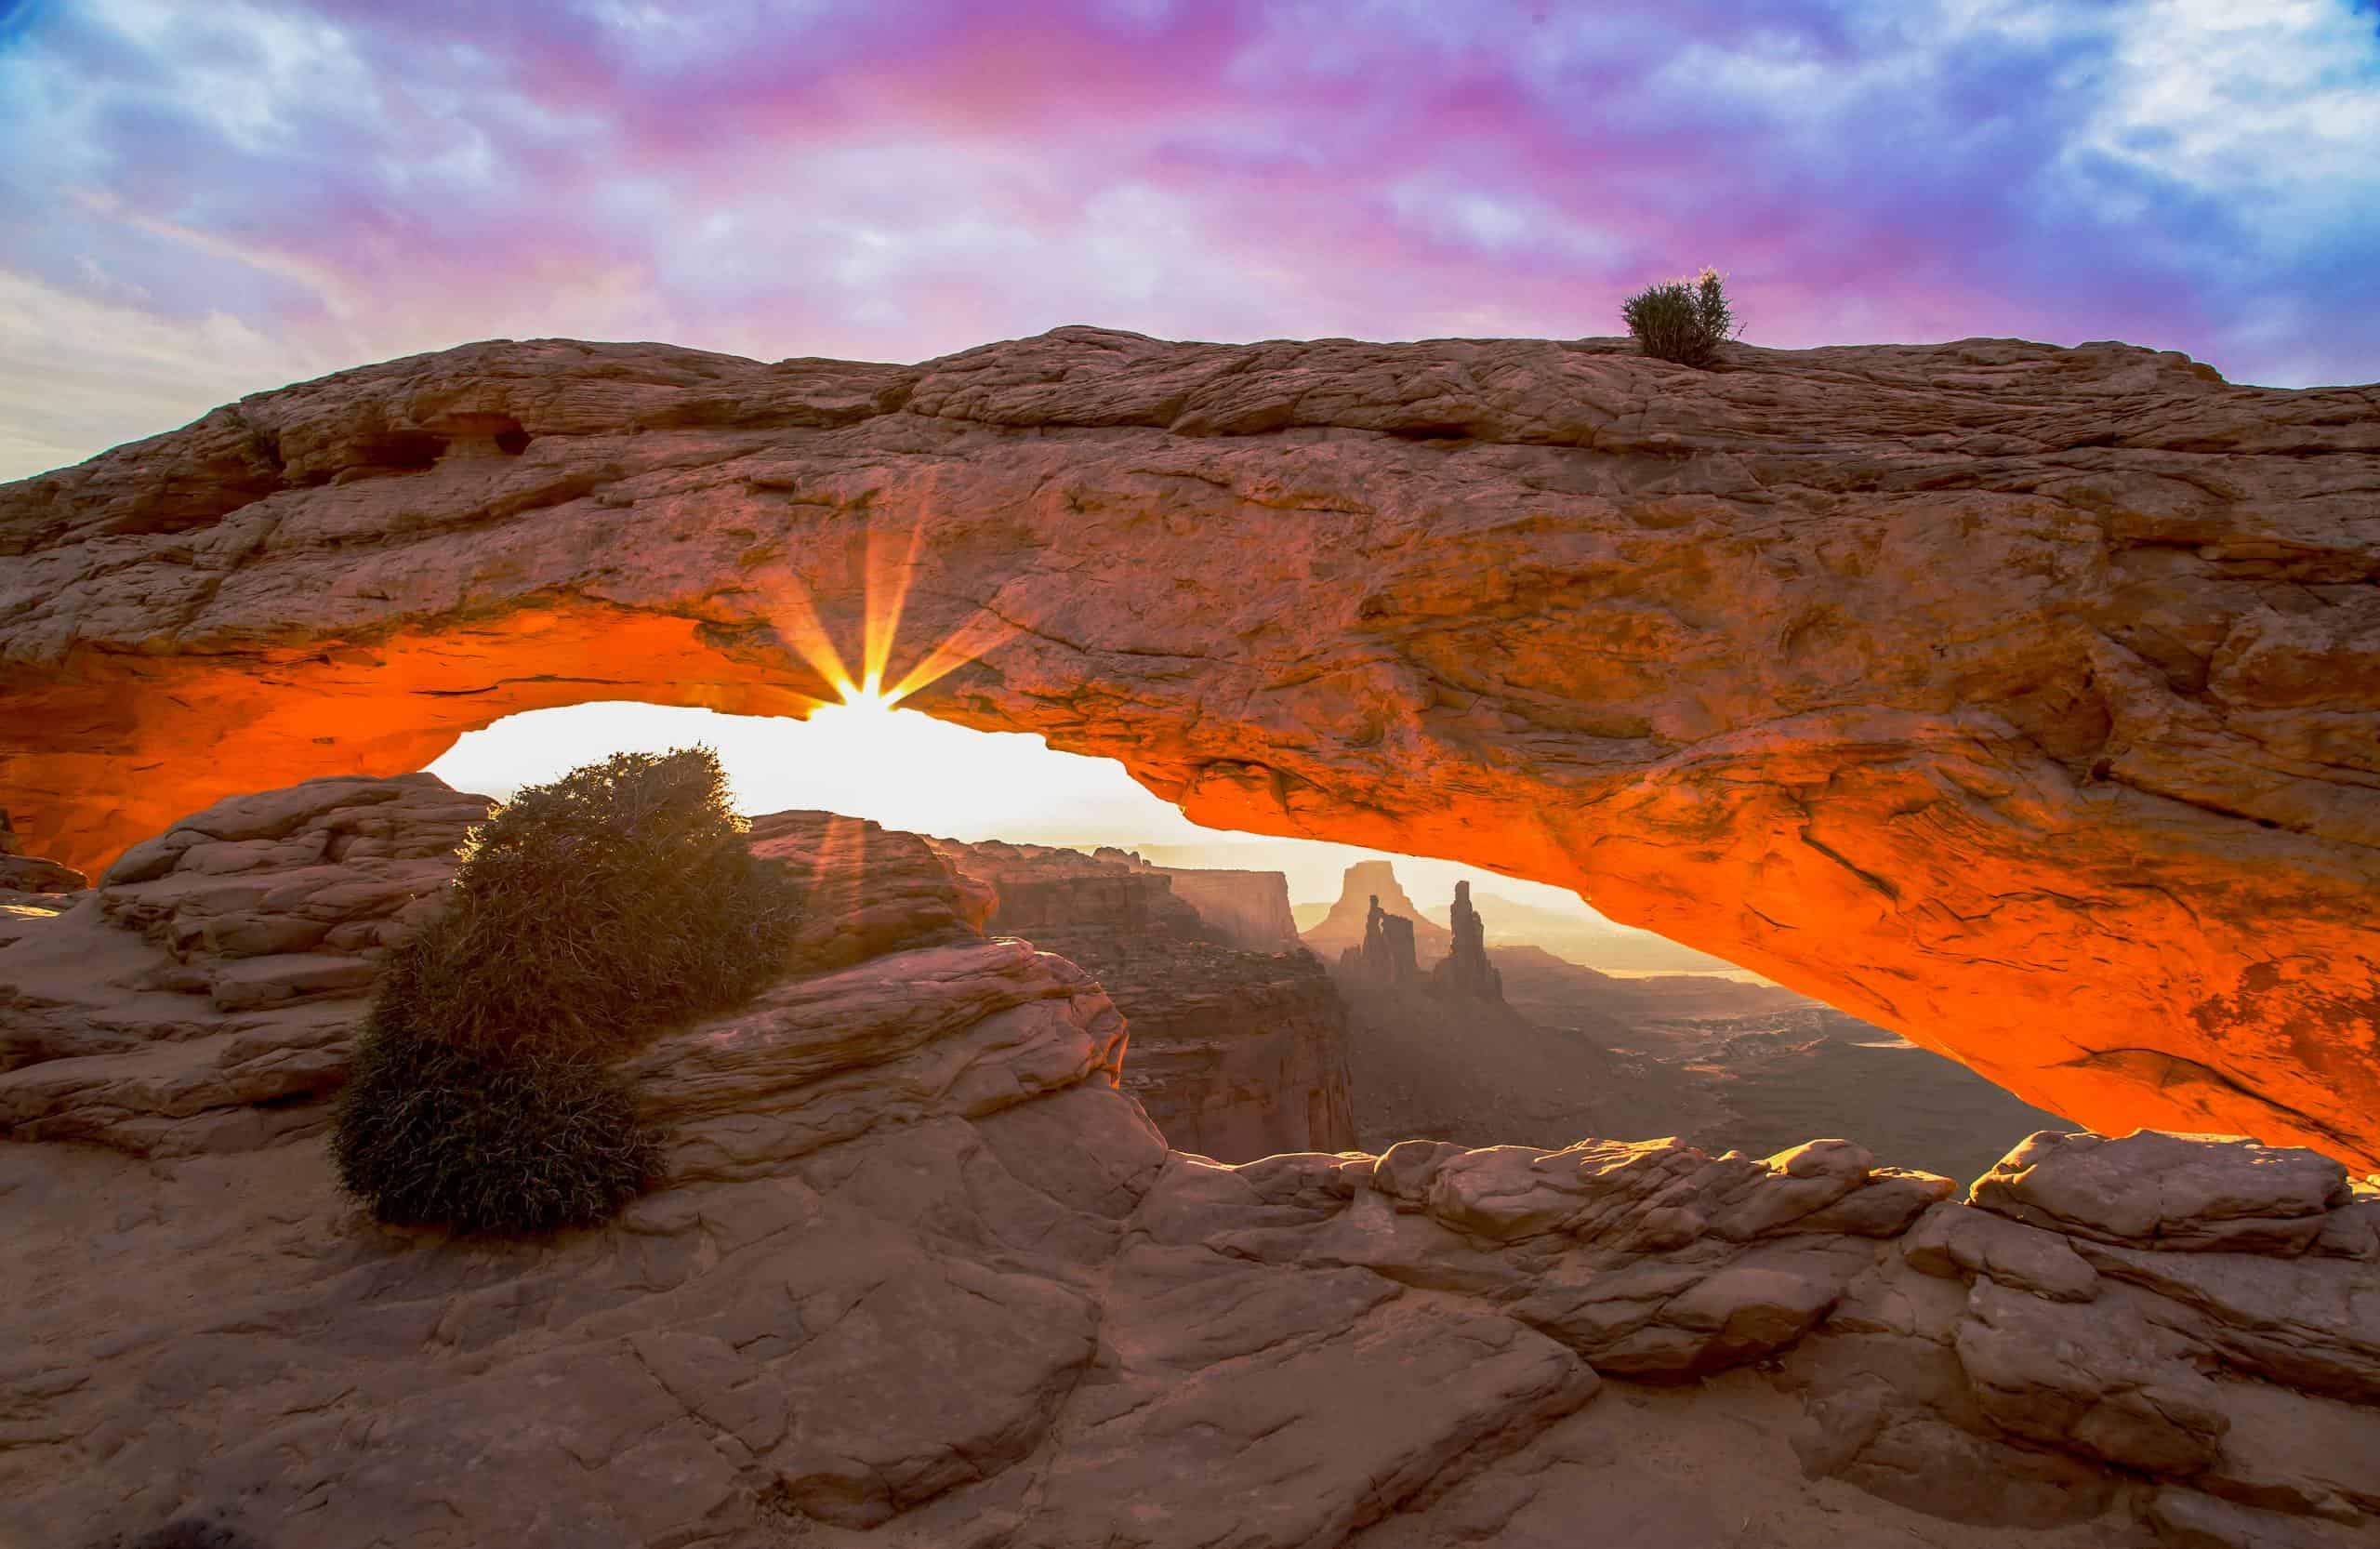
For photographers, this quick hike should be on their sunrise photography list! If you time it correctly, you can capture the iconic shot of a sunburst through the arch itself. This happens most of the year, but I recommend going in spring or winter for the best lighting!
Pro Tip: As a hiker, I avoid going at sunrise. It’s extremely crowded with photographers. My first visit here was mid-day with light rain, which gave us the arch mostly to ourselves!
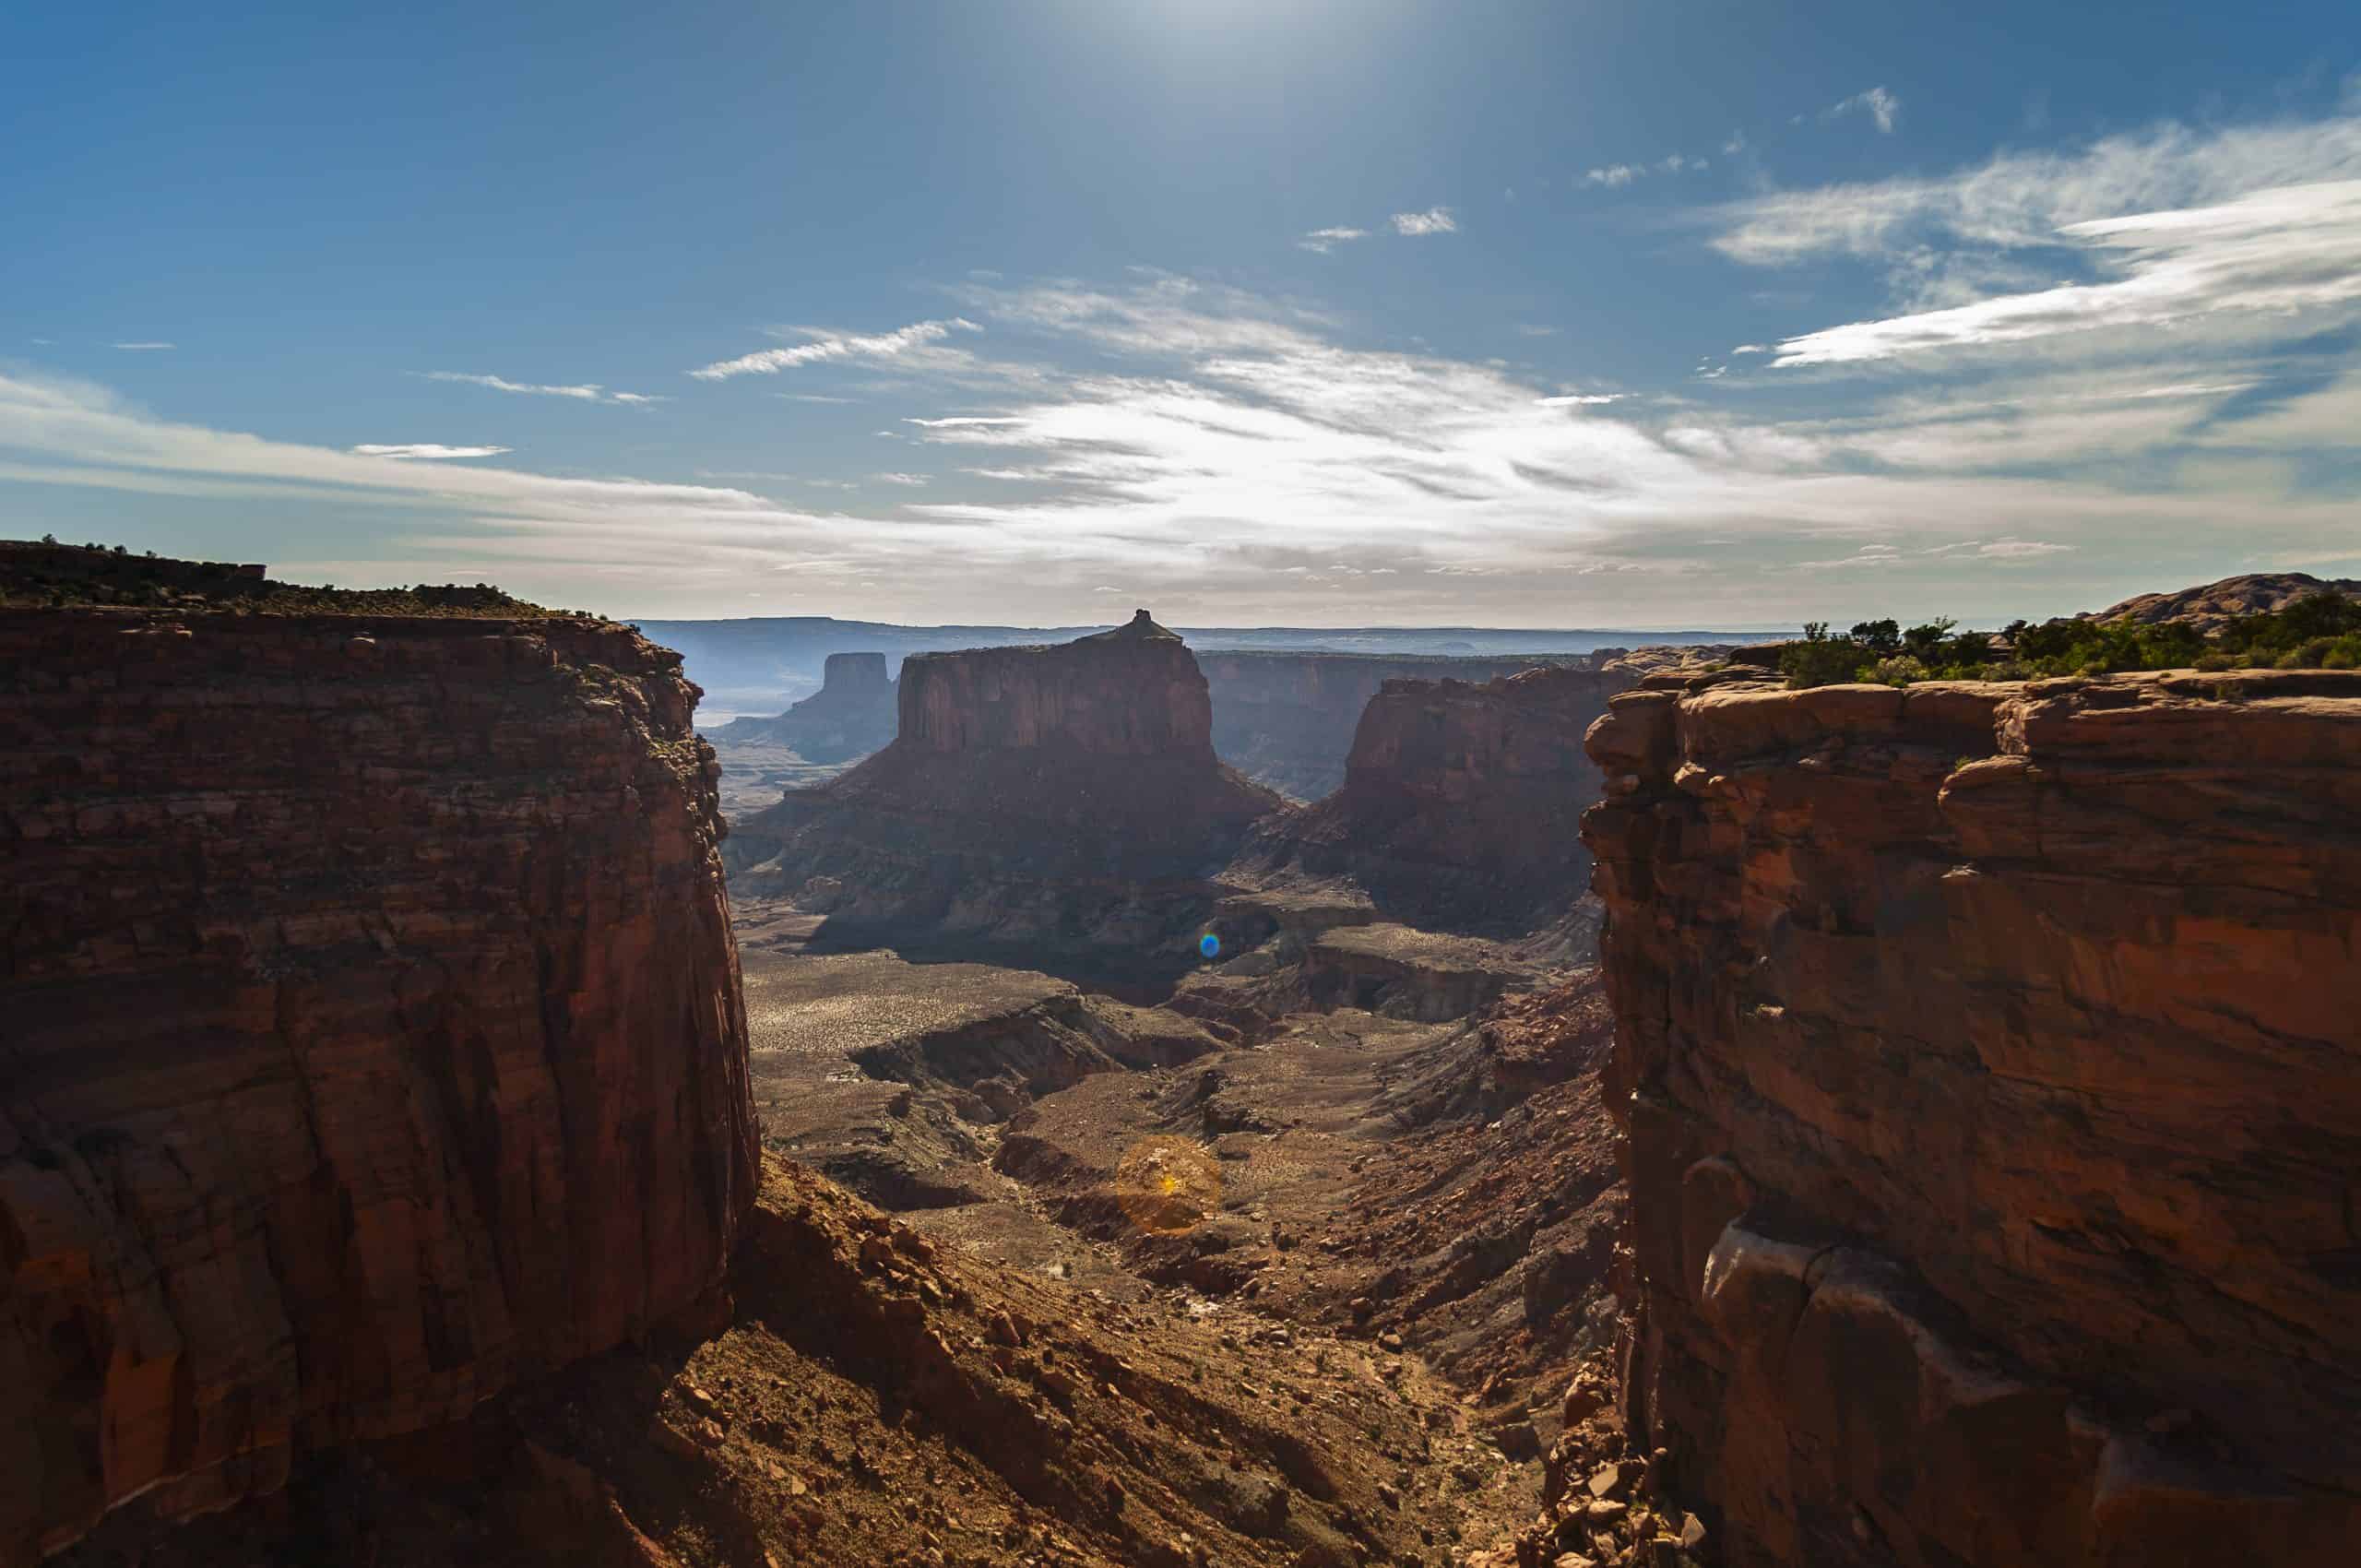
9. Upheaval Dome Overlook (Island In The Sky)
This natural feature is one of the highlights in the Island in the Sky district, and a short but steep hike takes you up to the first overlook. I personally haven’t hiked to the second viewpoint because I was short on time; it’s definitely on my list for next time.
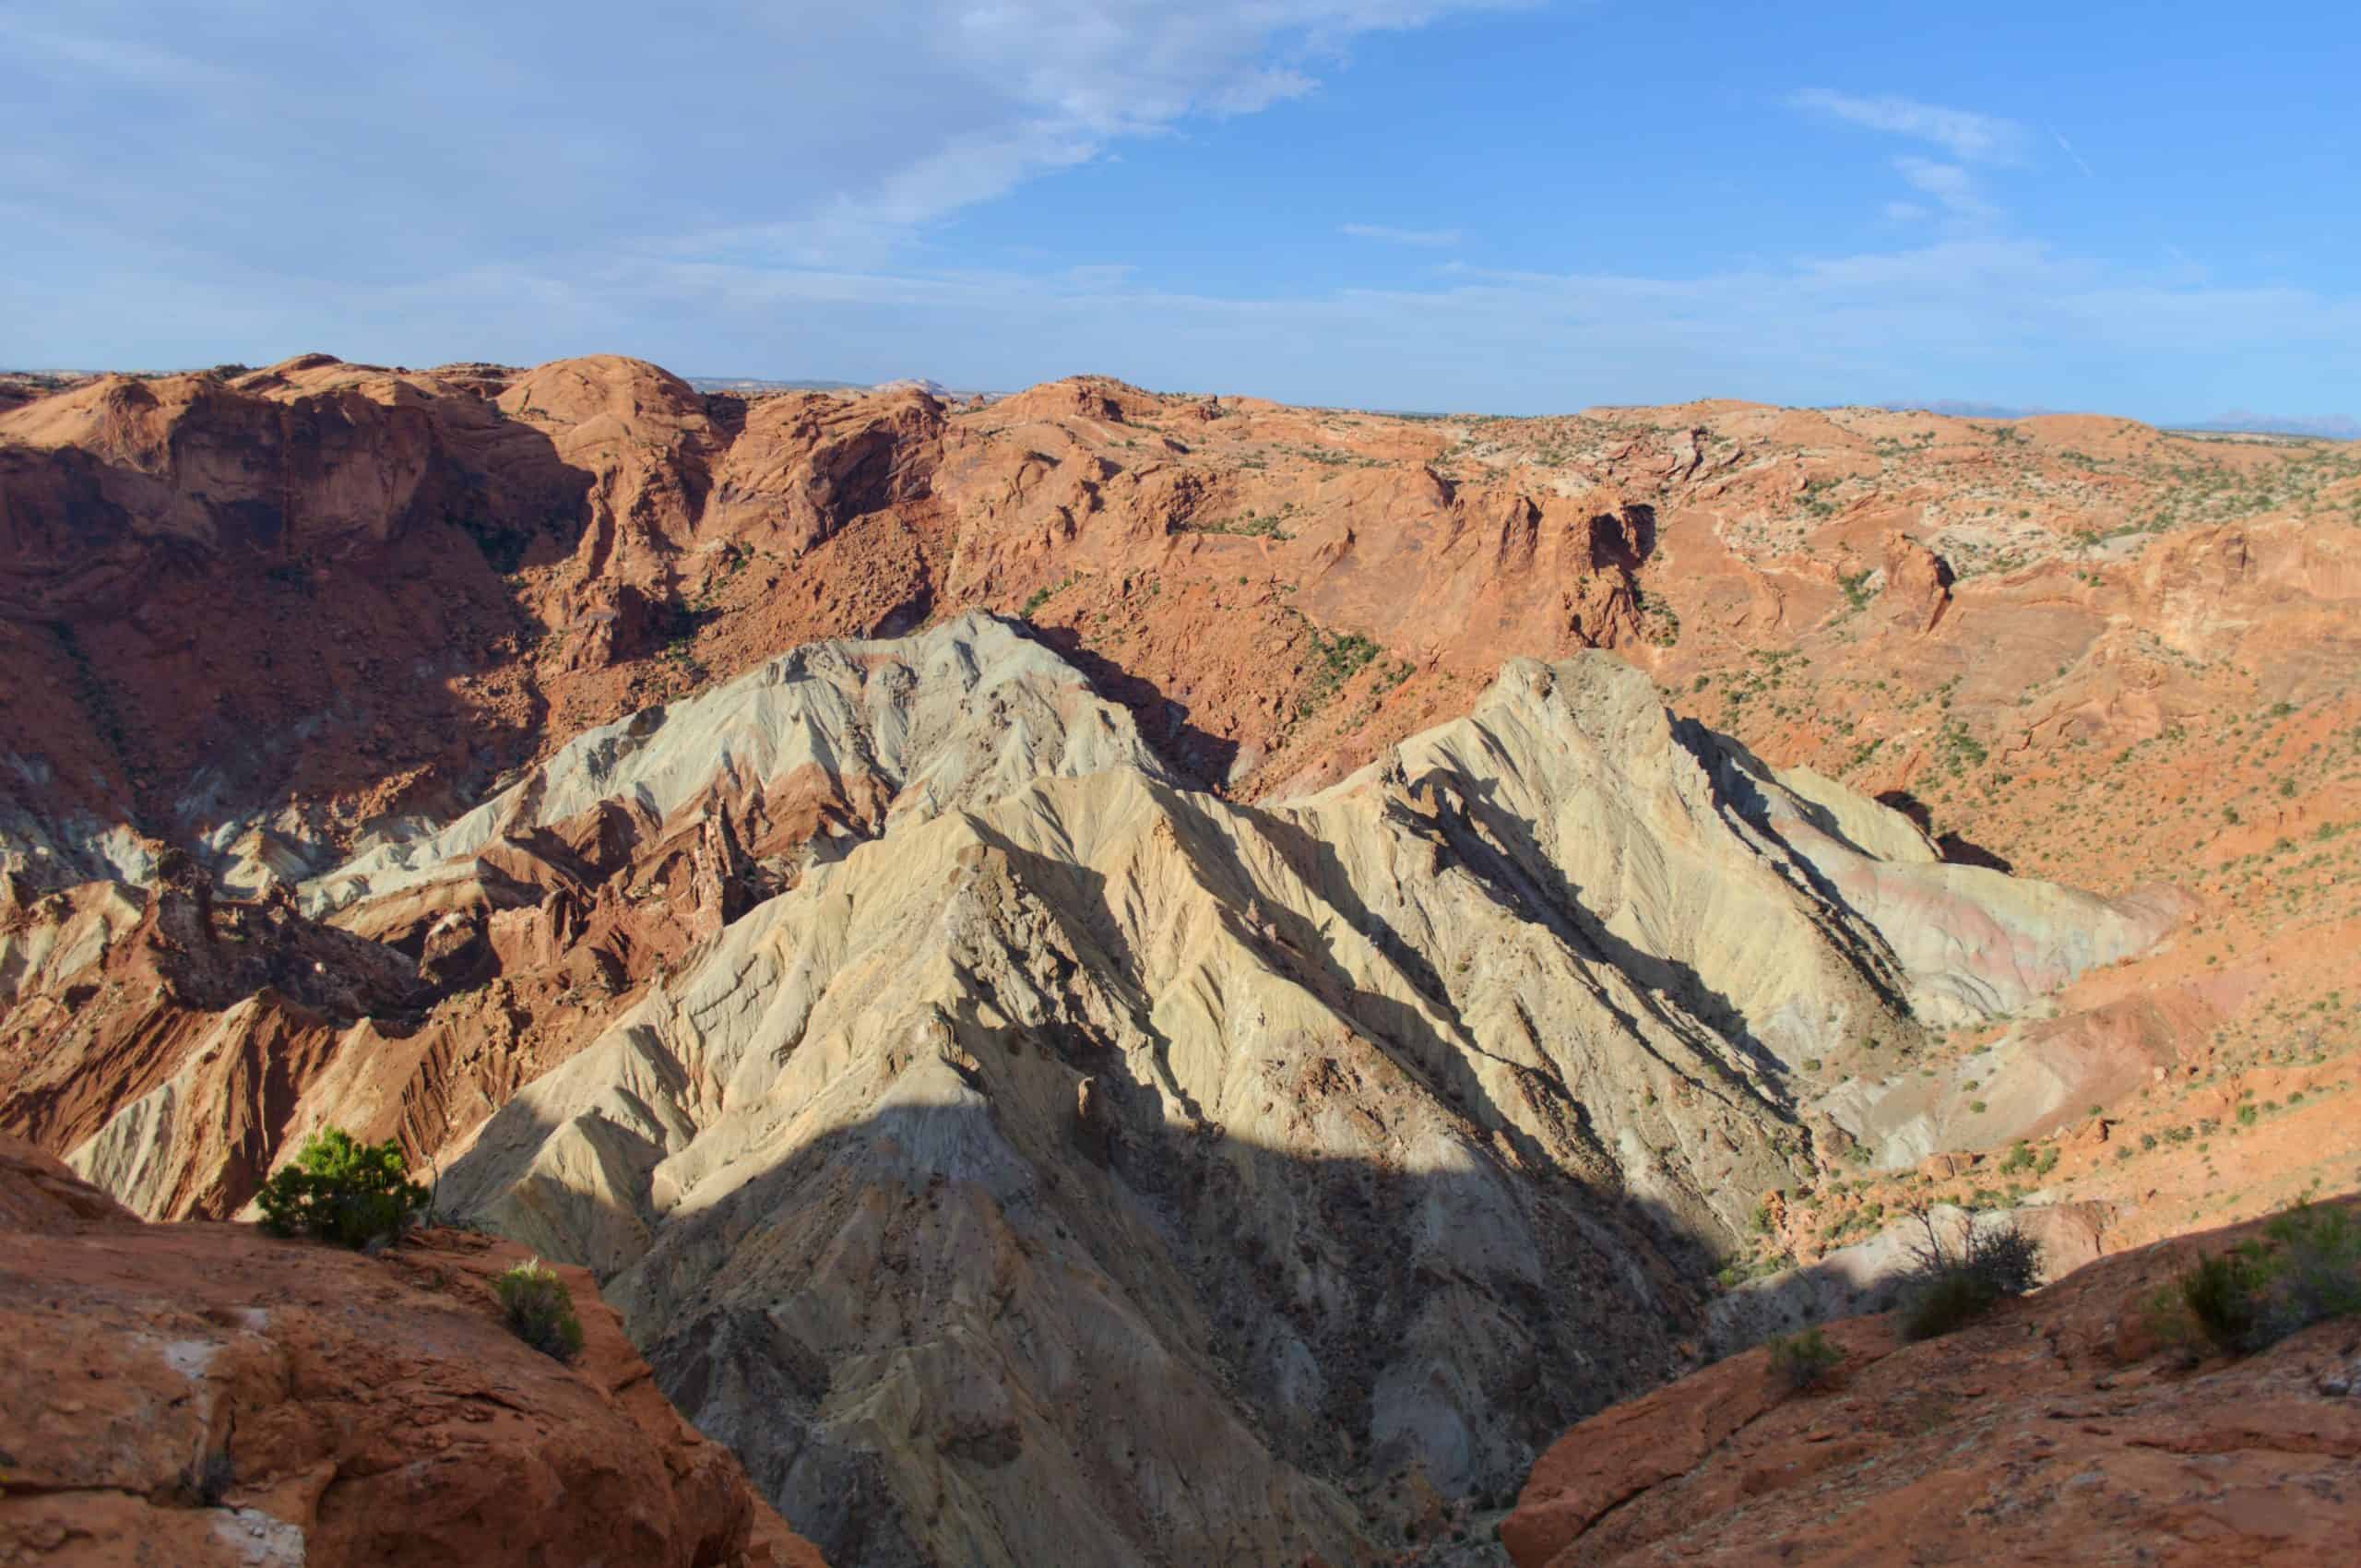
What’s really fascinating is that geologists don’t know exactly how the dome formed. It’s a geological puzzle because the rock layers stretch across two miles and tilt sharply against the surrounding canyon walls. When viewed from above, you can see the origins of the most popular theory: a meteor impact!
Imagine a long time ago, a meteor came in at a shallow angle and impacted the area, causing the rocks to explode at different angles, as if the ground was turned inside-out. Geology is truly fascinating!
11. Grand View Point Trail (Island In The Sky)
Wait, another Grand View Point? Well, it’s actually the same spot, but I highly recommend venturing beyond the main overlook!
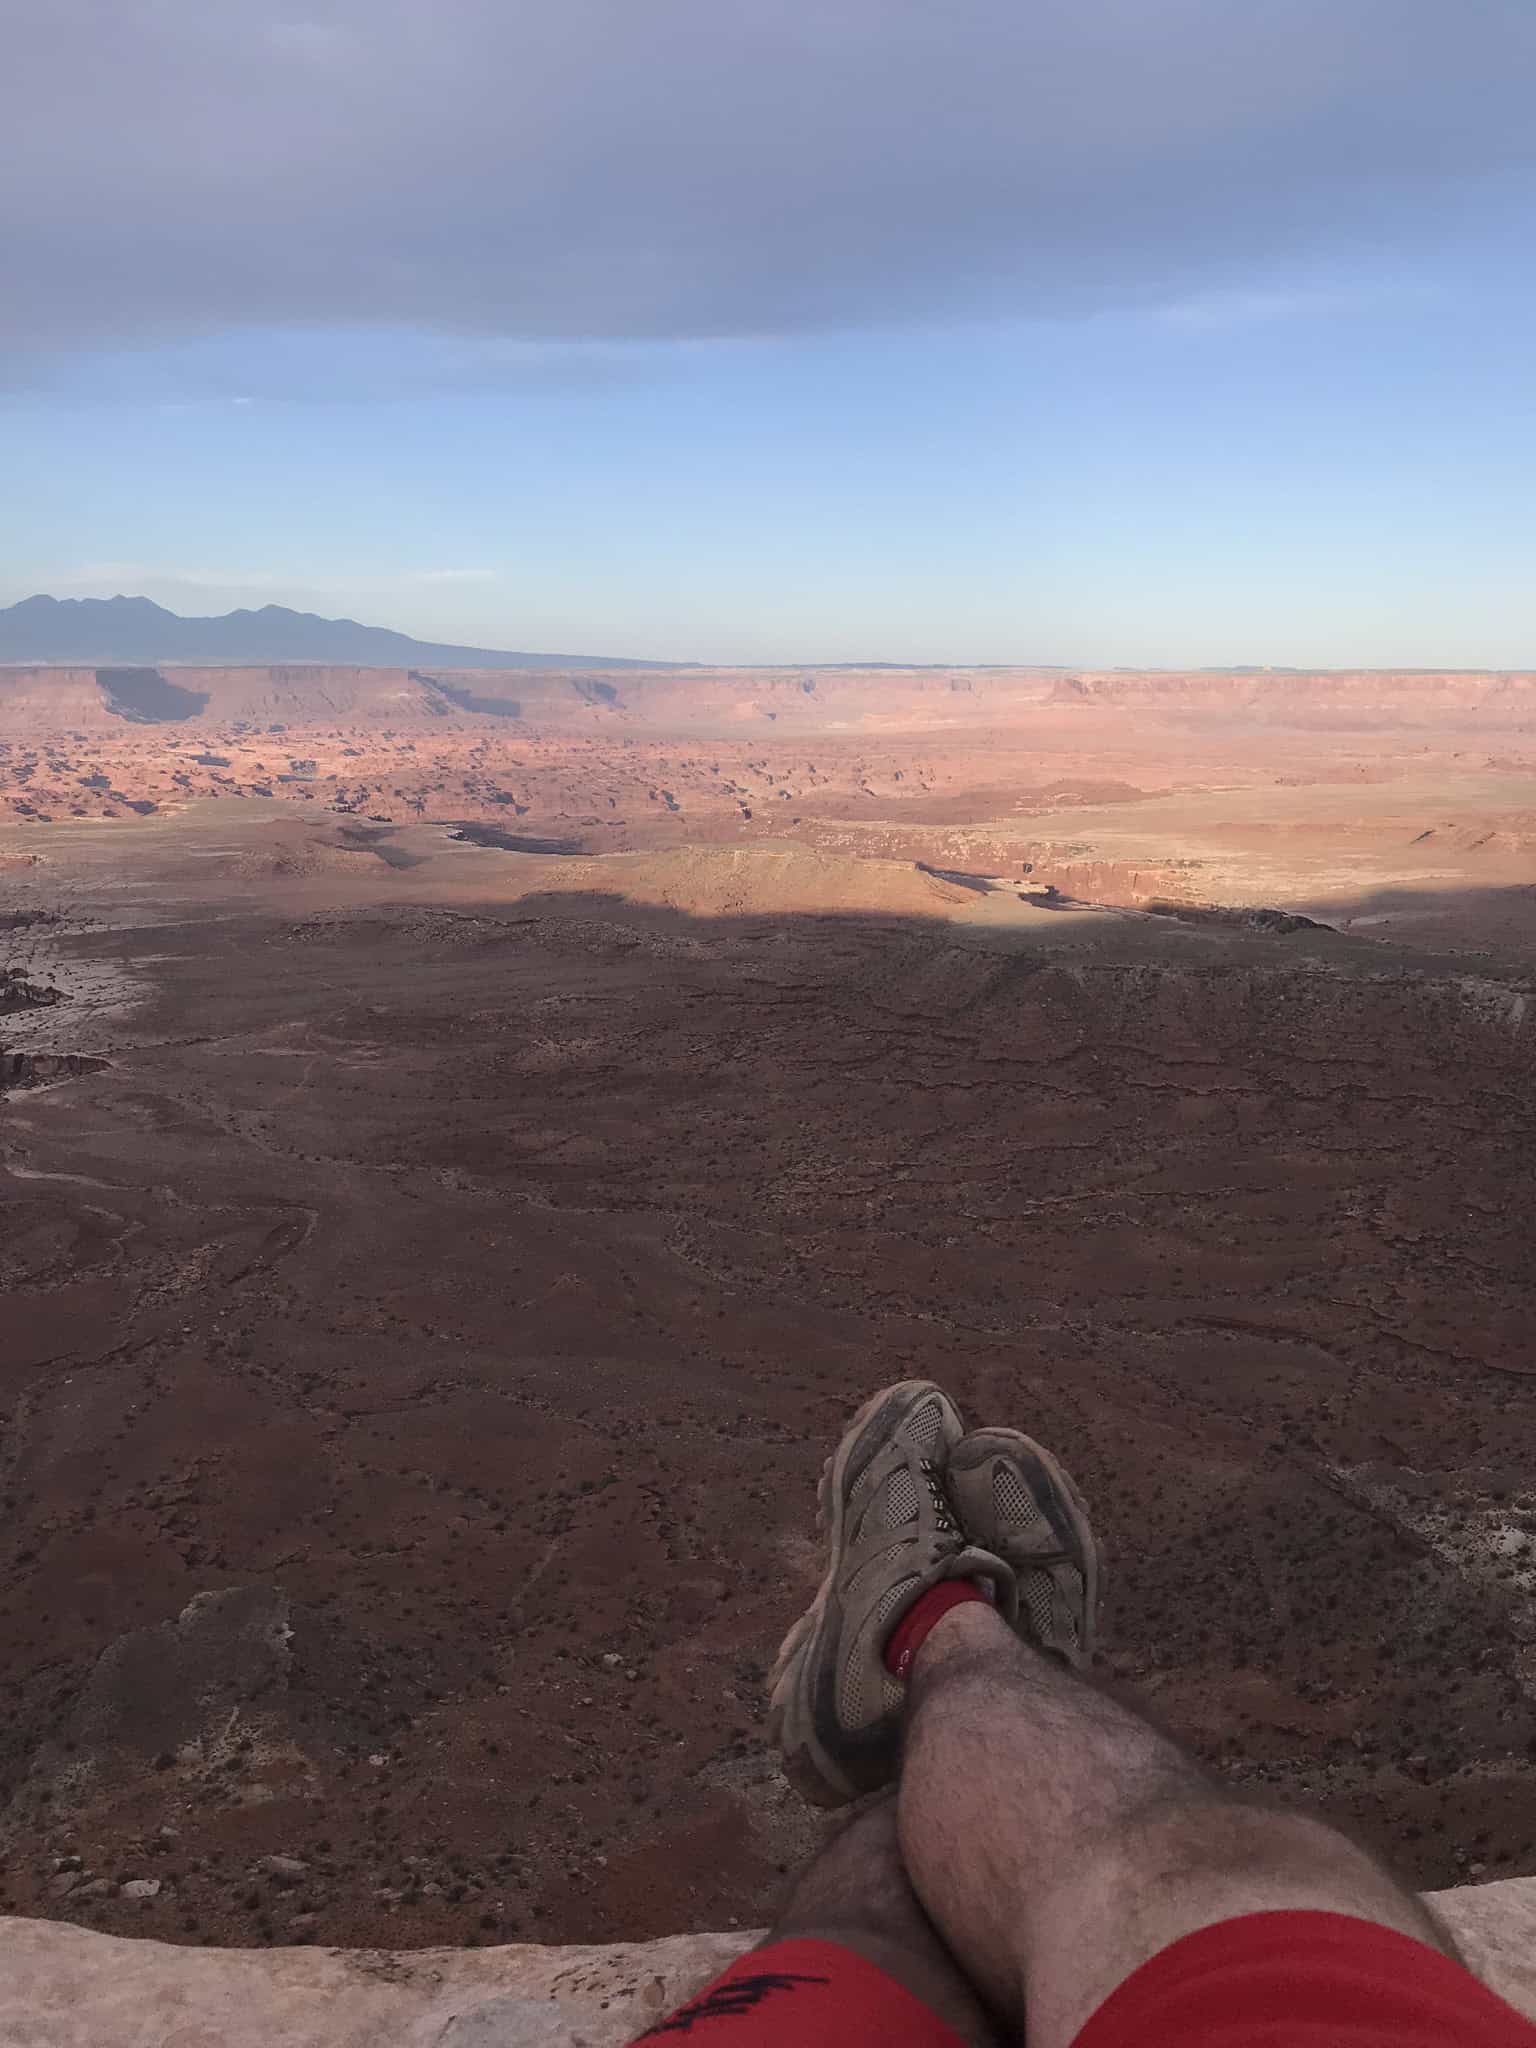
For one, you can escape the crowds on this hike, and secondly, the views are stunning the entire way. What’s really cool is that it takes you to the very end of the mesa as it narrows down. This is the furthest you can physically go on the “Island” in the sky, as beyond this edge, it’s just cliffs in every direction!
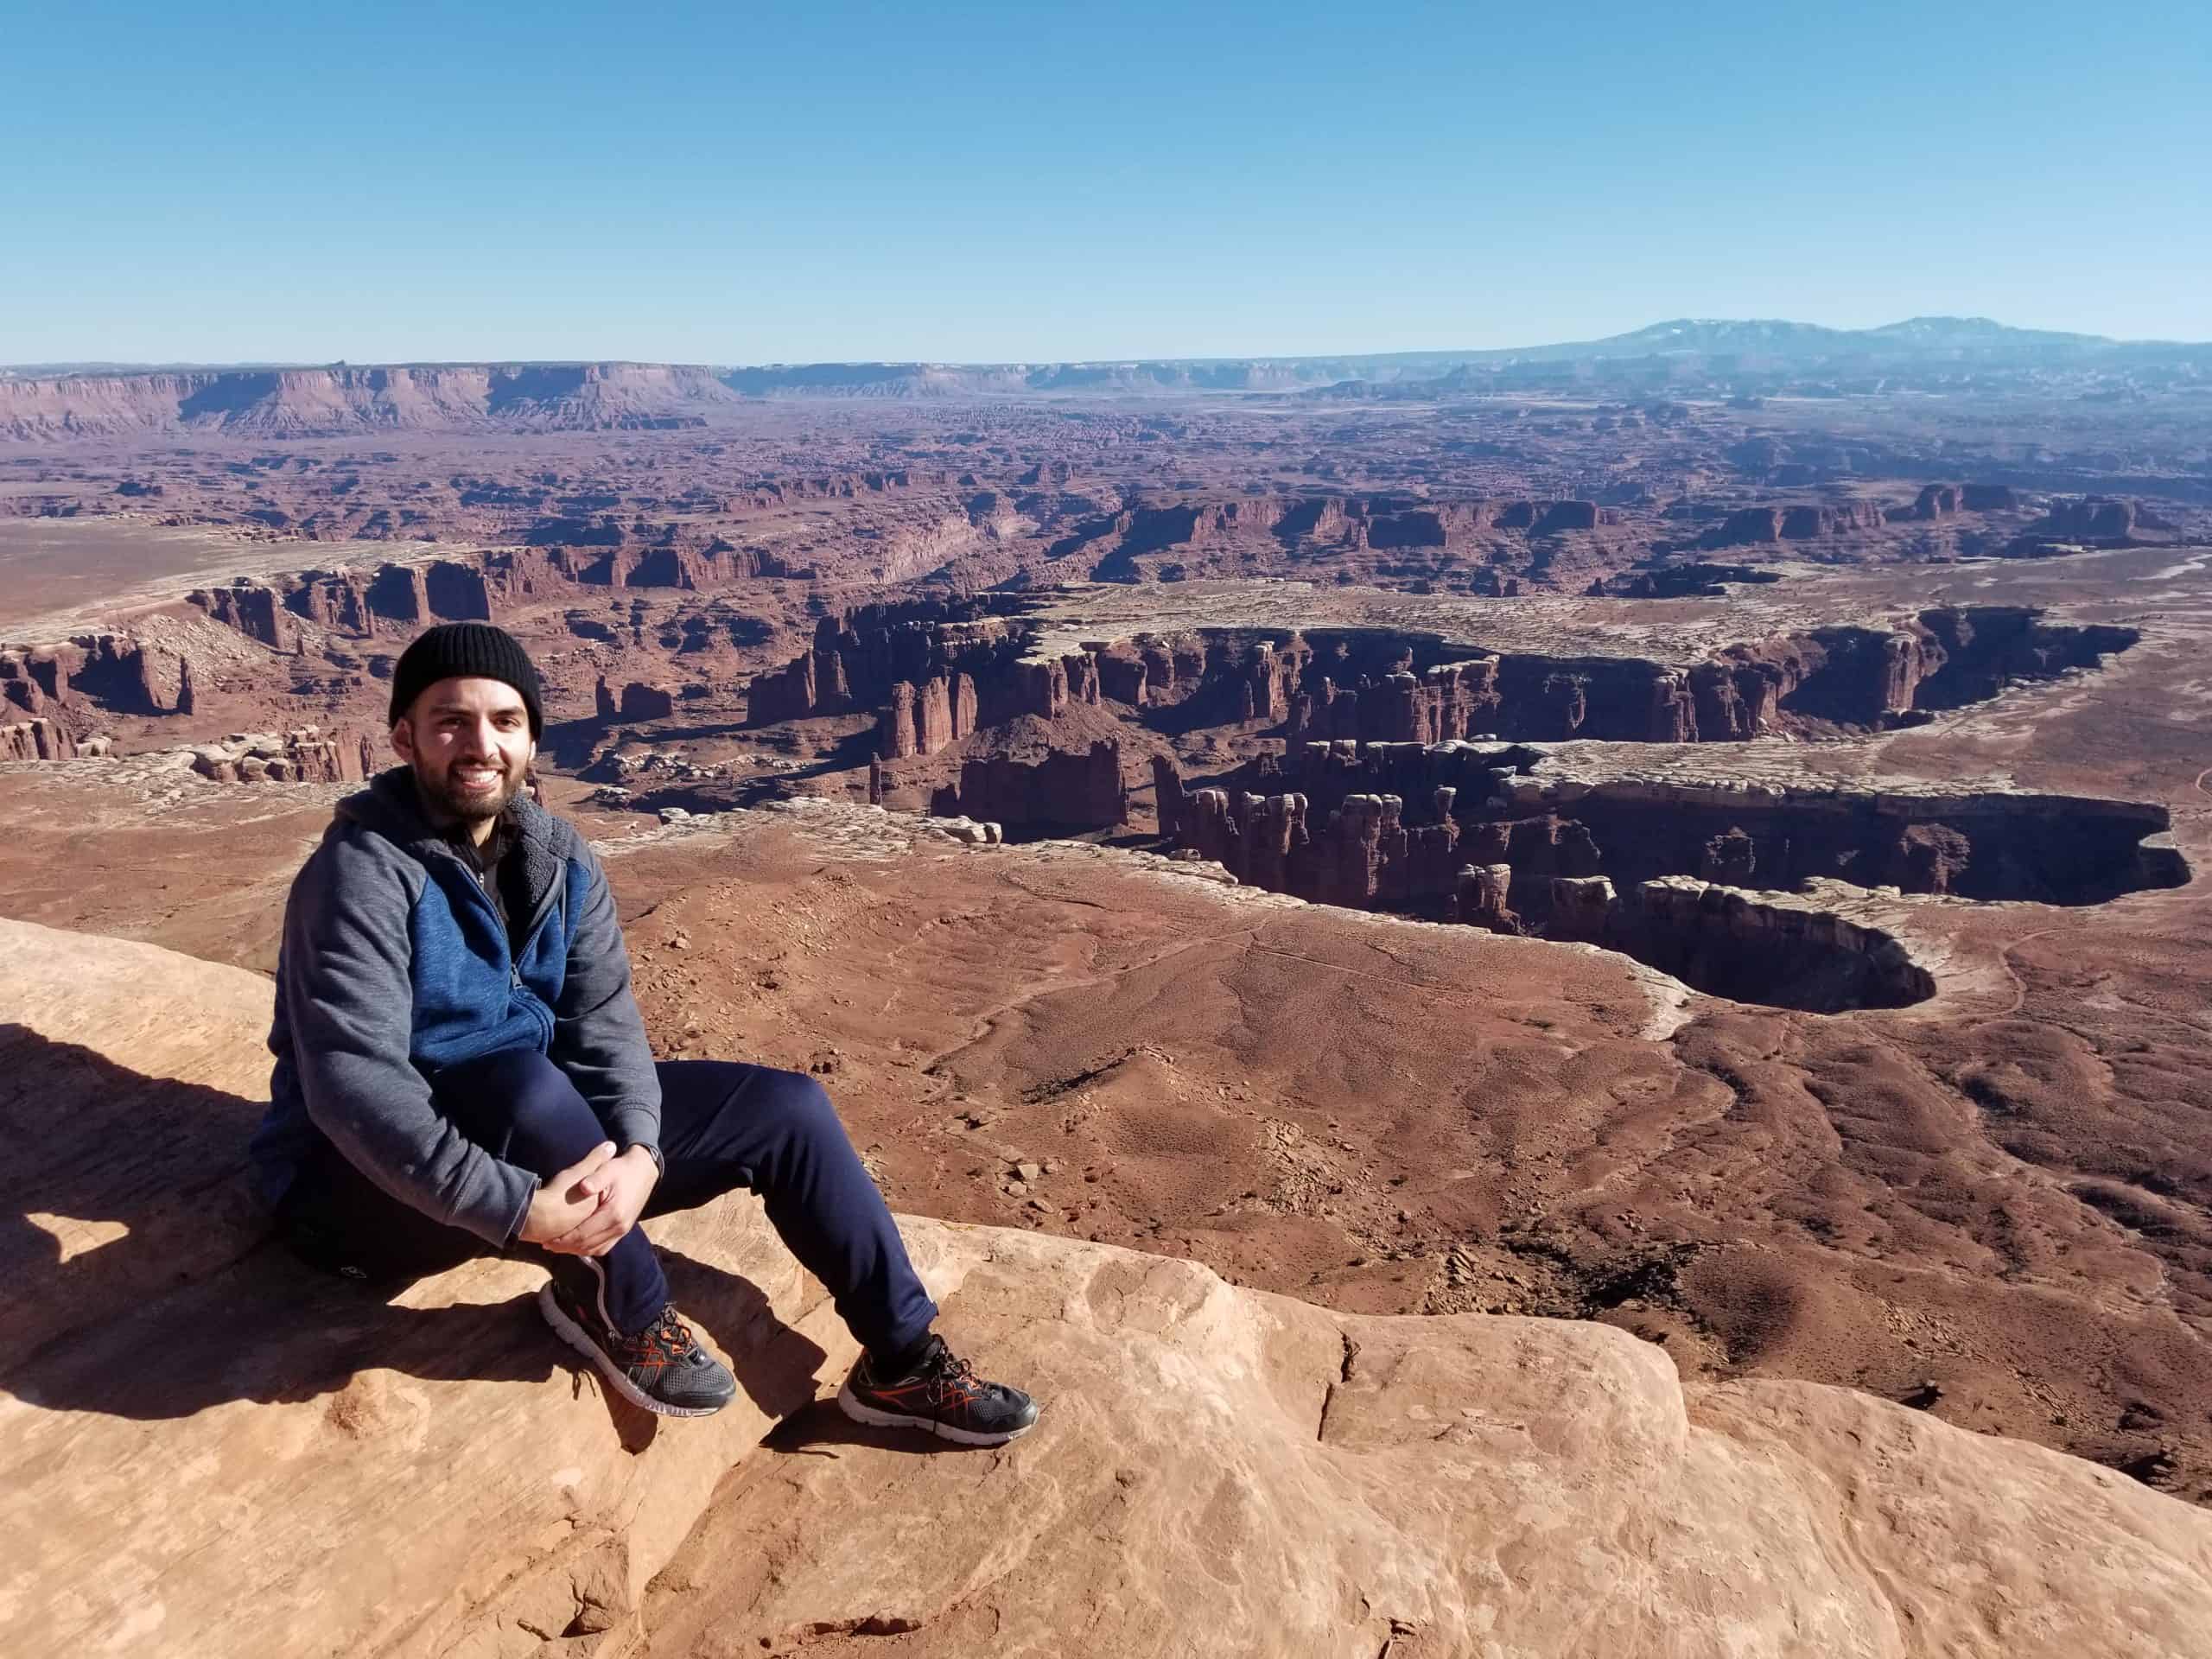
I’ve only hiked it once, and I remember that day perfectly! It was awe-inspiring, but my phone battery had just died, so all that remains are mental photos. Standing there on the edge, felt like I was at the end of the world! While I can’t show you exactly how it looked, it is definitely a memory that sticks, and one I yearn to experience again.
12. Murphy Point Overlook (Island In The Sky)
This is an easy, flat, and somewhat uneventful hike that leads you to a stunning viewpoint with little crowds! The hike itself goes through sagebrush (which is pretty in its own right), and you might be wondering why you’re doing it. BUT the payoff is more than worth it!
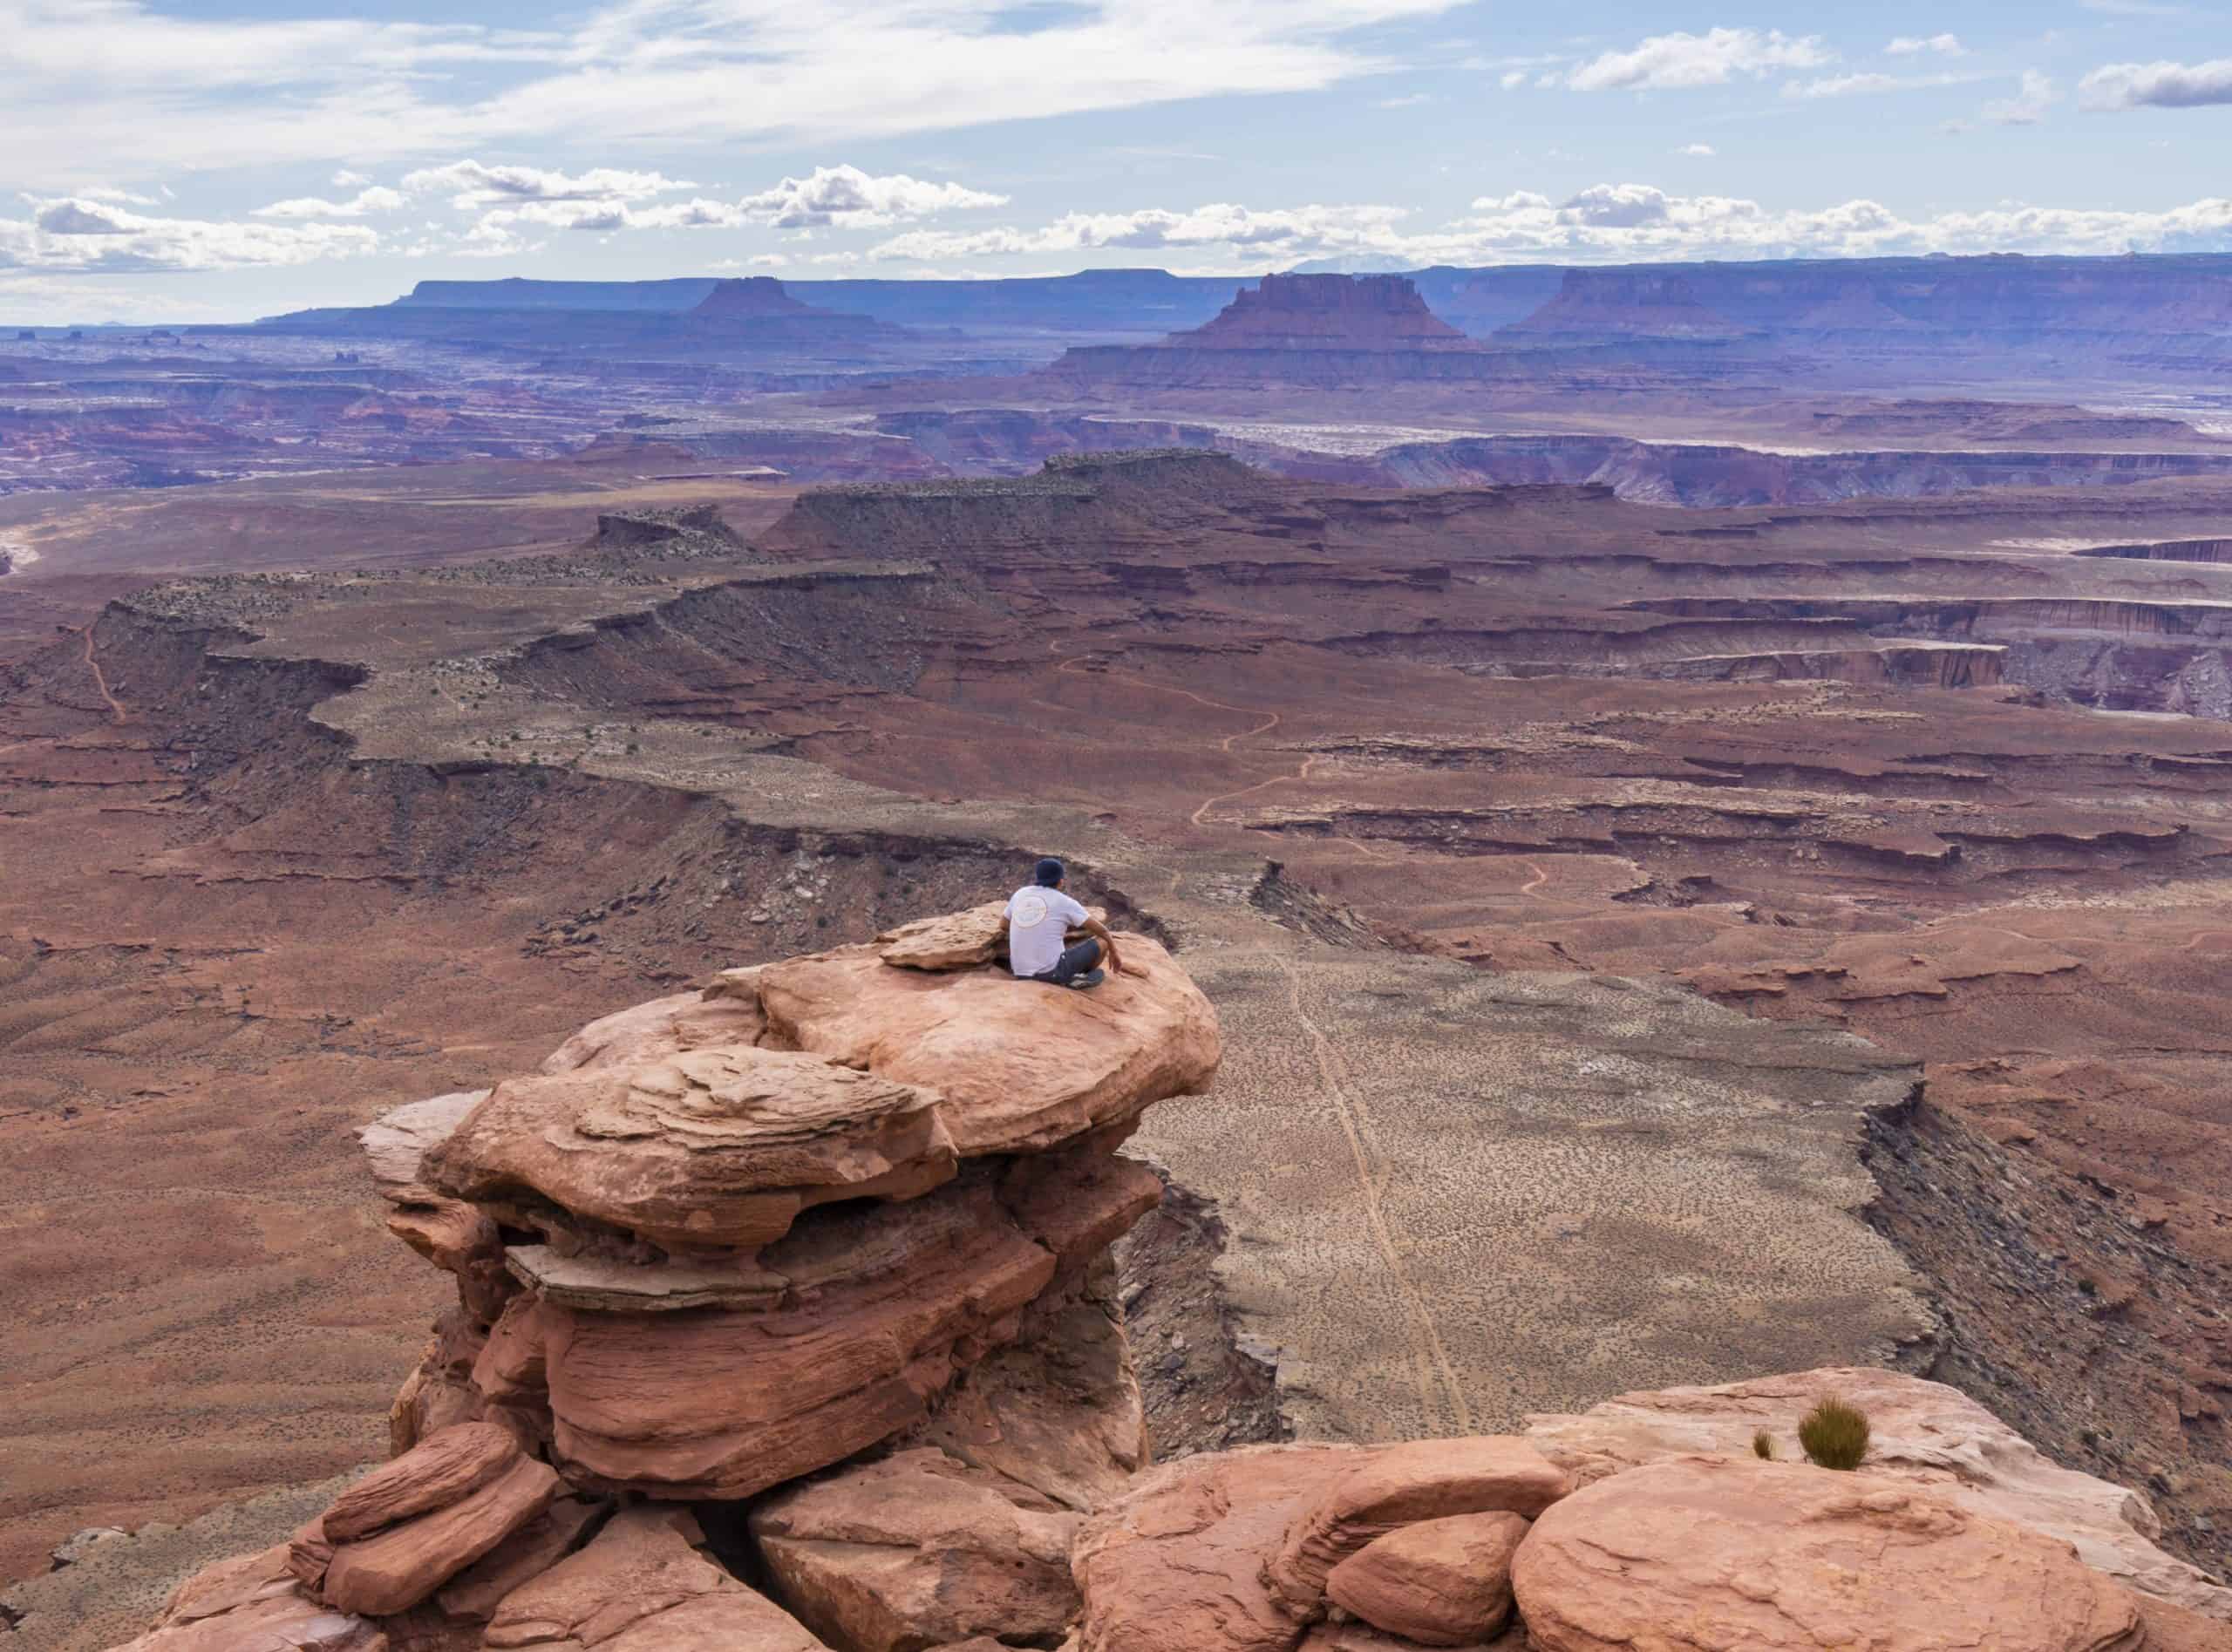
From the viewpoint, you’ll see endless layers of canyons and a very cool rock feature called Candlestick Tower, which is a 450-foot (140 m) tall sandstone butte resembling the buttes you’d find in Monument Valley.
If you don’t have time for this hike, stop at the Candlestick Tower Overlook instead for a view of the butte. However, the view from Murphy Point is definitely more epic!
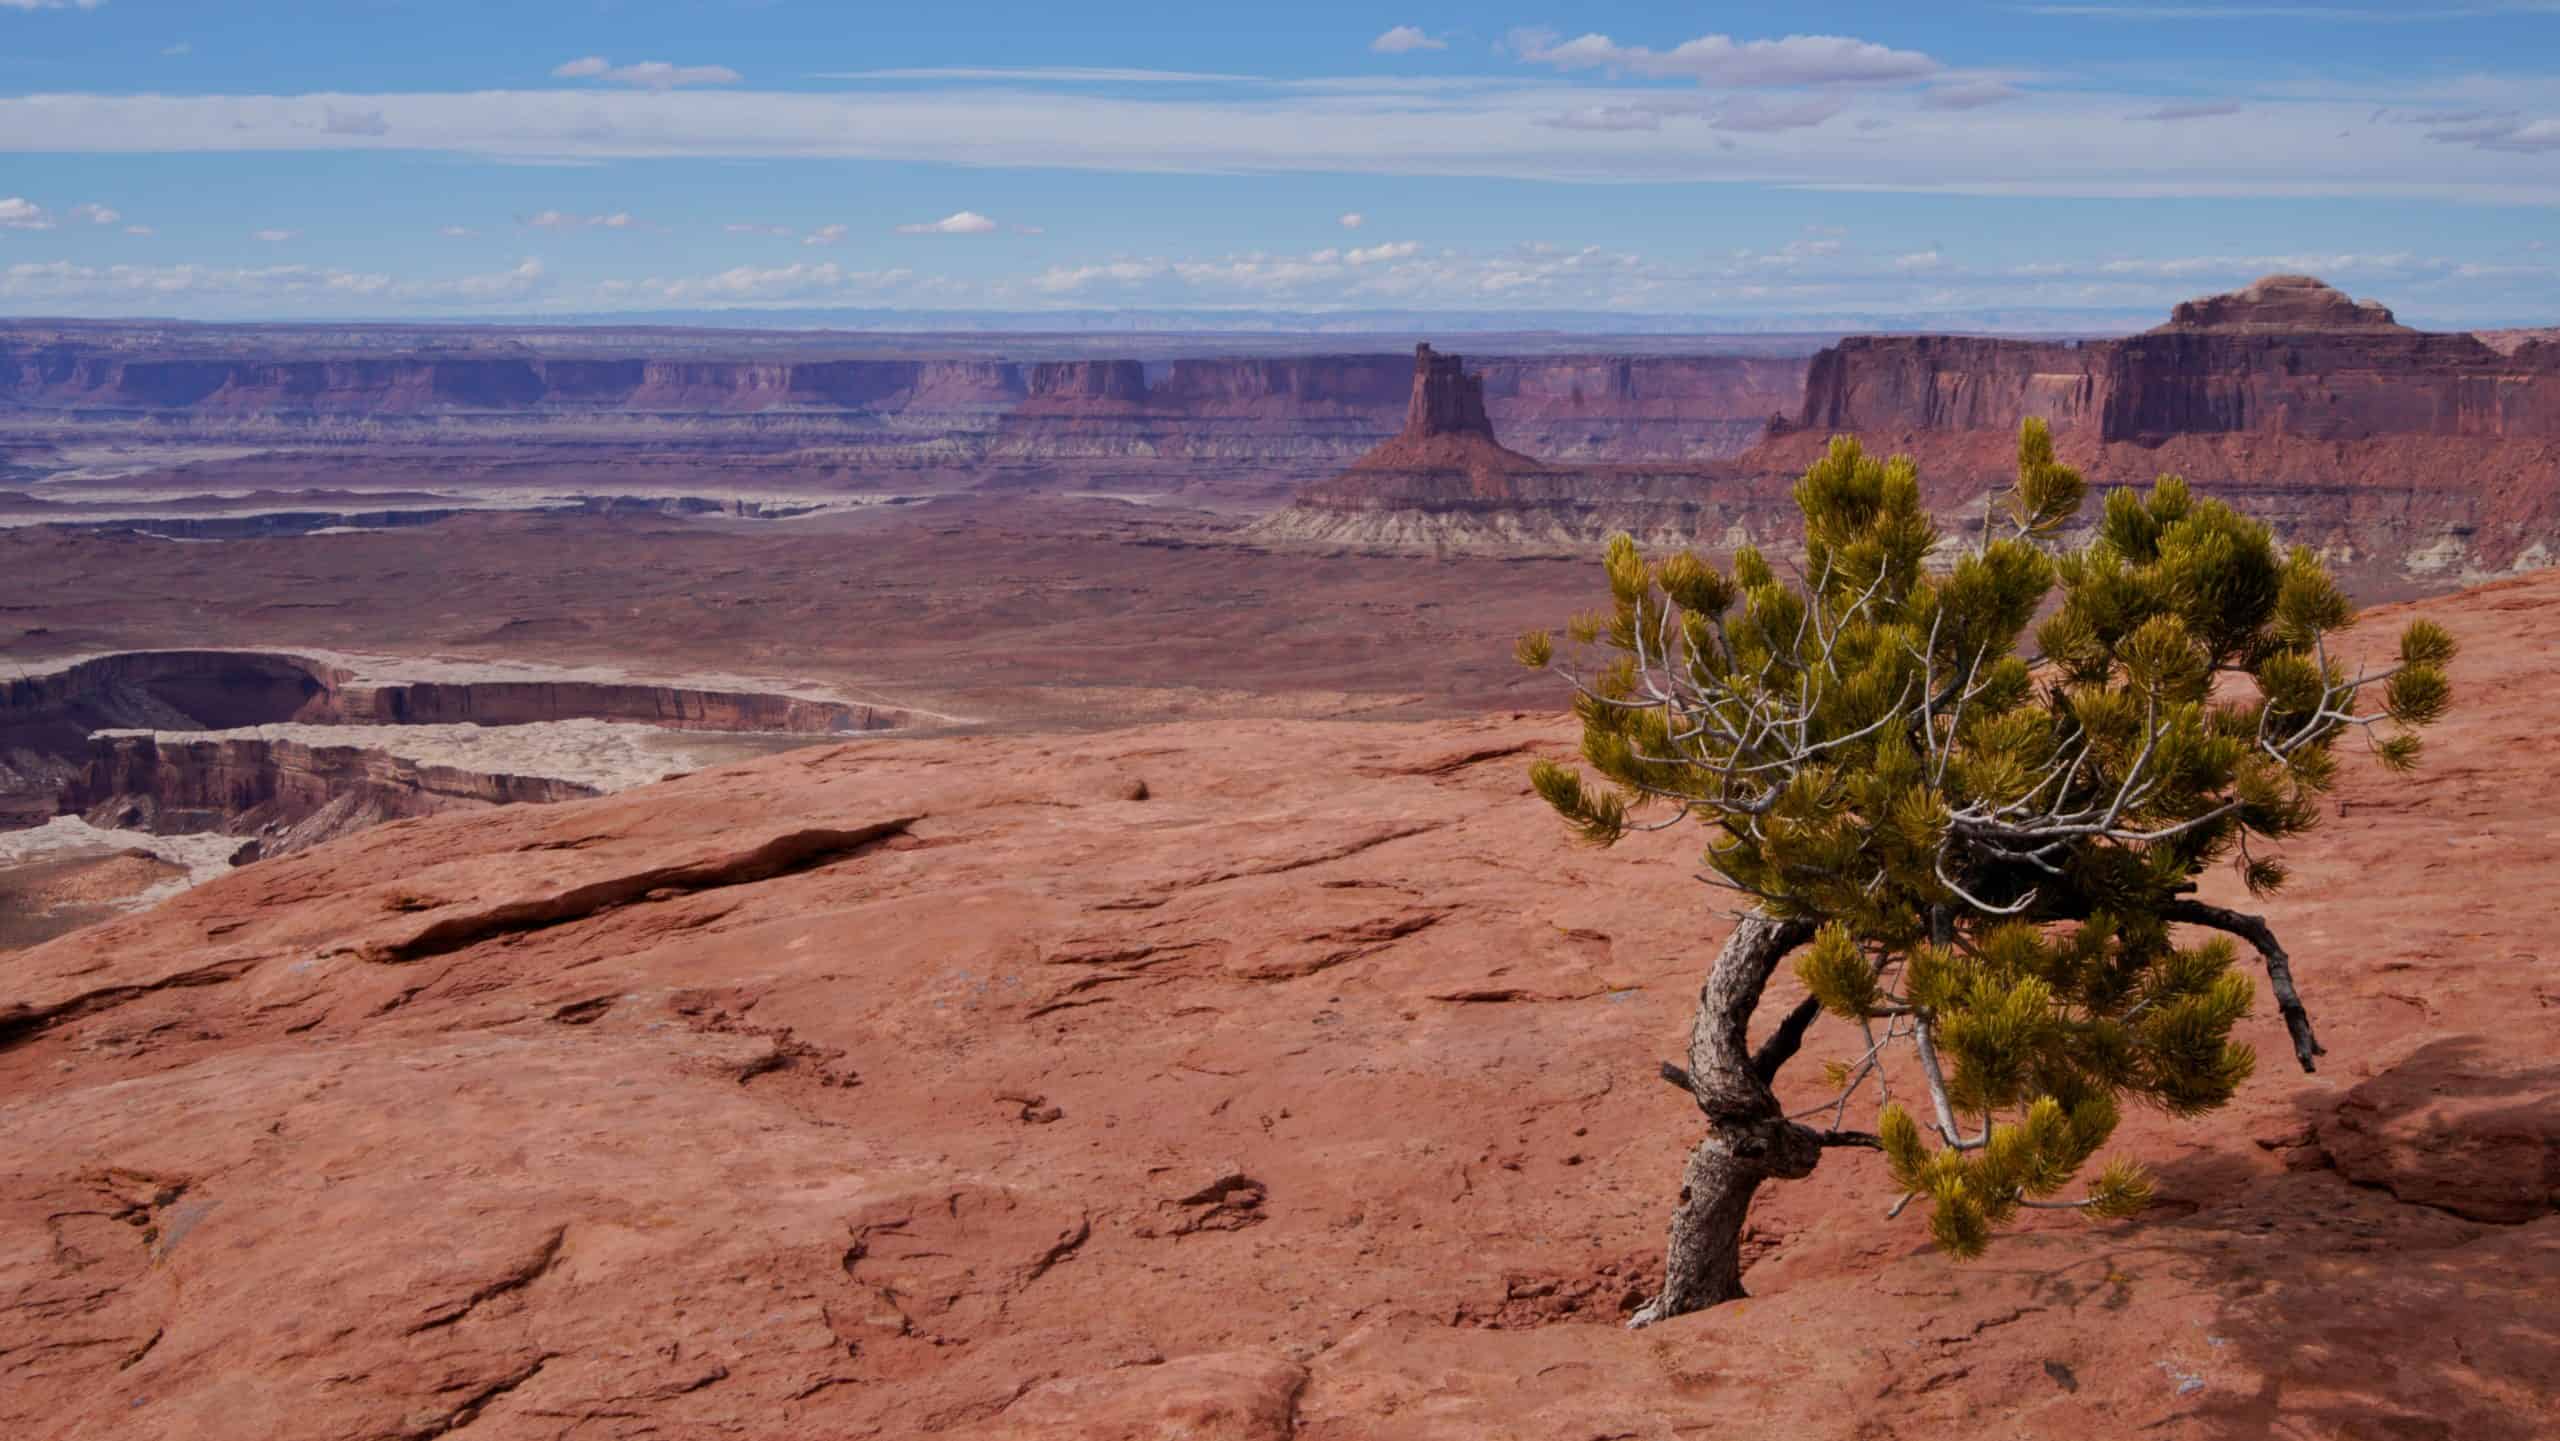
13. White Rim Overlook (Island In The Sky)
This short hike takes you to the canyon rim for an interesting vantage point. The payoff is a view you can’t quite get from the car: a clear look at the White Rim Road winding through the canyon floor below. You can see why that road is so popular for off-roaders!

This hike is an ideal choice for families or road-trippers who want to experience some of that “otherworldly” Island in the Sky atmosphere without committing to a full-day backcountry trek.
14. Whale Rock Trail (Island In The Sky)
The Whale Rock Trail is a short, family-friendly scramble that leads to the top of a smooth sandstone formation shaped kind of like a whale! While the path isn’t always obvious, simply follow the small rock cairns around to the right side of the formation and climb up its spine for the safest and most direct route to the summit.
Once you reach the wide, flat top, you’ll be rewarded with sweeping canyon views and a unique vantage point that feels like standing on your own desert island. Just keep little ones near the edges, pack water, and enjoy one of Utah’s most playful and rewarding short hikes.
15. Cave Spring Trail (Needles District)
The short trail is for the history buffs! Here, you’ll pass Cowboy Camp, a natural spring shaded by rock overhangs, and scattered remnants of early homesteads. Though rated easy, the trail features two steep ladders and an exposed traverse, so tackle the climbs first by hiking counter-clockwise.
If you’d rather skip the ladders entirely, staying on the lower loop still gives you access to the spring and historic artifacts without the exposure. As one of Canyonlands’ quietest trails, it offers a peaceful, historically rich desert walk perfect for a quick but meaningful stop!
BONUS: No Hike Overlooks Worth Visiting
The following overlooks don’t require any hiking, and you can simply drive right up to them. If you only have a day in the park, I highly recommend stopping at each one to soak it all in! Each overlook is worth it and will genuinely take your breath away.
Visitor Center Overlook
As the name suggests, this overlook sits directly across the road from the visitor center and makes for an easy, welcoming introduction to Canyonland’s stunning scenery!
Shafer Canyon Overlook
This is the first pull-off you’ll hit past the visitor center with a great view of Shafer Canyon. However, for an even better view of the iconic zigzagging Shafer Canyon road, drive a little bit further to the next pullout. I wish I had known about this spot on my last visit! You can also walk here via the neck spring trail.
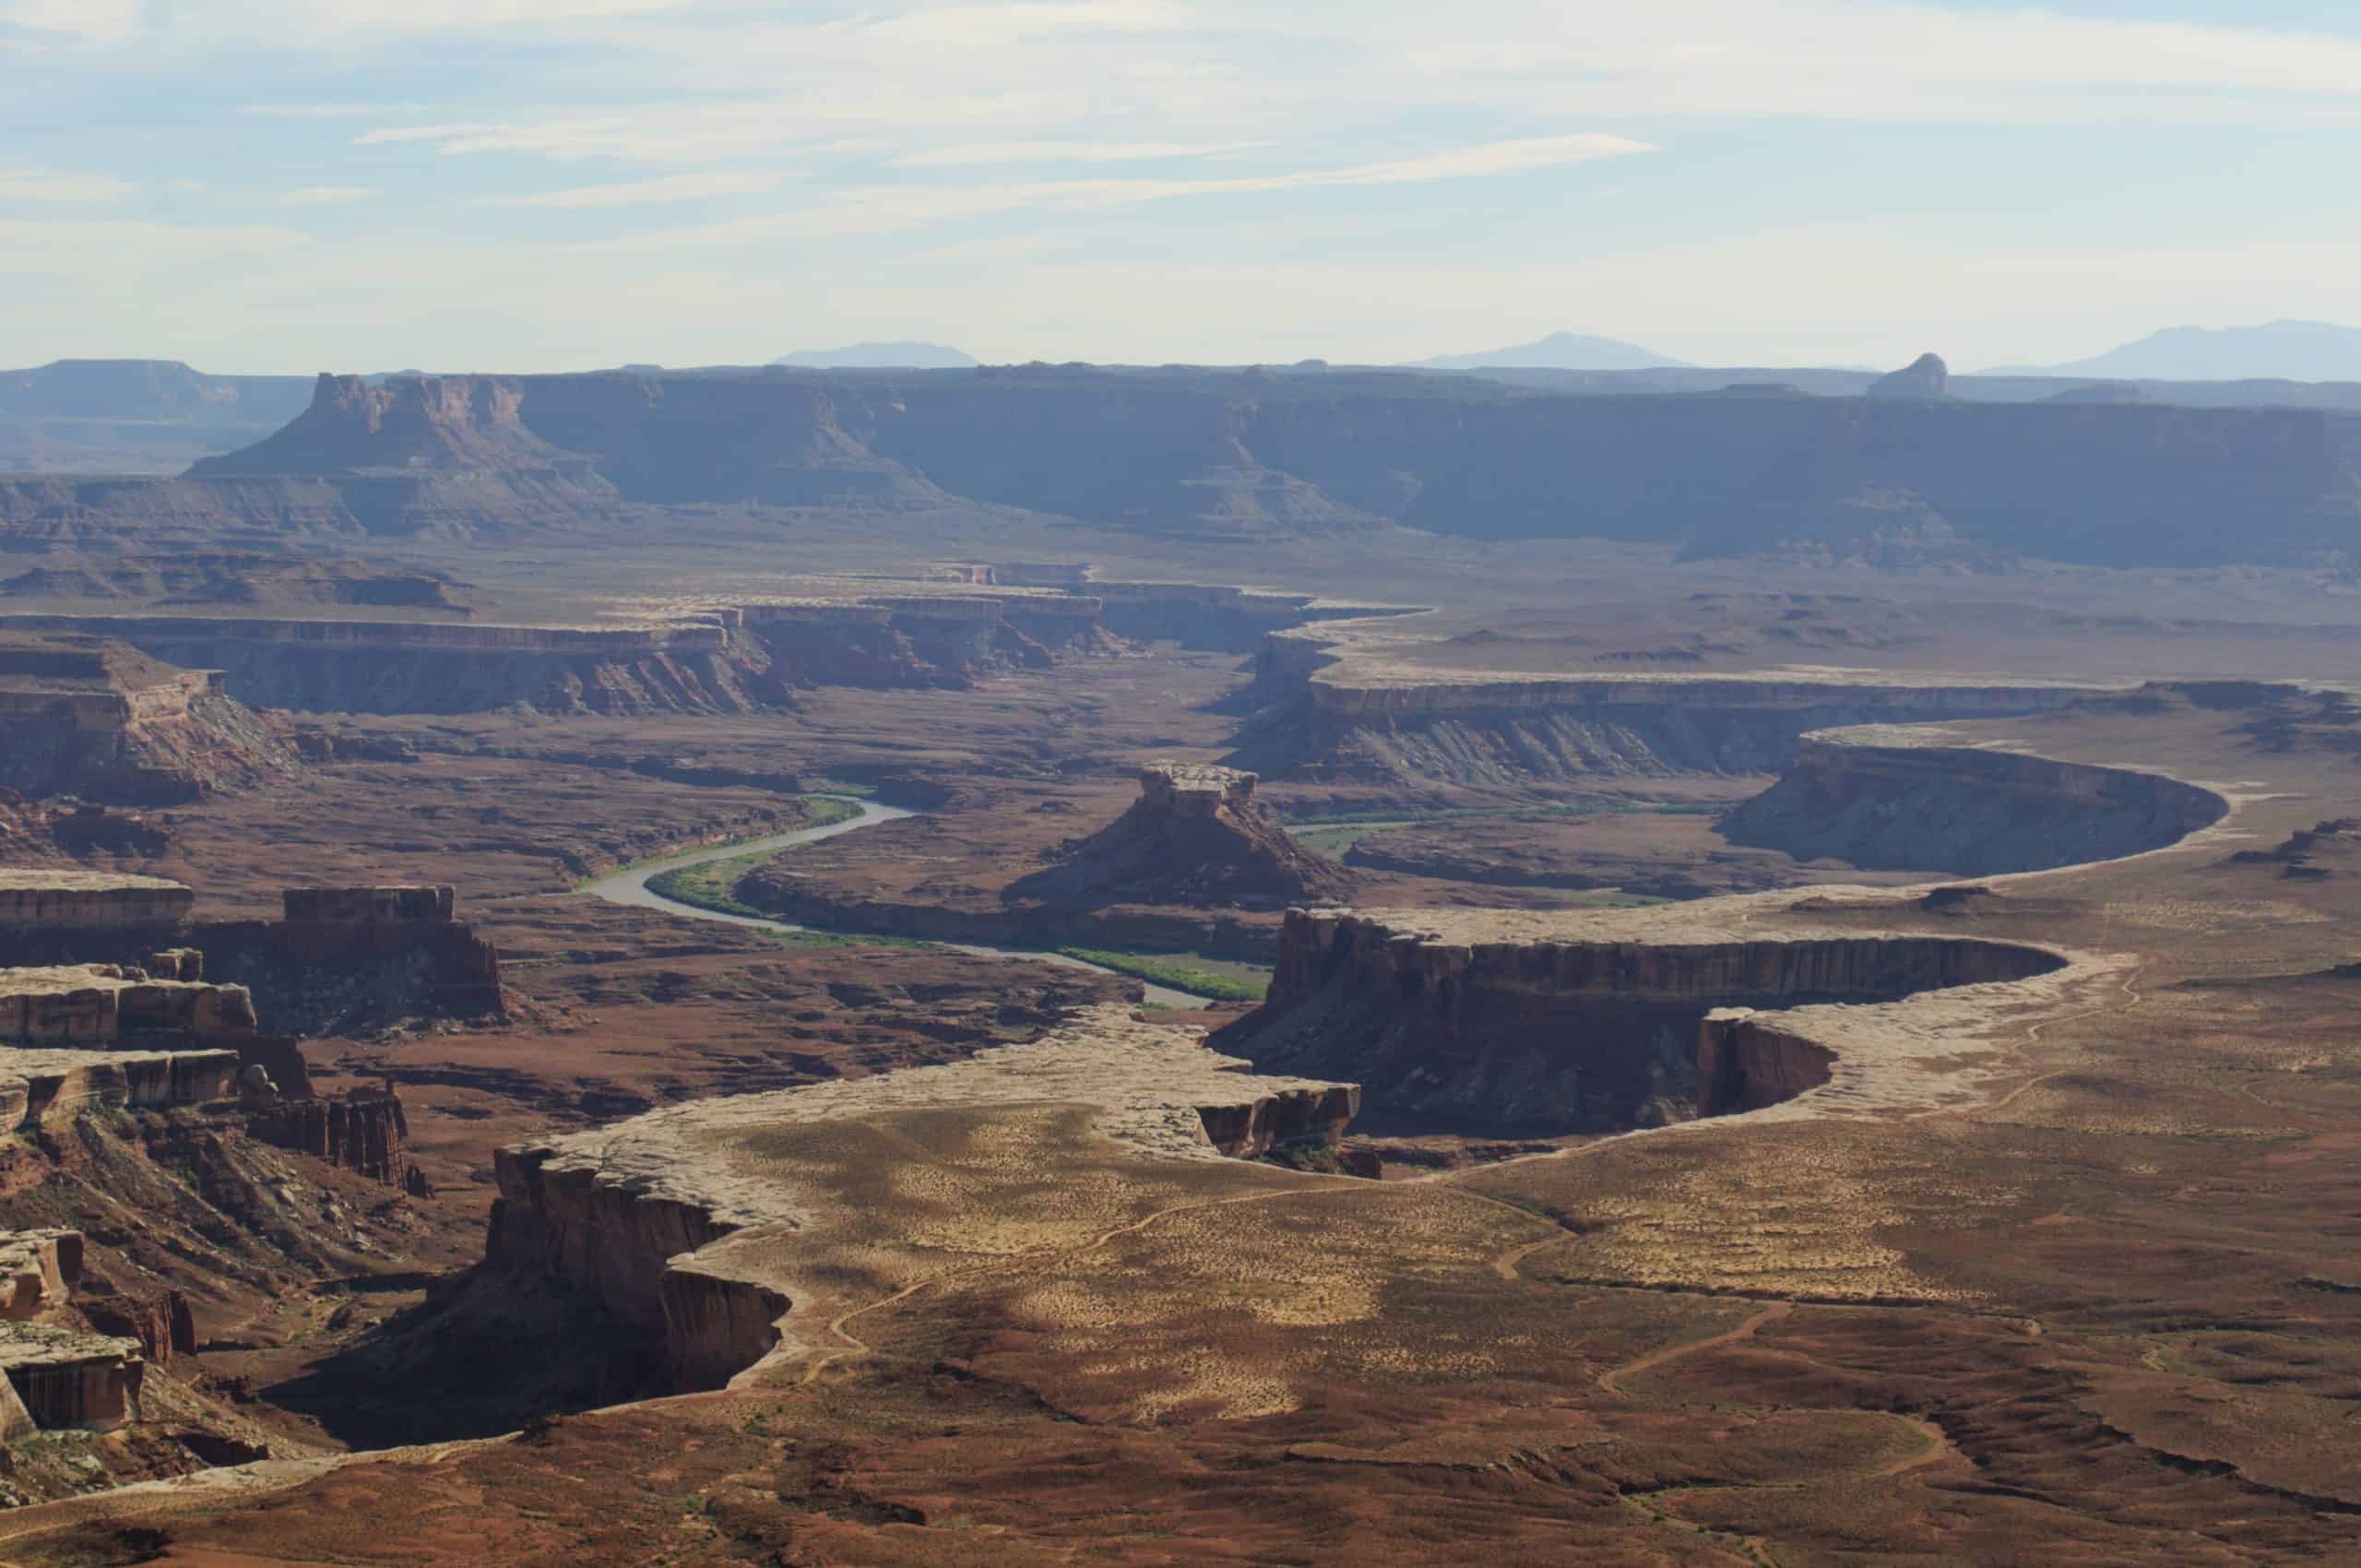
Green River Overlook
You may notice that most of these overlooks don’t actually show either of the rivers responsible for carving out the Canyons, so make sure to stop here for the best vantage point of the distant Green River.
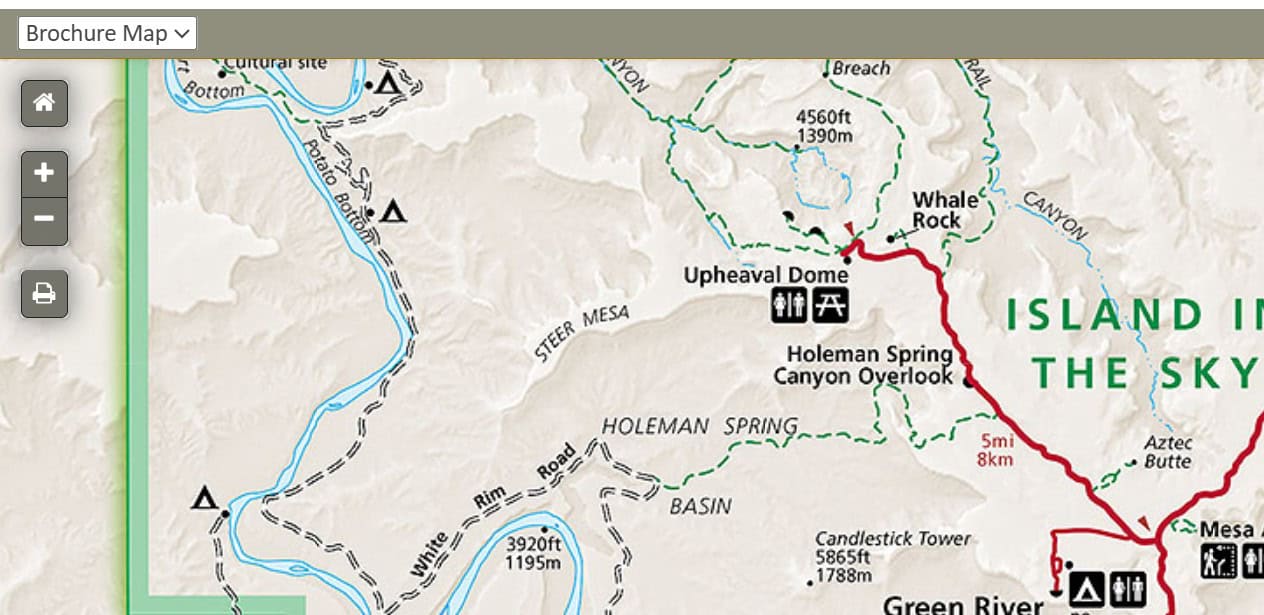
Holeman Spring Canyon Overlook
I found this one completely by chance, and it’s only mentioned on the official park brochure map, with no other details online. Essentially, you park in this pullout, walk back along the road for a few minutes to where the road narrows. Unfortunately, I don’t have the exact coordinates for where I took this photo. I hope to go back soon!
Buck Canyon Overlook
This overlook highlights the immense scale of Canyonlands. The lower canyon floor here drops to roughly 4,000 feet (1219 m), while the La Sal Mountains in the background rise to 12,726 feet (3879 m) at Mount Peale. That’s a vertical rise of almost 9,000 feet (2743m), nearly twice as deep as the Grand Canyon!
Grand View Point & Orange Cliffs Overlook
These two overlooks sit right next to each other at the very end of the Island in the Sky road. Stop at both, but spend extra time at Grand View Point. Every National Park seems to have one, and spoiler alert: they always live up to the hype!
Pro Tip: For those on a 10-day Utah Mighty 5 Roadtrip, I recommend stopping at each of these overlooks and really soaking in the beauty!
Recommended Gear
I truly believe that gear should never hold you back from exploring, but having reliable equipment makes a real difference in comfort and safety. Over ten years of hitting the trails, I’ve built and refined my collection item by item. Here are the items that go with me on every adventure. 😊
✅Hiking Backpack:
My Osprey Stratos 24L daypack completely changed my view on brand names. I used to be skeptical, but Osprey’s eco-conscious promise, hassle-free All Mighty Warranty, and thoughtful design won me over! This bag perfectly redistributes the weight across my body.. so it feels as if I am not carrying any weight! No sore shoulders or back pain after a long day of hiking.
✅Hiking Shoes:
Finding the right footwear took some trial and error until I tried Columbia. Once I stepped into the Men’s Transverse™ Hike Waterproof Shoe, everything clicked. Columbia’s Omni-Tech waterproof material keeps my feet dry, and the wide fit option is perfect for someone with wider feet to ensure a comfortable fit.
✅Trekking Poles:
I discovered these ALAFEN Collapsible Ultralight Poles two years ago, as a Christmas gift for my partner. I loved them so much, I ordered some for myself! Rather than collapsing, they fold into a more compact size to easily fit in my backpack. Note that each order includes one pole, so adjust your shopping cart accordingly.
✅Hiking Socks:
I had similar brand skepticism until switching to Smartwool. The merino wool blend handles moisture beautifully and prevents blisters. It is one upgrade I will never go back from.
✅Reusable Bottles:
I take my trusted Nalgene 48 oz (1.5L) bottles on every hike! They are virtually indestructible (I’ve dropped them many times) and an easy way to cut down on single-use plastic while staying properly hydrated on the trail.
✅The Ten Essentials:
Always review The Ten Essentials before heading into nature. Keeping navigation, sun protection, extra insulation, emergency supplies, and hydration ready makes a huge difference when plans change or weather shifts.
✅Microspikes (Winter)
I always keep my Kathoola microspikes in my bag during the winter months. They provide a serious grip on packed ice and are reliable (I’ve had the same pair since 2018). Skip the Yaktrax-style cleats entirely since they don’t provide nearly enough traction.
✅Base Layer (Winter)
My Columbia winter base layer goes with me whenever temperatures dip below freezing. I always pack it in my backpack to keep my body temperature stable throughout the day.
When To Visit
Canyonlands National Park is a year-round hiking destination, with each season bringing something different. While Spring and Fall are the most popular seasons due to cooler temperatures, Winter and Summer are seasons of extreme heat and cold.
Fall:
Fall is the second-best season to visit, but I usually wait until November since the park sees limited fall color, and October is peak fall color in the Rocky Mountains (such as the La Sal Mountains nearby). Temperatures are variable: It can be very pleasant one day (~70°F or 21°C) and cold the next (~50°F or 10°C).
winter:
The hush and stillness of the desert scape hit different in Winter. The midday sun keeps temperatures manageable for hiking (~45°F or 7°C), even when the high rims are dusted with snow, which isn’t super often. In fact, seeing the park covered in snow is rare and requires a bit of luck (one I haven’t had yet).
In December and January, the snow melts during the day and refreezes overnight, making the trails icy and slippery. Don’t forget to bring your Kathoola microspikes!
Spring:
Spring is easily the best (and most crowded) time to visit when daily temperatures become comfortable enough for long treks across the mesa tops. The landscape comes to life, and if you’re lucky, you might see a wildflower bloom. I personally love seeing the snowcapped La Sal Mountains contrasted against the redrock scape!
Summer:
Summer can draw big crowds to Moab, but visitation numbers drop in Canyonlands due to the intense heat, with temperatures easily reaching 100°F (38°C) at midday. Sunrise and sunset are the best times to hike, but don’t be afraid of hiking at night. The park is an International Dark Sky site, so you’ll be treated to a beautiful night sky!
FAQs
Planning a hike in Canyonlands National Park? You likely have a few questions. Here are some of the most common ones I hear, paired with answers to help you prepare.
What is so special about Canyonlands National Park?
Consider this: the last scene in Thelma and Louise was filmed at the Grand Canyon, right? Well, not exactly, it was actually filmed in Canyonlands National Park! This park rivals the Grand Canyon in terms of raw beauty without the crowds and with endless unique geologic oddities for desert lovers to explore.
What is a must-see in Canyonlands National Park?
In the Island in the Sky District, don’t miss the many overlooks; each one is worth stopping at, and Mesa Arch is THE must-see hike! In the Needles District, Druid Arch, and Chesler Park are easily the best hikes, possibly even in the entire park!
What is the best month to visit Canyonlands National Park?
March is my favorite month to visit, as the daytime temperatures are generally in the 60F range. November brings similar cool weather, allowing you to dodge that intense summer heat, since the trails offer absolutely zero shade.
Conclusion
After years of hiking in Canyonlands National Park, I’ve learned that this vast desert landscape rewards you in an indescribable way. Whether you’re chasing sunrise at Mesa Arch, navigating cairn-marked routes in the Needles, or simply soaking in quiet mesa-top views, there’s a trail for everyone.
The park demands respect, so pack extra water, sun protection, and an offline map. The payoff is unmatched: stunning redrock beauty that rivals the more popular National Parks. So, grab your boots, step onto the rim, and enjoy the beauty that Canyonlands National Park offers!